1975 Monte Carlo
+22
Joe73
LSANTI76
dynchel
Bruisr
magic marouke
1973montec
DiscoMalibu
brad
Mcarlo77
74MonteCarlo
JiMi_DRiX
Limey SE
The Dude
ant7377
abajc3
bigredlaguna
74Malibu383
JB2wheeler
McCauley5983
Jedediah
Biomedtech
Laguna Budman
26 posters
G3GM :: Media :: G3 Project Pictures
Page 7 of 11
Page 7 of 11 •  1, 2, 3 ... 6, 7, 8, 9, 10, 11
 Re: 1975 Monte Carlo
Will try & get out when I get home & take a photo & post. Are those new outer window belts? Do you remember where you got them from. You should double check those as I'm pretty sure that Monte Carlo and Chevelle are slightly different shape or you may have them on there upside down on the opposite window. Not sure but If I remember correctly, on my drivers side, the belt trim looks like it's upside down versus what you show in new close up pic. Hope that makes sense. Will post asap.
77mali- Donating Member

- Street Cred : 62
 Re: 1975 Monte Carlo
Got them from a dealer here in Norway. It's impossible to put them on upside down or mix sides, so I'm pretty sure they are the correct ones. They are also identical to the old ones  Anyhow they shouldn't affect this gap I'm getting, because that's on the inside of the window, between the window and the bottom of the roof rail gasket
I could also try to take som better pictures tomorrow if we haven't made progress by then.
Thanks for checking it out Mali
I could also try to take som better pictures tomorrow if we haven't made progress by then.
Thanks for checking it out Mali
Fishgrinder- G3GM Member

- Street Cred : 4
 Re: 1975 Monte Carlo
No problem hope these help. The seals & belts are in bad shape...LOL.
Kept door as is so I could re-assemble the other side & work from this one.


Kept door as is so I could re-assemble the other side & work from this one.


77mali- Donating Member

- Street Cred : 62
 Re: 1975 Monte Carlo
Your lower picture shows the actual spot, but it's hard to see it from that angle.
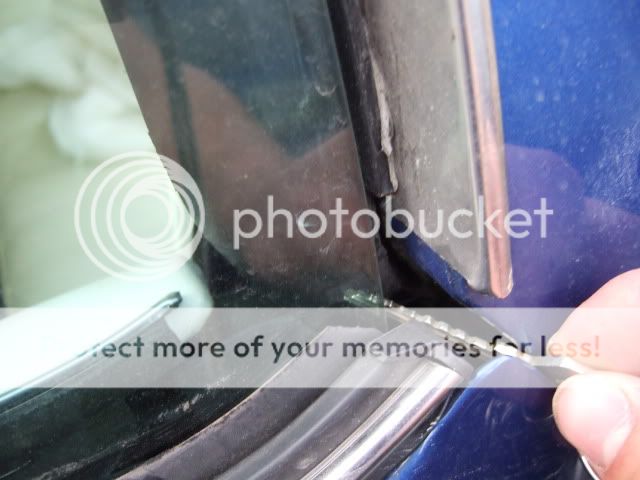
I see the pictures in my post weren't very explaining, so here are better ones.
Here the key is through the gap


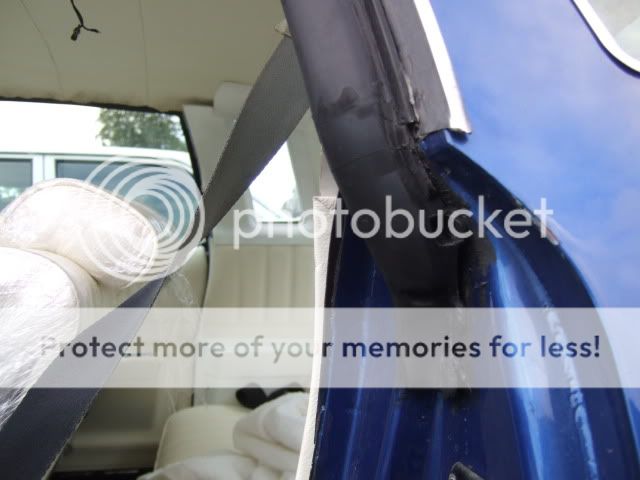
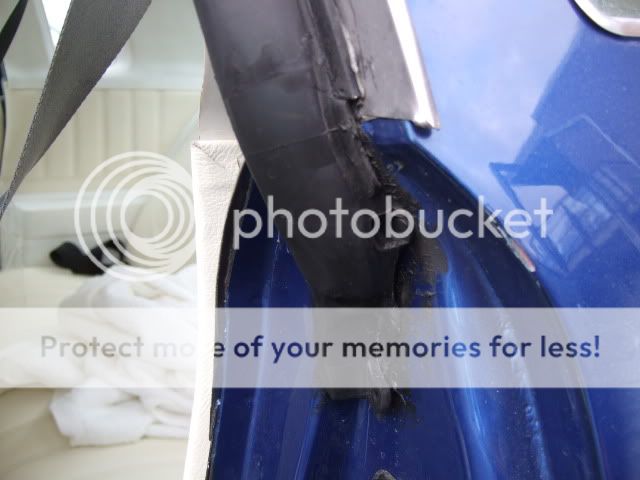
Is there a possibility that I've installed the lower part of this gasket the wrong way? Couldn't find the hole for the third clip, but I didn't really see any other ways it could go on either. If it was pushed more out it would seal against the window. The door jamb interior molding isn't installed if it matters.
I see the pictures in my post weren't very explaining, so here are better ones.
Here the key is through the gap


Is there a possibility that I've installed the lower part of this gasket the wrong way? Couldn't find the hole for the third clip, but I didn't really see any other ways it could go on either. If it was pushed more out it would seal against the window. The door jamb interior molding isn't installed if it matters.


Fishgrinder- G3GM Member

- Street Cred : 4
 Re: 1975 Monte Carlo
I have a new set of roof rail & door seals, still in the package. Will look tonight & post a pic with it "mocked-up" in that location. Yours look different that mine but I will verify.

77mali- Donating Member

- Street Cred : 62
 Re: 1975 Monte Carlo
The door jamb interior molding isn't installed if it matters. <<--- yes it matters
___________________________________________
1977 Chevelle SE x2
One Mild original
one Wild NON original
Anthony

Limey SE- Management

- Street Cred : 98
 Re: 1975 Monte Carlo
Limey wrote:The door jamb interior molding isn't installed if it matters. <<--- yes it matters
Allright, when looking at it I can see that the area will get pushed out by the molding. Hope it solves the problem.
Fishgrinder- G3GM Member

- Street Cred : 4
 Re: 1975 Monte Carlo
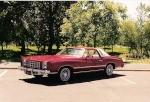
Here is a photo of my factory original weatherstrip for reference. You will notice only two mtg pins...rather than the three mtg points yours is showing. That in itself probably isn't a factor. However, the profile might be a little different and not quite thick or fat enough to seal against the glass. The interior trim installed may help, but on mine, it doesn't seem to be pushing out on the weatherstrip much at all. Unfortunately, I think you are experiencing one of the dilemmas of using after-market weatherstrips...they don't always fit correctly.


Mcarlo77- Donating Member

- Street Cred : 78
 Re: 1975 Monte Carlo
My roof rail is different it has the 3 mounting points and the label says:
RR 5019...73-77 Chevelle, Century, Cutlass, Grand-Am & lemans. My Door seal is part # LM 12-Y- 73-77 GM A body- Except Monte Carlo.
I bought mine from Columbia Auto Parts in California & they are made by Metro Molded products "Sponge Super soft". Here is their makers website- http://metrommp.com/
They show 75 Monte Roof Rail Seals on the site like Mcarlo77 shows in the pic. Don't know if you can get your part # & confirm w/ who you bought them from over there & if they screwed up or if the wrong stuff was shipped, I'd ask for a new set if your problem is not resolved by all the window belts being on too. Good luck Grinder, let us know.

77mali- Donating Member

- Street Cred : 62
 Re: 1975 Monte Carlo
Thanks for the feedback guys.
Weatherstrip kit is Metro Supersoft RKB1900-111
On the right side bottom front pillar there was only one mounting hole (of two) that lined up, whereas both lined up on the left side. So you might have a point regarding aftermarket weatherstrip there Mcarlo77.
I'll try to install the interior trim and see how it turns out.
Fishgrinder- G3GM Member

- Street Cred : 4
 Re: 1975 Monte Carlo
According to O'reilly auto parts anyway, that looks like a complete kit and they show nothing but 73-77 MC on the page. It is also on Metro's site w/ that P/N.

77mali- Donating Member

- Street Cred : 62
 Re: 1975 Monte Carlo
I dont mean to sound rude, but it looks like a poor aftermarket re-pop. Or its possible that the glass hasnt set its "groove" into the rubber yet since its brand new.
otherwise, I chose SoftSeal for my glass and door weather stripping, and it has fit great.
otherwise, I chose SoftSeal for my glass and door weather stripping, and it has fit great.

JiMi_DRiX- G3GM Enthusiast

- Street Cred : 3
 Re: 1975 Monte Carlo
I put the trim on, but unfortunately it didn't change anything. If the area where I have my finger in the picture below was sticking more out it would probably close the gap. Just a matter of 1/8 inch or so actually, so perhaps I can glue on an old gasket piece behind it.

But the doors seem watertight despite the gap. I've both driven in rain and washed the car with a high pressure gun. Nothing came inside Rear window is another story though, will have to take that out and get it reglued.
Attempted some night time photos (without flash) this evening, but they didn't come out very clear. Could probably fiddle with the camera settings to get it better.

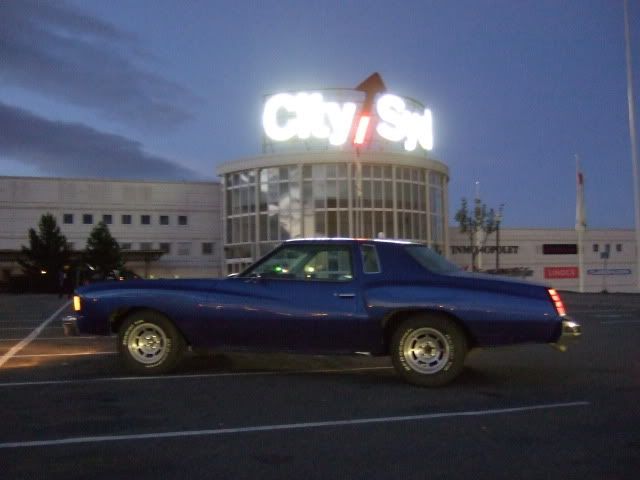
With flash



But the doors seem watertight despite the gap. I've both driven in rain and washed the car with a high pressure gun. Nothing came inside
Attempted some night time photos (without flash) this evening, but they didn't come out very clear. Could probably fiddle with the camera settings to get it better.


With flash


Fishgrinder- G3GM Member

- Street Cred : 4
 Re: 1975 Monte Carlo
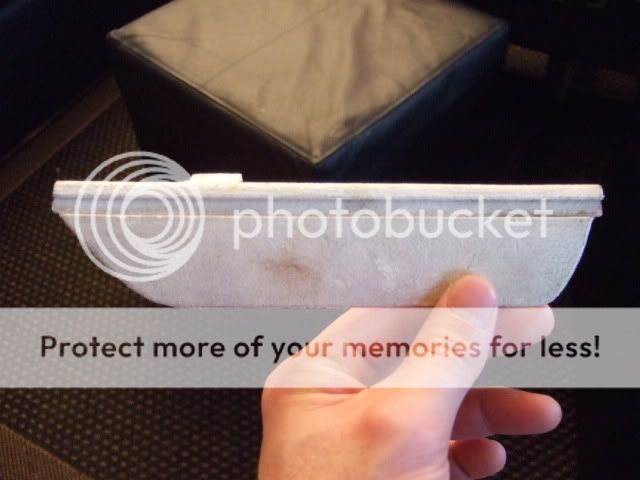
Does anyone know where this interior piece goes?

Fishgrinder- G3GM Member

- Street Cred : 4
 Re: 1975 Monte Carlo
I don't think I've ever seen anything like that...
74MonteCarlo- G3GM Fanatic

- Street Cred : 17
 Re: 1975 Monte Carlo
Found two of them in the parts pile.
Let's see what 1973 454 Monte says hehe.
Let's see what 1973 454 Monte says hehe.
Fishgrinder- G3GM Member

- Street Cred : 4
 Re: 1975 Monte Carlo
it attaches on to the piece that goes over the front upper seat retractor. kinda goes in to the opera window.
74-77 has them. i cant take a pic,but kyle you can.
74-77 has them. i cant take a pic,but kyle you can.
1973 454 MONTE- Donating Member

- Street Cred : 36
 Re: 1975 Monte Carlo
That is correct in that it snaps onto to the upper shoulder belt retractor trim cover to hide the leading edge of the slot where the belt strap slips in and out when removed or installed. Here is a pic of one from a '75 Laguna. There were a couple styles used depending on the type of sail panel trims you had inside your car.


Mcarlo77- Donating Member

- Street Cred : 78
 Re: 1975 Monte Carlo
Hi guys, long time no see!
My headliner which initially looked very good when I glued it in last year came down shortly after. Guess I got too trigger happy with the heat gun when I used it to smooth out small wrinkles. This has annoyed me a lot, so in June I decided to re glue it. I took all the interior panels out, and worked for hours. Again it looked nice and tight. But when I looked inside the car the next morning, the whole thing had fallen down again. Doh! Probably it was bound to fail from the start with residue from the old glue everywhere.
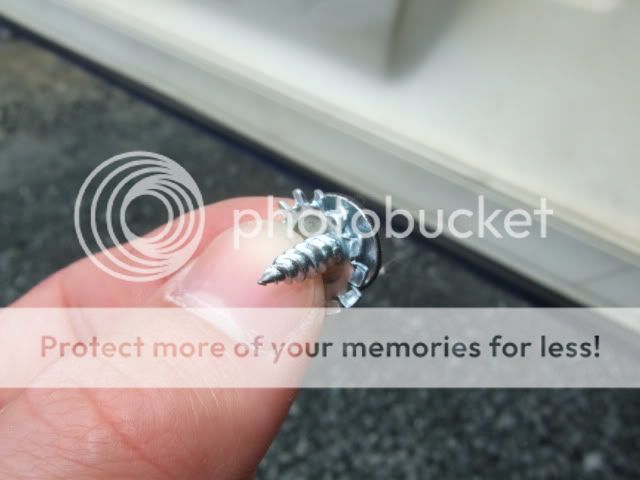
After this I kind of gave up, and asked the upholstery guy if he could do it. He said gluing wouldn't work anymore so he suggested that I screwed it in place instead. As a last resort I decided to give this a try. I drilled 4mm holes in strategic places after checking where the headliner tensioned up most, and so that they got hidden by the interior moldings. Then I screwed it down with a 4.2mm screw and a toothed washer. This turned out to work very well, and the headliner is now tighter than ever! So now i can finally assemble the whole interior. I bought some hard to find parts (at least for me ) from Mcarlo77 this winter, so I pretty much have everything I need now.
Pictures

Before
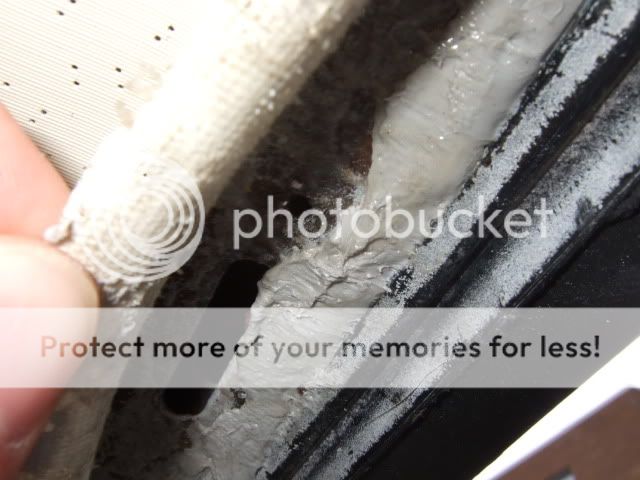
Hole drilled. The grey stuff is butyl tape wich I used between the door opening and weather strip channel
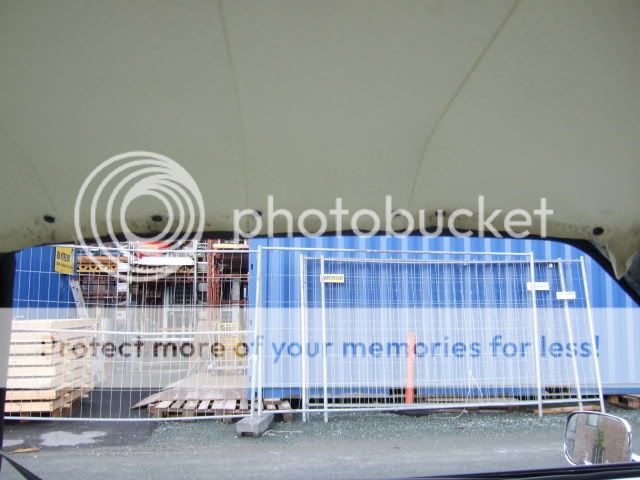
Driver side done

The sun visors I got from Mcarlo77

Same with rear window molding and opera window corner clips
My headliner which initially looked very good when I glued it in last year came down shortly after. Guess I got too trigger happy with the heat gun when I used it to smooth out small wrinkles. This has annoyed me a lot, so in June I decided to re glue it. I took all the interior panels out, and worked for hours. Again it looked nice and tight. But when I looked inside the car the next morning, the whole thing had fallen down again. Doh! Probably it was bound to fail from the start with residue from the old glue everywhere.
After this I kind of gave up, and asked the upholstery guy if he could do it. He said gluing wouldn't work anymore so he suggested that I screwed it in place instead. As a last resort I decided to give this a try. I drilled 4mm holes in strategic places after checking where the headliner tensioned up most, and so that they got hidden by the interior moldings. Then I screwed it down with a 4.2mm screw and a toothed washer. This turned out to work very well, and the headliner is now tighter than ever! So now i can finally assemble the whole interior. I bought some hard to find parts (at least for me ) from Mcarlo77 this winter, so I pretty much have everything I need now.
Pictures

Before

Hole drilled. The grey stuff is butyl tape wich I used between the door opening and weather strip channel


Driver side done

The sun visors I got from Mcarlo77

Same with rear window molding and opera window corner clips
Fishgrinder- G3GM Member

- Street Cred : 4
 Re: 1975 Monte Carlo
Dude, where the heck have you been & how's the Monte holding up?

77mali- Donating Member

- Street Cred : 62
 Re: 1975 Monte Carlo
I'm still alive Mali  Parked the car for the winter in October, so I'm just a lurker in here these days
Some stuff happened between my previous post and October though. I managed to install all the interior moldings and panels. Also got hold of a second hand dome light, so the only thing I'm missing now is the map light. This was on a Saturday evening, and I figured I had to celebrate the finishing of the interior with some cruising.
But just as I came out of the garage, the engine started coughing and run uneven. I had to chase it with the throttle to keep it running, and pulled over at the nearest parking lot. Opened the hood and found the carburetor to be flooding like a river. It was impossible to start it again, and I was about to call a friend to tow me back when I gave it a last try. Then it ignited (fuel level had sunk enough I would guess). Managed to get back to the garage and started trouble shooting. It is embarrassing as hell, but there was no fuel filter in the carb . So the whole thing was filled with sediment. Pretty fortunate this didn't happen earlier when cruising on the highways.
I happened to have a book on Quadrajets by Cliff Ruggles in my bookshelf. I read through it and decided to give the carb a complete overhaul. Ordered a kit from Cliff's shop, and had to wait some time for the parts to arrive overseas. Excellent service by Cliff by the way.
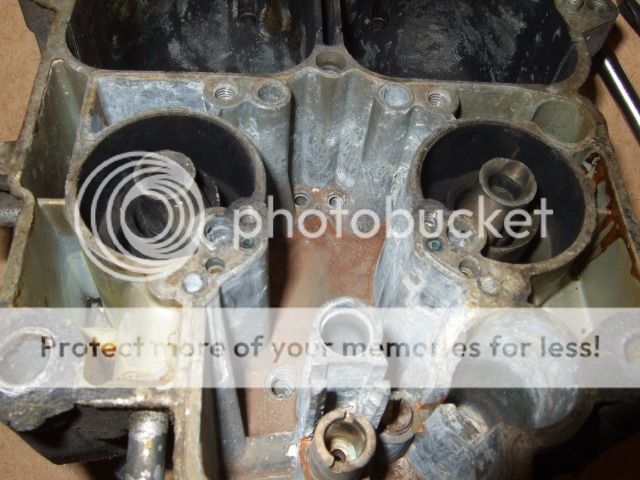
This is how it looked like

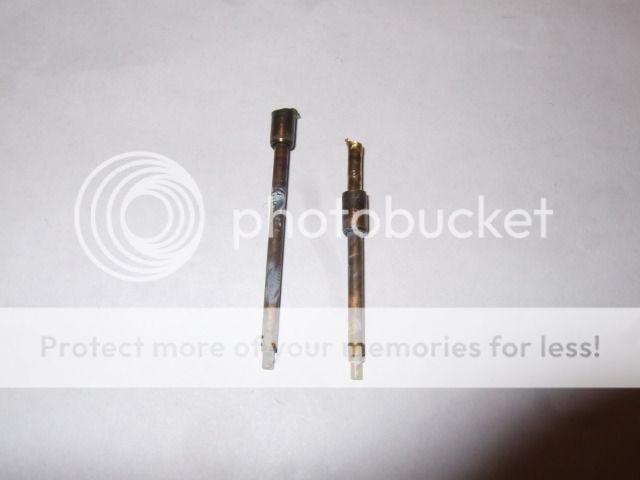
Damaged the idle tubes when I pulled them, so I had to get new ones from cliff as well
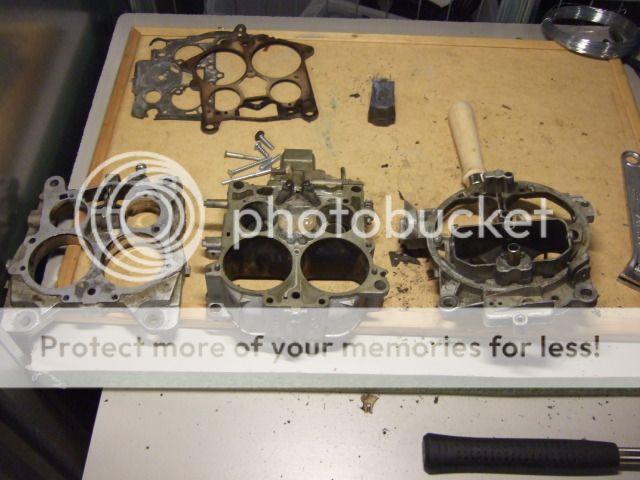
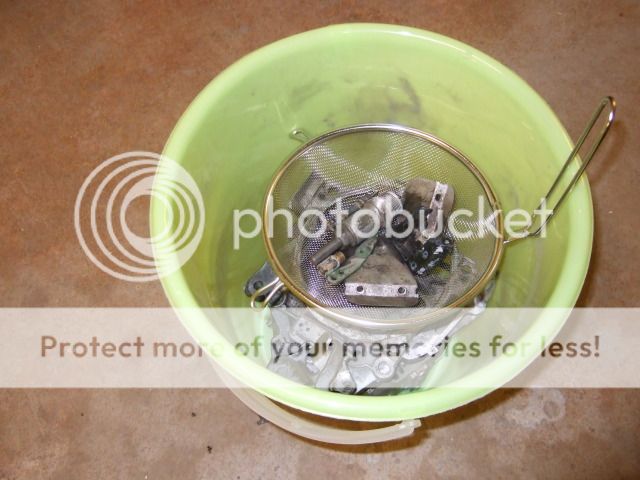
Then the parts sat in break cleaner over night
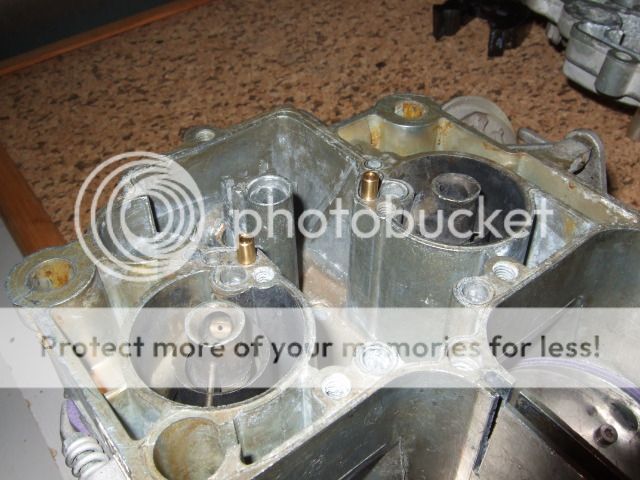
New tubes about to get hammered in
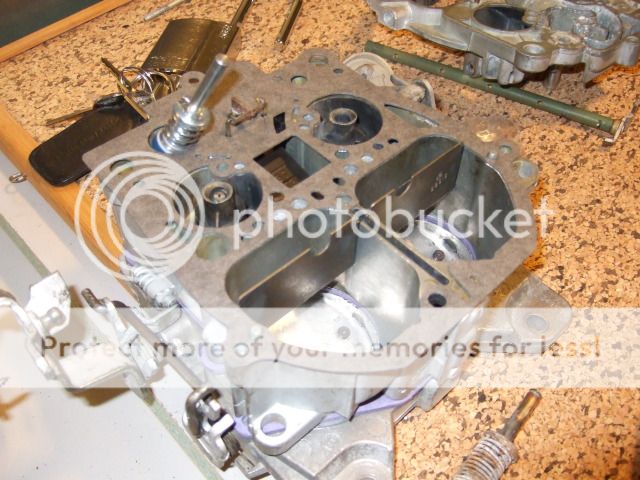
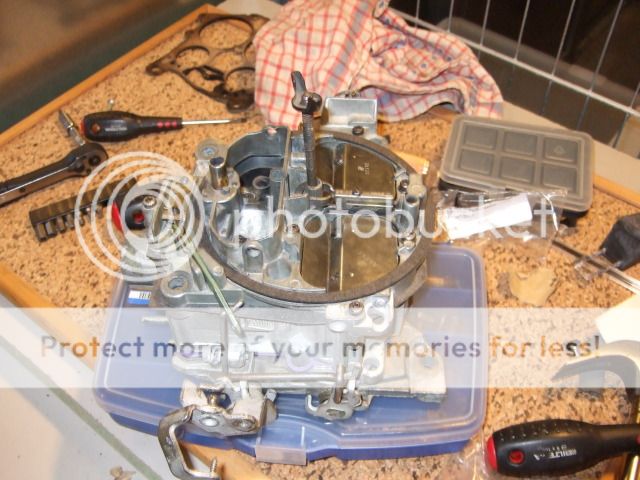
Also bought a new choke pulloff linkage from Cliff. The old one was missing and thus the secondaries
weren't operating properly
I also put in new throttle shaft bushings in the base plate. So It was a comprehensive rebuild and a great learning. Put the carburetor back on and got the engine started. The vacuum signal got incredible strong compared to prior the rebuild, and I even got the idle circuit tuned in. Then I finally got the last cruise of the season.
But now I'm thinking about replacing the Buick with a GM Performance 454 HO crate engine. I'll probably replace the transmission as well, as it still slips between first and second gear. On top of this I'm still chasing the stance of 1973 454 Monte. So there will most likely be lots of work this summer.
Some stuff happened between my previous post and October though. I managed to install all the interior moldings and panels. Also got hold of a second hand dome light, so the only thing I'm missing now is the map light. This was on a Saturday evening, and I figured I had to celebrate the finishing of the interior with some cruising.
But just as I came out of the garage, the engine started coughing and run uneven. I had to chase it with the throttle to keep it running, and pulled over at the nearest parking lot. Opened the hood and found the carburetor to be flooding like a river. It was impossible to start it again, and I was about to call a friend to tow me back when I gave it a last try. Then it ignited (fuel level had sunk enough I would guess). Managed to get back to the garage and started trouble shooting. It is embarrassing as hell, but there was no fuel filter in the carb
I happened to have a book on Quadrajets by Cliff Ruggles in my bookshelf. I read through it and decided to give the carb a complete overhaul. Ordered a kit from Cliff's shop, and had to wait some time for the parts to arrive overseas. Excellent service by Cliff by the way.

This is how it looked like


Damaged the idle tubes when I pulled them, so I had to get new ones from cliff as well


Then the parts sat in break cleaner over night

New tubes about to get hammered in


Also bought a new choke pulloff linkage from Cliff. The old one was missing and thus the secondaries
weren't operating properly
I also put in new throttle shaft bushings in the base plate. So It was a comprehensive rebuild and a great learning. Put the carburetor back on and got the engine started. The vacuum signal got incredible strong compared to prior the rebuild, and I even got the idle circuit tuned in. Then I finally got the last cruise of the season.
But now I'm thinking about replacing the Buick with a GM Performance 454 HO crate engine. I'll probably replace the transmission as well, as it still slips between first and second gear. On top of this I'm still chasing the stance of 1973 454 Monte. So there will most likely be lots of work this summer.
Fishgrinder- G3GM Member

- Street Cred : 4
Page 7 of 11 •  1, 2, 3 ... 6, 7, 8, 9, 10, 11
G3GM :: Media :: G3 Project Pictures
Page 7 of 11
Permissions in this forum:
You cannot reply to topics in this forum|
|
|


» Roll Call and Car showcase
» Central Texas Noob
» Welcome Keith Seymore
» Wanted: Front park lamp assemblies
» 75 Hurst Olds T-tpos
» G3 Chevy rims- help ID these
» 75 el camino project.
» Have had a few questions
» vinyl top removal