1975 Monte Carlo
+22
Joe73
LSANTI76
dynchel
Bruisr
magic marouke
1973montec
DiscoMalibu
brad
Mcarlo77
74MonteCarlo
JiMi_DRiX
Limey SE
The Dude
ant7377
abajc3
bigredlaguna
74Malibu383
JB2wheeler
McCauley5983
Jedediah
Biomedtech
Laguna Budman
26 posters
G3GM :: Media :: G3 Project Pictures
Page 8 of 11
Page 8 of 11 •  1, 2, 3 ... 7, 8, 9, 10, 11
 Re: 1975 Monte Carlo
We all make mistakes...I've made a bunch & ended up doing things twice or more LOL! Those NAPA P/N's for the springs can be cross referenced, no?
You did a nice job on that Q-jet too, I sent mine out for purposes of time (and I don't have that kind of patience)! There's probably no other 73-77 Monte in the world with a Buick engine like that in it (I'd keep it)..
Good to see you!
You did a nice job on that Q-jet too, I sent mine out for purposes of time (and I don't have that kind of patience)! There's probably no other 73-77 Monte in the world with a Buick engine like that in it (I'd keep it)..
Good to see you!
77mali- Donating Member

- Street Cred : 62
 Re: 1975 Monte Carlo
I became very interested in the Quadrajet after I rebuilt the carb for the 430 last year. Now I've started on a new project which will be setup for the 454 crate engine. I live in a flat and we have small storage rooms for each apartment down in the basement. I've rigged up a small workbench, and while the sun shines outside, Fishgrinder is down in the basement working on carburetors.
Figured I could post some pictures of the rebuild. Again I'm using Cliff Ruggles book as a guide.
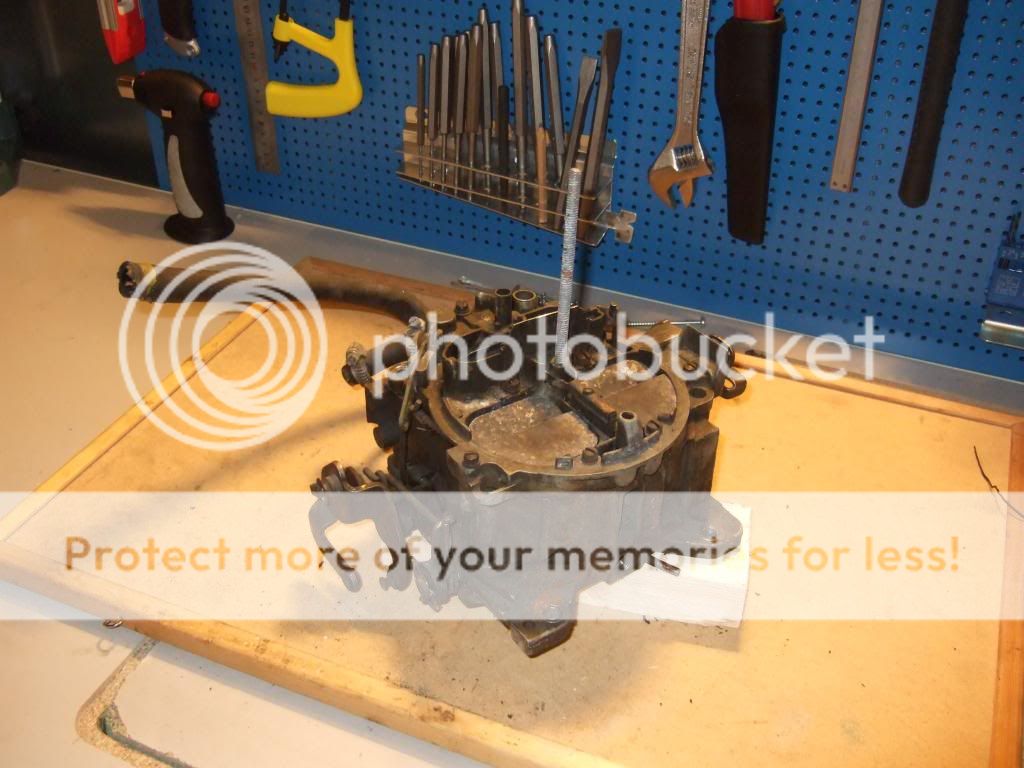
I originally started with another unit, but then I got hold of this one by pure coincidence. It is from the last years before they became computerized, and has a so called "adjustable part throttle" (APT).
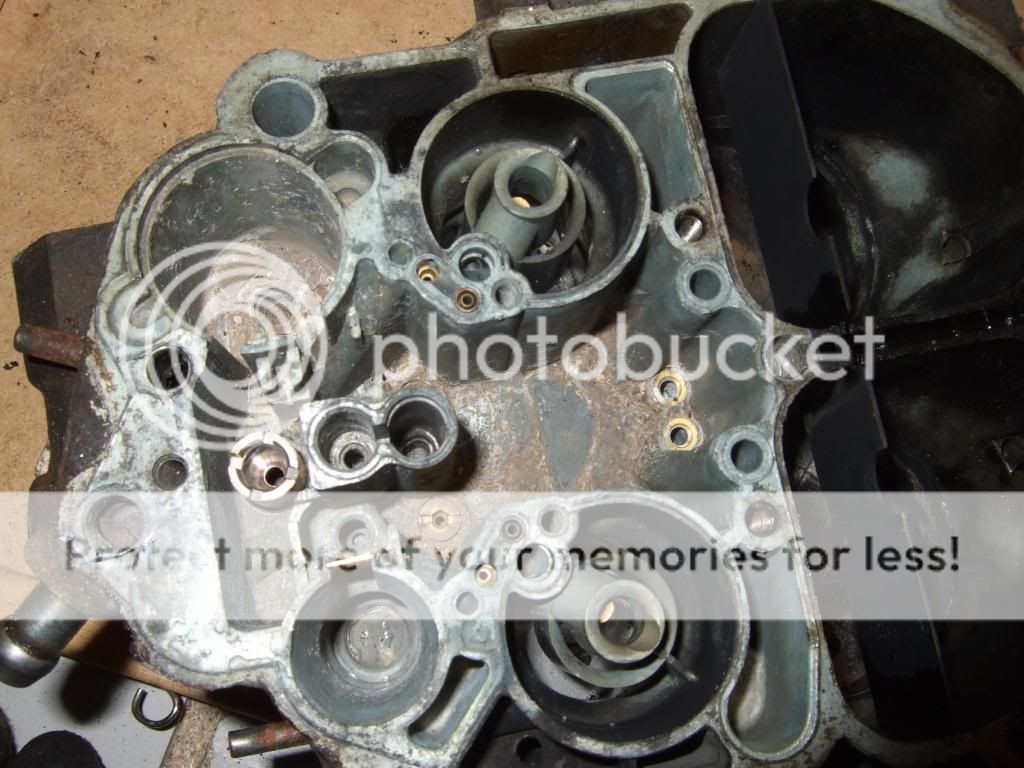
Here you can see the idle tube which sucks up fuel for the idle circuit, and the idle down channel which leads the fuel
down to the exit holes in the base plate.
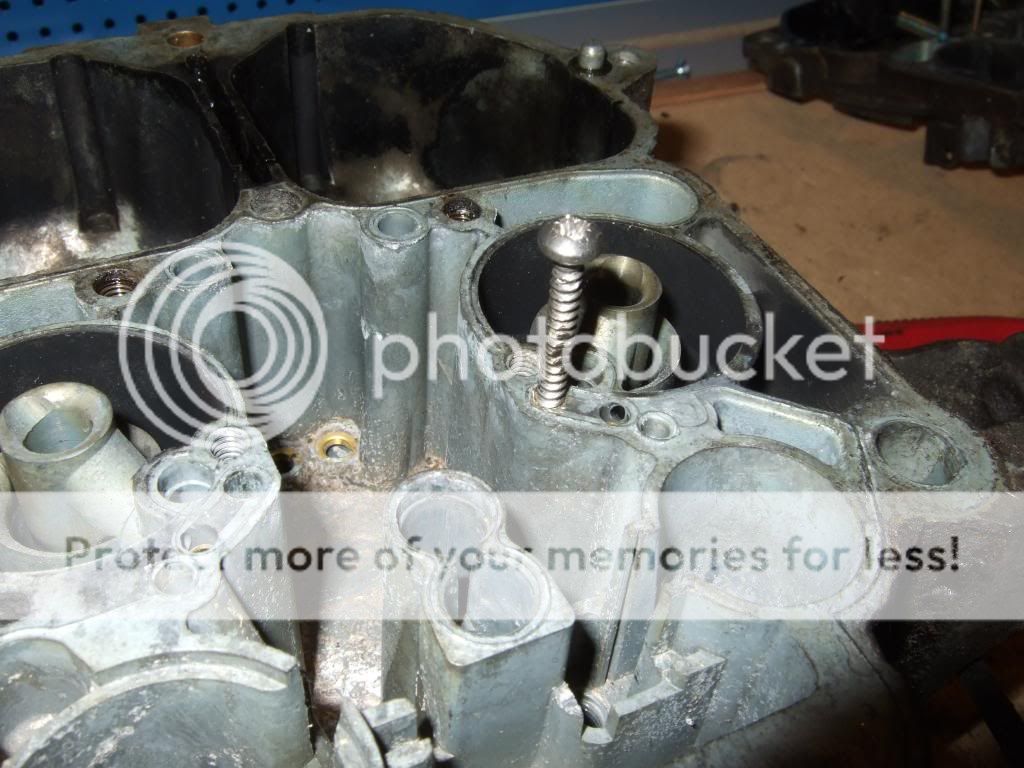
This is how I pull the idle tube, using a small wire cutter to pry it out. It is possible to reuse them
if you're careful, but so far I've messed up the collars on most ones I have pulled. New tubes are easy
to get.
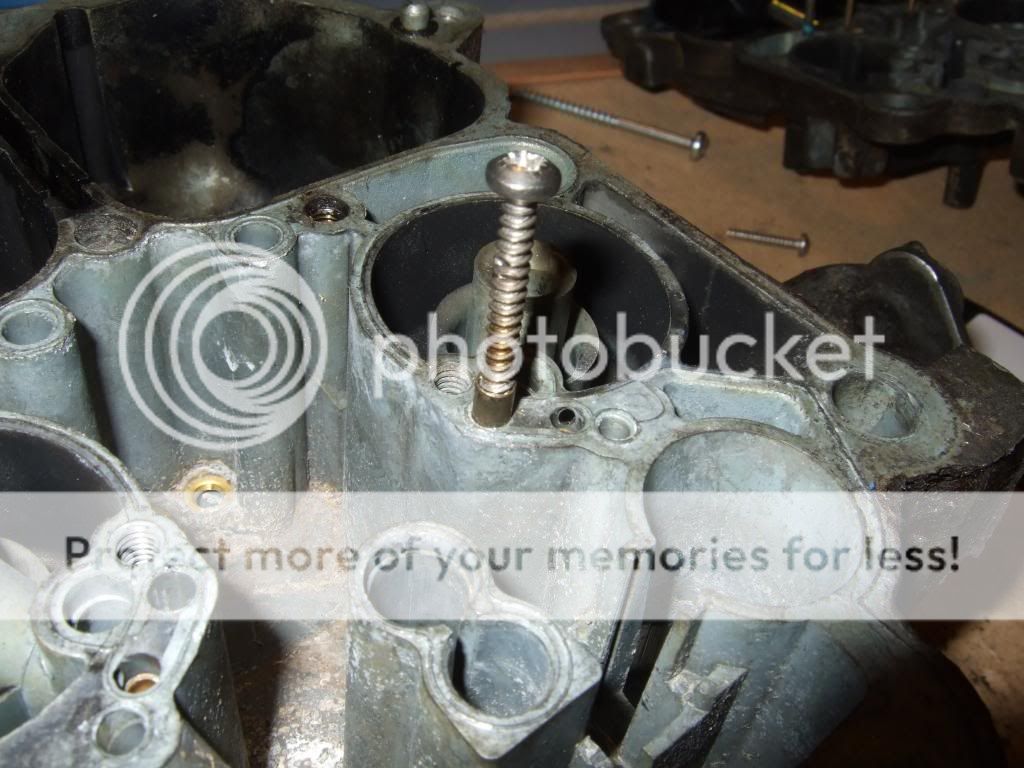
It's advised to remove these during a rebuild, as there could be deposits under them. In my case I will also
have to modify the size.
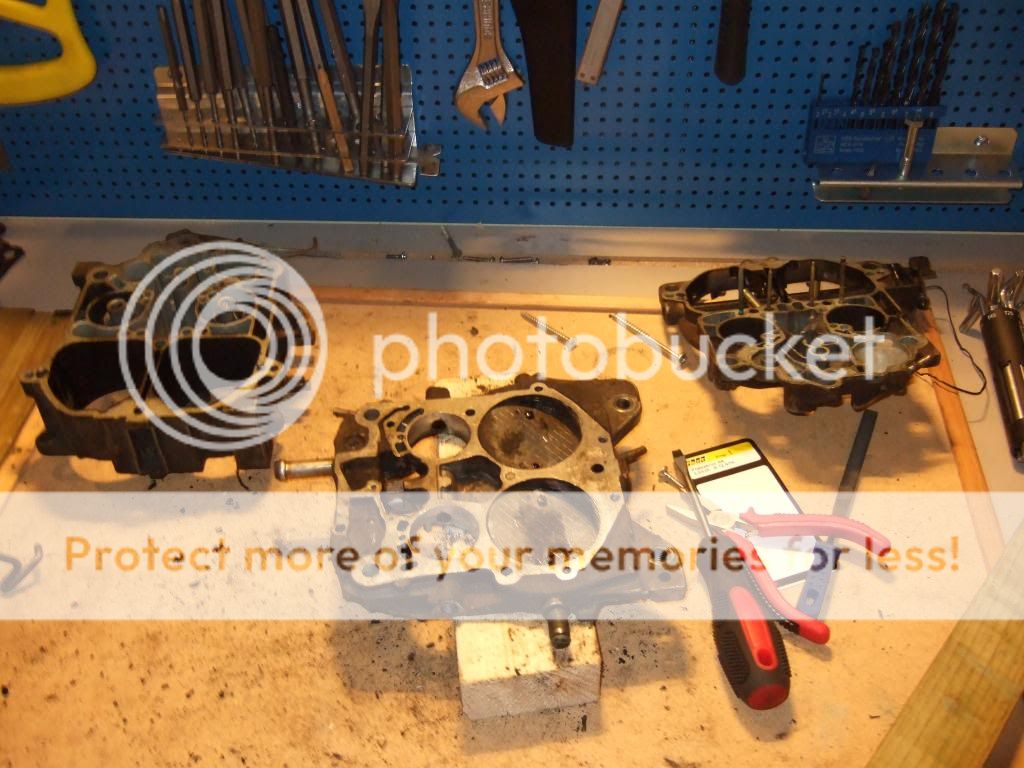
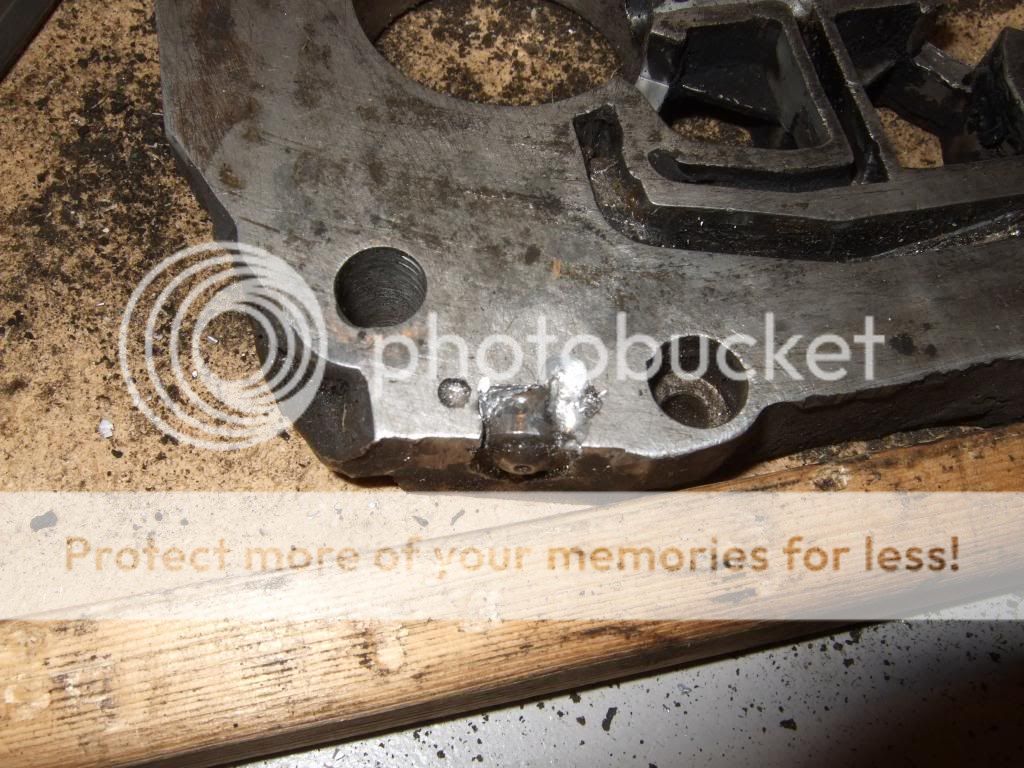
This is a disadvantage with the later carbs. Idle mixture screws are covered by steel plugs. Had
to punch around the casting to be able to drive them out.
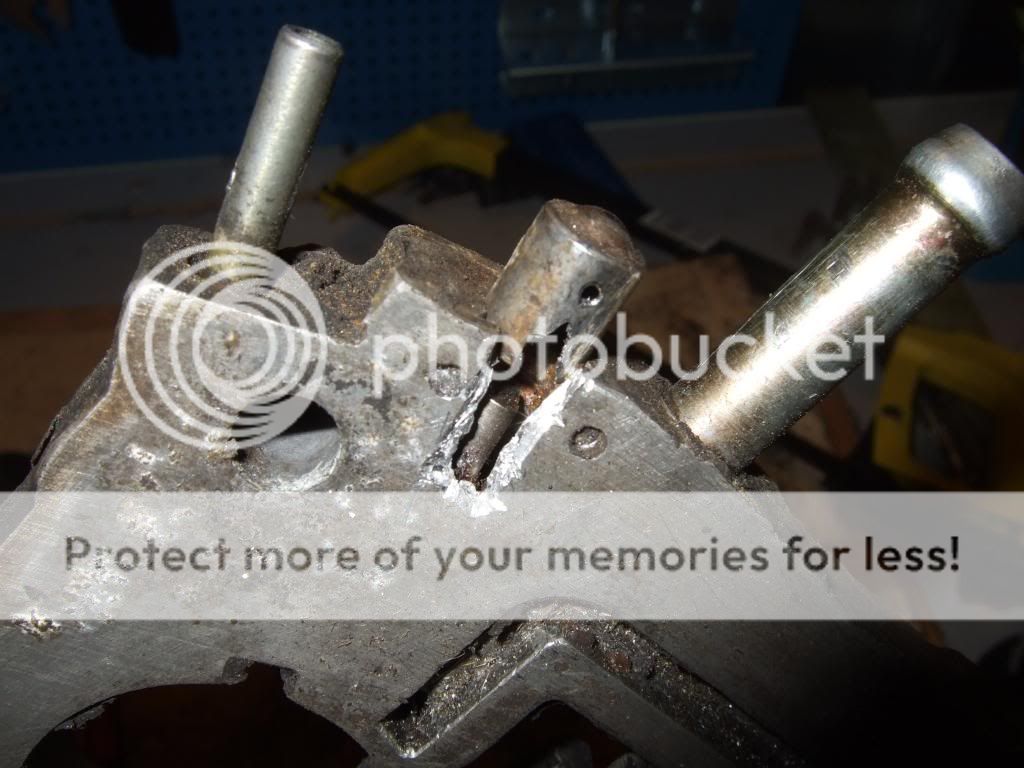
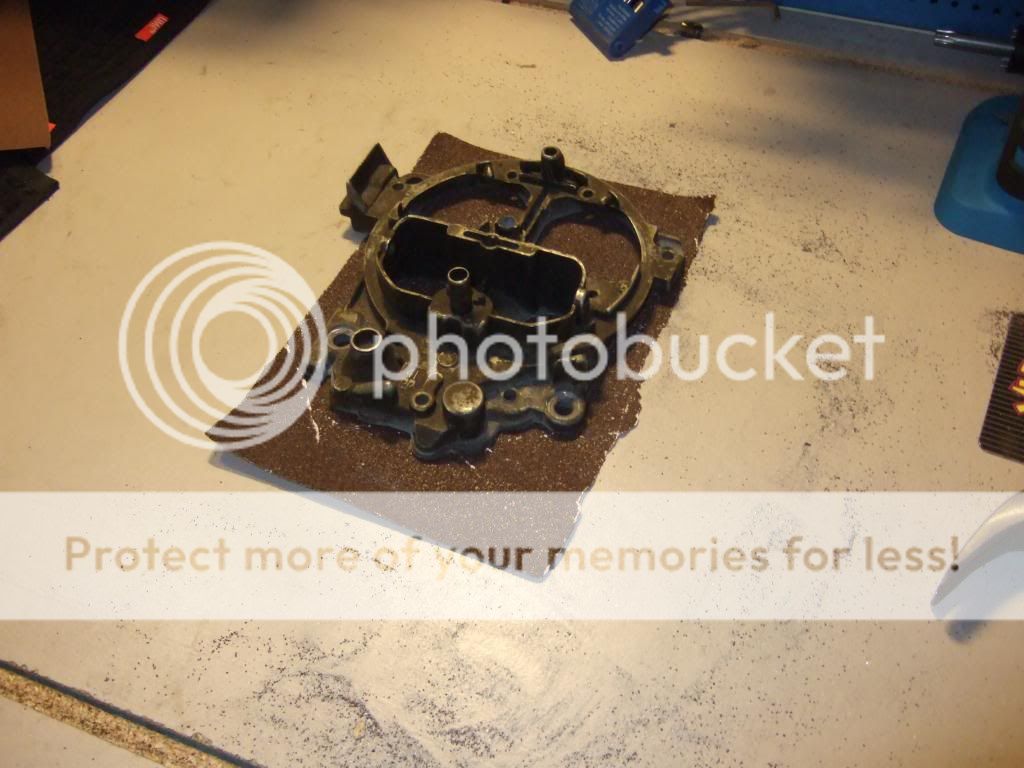
The air horn was warped, so I sanded it down until it became level.
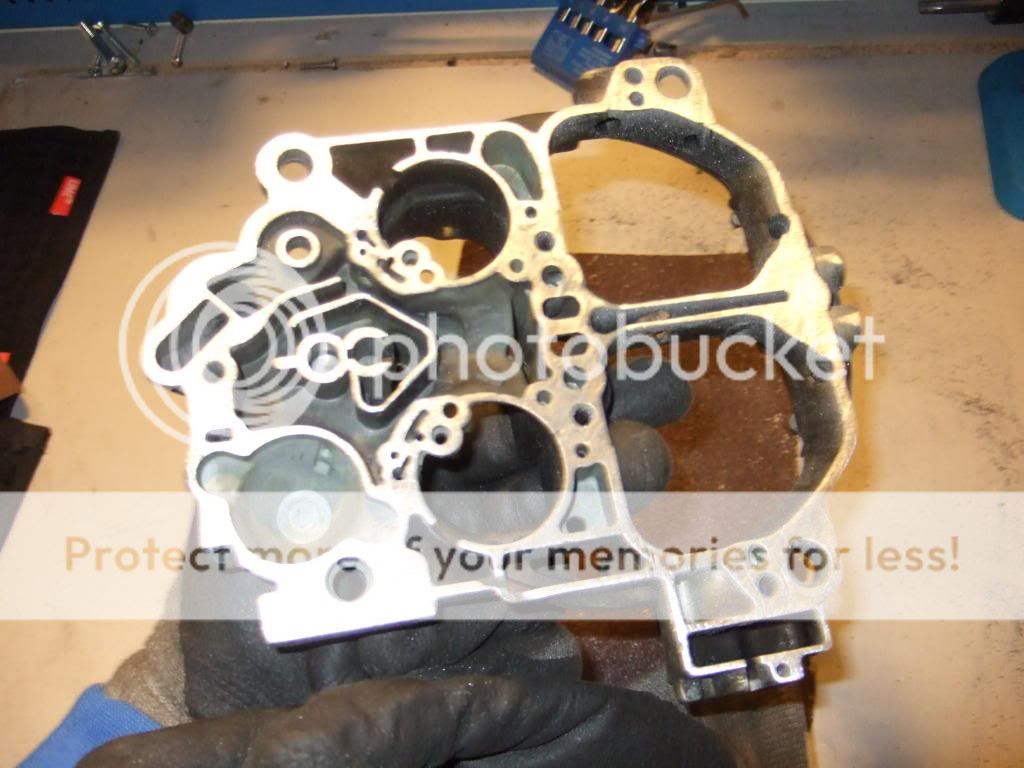
More to come
Figured I could post some pictures of the rebuild. Again I'm using Cliff Ruggles book as a guide.

I originally started with another unit, but then I got hold of this one by pure coincidence. It is from the last years before they became computerized, and has a so called "adjustable part throttle" (APT).

Here you can see the idle tube which sucks up fuel for the idle circuit, and the idle down channel which leads the fuel
down to the exit holes in the base plate.

This is how I pull the idle tube, using a small wire cutter to pry it out. It is possible to reuse them
if you're careful, but so far I've messed up the collars on most ones I have pulled. New tubes are easy
to get.

It's advised to remove these during a rebuild, as there could be deposits under them. In my case I will also
have to modify the size.


This is a disadvantage with the later carbs. Idle mixture screws are covered by steel plugs. Had
to punch around the casting to be able to drive them out.


The air horn was warped, so I sanded it down until it became level.

More to come
Fishgrinder- G3GM Member

- Street Cred : 4
 Re: 1975 Monte Carlo
Nice job man! (Again)
BTW...can you go to this thread & translate what was said for us?
http://www.g3gm.com/t6778-norwegian-flogs-a-third-gen-on-the-track
BTW...can you go to this thread & translate what was said for us?
http://www.g3gm.com/t6778-norwegian-flogs-a-third-gen-on-the-track

77mali- Donating Member

- Street Cred : 62
 Re: 1975 Monte Carlo
Done some work since last time:
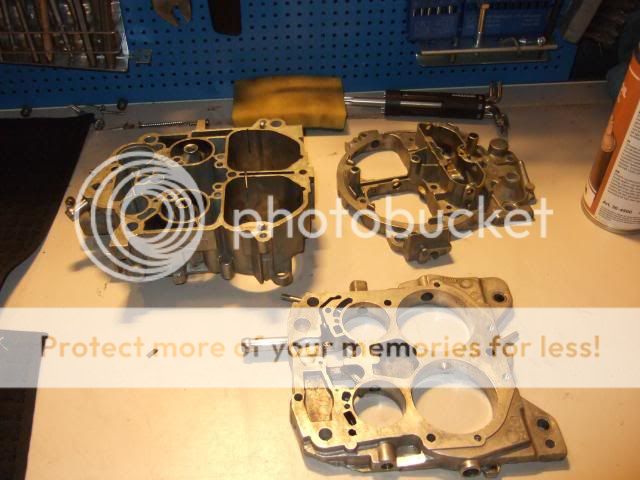
Cleaned the parts. I will paint them after I've finished the modifications.
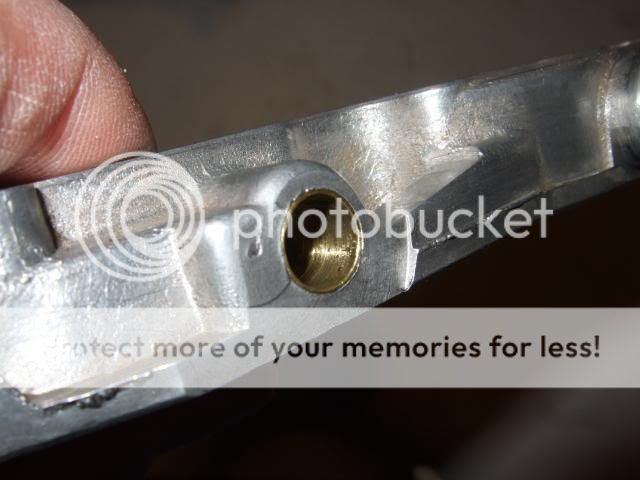
New bushings in the throttle shaft holes.
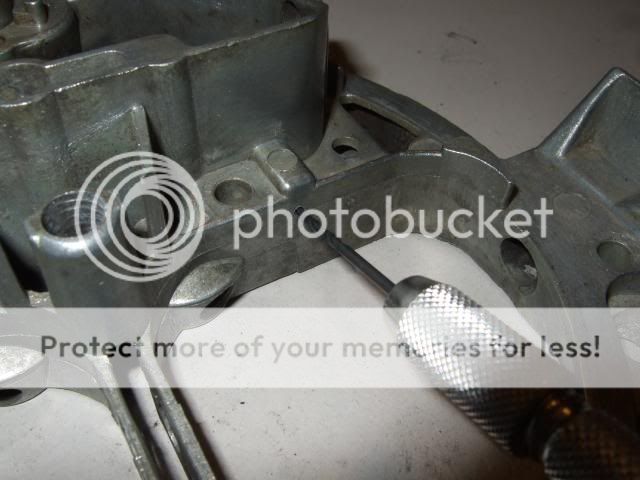
This hole is the exit location for a system that works as the secondary side "accelerator pump". Enlarged it slightly.
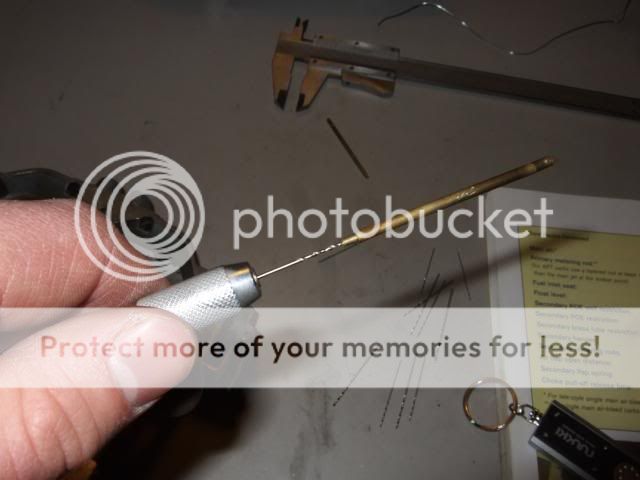
And this is one of two tubes that bleed air into secondary side mixture before it exits the big nozzles. Opened these
a little as well.
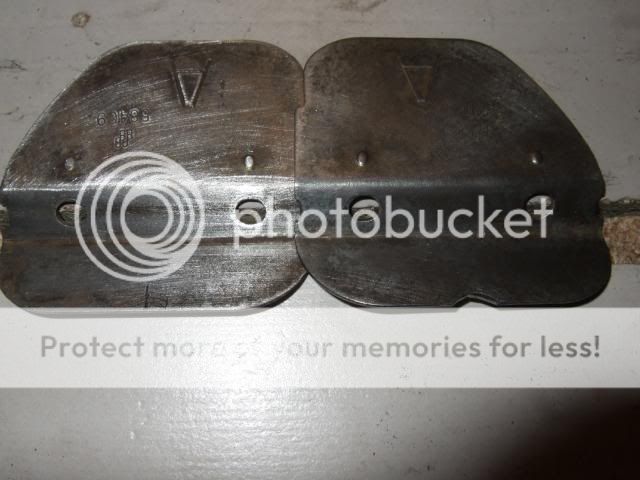
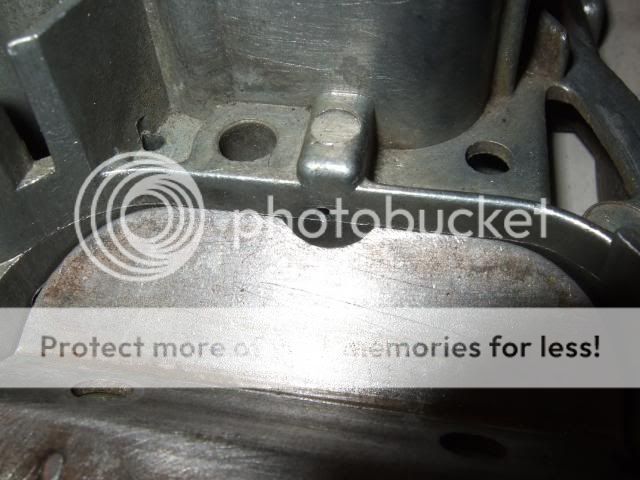
Here I'm making a notch in the air flaps.

And this is the idea behind it. Originally the holes were above the flaps, which will be a disadvantage for
high performance setups. With the notch, the secondary side will receive a more direct shot of fuel once the
throttle plates open.

Cleaned the parts. I will paint them after I've finished the modifications.

New bushings in the throttle shaft holes.

This hole is the exit location for a system that works as the secondary side "accelerator pump". Enlarged it slightly.

And this is one of two tubes that bleed air into secondary side mixture before it exits the big nozzles. Opened these
a little as well.

Here I'm making a notch in the air flaps.

And this is the idea behind it. Originally the holes were above the flaps, which will be a disadvantage for
high performance setups. With the notch, the secondary side will receive a more direct shot of fuel once the
throttle plates open.

Fishgrinder- G3GM Member

- Street Cred : 4
 Re: 1975 Monte Carlo
Man, you have a lot of patience. 
Some of those drill bits are so tiny they almost look invisible!

Some of those drill bits are so tiny they almost look invisible!

77mali- Donating Member

- Street Cred : 62
 Re: 1975 Monte Carlo
Oh yes, the tiniest I've used so far is around 0.036". Have to use a pin vise and drill by hand, but the material is really soft.
I guess the whole rebuild could be done in a day, but I'm in no rush. Really have to study the book carefully to catch all the details.
I guess the whole rebuild could be done in a day, but I'm in no rush. Really have to study the book carefully to catch all the details.
Fishgrinder- G3GM Member

- Street Cred : 4
 Re: 1975 Monte Carlo
Finished all the modifications inside, so it was time to get the carb painted.
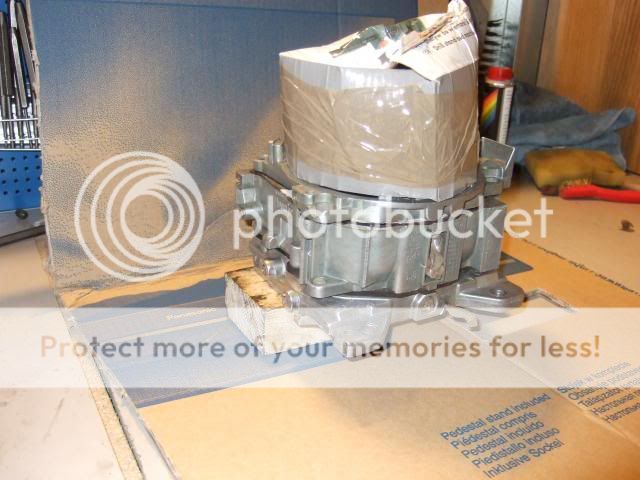
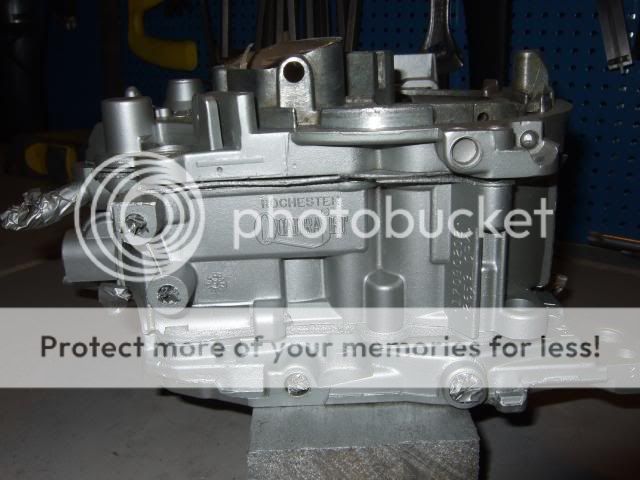

I feared that the "cast finish" paint would be too shiny, but it wasn't and I'm very happy with the result.
Now I've started the reassembly. The throttle plates weren't opening to 90 degrees, so I bent linkages
and stop pin on the secondary shaft to achieve this.
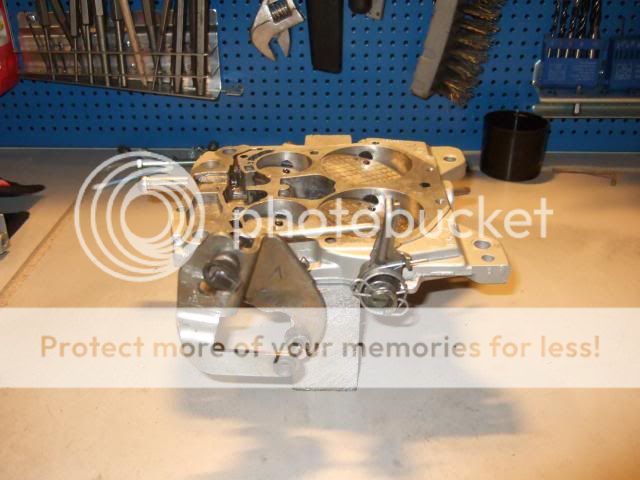
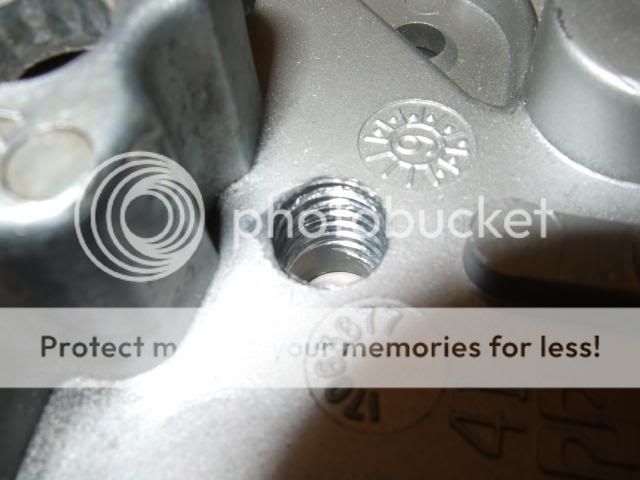
I've chased the all the threads with taps. In addition I tapped threads in the APT hole which is plugged from factory and inserted a hex head plug. This way the APT can be tuned without taking the airhorn off.
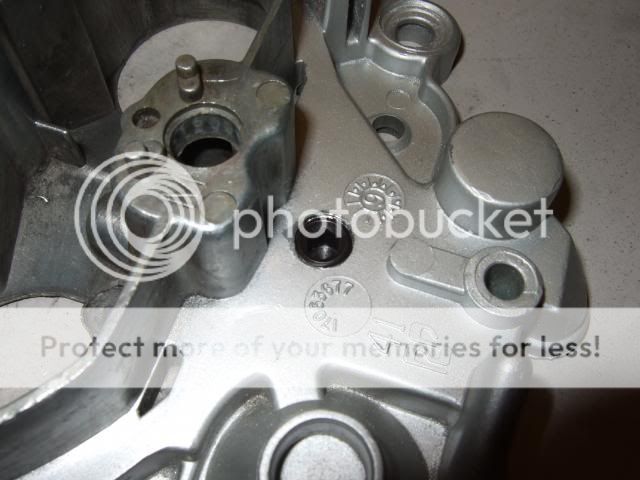


I feared that the "cast finish" paint would be too shiny, but it wasn't and I'm very happy with the result.
Now I've started the reassembly. The throttle plates weren't opening to 90 degrees, so I bent linkages
and stop pin on the secondary shaft to achieve this.

I've chased the all the threads with taps. In addition I tapped threads in the APT hole which is plugged from factory and inserted a hex head plug. This way the APT can be tuned without taking the airhorn off.


Fishgrinder- G3GM Member

- Street Cred : 4
 Re: 1975 Monte Carlo
Looks better than new.
I've been toying with the paint idea myself. What brand of paint/primer did you use? Nice work.
I've been toying with the paint idea myself. What brand of paint/primer did you use? Nice work.

77mali- Donating Member

- Street Cred : 62
 Re: 1975 Monte Carlo
Thanks mali!
I used this paint: http://www.captech.no/usapann/main.php?g2_itemId=953
Sanded with a 280 grid nylon sheet first. Then cleaned it good with thinner, and put on three coats of paint.
But isn't your Q-jet just rebuilt and painted?
I used this paint: http://www.captech.no/usapann/main.php?g2_itemId=953
Sanded with a 280 grid nylon sheet first. Then cleaned it good with thinner, and put on three coats of paint.
But isn't your Q-jet just rebuilt and painted?
Fishgrinder- G3GM Member

- Street Cred : 4
 Re: 1975 Monte Carlo
It was rebuilt yes. Bead blasted & not painted however. There is some rust coming out already on a few spots. I want to coat those areas so the rust does not come back. I was going to use Por15 & then try & find a nice finish coat. The "Alumicast" material looks really nice- like a factory finish. Thanks for the information.

77mali- Donating Member

- Street Cred : 62
 Re: 1975 Monte Carlo
stop with the carbs...................
get those springs in......
get those springs in......

1973montec- Donating Member

- Street Cred : 17
 Re: 1975 Monte Carlo
1973montec wrote:stop with the carbs...................
get those springs in......
Haha
Fishgrinder- G3GM Member

- Street Cred : 4
 Re: 1975 Monte Carlo
I like what you've done as far as modifying the QJet and i've been taking notes. I've been rebuilding carbs since I was a little kid and enjoy working with intricate parts. I've rebuilt dozens of Q-Jets, 2-Jets, Carters and Holleys as well as everything small engine. I've never modified anything before though, nice work.
Everyone seems to hate a QuadraJets but they've been around a long time, used on countless applications and have proven themselves as a reliable unit.
I like the factory cast look with the paint although I chose to polish mine, clearcoat it and even painted the lettering black.
Everyone seems to hate a QuadraJets but they've been around a long time, used on countless applications and have proven themselves as a reliable unit.
I like the factory cast look with the paint although I chose to polish mine, clearcoat it and even painted the lettering black.

DiscoMalibu- G3GM Member

- Street Cred : 7
 Re: 1975 Monte Carlo
I love my Q jet. Wouldn't swap it for any other carb.

77mali- Donating Member

- Street Cred : 62
 Re: 1975 Monte Carlo
DiscoMalibu wrote:Everyone seems to hate a QuadraJets but they've been around a long time, used on countless applications and have proven themselves as a reliable unit.
People bag on Q-Jets because they don't understand them.

thatfnthing- Donating Member

- Street Cred : 65
 Re: 1975 Monte Carlo
Thanks for the feedback guys.
I agree with thatfnthing. The Q-jet was very application specific. When people put smog era Q-jets on more aggressive engines without modifying them, tuning the carb can be almost impossible.
This is pretty much the case with the carb I'm working on. It is from 1982 and probably sat on a 305 in a Caprice or similar. The carb was setup for a lean mixture from factory (huge air bleeds, small main jets etc). This would not work very well on the 454 HO I've ordered.
In the book I have by Ruggles there are suggestions on how to modify and dimension the carb for certain engine characteristics. For instance, if you have a camshaft which gives very low vacuum at idle, more fuel (and perhaps bypass air) is needed in the idle mixture It won't be enough to just turn the mixture screws. You have to open the pickup tube itself as I've done.
There are structural weaknesses however, such as warping, loose shafts, and leaking bottom plugs on earlier units.
This is my first modification, so I hope I haven't screwed anything up. Looking forward to try the carb on the engine this summer That will be the litmus test!
Fishgrinder- G3GM Member

- Street Cred : 4
 Re: 1975 Monte Carlo
Fishgrinder wrote:1973montec wrote:stop with the carbs...................
get those springs in......
HahaThey come to mind every time I see a picture of 1973 454 Monte's car
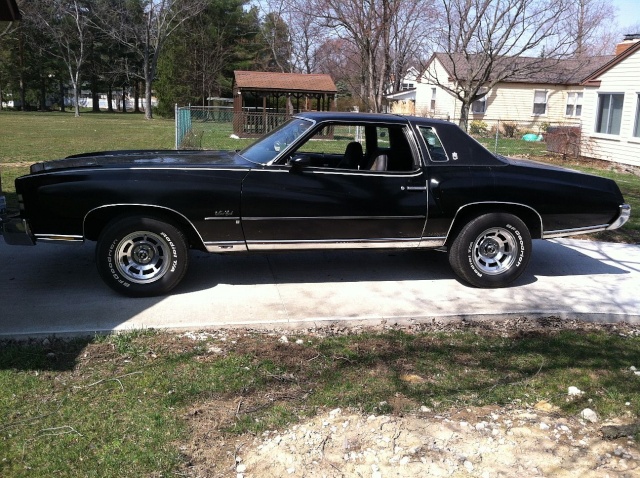
than get to it.......
1973 454 MONTE- Donating Member

- Street Cred : 36
 Re: 1975 Monte Carlo
Launched the summer project this weekend:


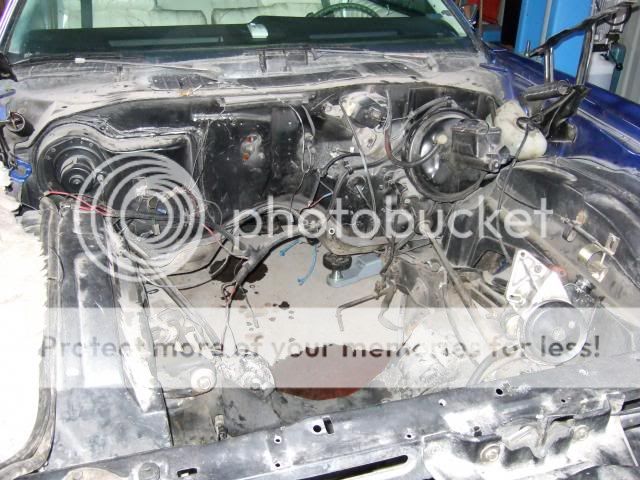
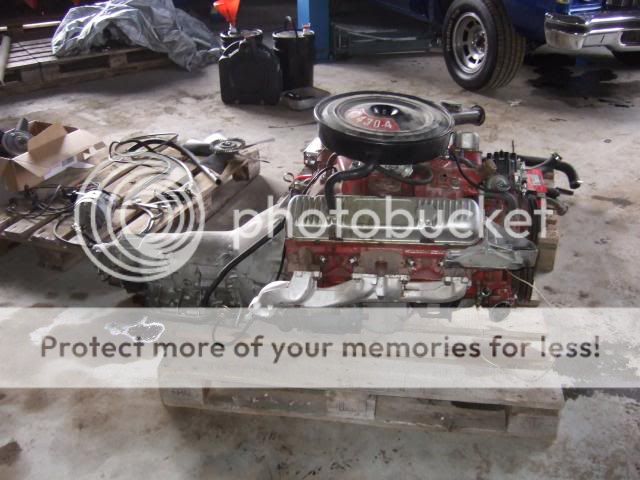
Everything went very smooth. Pity I didn't take pictures when lifting out the engine.. with my fathers's excavator.
The frame mounts had been welded to the frame in front of the original location to fit the Buick 430. So we had to cut them loose and grind down the weld seam. I will buy new frame mounts and bolt them in the original holes. I am a little confused regarding the mounts(brackets) that sit on the block. I've gotten hold of a pair from a small block, but I'm not sure if these will be correct for the 454 I'm putting in, and how they will affect the position of the engine in the bay.
Fishgrinder- G3GM Member

- Street Cred : 4
 Re: 1975 Monte Carlo
Not sure if the Clam-Shell type mounts are the same for small or big blocks but here's a pic. Mine is a small block, might be the same but different hole locations on the frame? There are a lot of holes there. This one is off but you can see where it is supposed to go by the dirt outline- LOL.
Hope this helps.
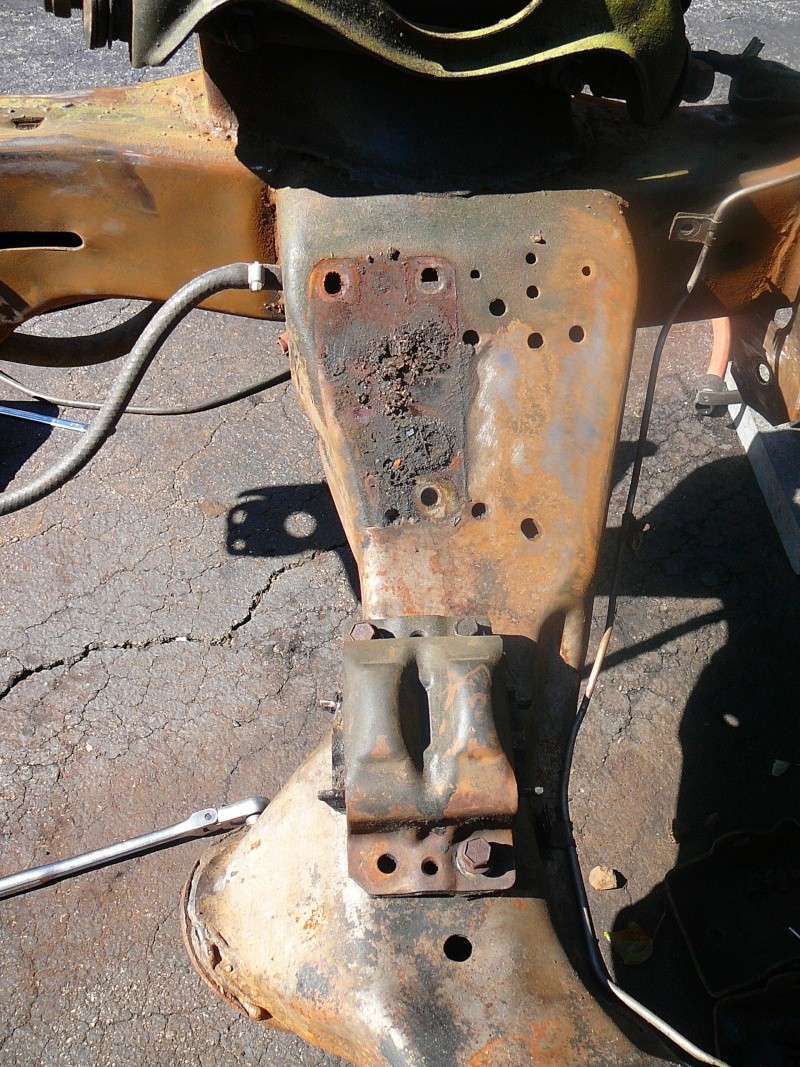
Hope this helps.

Last edited by 77mali on Mon May 20, 2013 5:38 pm; edited 1 time in total

77mali- Donating Member

- Street Cred : 62
 Re: 1975 Monte Carlo
i will get a pic of mine,but i think ours does not look like swiss cheese.
a 350 drops right into my 454 mounts.

1973 454 MONTE- Donating Member

- Street Cred : 36
 Re: 1975 Monte Carlo
1973 454 MONTE wrote:love those wheels

i will get a pic of mine,but i think ours does not look like swiss cheese.
a 350 drops right into my 454 mounts.
This is how you make Swiss cheese
 (but I'm sure you knew that)
77mali- Donating Member

- Street Cred : 62
 Re: 1975 Monte Carlo
I'm thinking about these brackets, not the frame mounts:


Fishgrinder- G3GM Member

- Street Cred : 4
 Re: 1975 Monte Carlo
Indeed! You know if small block brackets can be put on a big block?
Fishgrinder- G3GM Member

- Street Cred : 4
 Re: 1975 Monte Carlo
I'm not 100% certain that they can. I can measure & we can compare to what Chris has or maybe he already knows the answer for sure. I'll post my measurements later today if you still need them.

77mali- Donating Member

- Street Cred : 62
Page 8 of 11 •  1, 2, 3 ... 7, 8, 9, 10, 11
G3GM :: Media :: G3 Project Pictures
Page 8 of 11
Permissions in this forum:
You cannot reply to topics in this forum|
|
|


» Roll Call and Car showcase
» Central Texas Noob
» Welcome Keith Seymore
» Wanted: Front park lamp assemblies
» 75 Hurst Olds T-tpos
» G3 Chevy rims- help ID these
» 75 el camino project.
» Have had a few questions
» vinyl top removal