1975 Monte Carlo
+22
Joe73
LSANTI76
dynchel
Bruisr
magic marouke
1973montec
DiscoMalibu
brad
Mcarlo77
74MonteCarlo
JiMi_DRiX
Limey SE
The Dude
ant7377
abajc3
bigredlaguna
74Malibu383
JB2wheeler
McCauley5983
Jedediah
Biomedtech
Laguna Budman
26 posters
G3GM :: Media :: G3 Project Pictures
Page 1 of 11
Page 1 of 11 • 1, 2, 3 ... 9, 10, 11 
 1975 Monte Carlo
I bought this car in 2008, primarily to get some experience with paint prep and bodywork, but also because I was quite determined to get hold of a big engine at the time.
I found it on a popular auto trader site here in Norway. The add said that the engine volume was 6.8 liters, so I figured it had to be a 427 Chevrolet. But after a talk with the seller, it turned out it was a Buick 430! He had made new engine mounts, so it would fit in there. Behind it, there was a serviced TH400, and a 10 bolt rear with a locker. I did some research on the 430,
and allthough they came in 360hp versions, I think this one is a duller export.
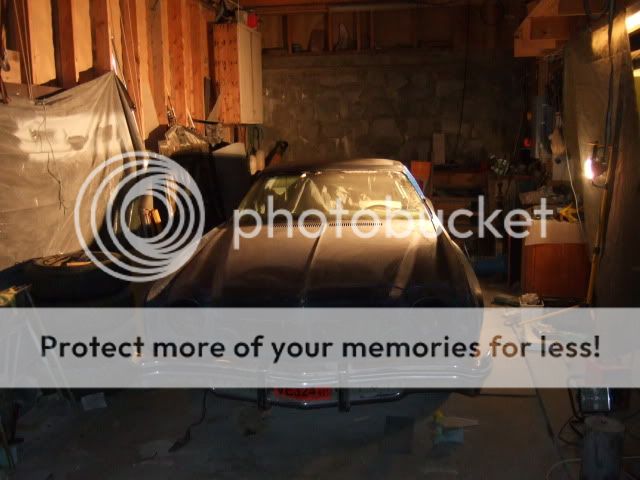
The car had been stored in a garage for a long time. Some serious rust had been taken care of, and he had put primer on the whole car after welding in new metal here and there. Then he had to move out of the garage, and wanted to get rid of the car instead of having it parked outside in open air.
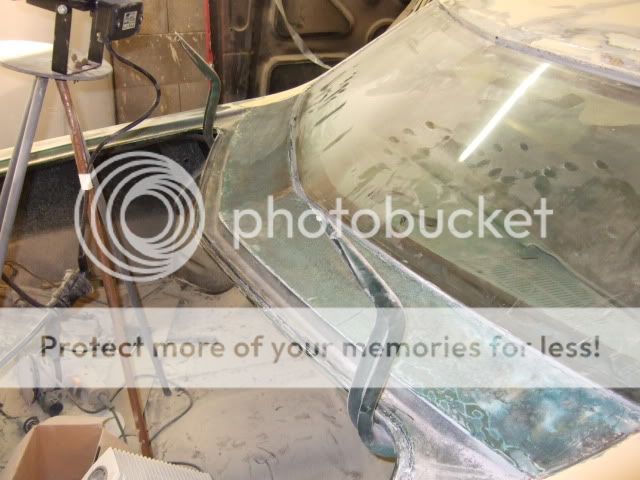
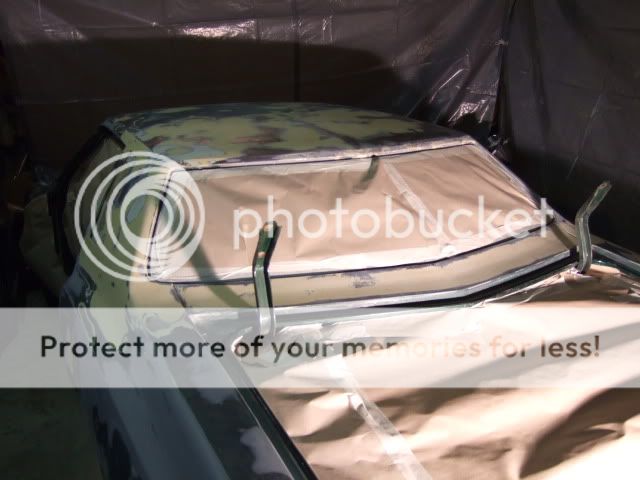
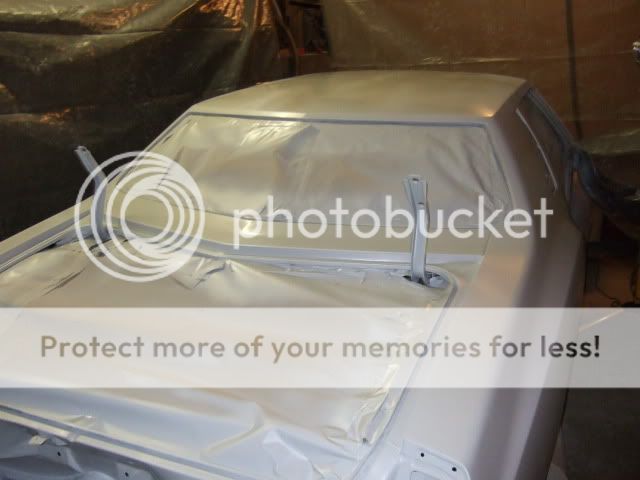
In retrospect I should have done a closer inspection, because it turned out the driver side door was heavily attacked by rust. I could also stick a screwdriver straight through the plate which is between the rear window and trunk. The hood wouldn't close properly, but I though it was an alignment issue. The roof was also a bit suspicious, as it had originally been a vinyl top, now turned in to a hardtop.
I started on the paint prep in the spring of 2009. As a complete beginner with this stuff, I had to learn by doing, along with some helpfull tips from people I know. My plan was to get it painted in the fall, but it turned out to be more work than expected, way more work hehe. So I first got it painted two weeks ago.
I kept a log over at the NMCOA-forum, so this is just a copy of what I posted there, hence the rapid timeline:
Here you go:
May-November 2009
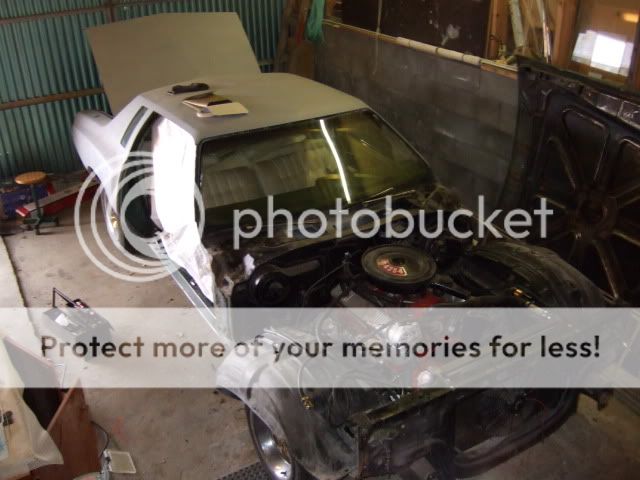
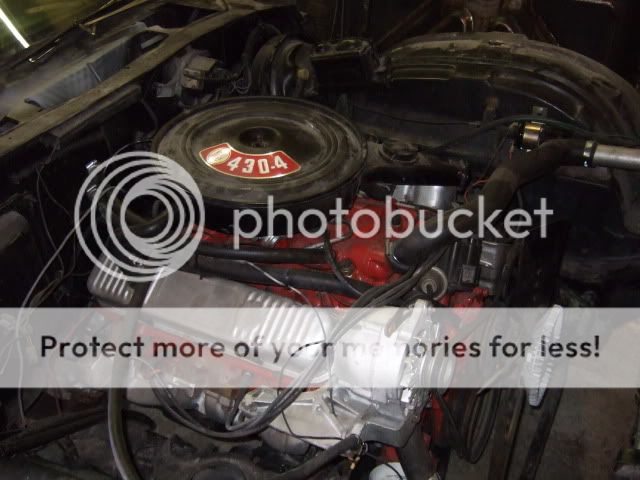
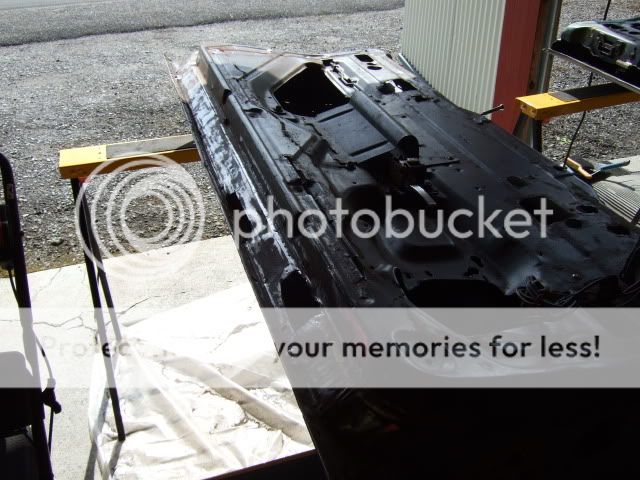
Driver side door while I still thought it could be saved
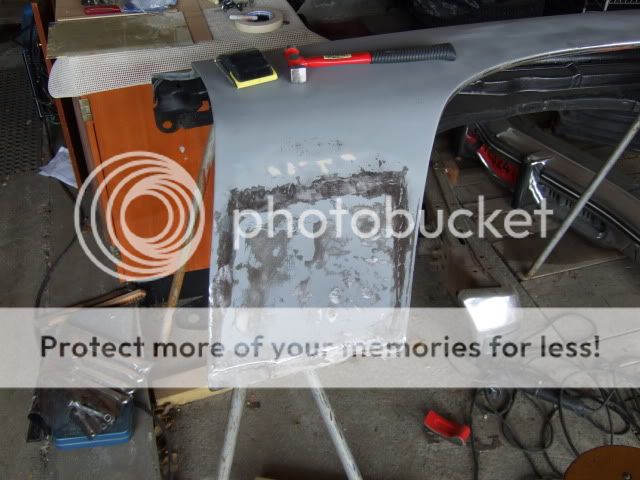
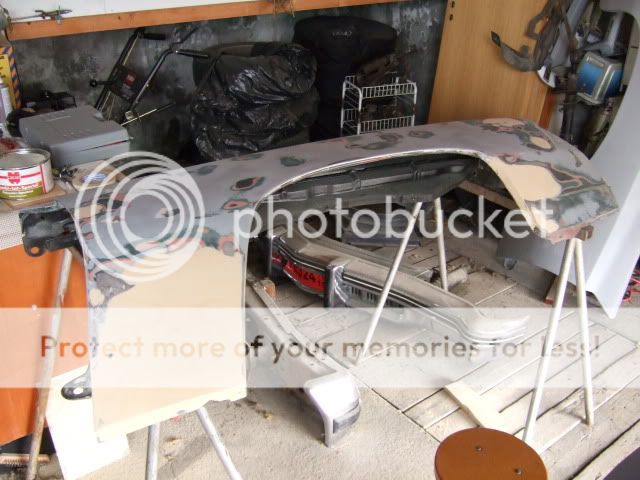
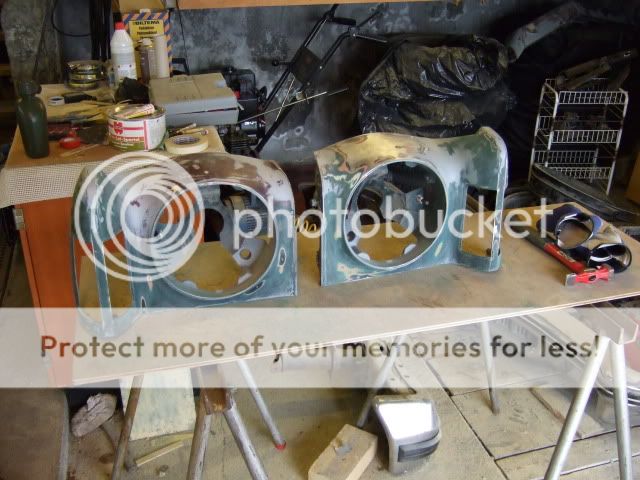
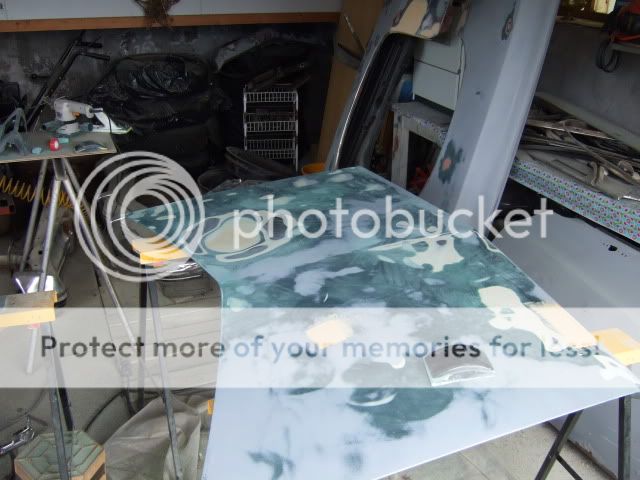
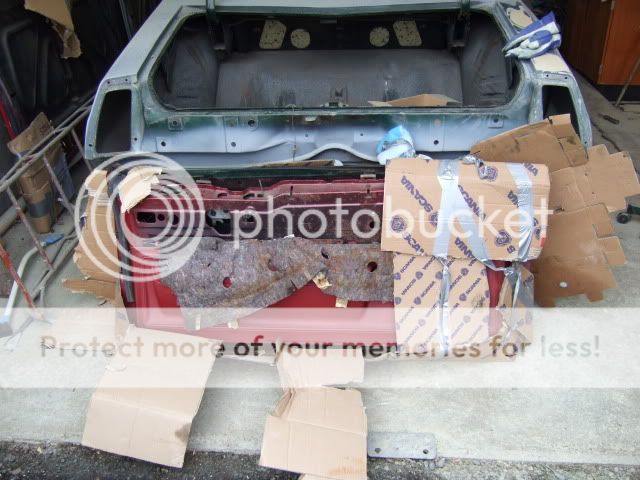
New door
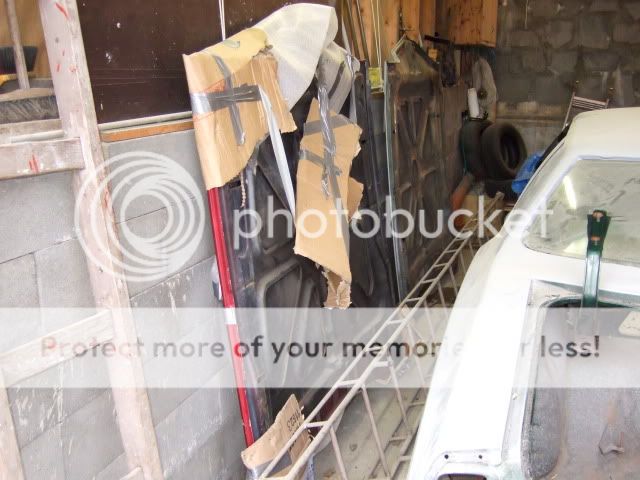
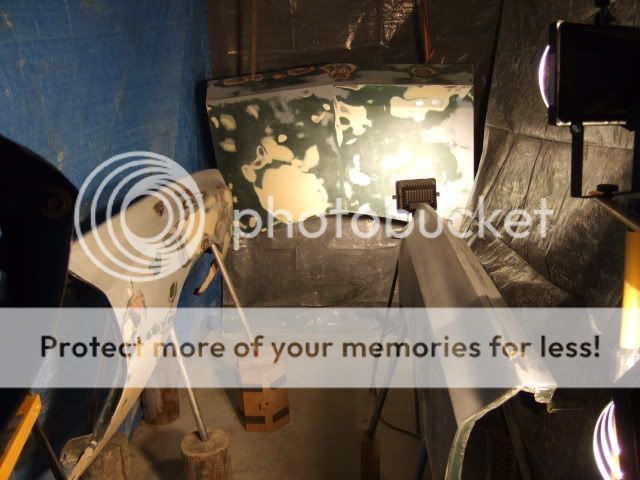
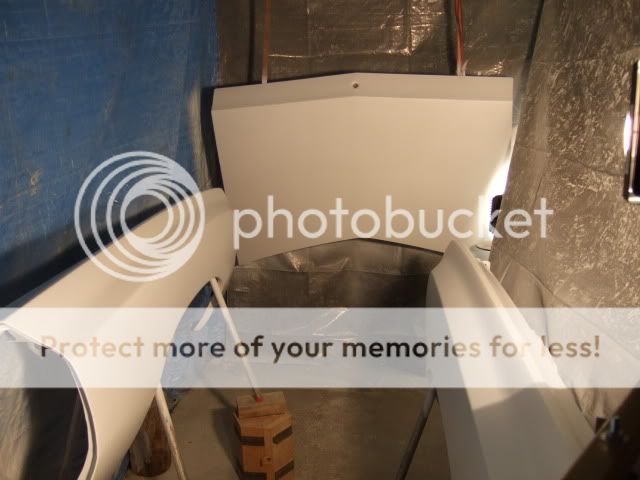
Hood
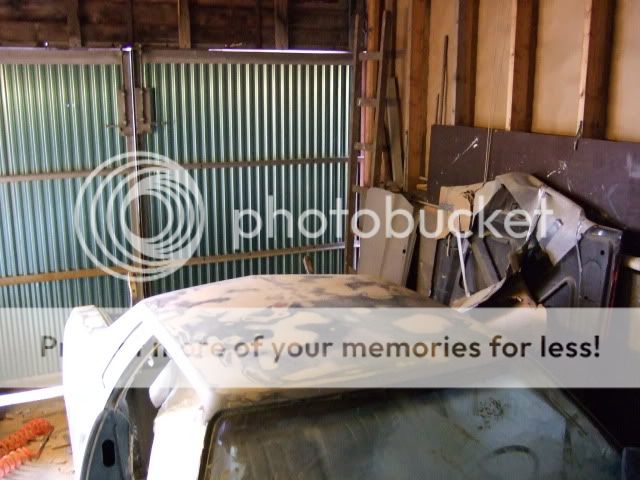
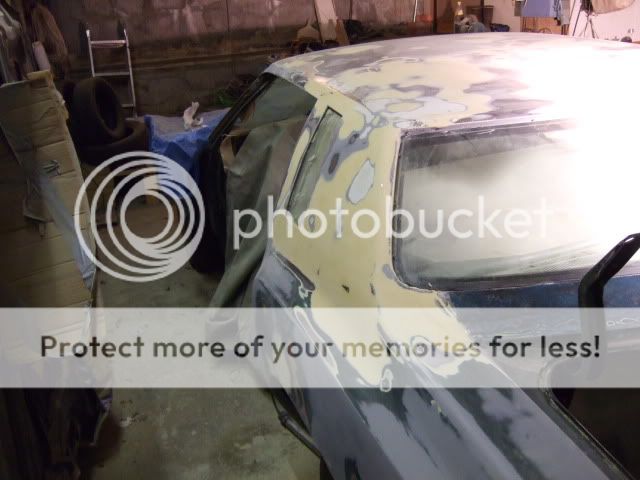
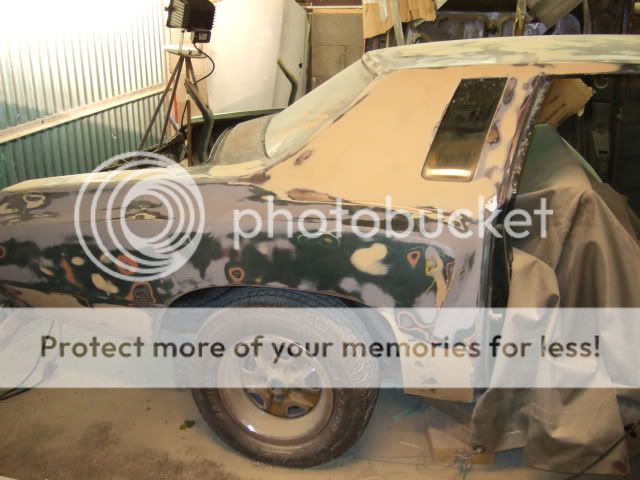

White trash paint box

I found it on a popular auto trader site here in Norway. The add said that the engine volume was 6.8 liters, so I figured it had to be a 427 Chevrolet. But after a talk with the seller, it turned out it was a Buick 430! He had made new engine mounts, so it would fit in there. Behind it, there was a serviced TH400, and a 10 bolt rear with a locker. I did some research on the 430,
and allthough they came in 360hp versions, I think this one is a duller export.
The car had been stored in a garage for a long time. Some serious rust had been taken care of, and he had put primer on the whole car after welding in new metal here and there. Then he had to move out of the garage, and wanted to get rid of the car instead of having it parked outside in open air.
In retrospect I should have done a closer inspection, because it turned out the driver side door was heavily attacked by rust. I could also stick a screwdriver straight through the plate which is between the rear window and trunk. The hood wouldn't close properly, but I though it was an alignment issue. The roof was also a bit suspicious, as it had originally been a vinyl top, now turned in to a hardtop.
I started on the paint prep in the spring of 2009. As a complete beginner with this stuff, I had to learn by doing, along with some helpfull tips from people I know. My plan was to get it painted in the fall, but it turned out to be more work than expected, way more work hehe. So I first got it painted two weeks ago.
I kept a log over at the NMCOA-forum, so this is just a copy of what I posted there, hence the rapid timeline:
Here you go:
May-November 2009


Driver side door while I still thought it could be saved


New door

Hood


White trash paint box


Last edited by Fishgrinder on Tue Dec 07, 2010 6:15 pm; edited 2 times in total
Fishgrinder- G3GM Member

- Street Cred : 4
 Re: 1975 Monte Carlo
Jul 05 2010
Long time no see
I've started on the doomsday project again after a 8 month hiatus.
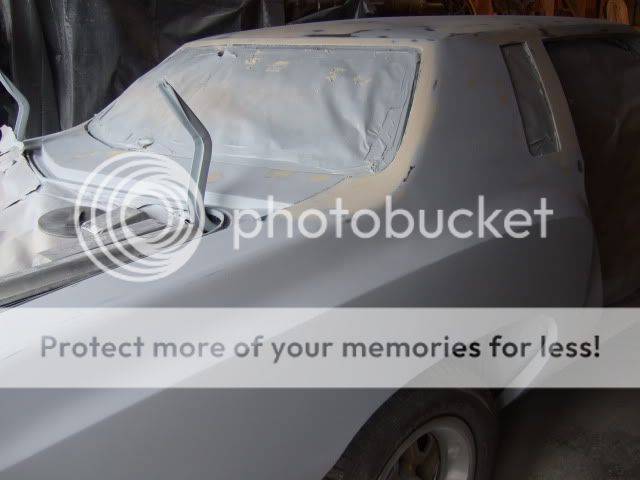
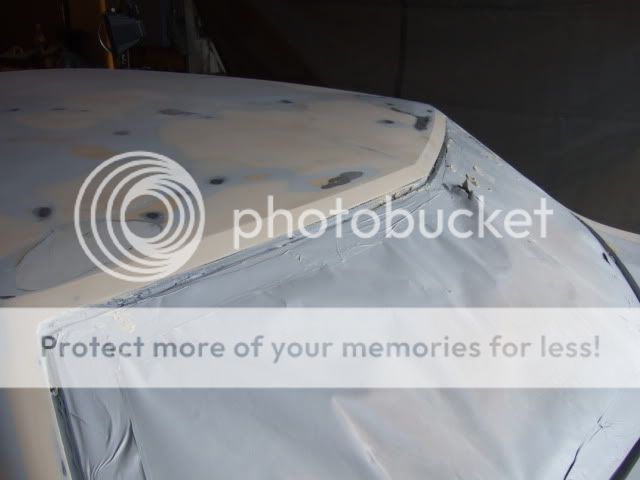
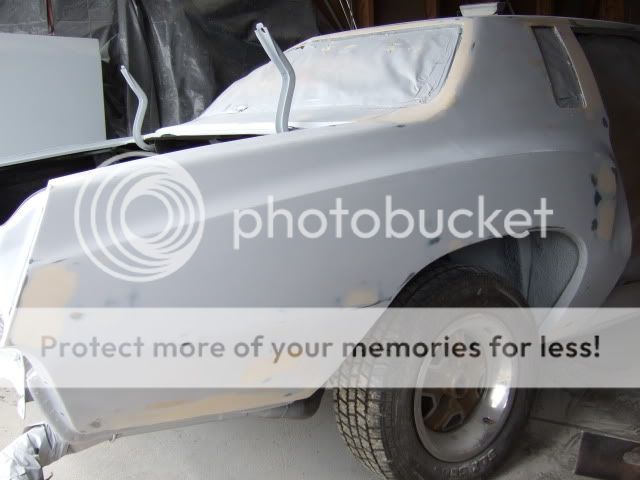
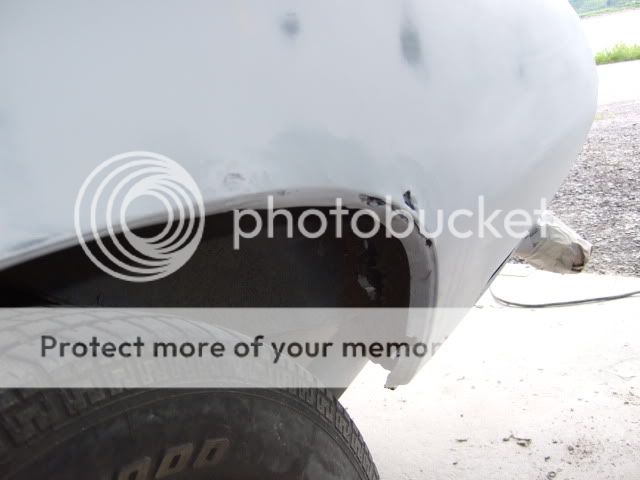
The car has now been sanded with 180 grit on a long block. Of course I found lots of stuff that needed to be improved. That especially goes for the rear half of the roof and down the sides (the old Landau).
Considering my background, I don't think it's too bad. At least almost all the new body filler I've applied feathers with the the "top" layer, and there's not too much sticking out. I finished off with 220 grit before the next coat of primer. I really hope it's straight enough for wet sanding then.
The rear left wheel well still needs to be welded. But as I don't have a welder available, I' going to prime the rest of the car first, and get the welding done later on.
After doing a quick tally of the moldings, it turned out they are incomplete for both sides of the car, and besides, they are in a poor condition. So I've decided to go without the lower moldings.
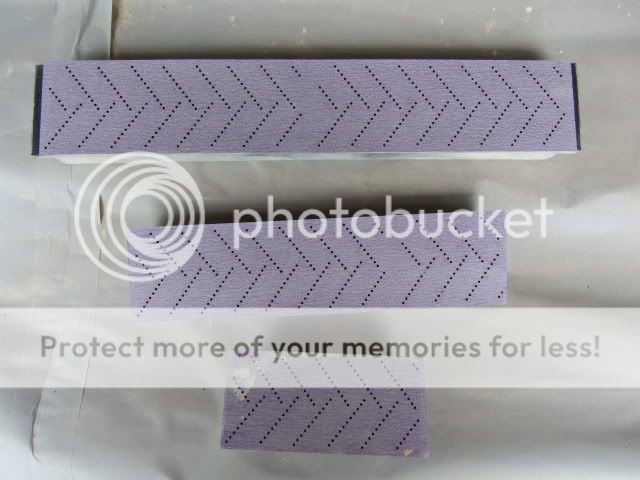
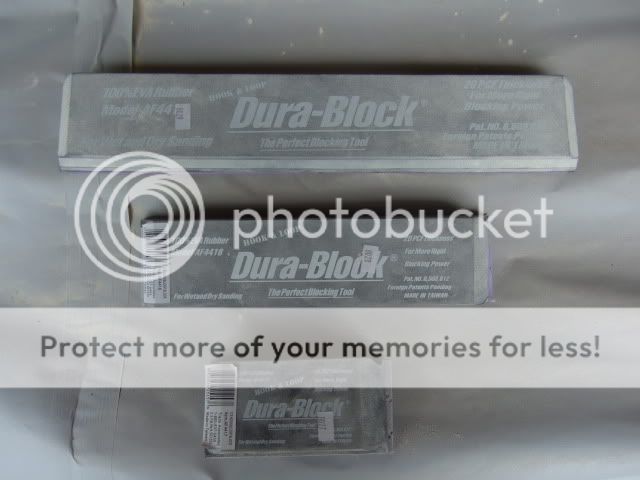
I'm now using Durablocks and 3M Hookit-Purple paper. This equipment is awesome to work with!
So next up is priming, then I will sand the panels, doors, etc.


Last edited by Fishgrinder on Tue Dec 07, 2010 4:20 am; edited 1 time in total
Fishgrinder- G3GM Member

- Street Cred : 4
 Re: 1975 Monte Carlo
Jul 22 2010
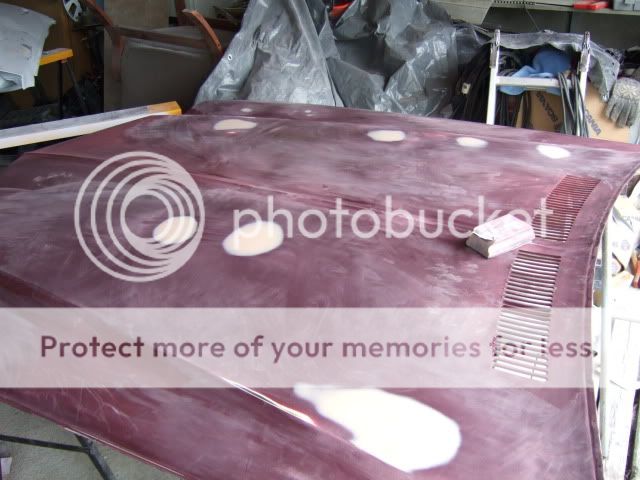
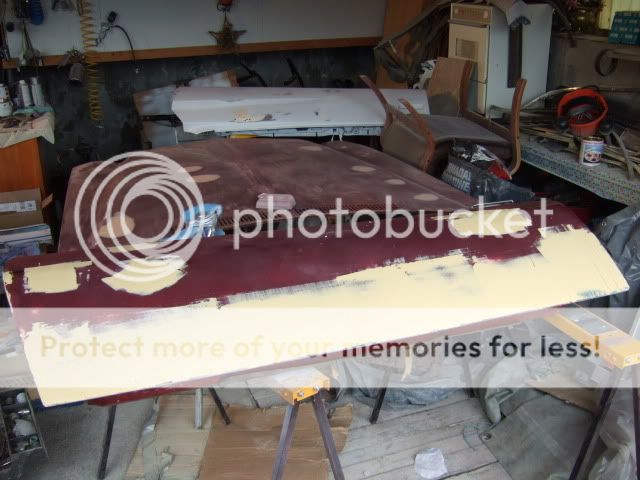
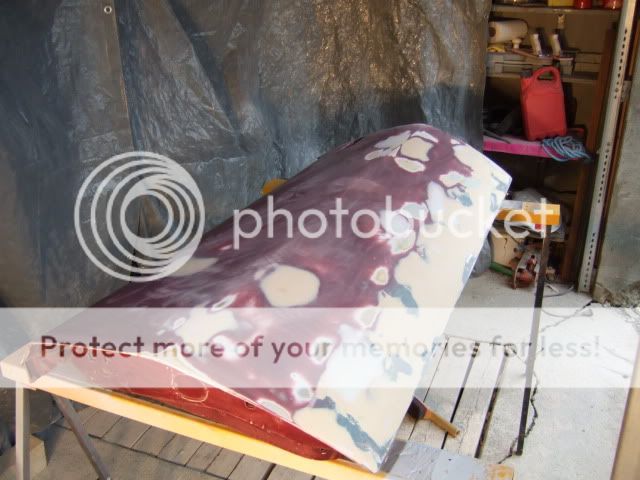
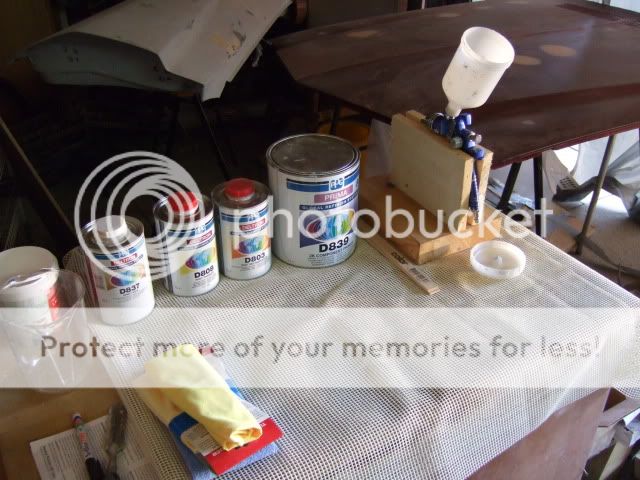
Well, things haven't exactly gone according to the plan lately.
I've tried to prime the car twice without success. The gun was just spitting lumps of primer instead of applying a nice coat. It turned out the nozzle I was using had a manufacturer defect.
So after sanding down the "failed" primer twice, I started sanding the panels, hood etc, just to get my mind off the all paint trouble. The "new" driver side door I bought was a little messed up behind the molding.
My plan was to mix the primer as a filler to get maximum build , and that was why I used a new nozzle (2.0 mm). But after all the problems I decided to use the method that worked last time. A less viscous mix, and a 1.7mm nozzle.
This time it went much better, although it was kind of difficult to get the coats even on the roof. The gun had a tendency to spit in the vertical position, and it was hard to see where I had primed as the layer beneath had the same colour. But, I really hope it's good enough for wet sanding now.
Tomorrow I'll prime the remaining parts.
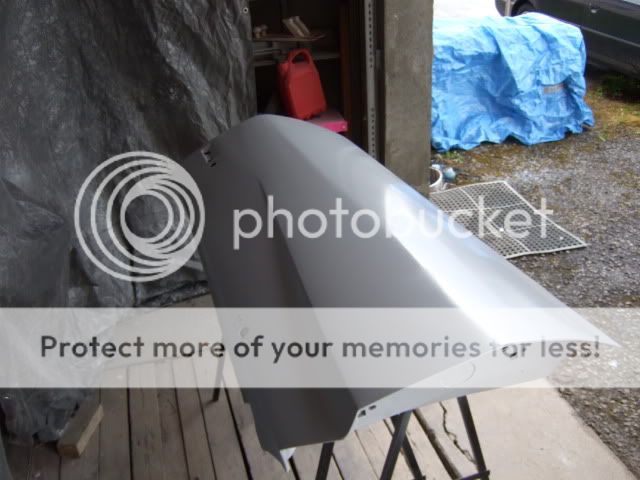
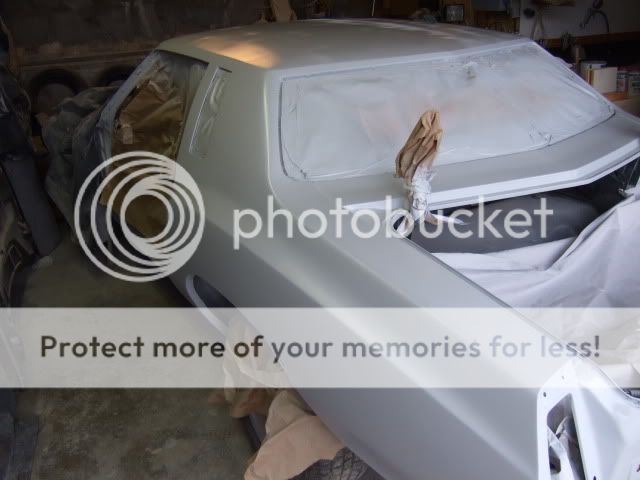


Fishgrinder- G3GM Member

- Street Cred : 4
 Re: 1975 Monte Carlo
Oops!!! I read your other post in the "welcome" section first and it appears I made a mistake by not reading this one first. JB
Last edited by JB2wheeler on Tue Dec 07, 2010 4:27 am; edited 1 time in total

JB2wheeler- G3GM Fanatic

- Street Cred : 28
 Re: 1975 Monte Carlo
Jul 24 2010
I'm thinking about silver metallic as the choice of color. Preferably it color should be on the brighter side, as it will help mask possible "bad" areas. You know, I'm just an amateur
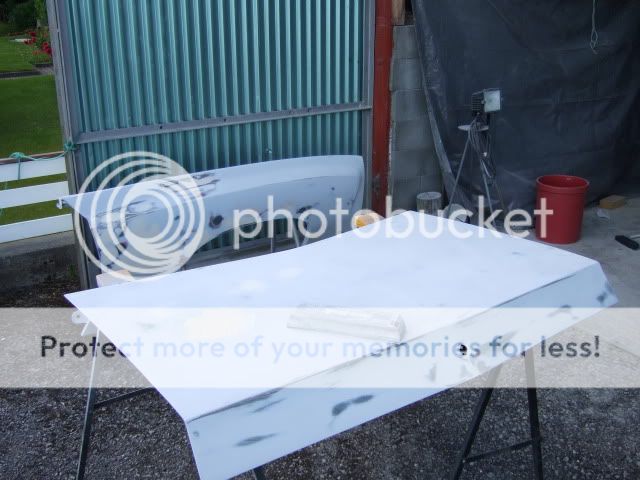
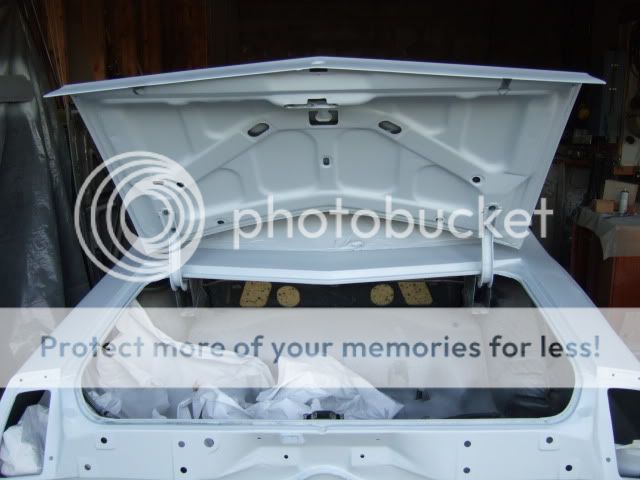
I've primed the remaining parts, and the spray gun worked as hell this time, except that I started a little too rich on the paint/air ratio. I find it ridiculously hard to see what's been painted and not when I start on the second coat. So the overlap gets a little erratic here and there, as you can see on the hood.
Today I started sanding down the whole car again with 220 grit on a long block and it is looking very good. This can be considered as a final exam before the wet sanding. Some spots came through on the roof and trunk lid, but nothing serious.
I must admit I held my breath couple times when sanding the transition between the front and rear half of the roof ;-) But this area came out excellent!
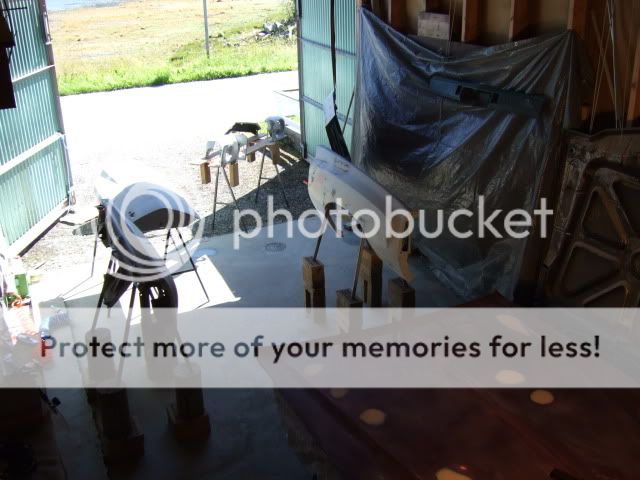
Notice my free mason skills!
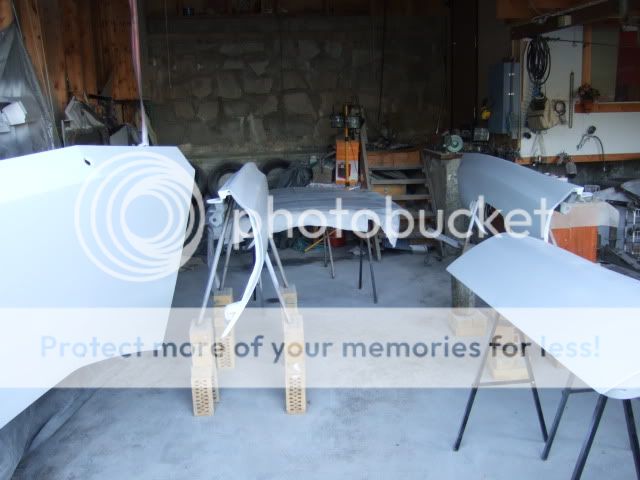
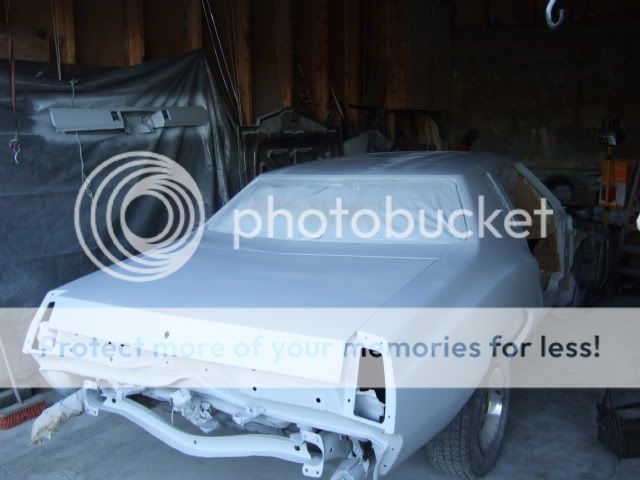
Put the trunk lid on to boost the moral
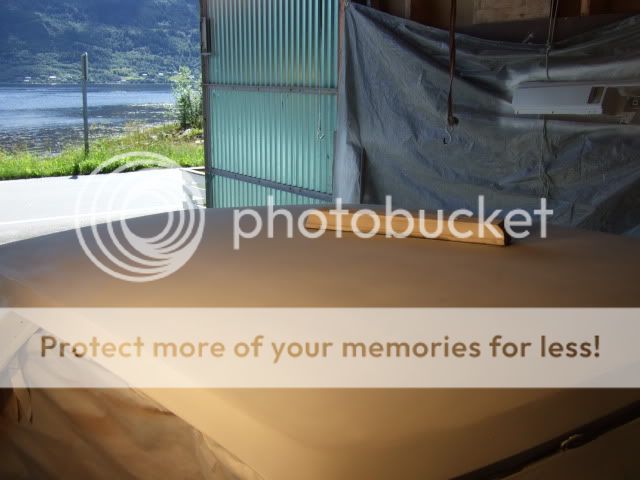
Roof sanded with 220 grit long block

I'm thinking about silver metallic as the choice of color. Preferably it color should be on the brighter side, as it will help mask possible "bad" areas. You know, I'm just an amateur
I've primed the remaining parts, and the spray gun worked as hell this time, except that I started a little too rich on the paint/air ratio. I find it ridiculously hard to see what's been painted and not when I start on the second coat. So the overlap gets a little erratic here and there, as you can see on the hood.
Today I started sanding down the whole car again with 220 grit on a long block and it is looking very good. This can be considered as a final exam before the wet sanding. Some spots came through on the roof and trunk lid, but nothing serious.
I must admit I held my breath couple times when sanding the transition between the front and rear half of the roof ;-) But this area came out excellent!

Notice my free mason skills!


Put the trunk lid on to boost the moral


Roof sanded with 220 grit long block

Fishgrinder- G3GM Member

- Street Cred : 4
 Re: 1975 Monte Carlo
Aug 08 2010
I'm back after another weekend in the garage.
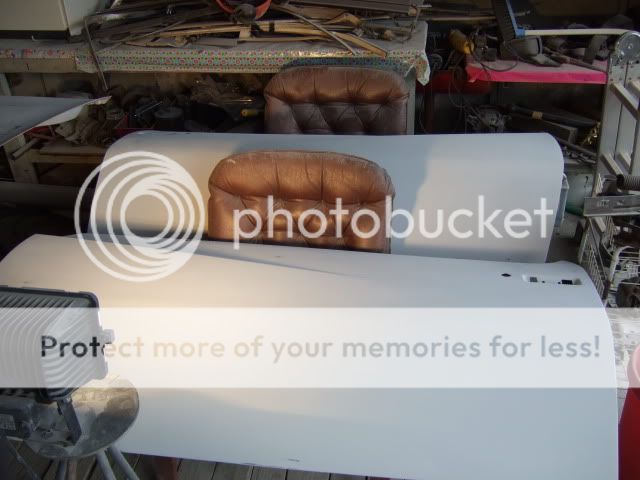
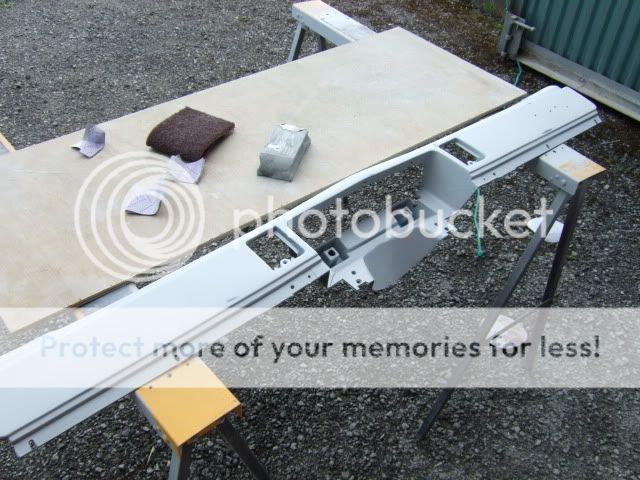
Nothing exciting to report this time. I've sanded down the remaining parts with 220 on a long block. I feared that the body filler I put on the new door wasn't straight enough, as it felt quit bumpy when I ran my fingers over the lower part. But amazingly, nothing came through when I sanded down the primer. Puh!
I also got hold of the painter I'm planning to use. He came to my garage and looked at the project, and said it was good enough for the final sanding. He recommended using 600 dry instead of 800 wet, which was my initial plan.
After he left I started getting second thoughts about painting it silver metallic. For the first, it seems like 80% of all new cars I see on the road today have this color. For the second, it would be cool to make the car stand out a little, considering all the work I've put in it.
If anyone has suggestion regarding the color, feel free to comment. It'll be PPG, as that's what the painter is using.
Some pictures:



Fishgrinder- G3GM Member

- Street Cred : 4
 Re: 1975 Monte Carlo
Aug 14 2010
My vacation ended 3 weeks ago, so I can only work on the car during the weekends now.
As mentioned earlier, I sanded down the primer with 220 grit, and my plan was to move directly to 600. But after talking to the guy at the paint store, I learned that such a huge leap in grits would not remove the 220 scratches. So, I had to sand with 320 grit first, because 320 to 600 would work, he told me.
This felt like a fist in my face, but I always have to learn the hard way. Spent 9 hours today sanding the whole car with 320 grit. The primer was kind of "thin" some places, but luckily nothing serious came through. The sanding god must have been in a good mood .
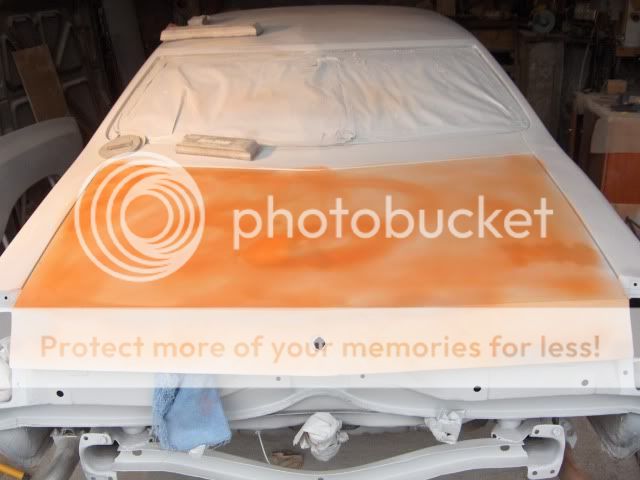
Here's something I bought at the paint store. It's a 3M guid coat powder. You just apply it to the surface, and it goes down in the scratches from the previous grit. It does not fly away when you blow the dust of, or clog up in the paper. Just sand until all the color is gone, and the whole surface is in the same grit.


I've also come up with a color, namely the 2006 Dodge viper sr10 blue:

Not sure if I'll go with white stripes. What do you think?
My vacation ended 3 weeks ago, so I can only work on the car during the weekends now.
As mentioned earlier, I sanded down the primer with 220 grit, and my plan was to move directly to 600. But after talking to the guy at the paint store, I learned that such a huge leap in grits would not remove the 220 scratches. So, I had to sand with 320 grit first, because 320 to 600 would work, he told me.
This felt like a fist in my face, but I always have to learn the hard way. Spent 9 hours today sanding the whole car with 320 grit. The primer was kind of "thin" some places, but luckily nothing serious came through. The sanding god must have been in a good mood .
Here's something I bought at the paint store. It's a 3M guid coat powder. You just apply it to the surface, and it goes down in the scratches from the previous grit. It does not fly away when you blow the dust of, or clog up in the paper. Just sand until all the color is gone, and the whole surface is in the same grit.


I've also come up with a color, namely the 2006 Dodge viper sr10 blue:

Not sure if I'll go with white stripes. What do you think?
Fishgrinder- G3GM Member

- Street Cred : 4
 Re: 1975 Monte Carlo
Oct 04 2010
The first painter I consulted said he would use a wet in wet primer before the paint, which would cover up the spots that came through after the 220 sanding. That's why I sanded the whole car with 320 and planned to go to 600.
But after talking to a second painter, who did not recommend wet in wet primer, I decided to put a third coat of primer on the car. With other words: all the 320 sanding wasn't necessary
:-(
However, I've prepared all the parts for inside painting, which will be done first. Then the painter will put 2 coats of primer on the outside of the car. I don't want to risk bubbles and pores in this final coat with my amateruish technique and equipment.
This is what me and my helpers (welder & painter) have done since last time:
- welded rear fender
- put final coat of primer on the car and all parts
- painted the inside of the doors, fenders etc.
- sanded roughly 1/2 of the car with 500 grit
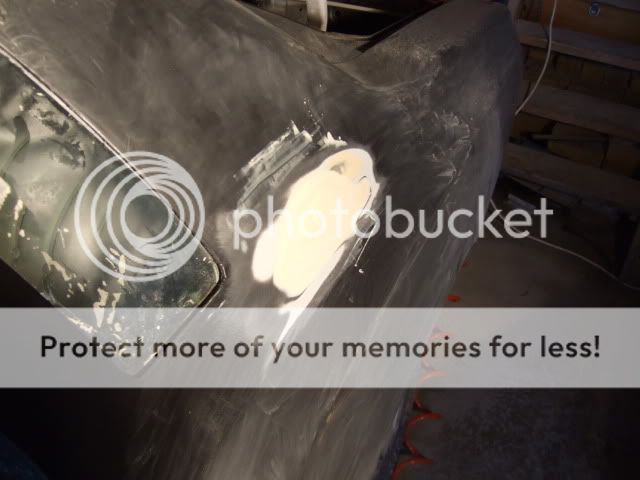
The bad news is that there was a reaction in two places when the car was heated in the paint booth. So I have to sand these spots down to bare metal, apply filler and feather out the edges. But in the big picture it's not much work.
The painter thinks it could be glue residue from the old vinyl top which caused the reaction. This is the risk you face when not starting from bare metal I guess
Good news is that we hit jackpot with the colour choice. It is "Chrysler Viper GTS Blue" from the PPG library. A gorges colour, but the pearl doesn't show in the photos.
Looks like my evil plan is coming together!
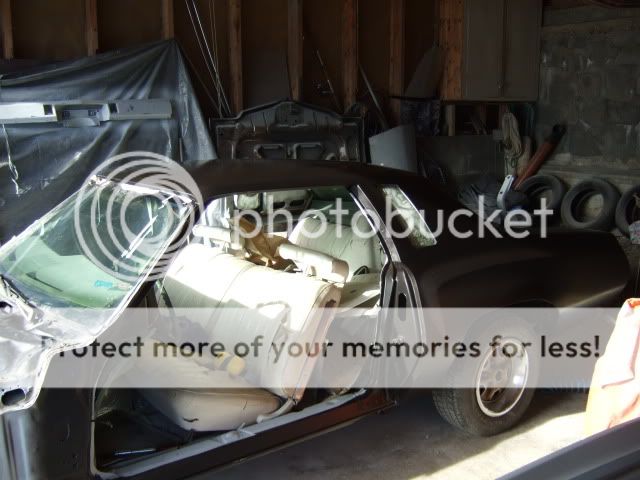
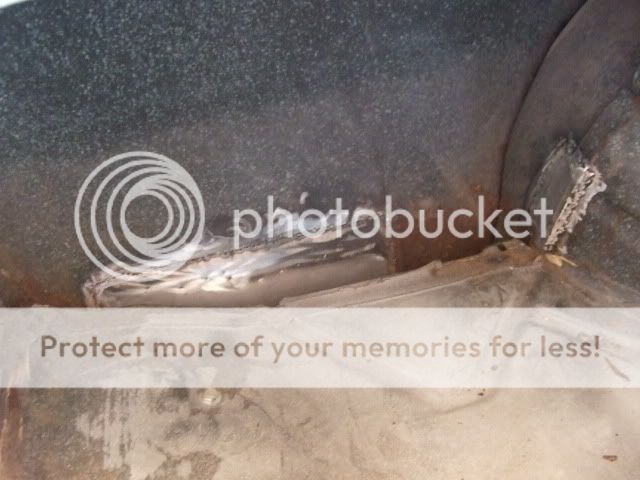


Reaction spot in the middle of picture
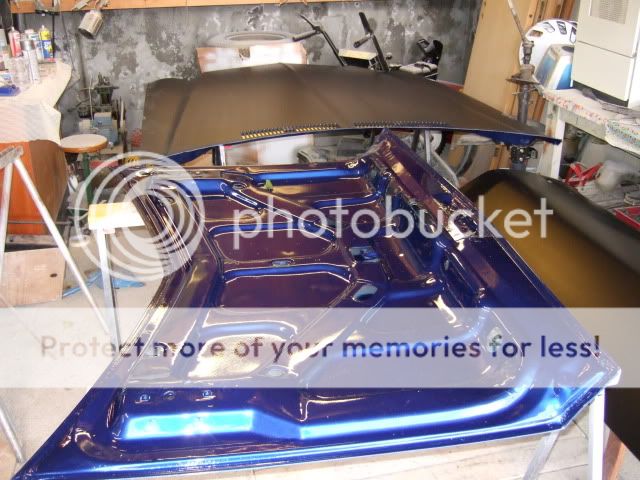
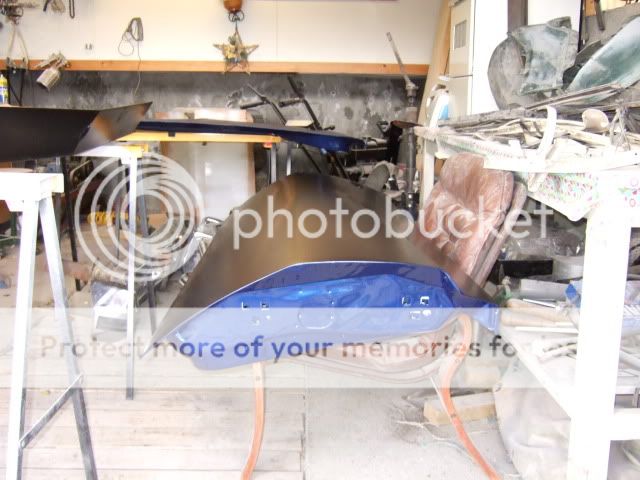
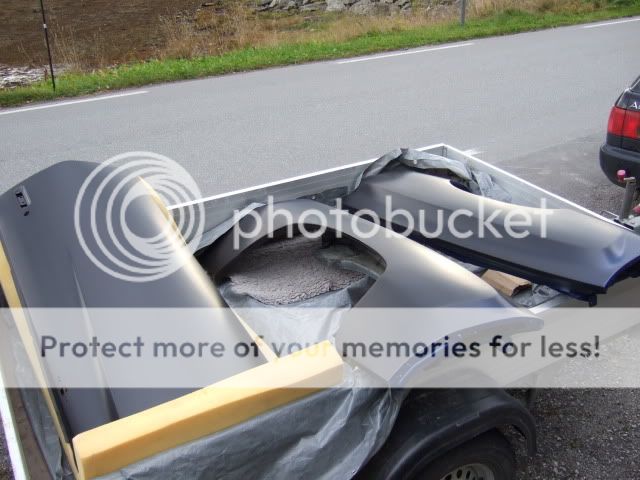
The first painter I consulted said he would use a wet in wet primer before the paint, which would cover up the spots that came through after the 220 sanding. That's why I sanded the whole car with 320 and planned to go to 600.
But after talking to a second painter, who did not recommend wet in wet primer, I decided to put a third coat of primer on the car. With other words: all the 320 sanding wasn't necessary
:-(
However, I've prepared all the parts for inside painting, which will be done first. Then the painter will put 2 coats of primer on the outside of the car. I don't want to risk bubbles and pores in this final coat with my amateruish technique and equipment.
This is what me and my helpers (welder & painter) have done since last time:
- welded rear fender
- put final coat of primer on the car and all parts
- painted the inside of the doors, fenders etc.
- sanded roughly 1/2 of the car with 500 grit
The bad news is that there was a reaction in two places when the car was heated in the paint booth. So I have to sand these spots down to bare metal, apply filler and feather out the edges. But in the big picture it's not much work.
The painter thinks it could be glue residue from the old vinyl top which caused the reaction. This is the risk you face when not starting from bare metal I guess
Good news is that we hit jackpot with the colour choice. It is "Chrysler Viper GTS Blue" from the PPG library. A gorges colour, but the pearl doesn't show in the photos.
Looks like my evil plan is coming together!


Reaction spot in the middle of picture


Fishgrinder- G3GM Member

- Street Cred : 4
 Re: 1975 Monte Carlo
Nov 01 2010
Another report from the front:
I've sanded down the areas that reacted in the paint booth, and reapplied body filler. What was under there will remain a secret, but to put it short I doubt that any professional would apply filler over it again like I did. However, desperate men like me go to great lengths....
Then it was time to send the car to the painter again for coats of primer on the improved areas, and inside painting of the car. This time he heated the box to 45 degrees C compared to 65 the first time. Fortunately nothing bubbled this time. For the final paint, he will let the car dry in the booth over night , just to make sure nothing happens.
I didn't have enough time to start on reassembling, so that will be next (in about two weeks). 85% of the car is sanded with 500 grit now, so at least that won't be much hassle.
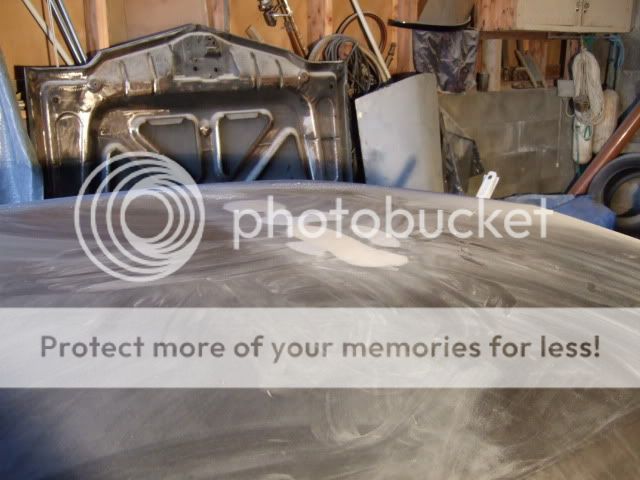
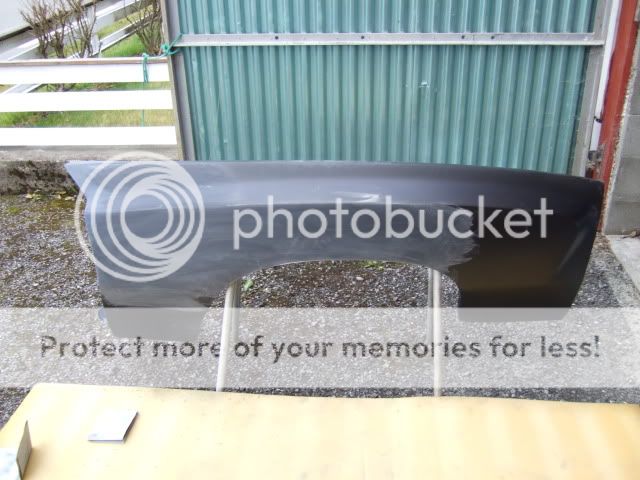
Fender during 500 sanding
Another report from the front:
I've sanded down the areas that reacted in the paint booth, and reapplied body filler. What was under there will remain a secret, but to put it short I doubt that any professional would apply filler over it again like I did. However, desperate men like me go to great lengths....
Then it was time to send the car to the painter again for coats of primer on the improved areas, and inside painting of the car. This time he heated the box to 45 degrees C compared to 65 the first time. Fortunately nothing bubbled this time. For the final paint, he will let the car dry in the booth over night , just to make sure nothing happens.
I didn't have enough time to start on reassembling, so that will be next (in about two weeks). 85% of the car is sanded with 500 grit now, so at least that won't be much hassle.


Fender during 500 sanding
Fishgrinder- G3GM Member

- Street Cred : 4
 Re: 1975 Monte Carlo
Nov 14 2010
Getting close to the finish line.
Got the parts bolted on to the car again this weekend.
As with everything in this project I had to learn by doing/failing. Getting the doors alligned with the rear body was quite tricky. Luckily I got some help from my brother and father.
After the doors were done, (at least I thought their were good enough), we put the fenders on with the wheel wells (inner fenders) already attached to the frame. This turned out to be very difficult, because the inner fender lip has to be inside an edge that runs along the outer fender. We got it on, but the lip wasn't in place, and it felt very tensioned.
Then we saw that the doors didn't really hit the striker bolt as smooth as they should. And to readjust the doors, the fenders had to go off again
But this time, I also took of the inner fenders, and bolted them to the fender when it was off the car, so they could be mounted on as one piece. Worked like a charm!
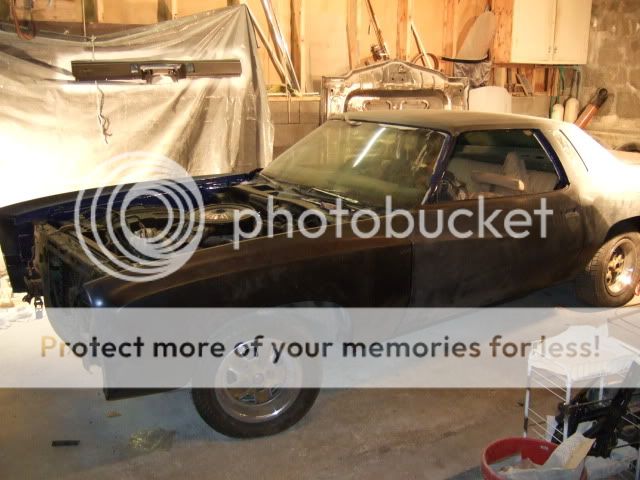
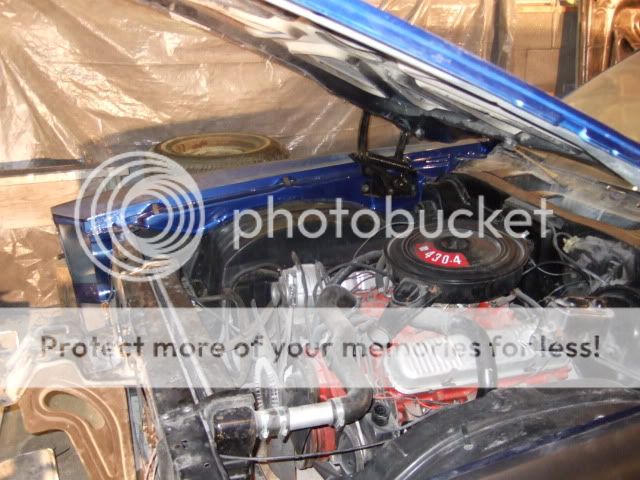
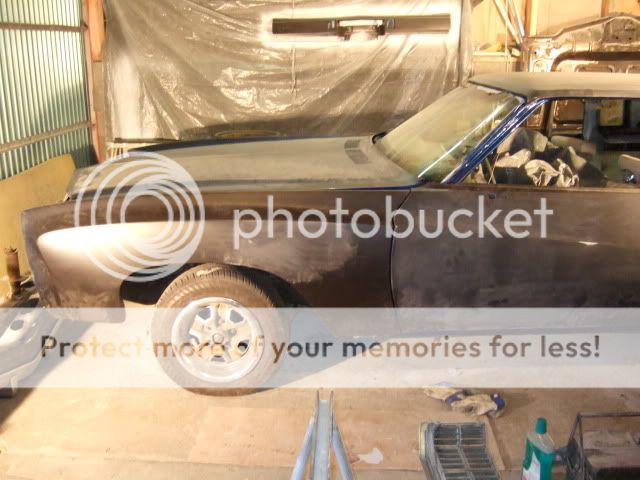
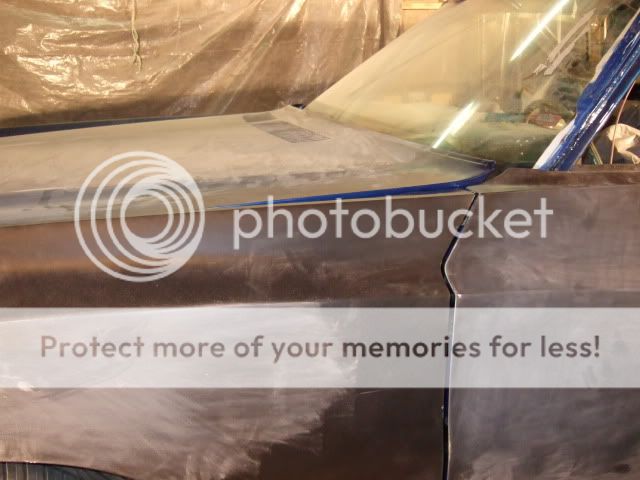
Next up was the new hood. Would it fit now that all he fenders were perfectly adjusted? Last time i was fiddling with it was back in 2008, and that wasn't much of a success.
Well, it definitely fit better than 2008, but still it rises up a bit too much in the rear, even with the hinges in the lowest position. There is an upwards play in the hinges, so I think this could cause it. Would it be possible to en long the bolt slots in the hinges so they can drop lower down?
Seems like lot's of 70's daily driver cars have this problem, but as the symmetry freak I am, everything must be perfect!
If anyone has suggestions I'll appreciate it. See the picture further down.


Fishgrinder- G3GM Member

- Street Cred : 4
 Re: 1975 Monte Carlo
Nov 21 2010
We got the hood issue sorted out. Had to en long the bolt holes in the hinges, and it came down flush in the back.
Then it was time to put on the center piece and light assemblies, which didn't align with the hood in any direction at all! But after spending 5 hours on shimming, moving the whole raditor wall, messing with the hood again - litteraly using all tricks in the book, everything is now aligned nicely.
Paint is booked this friday.
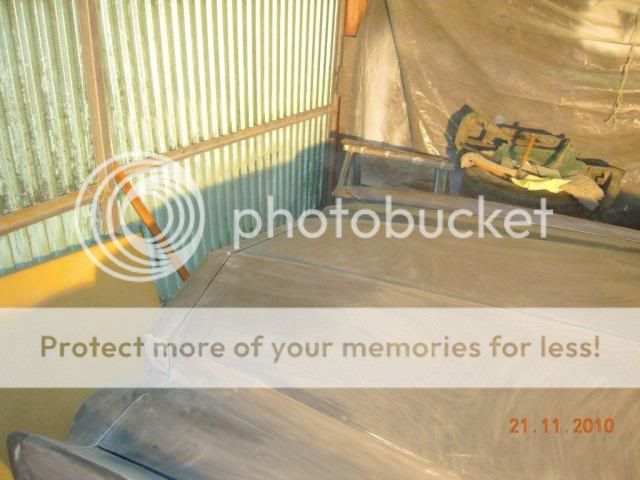
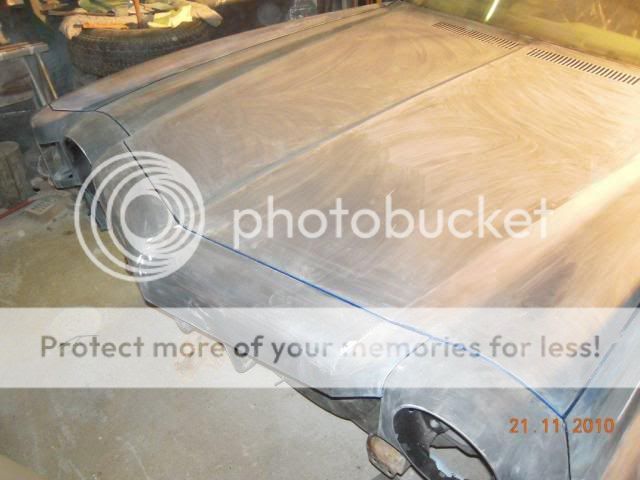
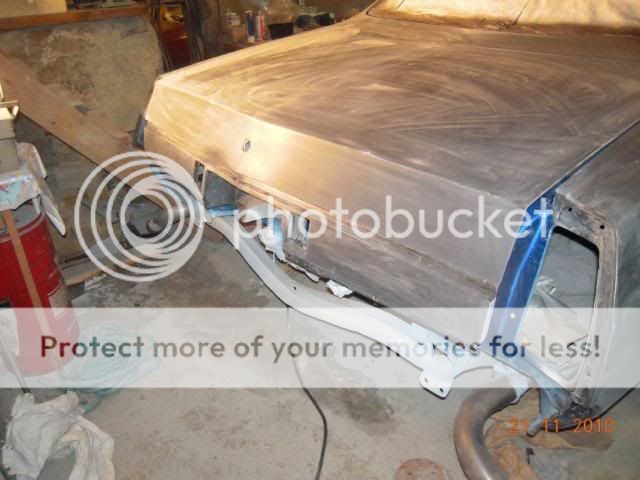


Fishgrinder- G3GM Member

- Street Cred : 4
 Re: 1975 Monte Carlo
Nov 27 2010
I couldn't get the plate on the bumper off, so I put the bumper on the car instead.
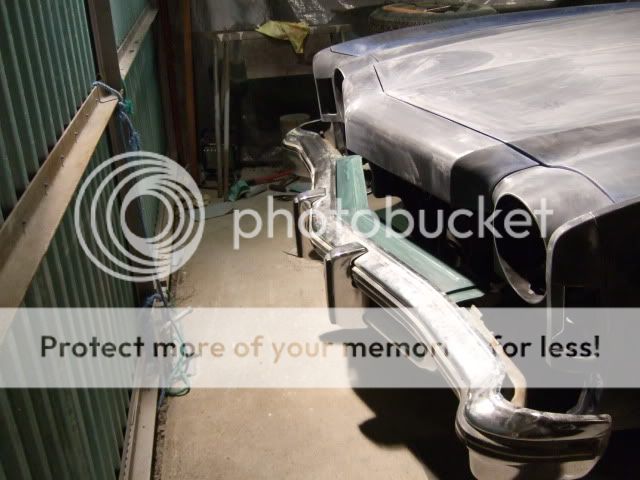
Here I'm done with a final check up
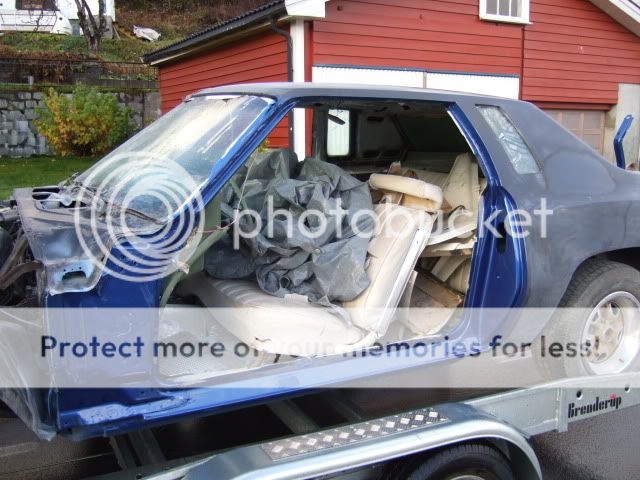
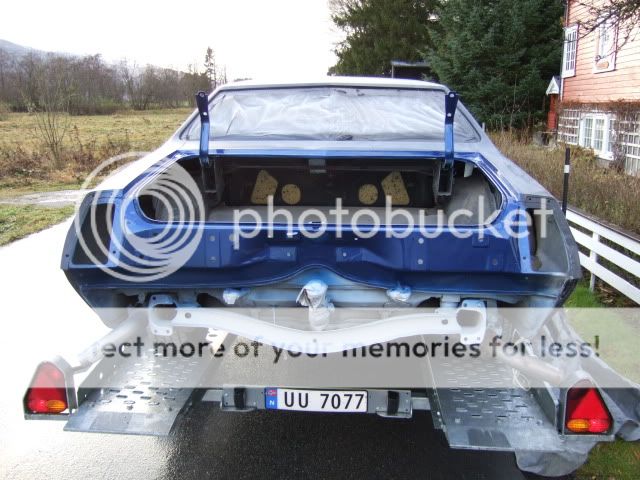
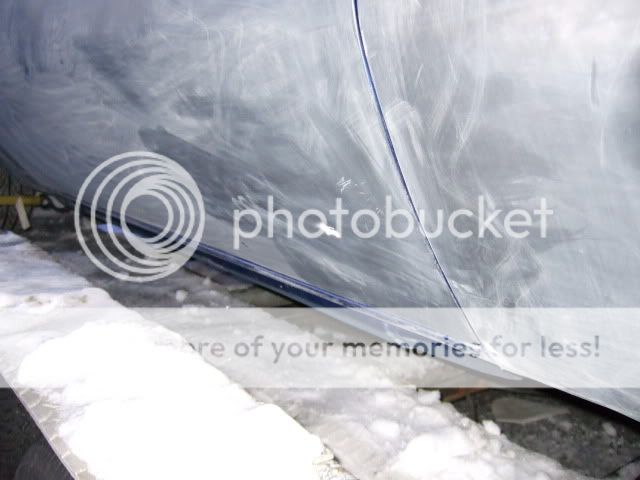
Due to extreme temperatures over here, the hydraulics on the car freight trailer we borrowed was frozen. We could still winch the car it on though, but when the front passed the middle of the trailer, disaster struck. The back pivoted up and slammed in to the lower part of the driver door, resulting in a small dent. This was the point of no return, so I sanded down the worst scratches, and decided just to leave it. But I really wanted to smack myself in the face hard after this.
On our way to the painter

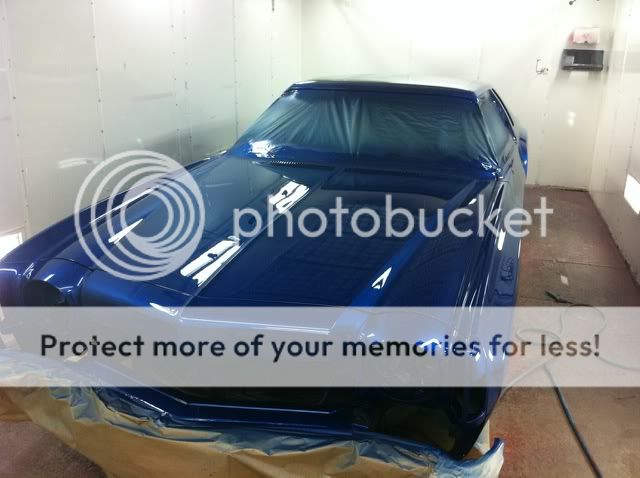
Inside the booth, I think this picture shows the color best
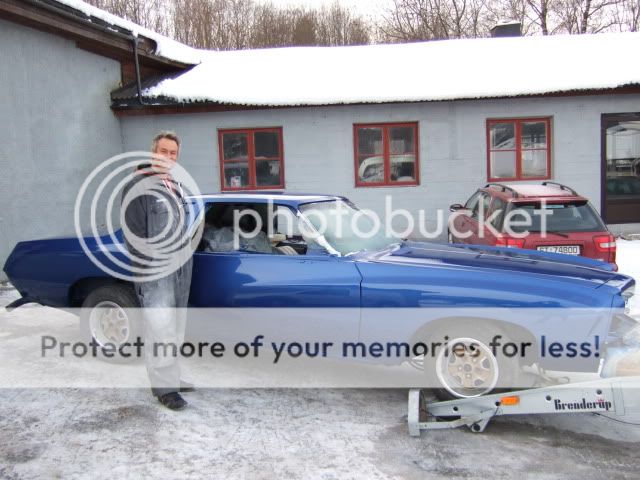
Finished, got the painter to pose
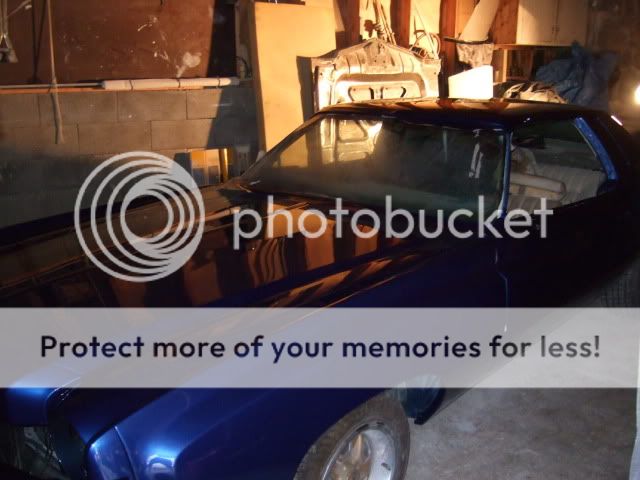
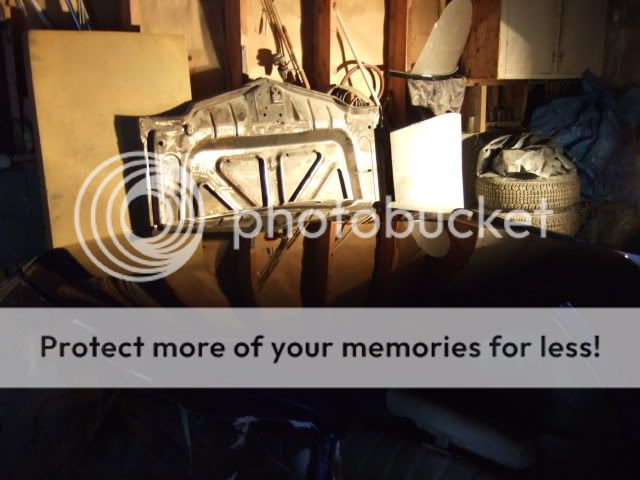
I couldn't get the plate on the bumper off, so I put the bumper on the car instead.

Here I'm done with a final check up

Due to extreme temperatures over here, the hydraulics on the car freight trailer we borrowed was frozen. We could still winch the car it on though, but when the front passed the middle of the trailer, disaster struck. The back pivoted up and slammed in to the lower part of the driver door, resulting in a small dent. This was the point of no return, so I sanded down the worst scratches, and decided just to leave it. But I really wanted to smack myself in the face hard after this.

On our way to the painter

Inside the booth, I think this picture shows the color best

Finished, got the painter to pose


Fishgrinder- G3GM Member

- Street Cred : 4
 Re: 1975 Monte Carlo
Thats a pretty color. I saw a TV show, something about auction bargians, and a guy bought a 1960s or 70s truck and painted it that color and then sold it for about 4 times what he paid for it. JB

JB2wheeler- G3GM Fanatic

- Street Cred : 28
 Re: 1975 Monte Carlo
That's an amazing job! I like how everything was disassembled & all of the jambs were sprayed. Not everyone takes that kind of effort. So what are your plans for it now?

The Dude- Management

- Street Cred : 48
 Re: 1975 Monte Carlo
Rago wrote:That's an amazing job! I like how everything was disassembled & all of the jambs were sprayed. Not everyone takes that kind of effort. So what are your plans for it now?
Thanks Rago
The plans ahead are roughly:
- reassemble the rest of the car (naturally)
- do a check on the brakes and steering
- upholstery.. front seat is pretty wasted
- 275/60 tires on 15x8 wheels on all fours like 454 73 monte (love his car) doing som research on backspace and clearance here,
I'll probably make a thread in the Tech-forum
- go over the electrics, fuel gauge is not working
- take care of some legal issues ragarding the engine swap
Quite a few things to do, but my goal is to get it on the road next summer
Fishgrinder- G3GM Member

- Street Cred : 4
 Re: 1975 Monte Carlo
Wow, that looks great! Nice to see such an extensive restoration on a G2 Monte Carlo. Not many people doing it. Way to go!
74MonteCarlo- G3GM Fanatic

- Street Cred : 17
 Re: 1975 Monte Carlo
Too bad you are so far away. I've got a freshly upholstered front & rear set that would go great in that Monte.
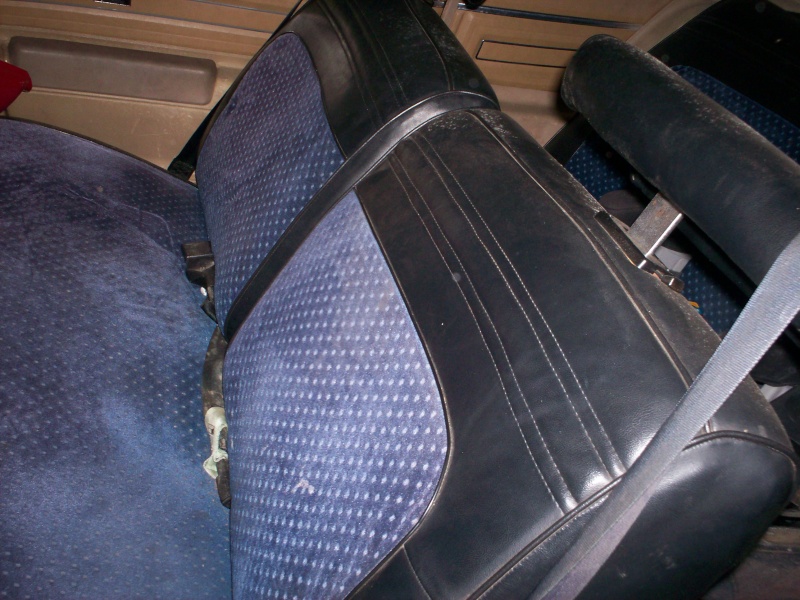
I agree, Chris' Monte (wherever he ran off to) is one of my favorites as well. Maybe it's the wheels?

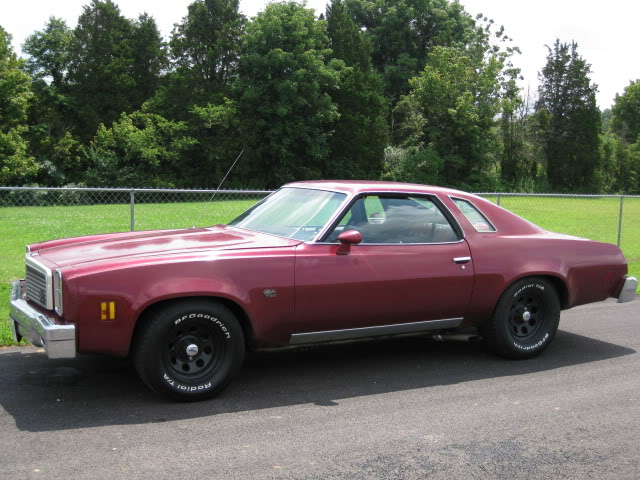
If you plan to go with 15x8 wheels, just stick to about 4.5" backspacing & call it good. The Vette wheels like Chris & I have are just about perfect for 8" wheels. Honestly a 10" wheel tucks so nicely in the rear that I'd almost recommend that size if you go aftermarket. Clearance is not a problem. Jonny O is running 285/60r16s in the rear of his Chevelle with 5" of backspacing & 275/60r15 up front with 4.5" BS. Both are 8" wide:
On the fuel gauge, it's probably just the wire going to the tank. Crawl under the car to double check if it came loose or broke. The wire will be on top of the tank towards the front/middle. Might have to lower the tank slightly to see it. Sounds like you have a solid plan ahead & the craftsmanship shows.

I agree, Chris' Monte (wherever he ran off to) is one of my favorites as well. Maybe it's the wheels?
If you plan to go with 15x8 wheels, just stick to about 4.5" backspacing & call it good. The Vette wheels like Chris & I have are just about perfect for 8" wheels. Honestly a 10" wheel tucks so nicely in the rear that I'd almost recommend that size if you go aftermarket. Clearance is not a problem. Jonny O is running 285/60r16s in the rear of his Chevelle with 5" of backspacing & 275/60r15 up front with 4.5" BS. Both are 8" wide:

On the fuel gauge, it's probably just the wire going to the tank. Crawl under the car to double check if it came loose or broke. The wire will be on top of the tank towards the front/middle. Might have to lower the tank slightly to see it. Sounds like you have a solid plan ahead & the craftsmanship shows.


The Dude- Management

- Street Cred : 48
 Re: 1975 Monte Carlo
BY Far this is one the better build ups on a monte this site has seen in a long time LOL
great choice on Color
great choice on Color
___________________________________________
1977 Chevelle SE x2
One Mild original
one Wild NON original
Anthony

Limey SE- Management

- Street Cred : 98
 Re: 1975 Monte Carlo
Limey wrote:BY Far this is one the better build ups on a monte this site has seen in a long time LOL
great choice on Color
Wow! Appreciate that Limey!
Rago wrote:
I agree, Chris' Monte (wherever he ran off to) is one of my favorites as well. Maybe it's the wheels? Rolling Eyes Very Happy
If you plan to go with 15x8 wheels, just stick to about 4.5" backspacing & call it good. The Vette wheels like Chris & I have are just about perfect for 8" wheels. Honestly a 10" wheel tucks so nicely in the rear that I'd almost recommend that size if you go aftermarket. Clearance is not a problem. Jonny O is running 285/60r16s in the rear of his Chevelle with 5" of backspacing & 275/60r15 up front with 4.5" BS. Both are 8" wide:
Great tips Rago! I hope the fuel gauge is a simple fix.
You pretty much answered my wheel issue. But while we're in it:
- do you know if there is going to be a rubbing issue at full steering with 275/60r15 4.5" in the front?
- do all wheels stay "inside" the wells when they are straight? We have this regulation over here that says that the tires can't stick outside the wheel well. Looks OK on Chris's car
I've actually been in touch with a guy who's selling Corvette Rallys, but frustrating enough, he's not answering the phone...
Fishgrinder- G3GM Member

- Street Cred : 4
 Re: 1975 Monte Carlo
I have 8" wide fronts on mine
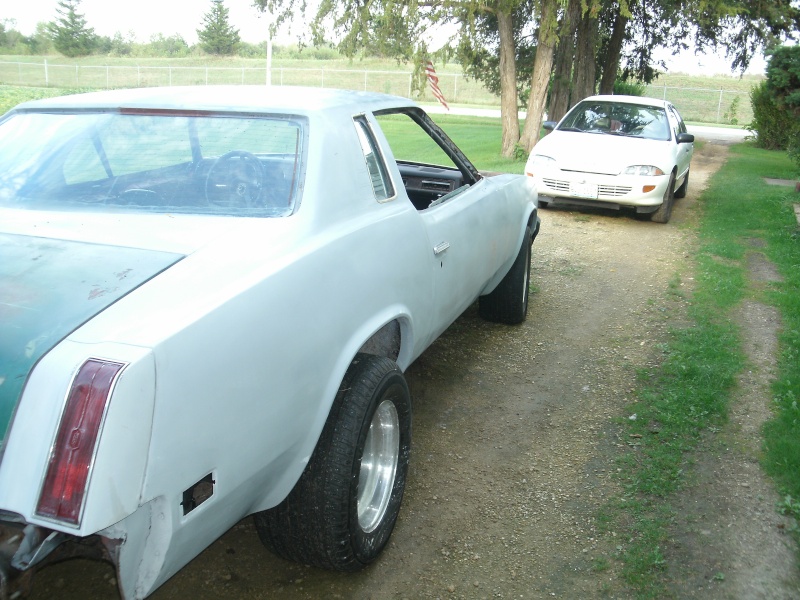


___________________________________________
1977 Chevelle SE x2
One Mild original
one Wild NON original
Anthony

Limey SE- Management

- Street Cred : 98
 Re: 1975 Monte Carlo
8" all around on mine too, but I run 235/70r15 tires. No rub & they don't stick out at all! I can imagine that Chris' car is similar even with 275's.
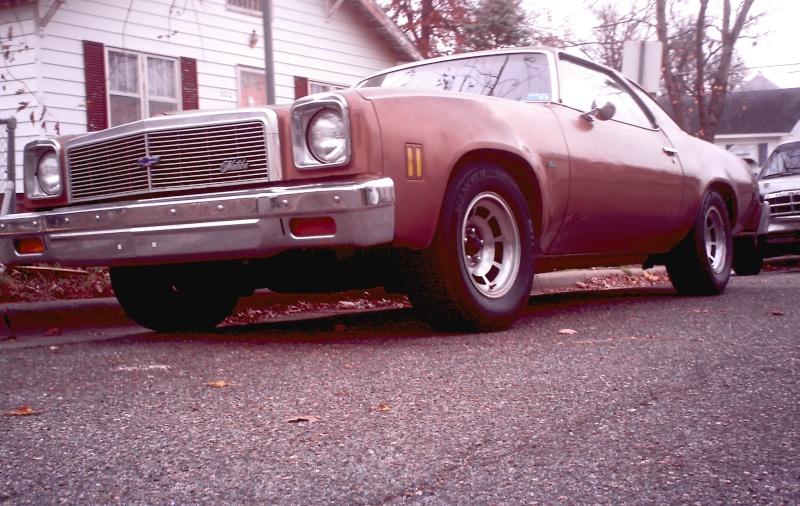


The Dude- Management

- Street Cred : 48
 Re: 1975 Monte Carlo
Excellent, that settles it!
I'll add BF Goodrich 275/60/r15 to my monster order after new year!
Hope I can dig up some Corvette rallys over here. If not I've been thinking about American Racing Outlaw 1 or 2. Also had black colored wheels in mind like Jonny O, so there are many choices
But rallys have first priority
Big tires look good on your cars Limey and Rago
Fishgrinder- G3GM Member

- Street Cred : 4
 Re: 1975 Monte Carlo
very nice job on your 75.that viper blue really sets off the body lines.
i have the 15x8 rally wheels with 275-60 BFG's on all 4 corners. i got the idea from chris and his 73.
i have the 15x8 rally wheels with 275-60 BFG's on all 4 corners. i got the idea from chris and his 73.

1973montec- Donating Member

- Street Cred : 17
 Re: 1975 Monte Carlo
Hey welcome ! Car looks great ! Good to see more out there.
You know what, where is Chris ? Yo, you out there ? !!!
You know what, where is Chris ? Yo, you out there ? !!!
ant7377- G3GM Addict

- Street Cred : 36
 Re: 1975 Monte Carlo
he might come back after first of year but I think he watching, but some things will have to happen first.......... like the bikering between members on what to do with others personal property
___________________________________________
1977 Chevelle SE x2
One Mild original
one Wild NON original
Anthony

Limey SE- Management

- Street Cred : 98
Page 1 of 11 • 1, 2, 3 ... 9, 10, 11 
G3GM :: Media :: G3 Project Pictures
Page 1 of 11
Permissions in this forum:
You cannot reply to topics in this forum|
|
|


» Roll Call and Car showcase
» Central Texas Noob
» Welcome Keith Seymore
» Wanted: Front park lamp assemblies
» 75 Hurst Olds T-tpos
» G3 Chevy rims- help ID these
» 75 el camino project.
» Have had a few questions
» vinyl top removal