1973 Chevelle SS, 350, 4spd. build
+41
zucchi
76 Malibu
Joe73
76Chevelle2Tone
S3TPI
Sinister
77camino
Flywheel
crice63
bracketchev1221
73ss
clanceman427
thatfnthing
Limey SE
fasrnur
g3chevy / Mr Pontiac
Roadcaptain S3
Mcarlo77
Hawk03
ant7377
1975 S3
77mali
jerry46765
Jeff-45
1cheapshot
dynchel
JF74chevelle
Tom Kochevar
Hs1973
dine73ss
Damon23
alowerlevel
driveit
chevellelaguna
RossK73
marks454ss
impalamonte
Dinomyte
Wallyuph
BK-75
1973montec
45 posters
G3GM :: Media :: G3 Project Pictures
Page 4 of 17
Page 4 of 17 •  1, 2, 3, 4, 5 ... 10 ... 17
 Re: 1973 Chevelle SS, 350, 4spd. build
Measurements would be tough. It was a build as you go type of thing. The main considerations I used were as follows:
At the rear, (2) 30" pieces of 2 1/2" x 2 1/2" x 3/16" angle iron. That size is probably too heavy of a gauge but I had it lying around. I blew two holes in each piece with a plasma cutter so I can bolt it to the body mounts on the sides of the gas tank. (no gas tank on the car). (4) bolts are needed in the standard GM 7/16-14 body bolt thread. Two of the bolts at 2 1/2" long and the other two bolts at 1 1/4 or 1 1/2". The shorter ones go towards the front of the car and the longer at the rear. At the rear you will need a short piece of 2x4 with a 1/2" hole drilled in it. It will be used as a spacer between the angle iron and the body since the trunk floor angles upward at the rear mount. Bolt both 30" pieces on. Then use a 44" piece of the same angle iron and lay it across the ends of the two 30" pieces. Square it up and weld in place. Now you have a "C" of angle iron bolted to the bottom of the trunk. A metal rotisserie just uses the two rear most body mounts. I was going to do that but I wanted to spread out the load so I went with the extra bolts.
Then you bolt an 86" piece of 2x6 to the 44" angle iron. Now you have something to work off of. Heres what it looks like.
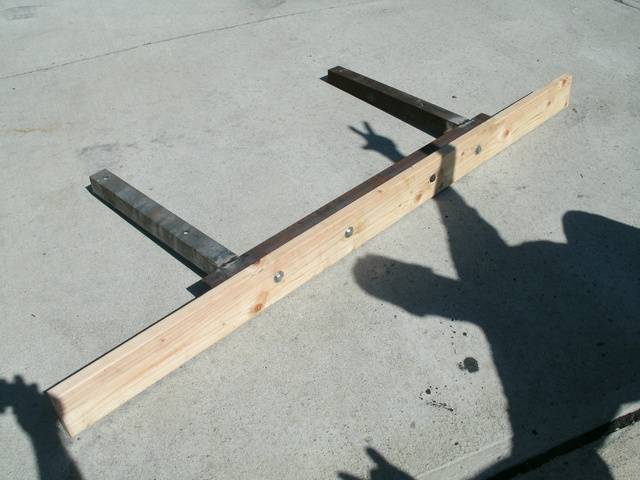
The vertical 2x6 I cut to length at just slightly higher than the roof of the car. The rest was just built as needed to extra reinforce.
For the front brace I used some 7/16-14 threaded rod with nuts. Bought a 36" piece and cut it into (4) nine inch lengths. I then took (2) 10 inch long pieces of 4x4 lumber and drilled holes in it to line up with the (4) bolt holes on the bottom of the firewall. These two blocks are just going to be spacers. Then I used an 86" piece of 4x4 lumber under those blocks and drilled to match. Now I was able to slide the spacers on the threaded rod and then the long 4x4 with a washer and nut. Snug it up. Then the same size vertical 2x6 was added. Reinforce as necessary. As a side note, the fender bolt that we have at the top of the firewall right next to the blower box. I put that bolt in about 3-4 turns before adding the vertical 2x6. That way if the wood wanted to flex towards the firewall, it couldnt touch because the bolt is in the way. Just a way to protect my finished painted firewall. Also, the vertical 2x6 on the front. I placed a piece of 2x4 and a shim of 3/4" ply between the vehicle side of the 2x6 and resting on the side of the cowl. That way, when resting flipped, the front of the car has some extra support with the side of the firewall lying on the 2x6. Takes some stress off the threaded rod.
Thats how I built the two main pieces to build off of. Everything else I added can be seen in the pics.
At the rear, (2) 30" pieces of 2 1/2" x 2 1/2" x 3/16" angle iron. That size is probably too heavy of a gauge but I had it lying around. I blew two holes in each piece with a plasma cutter so I can bolt it to the body mounts on the sides of the gas tank. (no gas tank on the car). (4) bolts are needed in the standard GM 7/16-14 body bolt thread. Two of the bolts at 2 1/2" long and the other two bolts at 1 1/4 or 1 1/2". The shorter ones go towards the front of the car and the longer at the rear. At the rear you will need a short piece of 2x4 with a 1/2" hole drilled in it. It will be used as a spacer between the angle iron and the body since the trunk floor angles upward at the rear mount. Bolt both 30" pieces on. Then use a 44" piece of the same angle iron and lay it across the ends of the two 30" pieces. Square it up and weld in place. Now you have a "C" of angle iron bolted to the bottom of the trunk. A metal rotisserie just uses the two rear most body mounts. I was going to do that but I wanted to spread out the load so I went with the extra bolts.
Then you bolt an 86" piece of 2x6 to the 44" angle iron. Now you have something to work off of. Heres what it looks like.

The vertical 2x6 I cut to length at just slightly higher than the roof of the car. The rest was just built as needed to extra reinforce.
For the front brace I used some 7/16-14 threaded rod with nuts. Bought a 36" piece and cut it into (4) nine inch lengths. I then took (2) 10 inch long pieces of 4x4 lumber and drilled holes in it to line up with the (4) bolt holes on the bottom of the firewall. These two blocks are just going to be spacers. Then I used an 86" piece of 4x4 lumber under those blocks and drilled to match. Now I was able to slide the spacers on the threaded rod and then the long 4x4 with a washer and nut. Snug it up. Then the same size vertical 2x6 was added. Reinforce as necessary. As a side note, the fender bolt that we have at the top of the firewall right next to the blower box. I put that bolt in about 3-4 turns before adding the vertical 2x6. That way if the wood wanted to flex towards the firewall, it couldnt touch because the bolt is in the way. Just a way to protect my finished painted firewall. Also, the vertical 2x6 on the front. I placed a piece of 2x4 and a shim of 3/4" ply between the vehicle side of the 2x6 and resting on the side of the cowl. That way, when resting flipped, the front of the car has some extra support with the side of the firewall lying on the 2x6. Takes some stress off the threaded rod.
Thats how I built the two main pieces to build off of. Everything else I added can be seen in the pics.

Joe73- Donating Member

- Street Cred : 83
 Re: 1973 Chevelle SS, 350, 4spd. build
My friends dustless blasting company. 2 cool short videos on the bottom of a camaro and box nova being blasted. No metal heat with this process so no metal warping.
http://www.mobileblastaway.com/automotive.html
http://www.mobileblastaway.com/automotive.html

Joe73- Donating Member

- Street Cred : 83
 Re: 1973 Chevelle SS, 350, 4spd. build
Video of the roll.
https://youtu.be/2QtFnmtyoXg
https://youtu.be/2QtFnmtyoXg

Joe73- Donating Member

- Street Cred : 83
 Re: 1973 Chevelle SS, 350, 4spd. build
Very nice, buy I think your build sheet fell out...lol

dynchel- Donating Member

- Street Cred : 40
 Re: 1973 Chevelle SS, 350, 4spd. build
dynchel wrote:Very nice, buy I think your build sheet fell out...lol
LOL


Joe73- Donating Member

- Street Cred : 83
 Re: 1973 Chevelle SS, 350, 4spd. build
Way cool -- that's gotta make working on it a LOT easier.

thatfnthing- Donating Member

- Street Cred : 65
 Re: 1973 Chevelle SS, 350, 4spd. build
Love the rotisserie, that is awesome!!!

driveit- Donating Member

- Street Cred : 15
 Re: 1973 Chevelle SS, 350, 4spd. build
Thanks. I'm playing with it today. I'm actually going to lay the car back down to do some sanding work on the floor. I'm lovin' it.

Joe73- Donating Member

- Street Cred : 83
 Re: 1973 Chevelle SS, 350, 4spd. build
Ok, waiting for my argon/co2 bottle to be re-ceritifed and filled. Going to be at least a week.
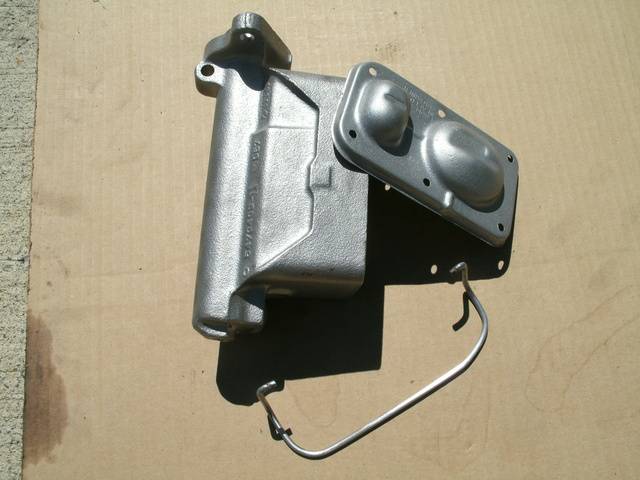
So I decided that my master cylinder has been laying on the bench too long. So I tossed it in the blast cabinet with the lid and retainer wire. Then blew it off, hit it with some wax and grease remover. Then 2 light coats of etching primer on the master then cast iron vht paint and just clear on the lid and wire. 24 hour dry time on the cast iron paint. I have an acdelco rebuild kit for it along with a hone.
Came out clean.


Joe73- Donating Member

- Street Cred : 83
 Re: 1973 Chevelle SS, 350, 4spd. build
I love restored parts. Fun to bring things like that back to life. (Doing the same to my springs & spindles right now). Nice job- helps to have the right equipment & tools, eh?
77mali- Donating Member

- Street Cred : 62
 Re: 1973 Chevelle SS, 350, 4spd. build
Oh yeah. I could have picked one up from auto zone for $23. But I had the rebuild kit which was $9. And lots of epoxy paint on the shelf.

Joe73- Donating Member

- Street Cred : 83
 Re: 1973 Chevelle SS, 350, 4spd. build
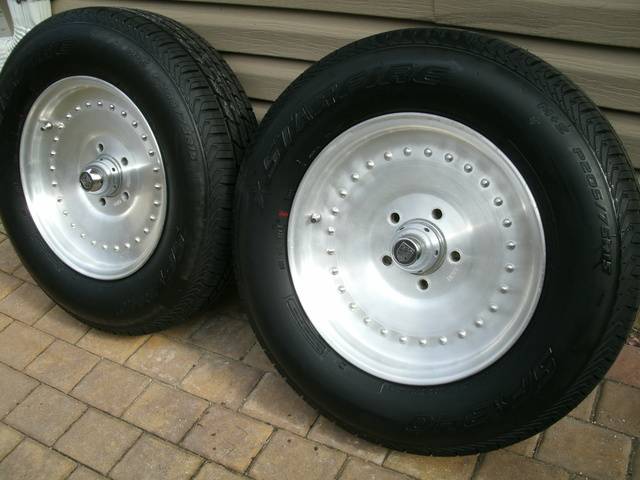
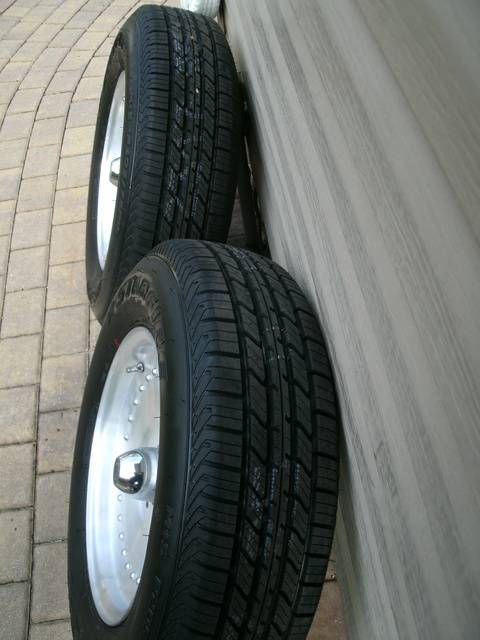
Ok, replaced my 3.5" centerline auto drags with some 5.5" auto drags. Took me a couple weeks to find the exact size front tires I wanted. I was looking for a narrower section width than the 215/75 I was running on my 3.5" rims. I finally settled on 205/75R15 which had almost a 3/4" less section width and 1" smaller in diameter and the speed rating I needed. The narrower section width will make the tires appear narrower than I had and actually have more tread on the pavement with wider rim. Should look better and be safer. And I was able to keep the sidewall bulge to a minimum.
Just mounted them up an hour ago. I was going to use some bolt on chrome valve stems but since the wheel is narrow, the washer and nut on the front would be in the bend of the wheel. I didnt want that. So I went with the shortest valve I could which is a TR412 which is only .88" long and came with a chrome sleeve and cap. The common TR413 is 1 1/4" long. I know your not "supposed to" use pull through stems on aluminum wheels due to the thickness of the aluminum but they lasted me over 30 years so I'm ok with that.
So my "skinny" 3/4" plywood front wheels are moving to the rear and these will be up front. Here's some pics.


Joe73- Donating Member

- Street Cred : 83
 Re: 1973 Chevelle SS, 350, 4spd. build
Well, I'm getting all my pieces together so my friend can dustless blast them. But primarily the bottom of the car. I want all the undercoating off so I can check it out. Then I will be shooting the bottom with some southern polyurethane (SU) black epoxy. Mixed with a little acetone to knock down the sheen from the semi-gloss it normally dries at.
Everything else will also be blasted. Everything will be coated with grey SU epoxy so I dont have any flash rust. Then the next morning I'll jamb all the body parts with color and clear and set them on the "rack" I made today.
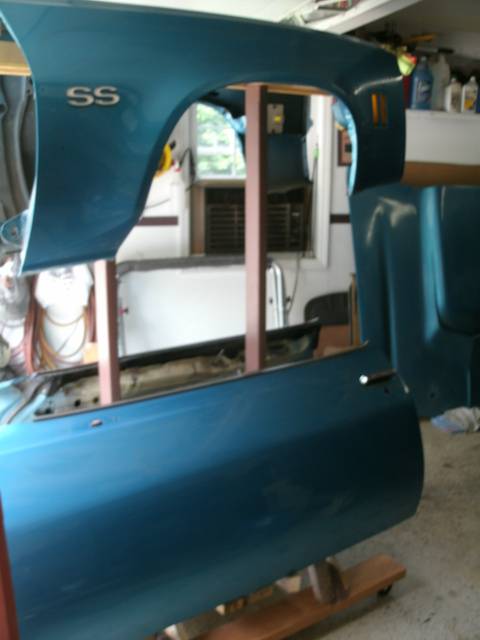
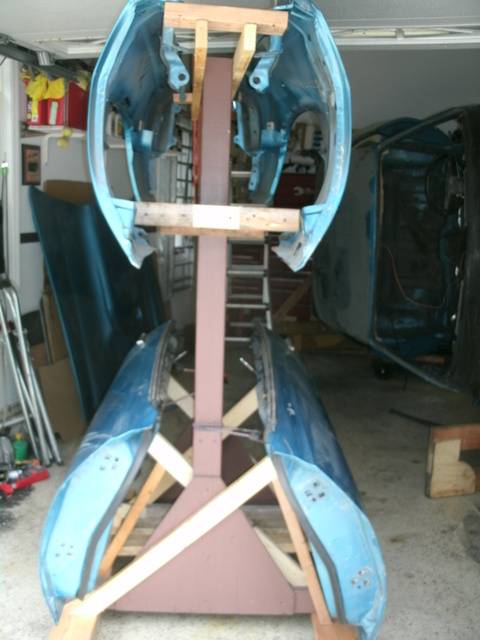
Too many parts all over the place. So I made a rack with wheels to hold my doors and fenders out of the way or while drying. For wheels, I read on another forum that guys like the wheels from the small $8 harbor freight moving dolly. So I picked one up and yes they are decent wheels. I've been rolling this rack around all day in my garage with ease.
The doors actually HANG on the rack. The angle pieces going at about a 45 degree angle are spaced so they go inside an existing hole in the door. Not far enough to touch the glass or anything, just enough to be secure and just hang. I can even do some sanding and spraying on this rack if need be.
I'm looking to get the bottom of the car sprayed so it can get off the wood rotisserie I wrote about earlier, and back on the frame. That will free up alot of space.
As for the wood rotisserie. The angle iron on the rear part did bolt directly to the body bolts alongside the gas tank. Yesterday I was looking at it and decided to cut some pipe I had laying around, that was a smaller diameter than an actual body bushing, and put the pipe between the angle iron and the body. I figure by spacing the angle iron away from the body, it will be easier for the guy to get in there and blast away. Spacers worked out good.
I'm actually thinking of lowering the doors on the rack and putting a flat top on it so I can lay my rad support up there and out of the way. But once the floor is sprayed and the body goes back on, the rad support will be back on the frame. Since it will just be some block sanding on the body parts to be done.
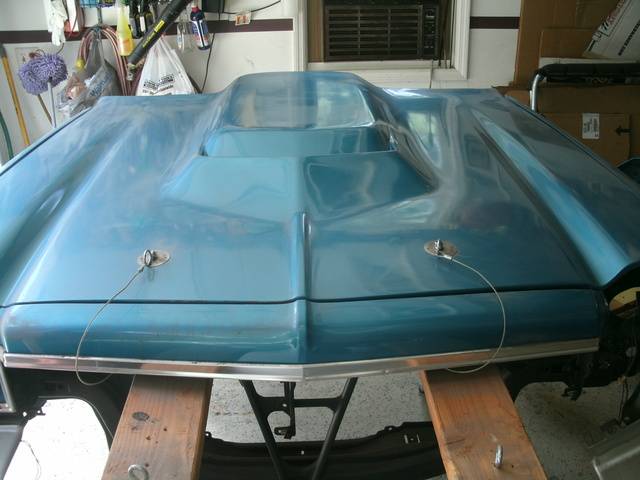
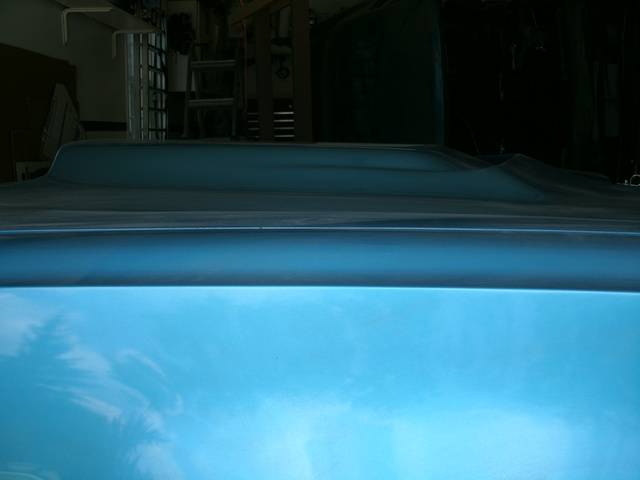
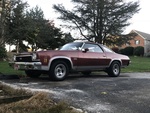
Here's some pics of the door and fender rack. Firrst and second pic are of the nose when I took it down from the ceiling. Just in case someone wants to see what a full fiberglass L88 hood looks like.


Joe73- Donating Member

- Street Cred : 83
 Re: 1973 Chevelle SS, 350, 4spd. build
Great progress Joe! Great job on those carts too. Keep them around for me  .
.
clanceman427- G3GM Enthusiast

- Street Cred : 16
 Re: 1973 Chevelle SS, 350, 4spd. build
LOL. Yes, the cart and rotisserie will be available when I'm done which I'm hoping will be by september. Paul originally expressed some interest in the rotisserie so I will offer him first shot.
For paul or kevin, since you guys are pretty much equidistant to me, we can definitely set something up to meet and drop off. Shouldnt be too difficult.
I'd just like to get like $100 to cover some of what I have into them. Everything will be included so it would be a bolt on and ready to go. The lumber wasnt too much of the cost but the hardware adds up.
I'll post up when I'm done with them.

Joe73- Donating Member

- Street Cred : 83
 Re: 1973 Chevelle SS, 350, 4spd. build
Thanks Joe. I never asked-are you going back to stock paint scheme?

clanceman427- G3GM Enthusiast

- Street Cred : 16
 Re: 1973 Chevelle SS, 350, 4spd. build
Yes, I never did finish putting the stripes back on when I painted her in the late 80s. It will be almost the exact same color it is now but with the factory light argent stripes. Tail panel is staying flat black cause the car came that way. I'm also having the rally wheels blasted when my buddy does the rest of the parts. They'll get some fresh argent and back into hibernation they go.
I really miss spraying big jobs. Cant wait to get back into it. And try out my gun.
BTW, factory color was midnight blue metallic. I was never a fan of that color.
I really miss spraying big jobs. Cant wait to get back into it. And try out my gun.
BTW, factory color was midnight blue metallic. I was never a fan of that color.

Joe73- Donating Member

- Street Cred : 83
 Re: 1973 Chevelle SS, 350, 4spd. build
Love the plan.
Since you miss big jobs, I'll ship mine up to you when your done.
I'm thinking maybe that 74 root beer brown metallic?
Since you miss big jobs, I'll ship mine up to you when your done.
I'm thinking maybe that 74 root beer brown metallic?

Roadcaptain S3- Donating Member

- Street Cred : 26
 Re: 1973 Chevelle SS, 350, 4spd. build
Roadcaptain S3 wrote:Love the plan.
Since you miss big jobs, I'll ship mine up to you when your done.
I'm thinking maybe that 74 root beer brown metallic?
LOL. Big spraying jobs. Getting tired of pulling cars apart.

Joe73- Donating Member

- Street Cred : 83
 Re: 1973 Chevelle SS, 350, 4spd. build
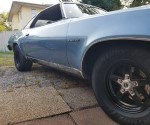
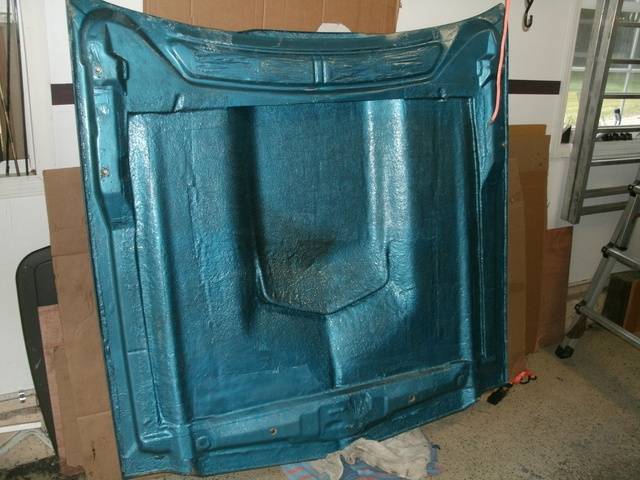
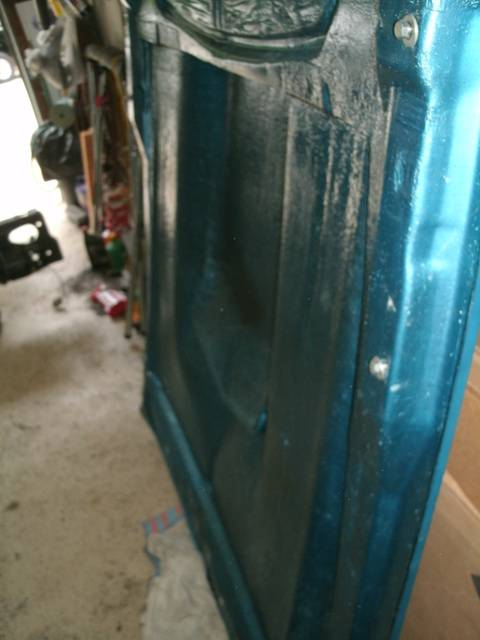
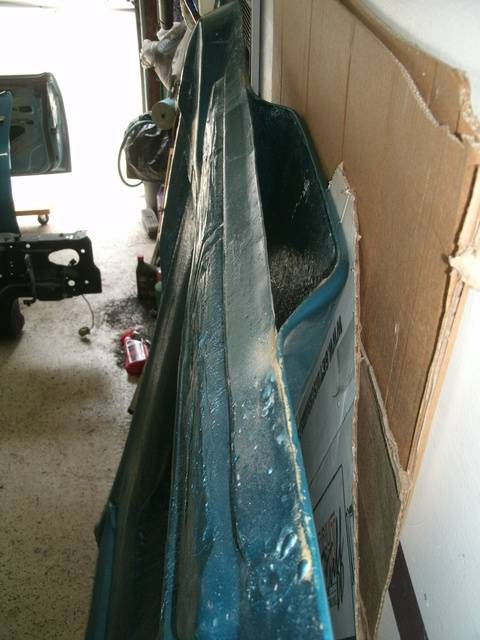
Who makes that hood? And any shots of the underside? wondering if its open underneath or if it has bracing running under the scoop area.
alowerlevel- G3GM Member

- Street Cred : 6
 Re: 1973 Chevelle SS, 350, 4spd. build
Hood was made by Fibermotive in Florida. I bought the hood in 1985 or so and put it on when I painted the car in '89. There is bracing on the bottom both at the front and rear ends. And a cross brace under the scoop opening. Pretty rigid hood. Not much flex at all. I'm also running the low tension hood springs.


Joe73- Donating Member

- Street Cred : 83
 Re: 1973 Chevelle SS, 350, 4spd. build
Nice work as usual Joe!
Thanks for remembering me also. If the other member needs it- that's OK, I'm not seeing any light at the end of the restoration tunnel here, haven't had any time to work on the car. I might tow mine down to you after you're done with yours, LOL!
Thanks for remembering me also. If the other member needs it- that's OK, I'm not seeing any light at the end of the restoration tunnel here, haven't had any time to work on the car. I might tow mine down to you after you're done with yours, LOL!

77mali- Donating Member

- Street Cred : 62
 Re: 1973 Chevelle SS, 350, 4spd. build
LOL. No problem Paul. All in due time.
Kevin, sent you a PM.
Kevin, sent you a PM.

Joe73- Donating Member

- Street Cred : 83
Page 4 of 17 •  1, 2, 3, 4, 5 ... 10 ... 17
G3GM :: Media :: G3 Project Pictures
Page 4 of 17
Permissions in this forum:
You cannot reply to topics in this forum|
|
|


» Roll Call and Car showcase
» Central Texas Noob
» Welcome Keith Seymore
» Wanted: Front park lamp assemblies
» 75 Hurst Olds T-tpos
» G3 Chevy rims- help ID these
» 75 el camino project.
» Have had a few questions
» vinyl top removal