1973 Chevelle SS, 350, 4spd. build
+41
zucchi
76 Malibu
Joe73
76Chevelle2Tone
S3TPI
Sinister
77camino
Flywheel
crice63
bracketchev1221
73ss
clanceman427
thatfnthing
Limey SE
fasrnur
g3chevy / Mr Pontiac
Roadcaptain S3
Mcarlo77
Hawk03
ant7377
1975 S3
77mali
jerry46765
Jeff-45
1cheapshot
dynchel
JF74chevelle
Tom Kochevar
Hs1973
dine73ss
Damon23
alowerlevel
driveit
chevellelaguna
RossK73
marks454ss
impalamonte
Dinomyte
Wallyuph
BK-75
1973montec
45 posters
G3GM :: Media :: G3 Project Pictures
Page 3 of 17
Page 3 of 17 •  1, 2, 3, 4 ... 10 ... 17
 Re: 1973 Chevelle SS, 350, 4spd. build
Use the paste moly lube on the cam and lifters and it will be there forever. Do not use the runny red liquid for a cam break in. And don't worry about turning the motor over by hand with the paste. It is the thin layer of paste that fills in the voids in the surfaces and the ultra thin layer between the parts. As far as planning on thin head gaskets, make sure you research the correct gasket. A .015 steel shim gasket will chew up an aluminum head. You may need to go with an expensive MLS type gasket. What was the reason for not decking the block?
bracketchev1221- G3GM Enthusiast

- Street Cred : 16
 Re: 1973 Chevelle SS, 350, 4spd. build
I'm definitely using the paste. Have it sitting in my box of goodies. Read too many negative posts about the red stuff. I also read that its real important to also coat in between the cam lobes so when the moly starts to "melt" off it also gets thrown around on the cam.
As for the head gaskets I already bought the Fel pro 1003 which are highly recommended for the aluminum heads. But I'll be selling those in favor of the fel pro 1094. Fel pro lists them for drag race applications with cast iron OR aluminum heads. The 1094 is coated and Fel Pro state "no brinelling" of aluminum heads. Alot of guys on other forums are running the 1094s for the same reason as me, without issues. So that will give me the correct quench to keep the compression ratio where it needs to be. The 1094 gasket at .015 thickness plus the small block chevy stock deck height of .025 will give me the optimum number of .040 quench. I'm not buying the 1094's until I check deck height upon reassembly.
Here's the fel pro link to the 1094 gasket. Check out under specs. http://www.fme-cat.com/overlays/part-detail.aspx?pNum=1094&partType=Head%20Gasket&brandId=FL
As for not decking the block, I didnt do it on the original build back in the late 80's pretty much because I didnt know they could "save" the block numbers. Not that this is a high value block or anything but it is my numbers matching, 4spd. coded block. Since the late 80's build, I only put on less than 5k miles, so the motor was still fresh. So when I tore it down and mic'ed it up again everything looks perfect. So a hot tank and clean up and she's ready for new parts/paint and way more power.

Joe73- Donating Member

- Street Cred : 83
 Re: 1973 Chevelle SS, 350, 4spd. build
As long as it states about the heads, then you are good.

bracketchev1221- G3GM Enthusiast

- Street Cred : 16
 Re: 1973 Chevelle SS, 350, 4spd. build
Yes it does. Thanks for looking out.

Joe73- Donating Member

- Street Cred : 83
 Re: 1973 Chevelle SS, 350, 4spd. build
Ok, just playing around in the garage. I was checking out my tapped oil galley holes on the front an back of my block. Figured now's a good time to tap the oil bypass adapter. Figure I'd post a pic.
The oil galley holes are the three holes, on the front of the block directly above where the cam goes in. And then the same three on the back of the block. Only had the usually builder press in plugs in there on the front. The rear were already tapped. The center oil galley plug on the front will have a .050 hole drilled into the center of it to allow some extra oil on the timing chain.
The plugs required (7 needed total) are 1/4"-18 thread. And obviously the tap to match. The 1/4"-18 thread is a pipe thread (NPT) so it doesnt usually come in a normal tap and die set. My MAC set didnt have it. Its more of a plumbing thing. Harbor Freight has a cheap kit in a wood box that has the sizes.
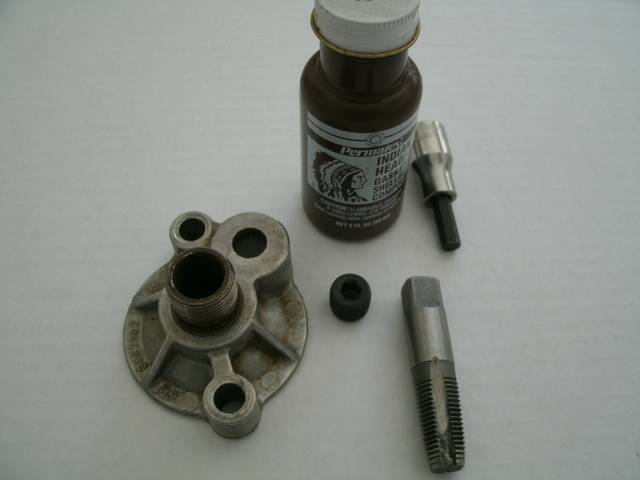
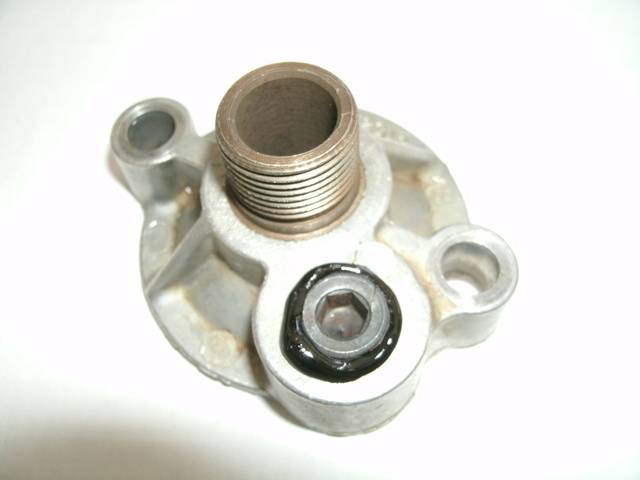
I also popped out my oil bypass cover and small spring. Again tapped the hole with 1/4"-18 tap and inserted a pipe plug sealed with some Indian head gasket cement. I was going to use some Ultra Black which I love but I've used the Indian head on numerous bypass plugs without fail
I did the mod to the oil bypass because it makes all oil go through the filter and not around it.
But my main reason is in case of flat tappet cam failure. The filter should catch a good majority of cam/lifter debris and not pump it to my bearings in the lower end. Might save the engine or at least make for an easier clean up and rebuild.
First pic is what is needed for the bypass mod. Second is the finished product. Took about 10 minutes. The plug should just sit slightly higher and not flush. Too high and it might not let the filter seal to the block.


Joe73- Donating Member

- Street Cred : 83
 Re: 1973 Chevelle SS, 350, 4spd. build
It may not hurt to put the "vented" plugs in the other 2 oil ports on the front of the block. It was supposed to release any trapped air in the oil galley for the front lifters. I use them on my big blocks. I cannot guarantee that it helps, but the theory is there I have not seen any issues using them. Also, not be sure to be VERY careful with getting the engine oil warm before jumping on it. With no bypass it puts the full pressure to the filter. So either use a race type filter like a Moroso, or ensure that the filter has an internal bypass for high pressure.

bracketchev1221- G3GM Enthusiast

- Street Cred : 16
 Re: 1973 Chevelle SS, 350, 4spd. build
I'll have to think about drilling the other plugs for more oil.
I know about not jumping on the motor with cold oil. I always use a Wix 1060 or 1061 on my small block builds. 270 and 285 burst strength and real good filtering and good price. 21 micron filtering on both.
Thanks
I know about not jumping on the motor with cold oil. I always use a Wix 1060 or 1061 on my small block builds. 270 and 285 burst strength and real good filtering and good price. 21 micron filtering on both.
Thanks

Joe73- Donating Member

- Street Cred : 83
 Re: 1973 Chevelle SS, 350, 4spd. build
Beautiful job Joe! - Takes a lot of time to do it right! ...quote from Mike Holmes!...haha
Are you going to have it on the road this summer?
Cheers!
-Ross
Are you going to have it on the road this summer?
Cheers!
-Ross

RossK73- Donating Member

- Street Cred : 0
 Re: 1973 Chevelle SS, 350, 4spd. build
Joe is very neat and meticulous. That car is going to come out really nice. Joe, you going to have it out this summer? We'll park next to each other at the cruise night at Deciccos.
ant7377- G3GM Addict

- Street Cred : 36
 Re: 1973 Chevelle SS, 350, 4spd. build
Thanks for the compliments guys. I dont think it will be driving this summer but I should be done with blasting the body and reshooting the car. Wont be too much work since there's almost no bondo on the car. So I'll be doing epoxy, then some priming and blocking to check everything. Then sealer and color/clear.
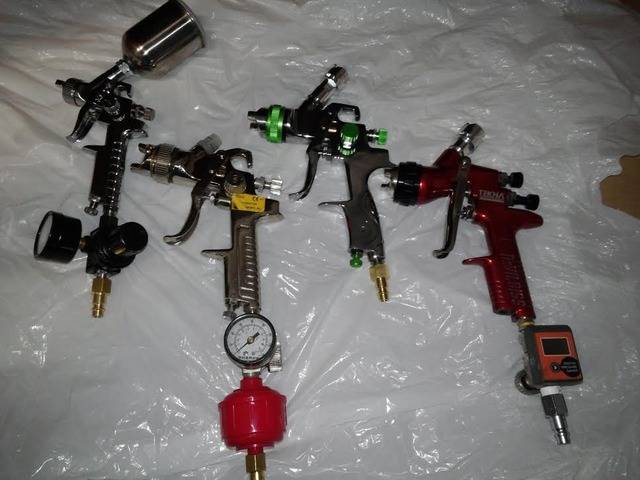
Changed out some spray guns. Now have a large tip dedicated primer gun along with my all around cheap gun and my new Devilbiss Tekna gun. Tekna will be doing my basecoat and clearcoat. Cant wait to shoot some base and clear. Its been awhile. Not the same as shooting epoxy on my frame, control arm, rear, etc. I'll be posting pics. Also changed out all my hose couplers and male and female plugs to all TYPE "v". They flow huge amounts of air and thats what the hvlp guns like. And now my air tools scream. Lug gun is way more powerful and the cut off tool has a deafening scream of rpms.
My muncie is rebuilt and waiting, scattershield is powdercoated. So that end is done. Balanced bottom end is waiting for assembly. I'm waiting til the last minute to pick up some aluminum heads just so I know whats out there. I'll have the engine miked and put together in a day or so when the time comes. Pypes Race Pro stainless muffs are now waiting as well. Couldnt pass up my deal on them.


Joe73- Donating Member

- Street Cred : 83
 Re: 1973 Chevelle SS, 350, 4spd. build
Joe73 wrote:.. The 1/4"-18 thread is a pipe thread (NPT) so it doesnt usually come in a normal tap and die set. My MAC set didnt have it. Its more of a plumbing thing. Harbor Freight has a cheap kit in a wood box that has the sizes. CARQUEST ALSO CRRIES THIS TAP <== LIMEY ADDED THIS

Limey SE- Management

- Street Cred : 98
 Re: 1973 Chevelle SS, 350, 4spd. build
Joe73 wrote:Yes it does. Thanks for looking out.
I HAVE TO GIVE A BIG HELLYEA TO YOU JOE, You have been very very helpful both here and thru the texts and other messages with this build I am doing, I cant fricken wait to get it this motor into the SE, Back to the Regularly scheduled Program THANKS AGAIN Joe

Limey SE- Management

- Street Cred : 98
 Re: 1973 Chevelle SS, 350, 4spd. build
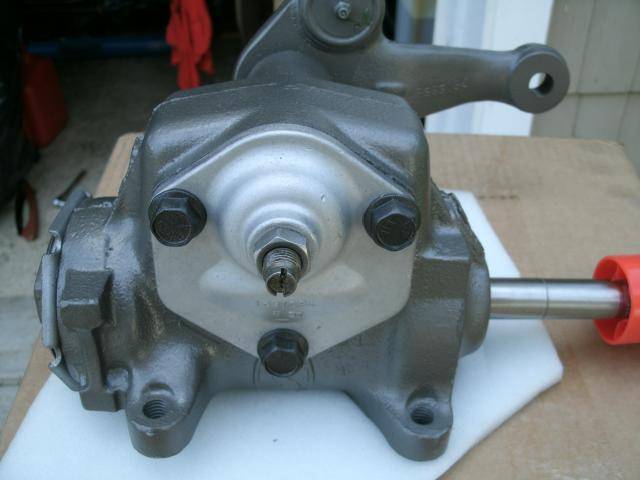
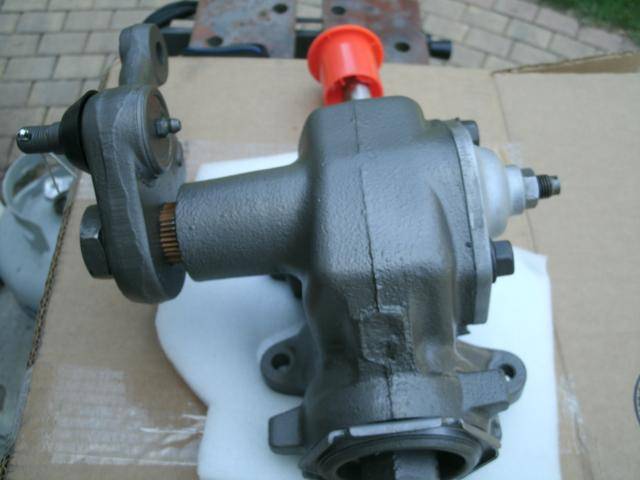
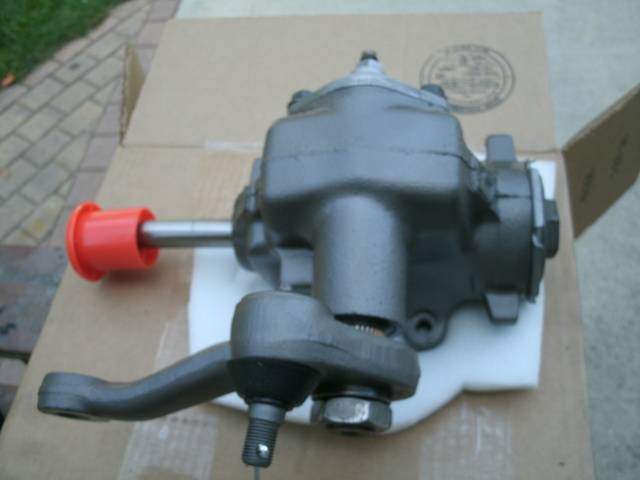
Pics of my rebuilt manual steering box. This is my factory 1973 manual box. Full rebuild. Mainshaft has been replaced with NOS by the rebuilder. I paid the extra $20 for the rebuilder to do factory detailing job on the box with correct paint and colors.


Joe73- Donating Member

- Street Cred : 83
 Re: 1973 Chevelle SS, 350, 4spd. build
Ok, I started stripping the bottom of my car of all its undercoating and etching primer. Did a small area above the trunk (you can see the silver in the pic). What a mess. I need a rotisserie. Did some searching and was ready to buy one but came upon some ideas for a wooden one. Well, $140 bucks later (because I had most of the wood just needed the hardware), my floor is vertical. And I kept $1000+ by not buying a rotisserie.
Took about 9 hours to build, loads of bolts and drilling and some welding of heavy angle iron for the rear supports. Now it will be a breeze to do the bottom. I'm thinking of having my buddy do some of his dustless blasting on the bottom since I saved the money on buying the rotisserie.
The 4x4 under the firewall is secured to the 4 body bolt holes with some threaded rod. The "C" made out of angle iron under the trunk is also bolted to the body bolts but with some grade 8 flanged nuts.
The arched plywood is a single 1/2 sheet of 3/4" ply. I measured 34" by 34" from a corner, put a screw in the corner and used a string to make the arch. Both arches came out of the 1/2 sheet of ply.
Not bad lifting it up with 2 guys. Its got some weight but not a big deal. After it was up we put a "leg" under it so it cant roll back down. In the upright position all the weight of the front and back of the car is a downward force onto the floor. So the arch has nothing to do with it standing. The arch only gets a load when its being rotated.
I know we love pics, so I put some below. I have a video that I will post up once I figure out how to get it off my phone.
BTW, this setup will work for any of our "A" bodies. So if anyone wants these 2 mounts when I'm done, $100 and come pick them up. I wont be keeping them. ANT7377 (or anyone else), if you want to come by and check it out, just let me know. Your always welcome.
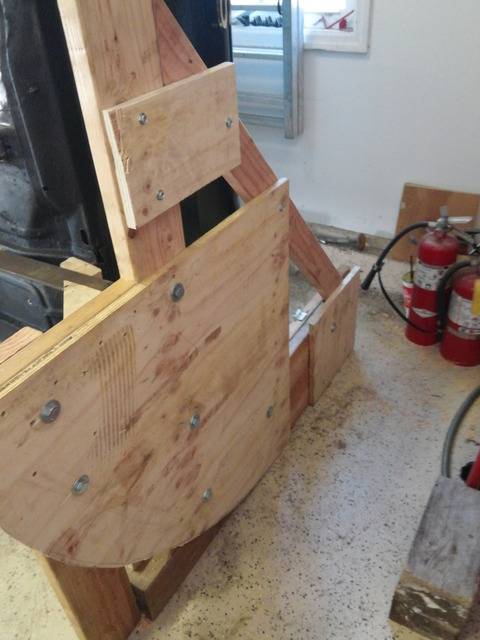
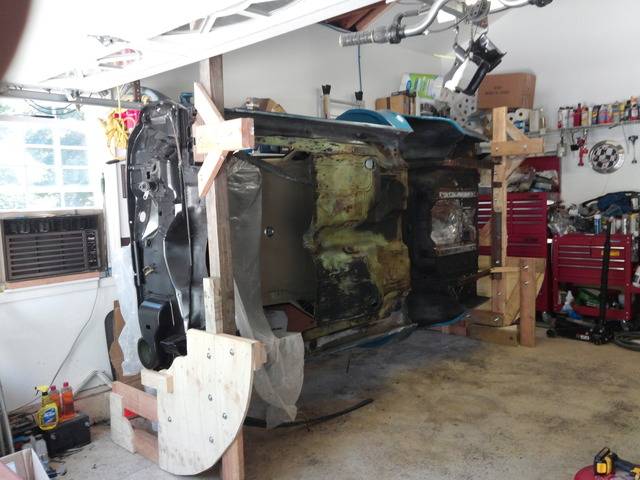


Joe73- Donating Member

- Street Cred : 83
 Re: 1973 Chevelle SS, 350, 4spd. build
That's really slick. I bet you were nervous as hell first time you "flipped it".

dynchel- Donating Member

- Street Cred : 40
 Re: 1973 Chevelle SS, 350, 4spd. build
Not really. I knew how I built it, so it wasnt going to flex. I was more concerned with the initial weight to flip it. I think if the plywood arch was longer (more towards the center of the car) it would be even easier to lift.
I use a laser level to get the heights correct so it sits level while down and while up.
I use a laser level to get the heights correct so it sits level while down and while up.

Joe73- Donating Member

- Street Cred : 83
 Re: 1973 Chevelle SS, 350, 4spd. build
Jeez Joe! Yeah id love to see it! Maybe next werk one night.

ant7377- G3GM Addict

- Street Cred : 36
 Re: 1973 Chevelle SS, 350, 4spd. build
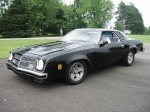
That's some ingenuity for sure Joe. Great idea! I'm happy that mine is back on its frame again, was a pain laying under it on a creeper scraping the undercoating off the bottom. I used black epoxy primer and black UPOL Raptor bed liner for the underside of mine.
What are you going to use?
What are you going to use?
chevellelaguna- G3GM Enthusiast

- Street Cred : 16
 Re: 1973 Chevelle SS, 350, 4spd. build
Joe great job on the rotisserie! Is that dustless blasting high pressure water that your buddy does?
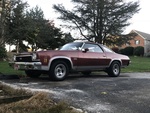
I like the look of your car with the blacked out rear cove panel, I wish they did that factory.
I like the look of your car with the blacked out rear cove panel, I wish they did that factory.
clanceman427- G3GM Enthusiast

- Street Cred : 16
 Re: 1973 Chevelle SS, 350, 4spd. build
Thanks guys.
I stripped the bottom back in the late 80's when I was younger and it was a real pain and mess. Especially working on a creeper underneath. I started a couple days ago and decided I'm getting too old for this. So rotisserie it is. I like how it came out and it works GREAT. The bottom will be 2 coats of SPI grey epoxy and then 2 coats of Summit Racing Satin Epoxy Black. I would have rather just shot some SPI black epoxy but I have a good amount of satin and semi summit racing epoxy left over. I want the SPI for the protection. And with going with grey and then black on top I can make sure I get good coverage. Black on black would be more difficult especially with all the nooks and cranny's on the bottom of the car.
Yes the dustless blasting uses water but such a small amount. I had my buddy blast my boat trailer frame which took about 3 hours. He used less than 10 gallons of water in that time. Theres no "cloud" like with sandblasting. I had it done in my yard. When he was done I just let the glass dry in the sun, swept it up and threw it out. I know my buddy charges $850 to blast a whole car, exterior only. I think thats a pretty good deal especially since its quick and doesnt score and pic the metal like sand or slag blasting. If he would have had the business prior to me slag blasting my frame, I would have gone that route.
As for the tail panel, I always wondered about that. I bought the car in '82 with the black tail panel with original paint. There were three or four 73 chevelles in my area with the black tail and they were all SS cars. A couple of novas as well. And I've always seen camaros with it, especially the 72 and older. I remember there was one non SS 73 for sale in my area (back in the early 80's) that was like a butternut yellow color with a black tail. I remember going to look at it and it was a respray. So dont know if it was a dealer thing or what. I've only seen a couple pics of the black tail 73 in other parts of the country.
I always liked the black tail alot so I decided to keep it.

Joe73- Donating Member

- Street Cred : 83
 Re: 1973 Chevelle SS, 350, 4spd. build
Hey Joe can you send me the plans? LOL
Nice job Bro!
Nice job Bro!
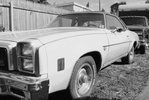
77mali- Donating Member

- Street Cred : 62
 Re: 1973 Chevelle SS, 350, 4spd. build
Thanks Paul. Your more than welcome too the braces. I hate to get rid of them when I'm done.

Joe73- Donating Member

- Street Cred : 83
 Re: 1973 Chevelle SS, 350, 4spd. build
Might take you up on that if I end up going that way. Trying to stay frame-on but you never know.
Hey ps-
Can you PM me on how to adjust those Moroso drag shocks? Thanks Joe!
Hey ps-
Can you PM me on how to adjust those Moroso drag shocks? Thanks Joe!

77mali- Donating Member

- Street Cred : 62
 Re: 1973 Chevelle SS, 350, 4spd. build
That is some nice work! I had seen that type of rotisserie setup before -- would love to do it myself if I can get to the frame off I'd really like to do. Maybe you could list the measurements of the pieces involved?
I had not heard of dustless blasting until now -- that sounds way cool.
I had not heard of dustless blasting until now -- that sounds way cool.

thatfnthing- Donating Member

- Street Cred : 65
Page 3 of 17 •  1, 2, 3, 4 ... 10 ... 17
G3GM :: Media :: G3 Project Pictures
Page 3 of 17
Permissions in this forum:
You cannot reply to topics in this forum|
|
|


» Roll Call and Car showcase
» Central Texas Noob
» Welcome Keith Seymore
» Wanted: Front park lamp assemblies
» 75 Hurst Olds T-tpos
» G3 Chevy rims- help ID these
» 75 el camino project.
» Have had a few questions
» vinyl top removal