1973 Chevelle SS, 350, 4spd. build
+41
zucchi
76 Malibu
Joe73
76Chevelle2Tone
S3TPI
Sinister
77camino
Flywheel
crice63
bracketchev1221
73ss
clanceman427
thatfnthing
Limey SE
fasrnur
g3chevy / Mr Pontiac
Roadcaptain S3
Mcarlo77
Hawk03
ant7377
1975 S3
77mali
jerry46765
Jeff-45
1cheapshot
dynchel
JF74chevelle
Tom Kochevar
Hs1973
dine73ss
Damon23
alowerlevel
driveit
chevellelaguna
RossK73
marks454ss
impalamonte
Dinomyte
Wallyuph
BK-75
1973montec
45 posters
G3GM :: Media :: G3 Project Pictures
Page 2 of 17
Page 2 of 17 •  1, 2, 3 ... 9 ... 17
 Re: 1973 Chevelle SS, 350, 4spd. build
Joe73 wrote:Thanks guys. Had some ply laying around so i reinvented the wheel. Lol
Where does one get their hands on a 27" hole saw?

thatfnthing- Donating Member

- Street Cred : 65
 Re: 1973 Chevelle SS, 350, 4spd. build
Firewall is almost fully stripped. Top of cowl is fully stripped. Windshield is out of the car. Just got my 2k primer and seam sealer in the mail. It will be sprayed black with the same chassis shield epoxy.


Joe73- Donating Member

- Street Cred : 83
 Re: 1973 Chevelle SS, 350, 4spd. build
Personally I would spray that body color, but the correct black will look really nice also.
dynchel- Donating Member

- Street Cred : 40
 Re: 1973 Chevelle SS, 350, 4spd. build
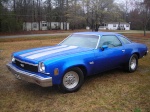
I thought about spraying it body color. The original body color is still on it from the drivers door to the fuse block and from the pass door to the heater box. Thats why its dark in those areas in the pic. The factory color of my car is midnight blue with the silver stripes. I'm thinking of putting the car back to that color.
But all black on the firewall.
But all black on the firewall.

Joe73- Donating Member

- Street Cred : 83
 Re: 1973 Chevelle SS, 350, 4spd. build
What black are you using? I'm debating it now and I like the Duplicolor semi-gloss or the Rustoleum "satin black".
77mali- Donating Member

- Street Cred : 62
 Re: 1973 Chevelle SS, 350, 4spd. build
I usually use duplicolor semigloss black for everything on my car.

dynchel- Donating Member

- Street Cred : 40
 Re: 1973 Chevelle SS, 350, 4spd. build
I like the dupli-color can's- much easier to control application, although I got a gift card from my daughter & am headed to sears to grab a spray gun so I might also reduce the Por15 & try that for the 1st coat- at least for the frame. The rest of the firewall is decent I think I can get away with just a high build primer.
Joe that thing is looking sweet!
Joe that thing is looking sweet!

77mali- Donating Member

- Street Cred : 62
 Re: 1973 Chevelle SS, 350, 4spd. build
I'm using summit racings chassis shield. Its an epoxy. Satin in color. Looks original. I know that por15 doesnt adhere to well to clean metal. It like some rust for bite. I built a utility trailer from scratch, scrubbed the new metal with wax and grease remover and sprayed it with por15. Didnt last one season. Scratched real easy with just hooking ratchet straps to it. Por15 does make a metal etch to use before spraying the color. But I think your better off with a 2k epoxy. 2k means its 2 parts that when mixed is activated. Self etching primer in a spray can is a 1k primer.

Joe73- Donating Member

- Street Cred : 83
 Re: 1973 Chevelle SS, 350, 4spd. build
Another update. Slow going right now due to bow season starting next week. So not much will be getting done. Firewall was stripped including the seam sealer all the way around. Some Eastwood 2k (2 part) primer was sprayed PRIOR to putting on new seam sealer. That eastwood stuff is really good. Once dry, it isnt coming off. Just as good a my gun spraying 2k but easier. One Eastwood can did 2 coats on the seam area and one light coat on the rest of the firewall. Wasnt planning on priming the firewall but the Eastwood stuff goes bad after 72 hours in the can. So I used it all up. Shot the firewall, again with Summit Chassis Shield, semi-gloss black. One coat. Didnt like the the sheen so I used their satin black for the second coat. I'm happy with it now. Cant wait to put on the new brake booster. Bought an ACDelco master cylinder rebuild kit for my master. It would have been cheaper just buying a new master but the new ones dont have the same casting as original and mine is real clean to begin with. So I'm just going to glass blast mine and install the kit.
Sent my manual steering box to http://www.powersteering.com/ Spoke with the owner Chip who is a great, knowledgeable guy. Took time to explain the process and what type of parts he will be using for the rebuild. Cost me $229 for the rebuild and I paid the extra $20 for his factory detailing. Well worth the 20 bucks. Looks just like when I bought the car in '82, right down to the copper colored splines by the pitman arm.
BTW, he rebuilds power steering boxes and pumps as well. He has a kit to make your stock box a 12.7:1 quick ratio.
Firewall stipping process.

Firewall 2K sprayed and new seam sealer applied

2 coats chassis shield epoxy (satin black topcoat)

Cowl area stripped and sprayed

Sent my manual steering box to http://www.powersteering.com/ Spoke with the owner Chip who is a great, knowledgeable guy. Took time to explain the process and what type of parts he will be using for the rebuild. Cost me $229 for the rebuild and I paid the extra $20 for his factory detailing. Well worth the 20 bucks. Looks just like when I bought the car in '82, right down to the copper colored splines by the pitman arm.
BTW, he rebuilds power steering boxes and pumps as well. He has a kit to make your stock box a 12.7:1 quick ratio.
Firewall stipping process.

Firewall 2K sprayed and new seam sealer applied

2 coats chassis shield epoxy (satin black topcoat)

Cowl area stripped and sprayed


Joe73- Donating Member

- Street Cred : 83
 Re: 1973 Chevelle SS, 350, 4spd. build
That looks really nice joe.

dynchel- Donating Member

- Street Cred : 40
 Re: 1973 Chevelle SS, 350, 4spd. build
Thanks Man. Next job with be removing all the undercoating from the bottom for the SECOND TIME. I stripped it in the late 80's and recoated. Now I will strip and probably shoot some black 3M chip guard under there. That way it could be cleaned easily. Undercoating always attracts dust and dirt and its always tacky so stuff sticks to it easily.
Then the frame will probably go back under and I'll block out the car and re-shoot it.
Then the frame will probably go back under and I'll block out the car and re-shoot it.

Joe73- Donating Member

- Street Cred : 83
 Re: 1973 Chevelle SS, 350, 4spd. build
That's coming along quite nicely.

thatfnthing- Donating Member

- Street Cred : 65
 Re: 1973 Chevelle SS, 350, 4spd. build
Jeez, you even took the wiper arm mechanism out! Looks awesome.
Ever try shooting a clear over the undercoat? Might save you from having to do it a 3rd time down the line.
Ever try shooting a clear over the undercoat? Might save you from having to do it a 3rd time down the line.

77mali- Donating Member

- Street Cred : 62
 Re: 1973 Chevelle SS, 350, 4spd. build
Looks awesome on the firewall.

driveit- Donating Member

- Street Cred : 15
 Re: 1973 Chevelle SS, 350, 4spd. build
looks great...i like it. keep it goin'.
impalamonte- G3GM Enthusiast

- Street Cred : 18
 Re: 1973 Chevelle SS, 350, 4spd. build
Ok, decided to rebuild my factory M20 muncie. Bought the rebuild kit from Jodys Transmissions in Reading, Pa. Awesome guy to talk to, gives tech support and only sells quality parts. Seen rave reviews about him over the years on other fourms. Jody also sells oversized (.050) torque-lock sliders and hubs. He hand matches them for perfect fit and sells them as a set. He has them on ebay as well. So along with the rebuild kit, I picked up a pair of sliders and hubs as an upgrade. Took my time with the whole thing and took a couple of pics.
Cleaned case, tail and counter gear

Rebuild kit parts

Guts out of the parts washer and sprayed with WD40 for protection

128 needle bearings (4 rows of 28) installed in the counter gear

Counter gear end play checked (I have .014 but .030 max is allowed) Counter gear installed

Mainshaft assembled and pressed together

Tail reverse arm installed and bearing installed on input shaft

Mainshaft/Input/front bearing installed and staked nut

Internal pic

Complete trans with french locks installed. No oil in her yet and I left the side cover bolts loose. Made the stand out of an old pallet to keep the trans from rolling around.

Cleaned case, tail and counter gear

Rebuild kit parts

Guts out of the parts washer and sprayed with WD40 for protection

128 needle bearings (4 rows of 28) installed in the counter gear

Counter gear end play checked (I have .014 but .030 max is allowed) Counter gear installed

Mainshaft assembled and pressed together

Tail reverse arm installed and bearing installed on input shaft

Mainshaft/Input/front bearing installed and staked nut

Internal pic

Complete trans with french locks installed. No oil in her yet and I left the side cover bolts loose. Made the stand out of an old pallet to keep the trans from rolling around.


Joe73- Donating Member

- Street Cred : 83
 Re: 1973 Chevelle SS, 350, 4spd. build
Nice job Joe!
Them 128 needle bearings alone would have driven me to the Jack Daniels & that Trans would have taken me a year (just like my motor did!) LOL
Them 128 needle bearings alone would have driven me to the Jack Daniels & that Trans would have taken me a year (just like my motor did!) LOL

77mali- Donating Member

- Street Cred : 62
 Re: 1973 Chevelle SS, 350, 4spd. build
It wasnt bad at all. There's 6 spacers (actually like a thin washer), 4 rows or 28 rollers and a long sleeve in the center. I just globbed on some wheel bearing grease onto the sleeve to keep it in the center and the roller just stuck in place. Went real quick. Then I slipped the shaft through it and rotated it which actually packed the bearings tight. And it allowed me to feel how it rotated to see if there was any binding.
I'm happy with the how it came out. When warmer weather hits I'll be removing the undercoating and shooting the bottom with some color instead. Then I'll be blocking the body down. I've been taking alot of heat for redoing the body since its nice a straight. But I want to shoot it again.
I'm happy with the how it came out. When warmer weather hits I'll be removing the undercoating and shooting the bottom with some color instead. Then I'll be blocking the body down. I've been taking alot of heat for redoing the body since its nice a straight. But I want to shoot it again.

Joe73- Donating Member

- Street Cred : 83
 Re: 1973 Chevelle SS, 350, 4spd. build
Your car man, do what U want! Who's giving you  ????
????
 ????
????
77mali- Donating Member

- Street Cred : 62
 Re: 1973 Chevelle SS, 350, 4spd. build
Wife, I'm sure. I have the "wife" problem also.lol

dynchel- Donating Member

- Street Cred : 40
 Re: 1973 Chevelle SS, 350, 4spd. build
Nah, just buddies of mine. My wife is great!! She doesnt mind anything. My buddies think I should just put the original stripes back on in lacquer and be done with it.
Car is mostly apart right now. I have the nose hanging from the ceiling. So I just have to unbolt the fenders and hood from the rad support.
Then I want to block every part down,
seal it with some epoxy sealer,
jamb it out in color,
assemble and lay down another coat of color for proper shade match,
then stripe it,
disassemble,
clear everything,
reassemble.
I got nothing but time. Then after the body is done, again, its onto the engine. Block has be tanked, blasted and painted. Freeze out plugs are done as well as tapping the oil returns and plugging them. I have a brand new, balanced, complete lower end (crank, rods, pistons, etc.) waiting to go. Cam and lifters have been waiting since 1989. Comp cams 292h magnum. Only thing I'm waiting on buying are the aluminum heads. I'll be going with a .015 thick head gasket because I didnt want to deck my block. And that gasket will give me the proper .040 quench for compression.
Cant wait to hear the motor run but I know its recommended to start a flat tappet within a couple of weeks of assembly or the lube on the cam will run off and not protect it upon start up. So I can wait.

Joe73- Donating Member

- Street Cred : 83
 Re: 1973 Chevelle SS, 350, 4spd. build
Joe,you are a jack of all trades! Looks great!
ant7377- G3GM Addict

- Street Cred : 36
 Re: 1973 Chevelle SS, 350, 4spd. build
Thanks ant. Hate having anybody touch my vehicles. Except for a wheel alignment since i dont have that machine. Lol

Joe73- Donating Member

- Street Cred : 83
 Re: 1973 Chevelle SS, 350, 4spd. build
Just read your thread from the beginning. Great job! I'm sure it gives you a heap of self satisfaction knowing it was all done correctly. Unlike the ring and pinion I let someone do for me. Lessons learned. 

marks454ss- Donating Member

- Street Cred : 1
Page 2 of 17 •  1, 2, 3 ... 9 ... 17
G3GM :: Media :: G3 Project Pictures
Page 2 of 17
Permissions in this forum:
You cannot reply to topics in this forum|
|
|


» Roll Call and Car showcase
» Central Texas Noob
» Welcome Keith Seymore
» Wanted: Front park lamp assemblies
» 75 Hurst Olds T-tpos
» G3 Chevy rims- help ID these
» 75 el camino project.
» Have had a few questions
» vinyl top removal