75 el camino project.
+24
Iggy
impalamonte
73ss
REVINKEVIN / Mr. 600+HP
tgaetto
fasrnur
bigredlaguna
Hawk03
Hs1973
Limey SE
thatfnthing
DaveFury
Joe73
chevellelaguna
Mcarlo77
knightfan26917
77mali
tropdeprojet
dynchel
pila
wunderlich_33
driveit
Dinomyte
JB2wheeler
28 posters
G3GM :: Media :: G3 Project Pictures
Page 4 of 11
Page 4 of 11 •  1, 2, 3, 4, 5 ... 9, 10, 11
 Re: 75 el camino project.
ok no picture of it yet but I Herculined the floor and inside the smuggler box. then moved on to remove the frame
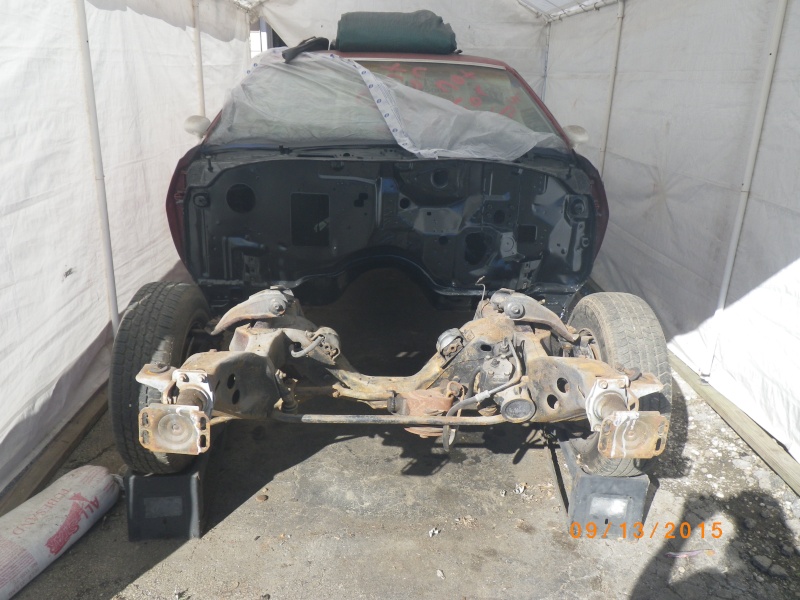
just used some 4x4's, cinder blocks, and a couple of floor jacks, mostly just one jack.
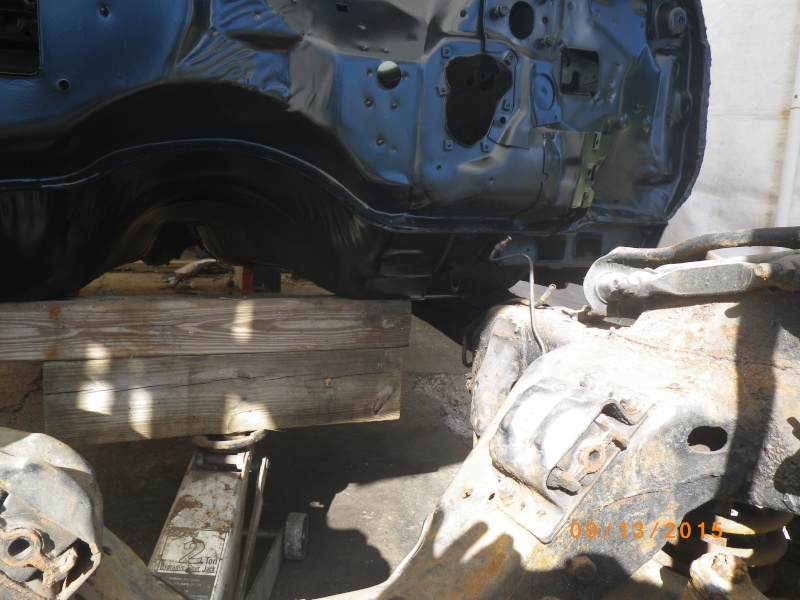
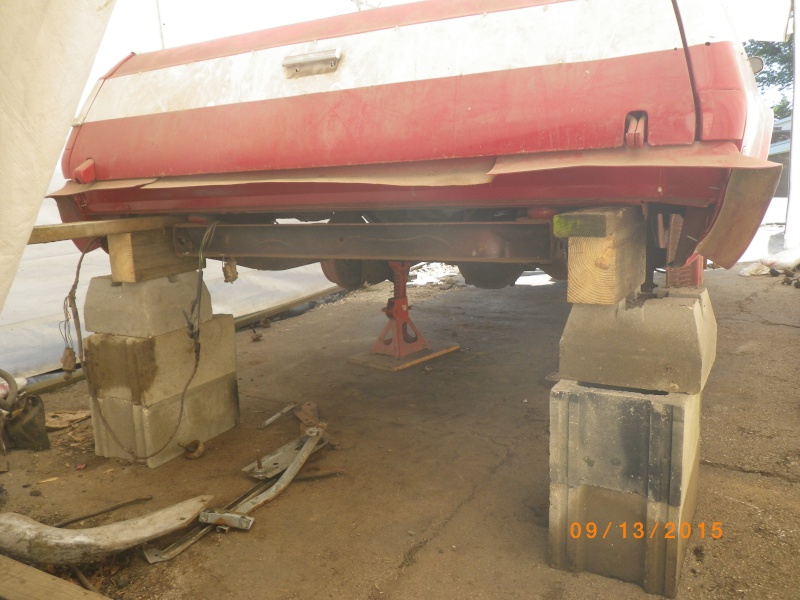

yanked it out using the drums as rollers which worked really well and gave more clearance for it to slide under
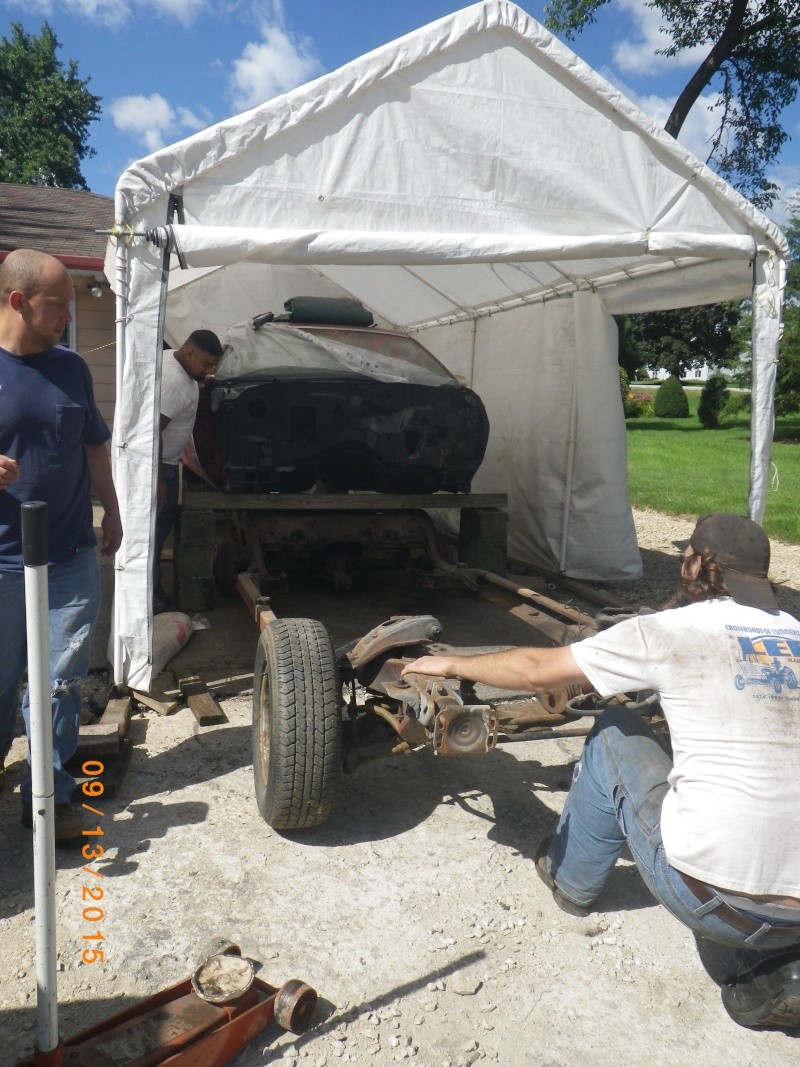
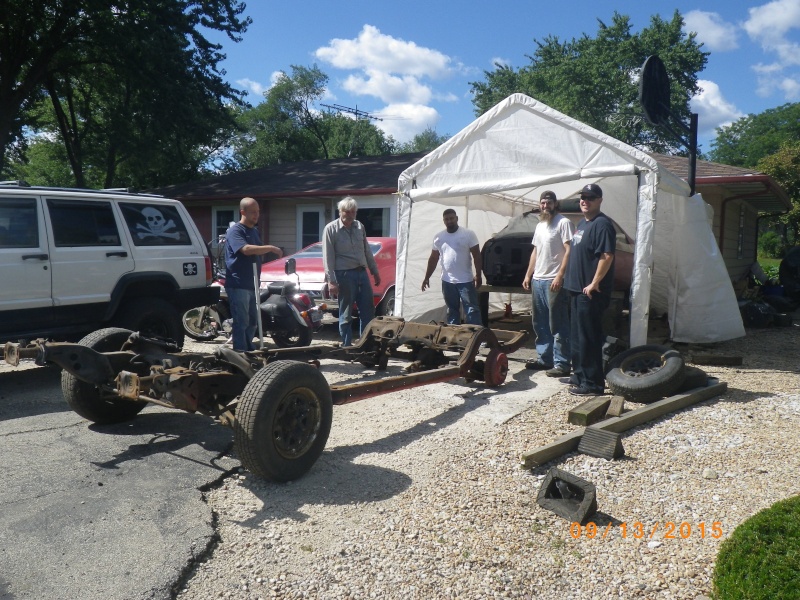
so now im selling a solid 1977 Georgia El Camino rolling chassis
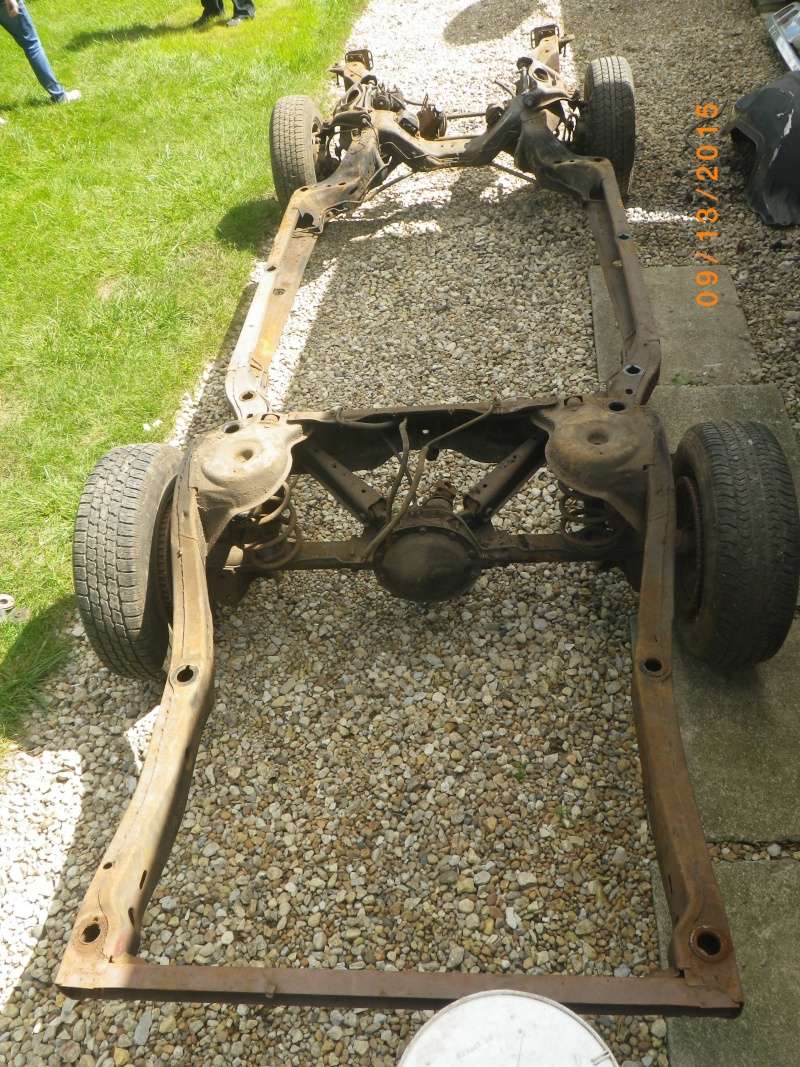
just gotta clean the spots that the frame was in the way of before and then I can drop the body on the frame that I already finished.

just used some 4x4's, cinder blocks, and a couple of floor jacks, mostly just one jack.


yanked it out using the drums as rollers which worked really well and gave more clearance for it to slide under


so now im selling a solid 1977 Georgia El Camino rolling chassis

just gotta clean the spots that the frame was in the way of before and then I can drop the body on the frame that I already finished.

riddick75- G3GM Member

- Street Cred : 6
 Re: 75 el camino project.
Very nice Riddick and GLWS on the frame ........

Limey SE- Management

- Street Cred : 98
 Re: 75 el camino project.
thanks, im gonna be working on the interior and Im curious whats the colors of yours? headliner, dash, carpet, door panels and seat. is everything one color?77camino wrote:Looks good!

riddick75- G3GM Member

- Street Cred : 6
 Re: 75 el camino project.
Progress is good ... appreciate the update!
Cort www.oldcarsstronghearts.com
pigValve, paceMaker, cowValve | 1979 Caprice Classic (awaiting new owner)
"We're runnin' out of time" __ Fine Young Cannibals __ 'She Drives Me Crazy'
Cort
pigValve, paceMaker, cowValve | 1979 Caprice Classic (awaiting new owner)
"We're runnin' out of time" __ Fine Young Cannibals __ 'She Drives Me Crazy'

knightfan26917- G3GM Senior Member

- Street Cred : 8
 Re: 75 el camino project.
got the under side undercoated (mostly) at least where the frame would be in the way. more undercoating on the way, its called rustfre. sprays well.
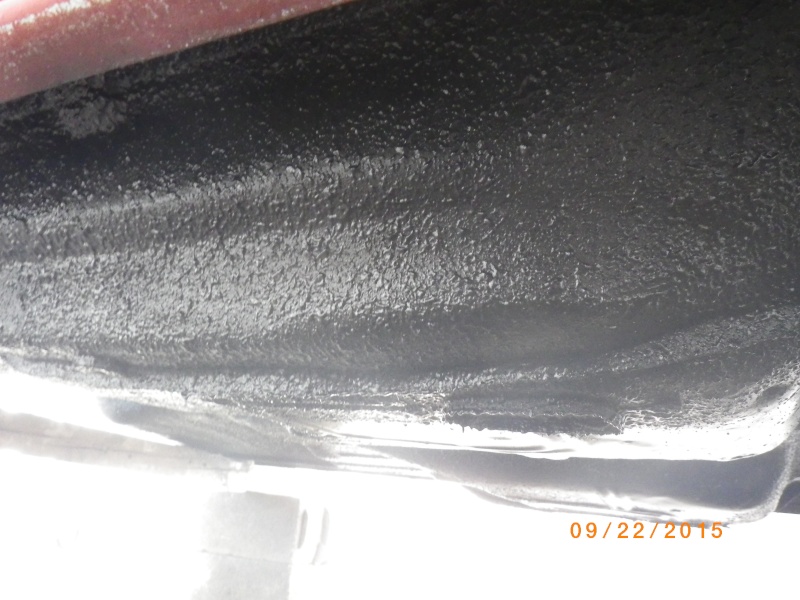
and I got covered enough.
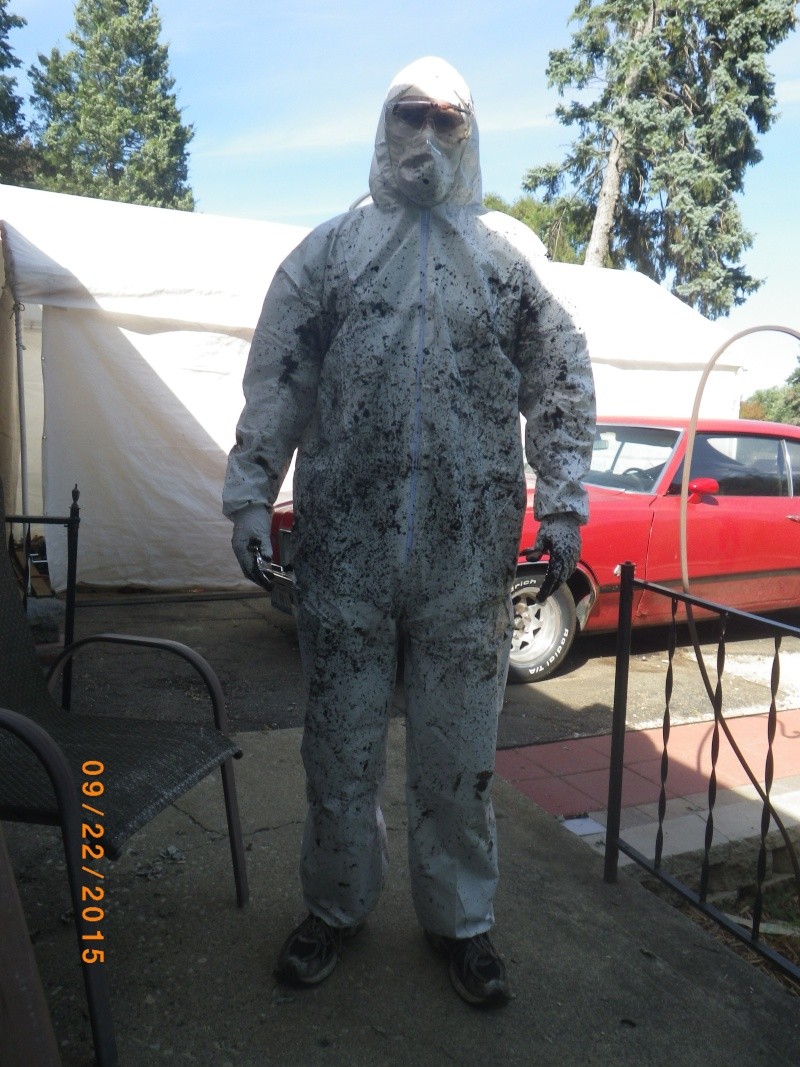
at least I had enough sense to get a painters suit for this.
and this saturday will be the mating of body and frame.

and I got covered enough.

at least I had enough sense to get a painters suit for this.
and this saturday will be the mating of body and frame.

riddick75- G3GM Member

- Street Cred : 6
 Re: 75 el camino project.
ok got her back down on the rightful frame with a few hands.
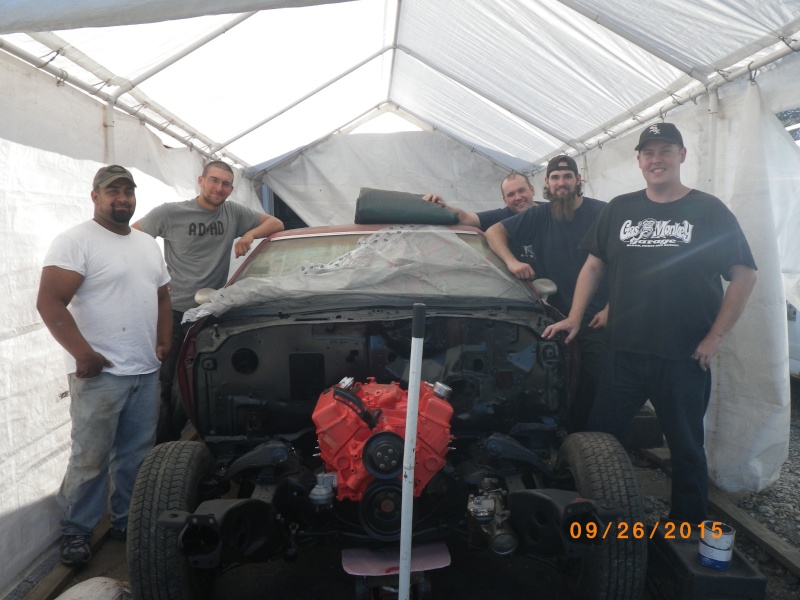
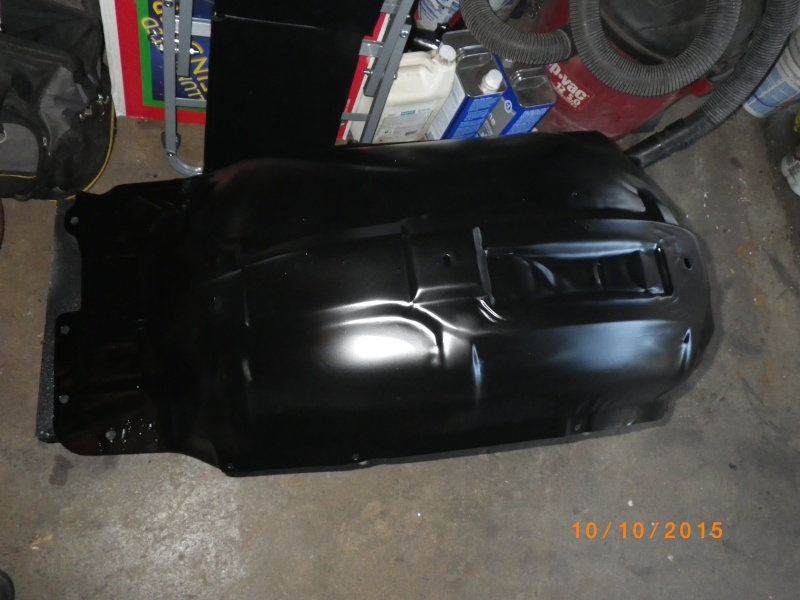
and got the other wheel well painted
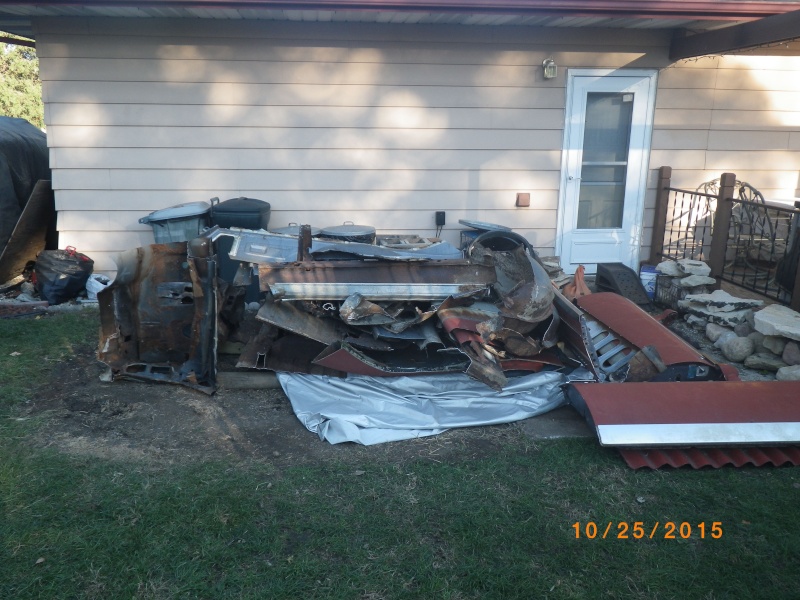
then spent a day removing the rest of the useful parts from the other body, and took it down to handlable pieces so I can take it to the scrap yard
before
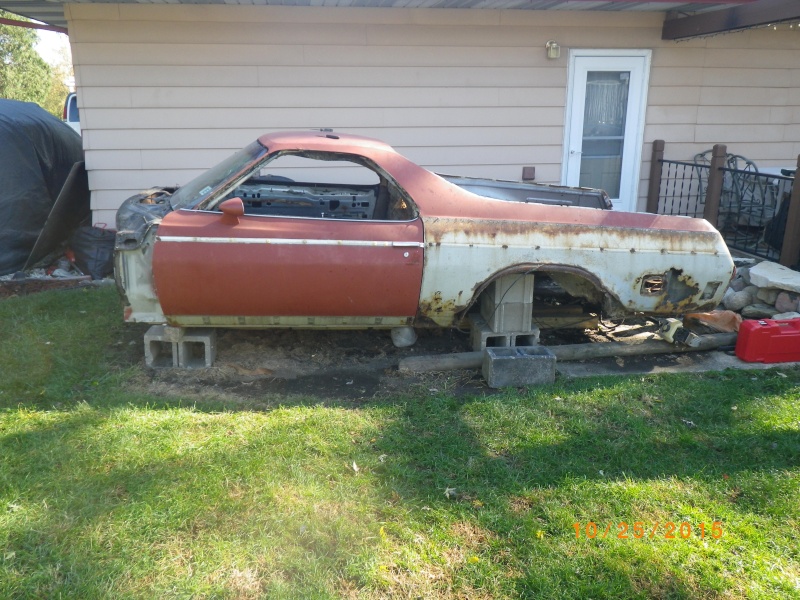
middle


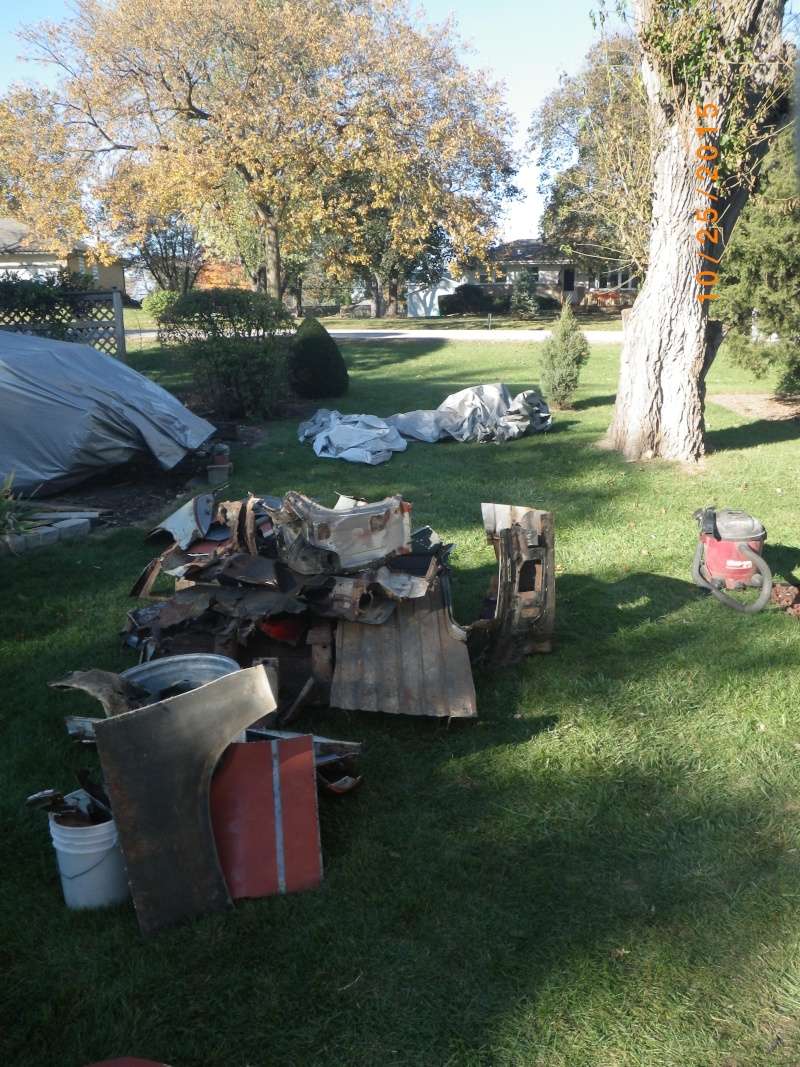
after

and got the other wheel well painted

then spent a day removing the rest of the useful parts from the other body, and took it down to handlable pieces so I can take it to the scrap yard
before

middle


after


riddick75- G3GM Member

- Street Cred : 6
 Re: 75 el camino project.
I know that it could not have been saved, but it is still sad to see another one heading to the scrap yard.

77camino- G3GM Enthusiast

- Street Cred : 8
 Re: 75 el camino project.
yea it is a shame, but it was still fun as hell. and interesting to see how it really all was assembled.

riddick75- G3GM Member

- Street Cred : 6
 Re: 75 el camino project.
riddick75 wrote:yea it is a shame, but it was still fun as hell. and interesting to see how it really all was assembled.
Looking at your pics, no doubt it was rather fun. My goodness ... I kinda wish I could've been there to observe it in person ... LOL! Talk about a transformation!
Cort
pigValve, paceMaker, cowValve | 1979 Caprice Classic (awaiting new owner)
"Are we having fun yet?" __ Nickelback __ 'This Is How You Remind Me'

knightfan26917- G3GM Senior Member

- Street Cred : 8
 Re: 75 el camino project.
77mali wrote:Approval Rating...10 out of 10
Now THAT'S a paint suit!

thatfnthing- Donating Member

- Street Cred : 65
 Re: 75 el camino project.
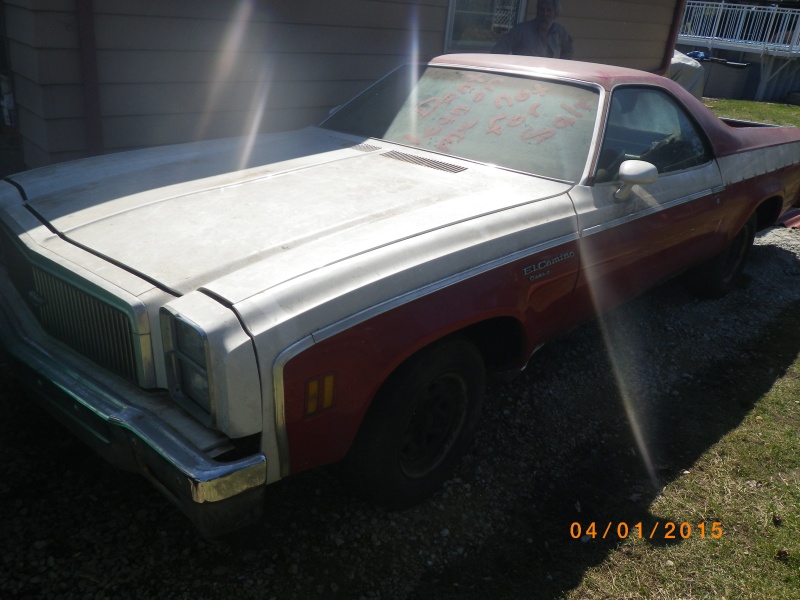
havent done too much yet, waiting on weather and time. but I'm planning on painting it myself, 2 tone, antique white and dark green metallic.
white whats white and green whats red not picture of actual stage, just a visual aid.
does anyone have suggestions of paint brand and type to go with keeping in mind Im not a professional painter but good at learning things.
white whats white and green whats red not picture of actual stage, just a visual aid.

does anyone have suggestions of paint brand and type to go with keeping in mind Im not a professional painter but good at learning things.

riddick75- G3GM Member

- Street Cred : 6
 Re: 75 el camino project.
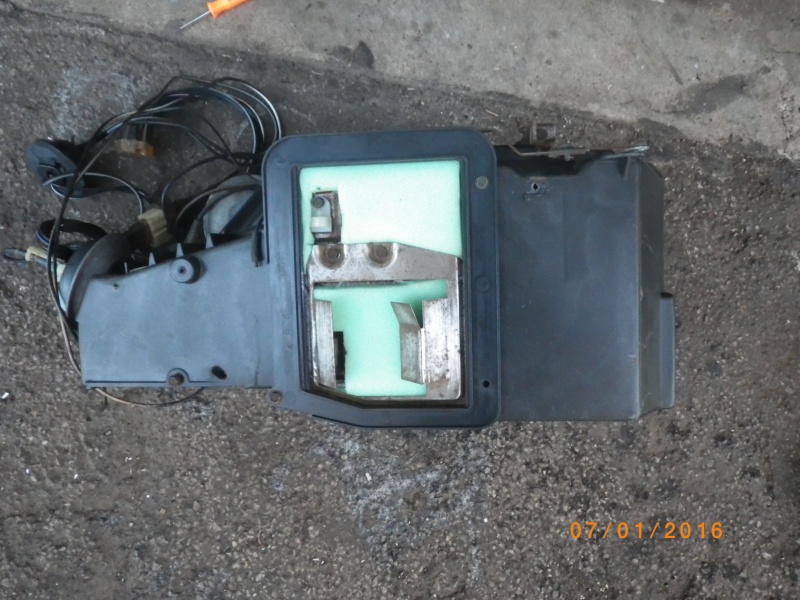
ok got some done nothing big unfortunately, got the heater box cleaned and rebuilt with new foam from joann fabrics,

removed the front windshield that nwas cracked and made it cracked more, took out the rear window in one piece no problem
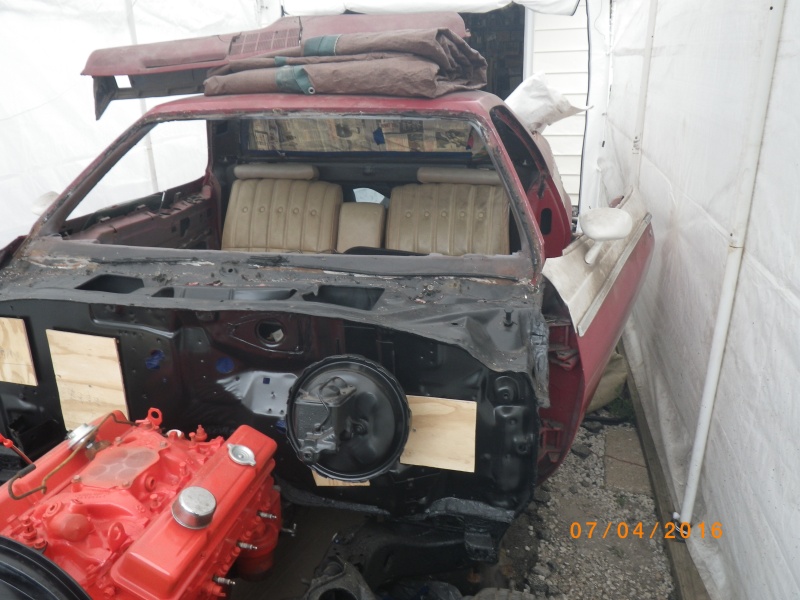
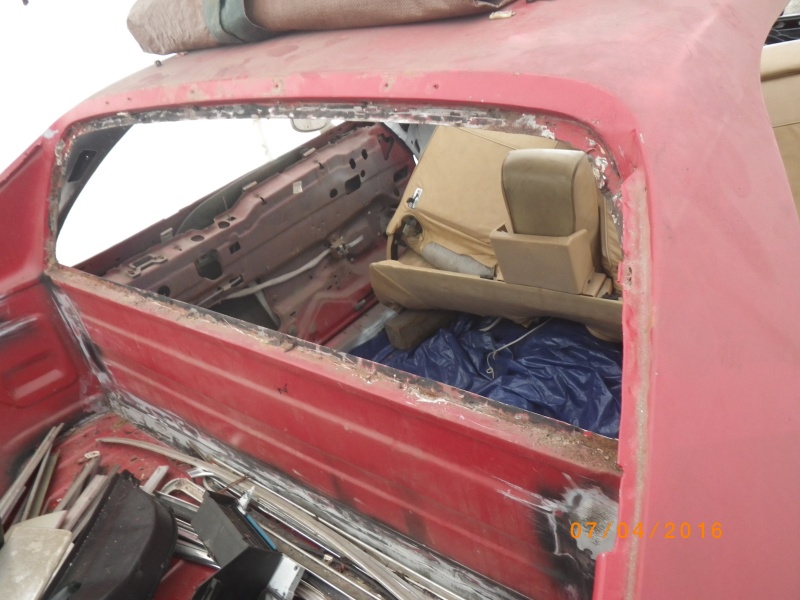
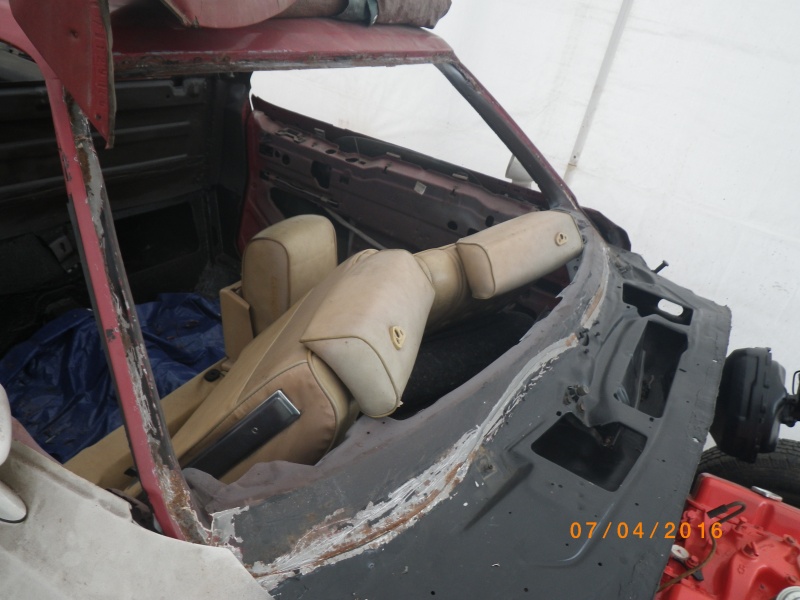
so next step is clean the surface, smooth it out with some body caulk and paint it. unless someone has a better method and steps to get ready for the glass to go back in. advice on what has worked from paint to window install is much appreciated.


removed the front windshield that nwas cracked and made it cracked more, took out the rear window in one piece no problem


so next step is clean the surface, smooth it out with some body caulk and paint it. unless someone has a better method and steps to get ready for the glass to go back in. advice on what has worked from paint to window install is much appreciated.

riddick75- G3GM Member

- Street Cred : 6
 Re: 75 el camino project.
Get ready for the big Urethane caulk vs Butyl Tape debate for installing the glass. Not to mention proper primers to make them stick. I've read dozens upon dozens of threads from other forums on this subject and it'll leave you scratching your head as to which way to go with it.
I'll be replacing the leaky back window seal on my Laguna and have decided I'll try the 3M Butyl tape with CRL 1106 Butyl Primer. Then, CRL 7711 Butyl Sealant around the edges of the glass and tape once it's seated in the pinchweld.
I'll be replacing the leaky back window seal on my Laguna and have decided I'll try the 3M Butyl tape with CRL 1106 Butyl Primer. Then, CRL 7711 Butyl Sealant around the edges of the glass and tape once it's seated in the pinchweld.
Mcarlo77- Donating Member

- Street Cred : 78
 Re: 75 el camino project.
Mcarlo77 wrote:Get ready for the big Urethane caulk vs Butyl Tape debate for installing the glass. Not to mention proper primers to make them stick. I've read dozens upon dozens of threads from other forums on this subject and it'll leave you scratching your head as to which way to go with it.
I'll be replacing the leaky back window seal on my Laguna and have decided I'll try the 3M Butyl tape with CRL 1106 Butyl Primer. Then, CRL 7711 Butyl Sealant around the edges of the glass and tape once it's seated in the pinchweld.
ok so either way I go im sure the pinch weld should be prepped all the same roughly, like at the weld lines it seemed like there was seam sealer to smooth it out, and I couldn't tell if there was paint under the butyl tape or was it bare metal for best adhesion. and if paint is ok to be under the window how long should I wait for the paint to cure before thinking of putting the windows back?
It seems like the pinch weld might have been worked on by the previous person so Im not sure how they did it originally.
So questions I would like some feed back on:
seam sealer or no?
paint or no?
and if paint how long after paint is layed down to wait for the windows?

riddick75- G3GM Member

- Street Cred : 6
 Re: 75 el camino project.
got a price from just dashes to redo the dash, way more than Im able to afford, thinking of trying their technique and redoing my own dash, might be a little more labor without the vacuum press but Im thinking it can be done. looking into materials now and the cost is definitely more in my budget.

riddick75- G3GM Member

- Street Cred : 6
 Re: 75 el camino project.
Mcarlo77 wrote:Get ready for the big Urethane caulk vs Butyl Tape debate for installing the glass. Not to mention proper primers to make them stick. I've read dozens upon dozens of threads from other forums on this subject and it'll leave you scratching your head as to which way to go with it.
I'll be replacing the leaky back window seal on my Laguna and have decided I'll try the 3M Butyl tape with CRL 1106 Butyl Primer. Then, CRL 7711 Butyl Sealant around the edges of the glass and tape once it's seated in the pinchweld.
when you replace it that way how are you thinking of prepping the pinchweld? like should it be smooth and straight as possible? I ask because when I took out my rear window there is a glob of I think lead sticking out about 1/4 inch on the upper passenger side so Im thinking they previous guy repaired it himself and missed it and Im thinking I should knock that down otherwise I might have issues later.

riddick75- G3GM Member

- Street Cred : 6
 Re: 75 el camino project.
I'm thinking with butyl tape, it should be as smooth and straight as possible. Urethane caulk would conceivably be more forgiving as it would be self-leveling. However, having a 1/4" mound would be of concern to me. I measured the height of the original glass from the bottom of the pinchweld on a salvage car in the junkyard and it was 1/2". Glass measures 1/4" thk...so, that 1/4" mound of lead wouldn't leave any room for adhesive without interfering with how the stainless molding would sit against the glass. Then again, this is the rear window on a coupe...not, the back glass on an Elkie. Not sure they sit the same.

Mcarlo77- Donating Member

- Street Cred : 78
 Re: 75 el camino project.
Mcarlo77 wrote:I'm thinking with butyl tape, it should be as smooth and straight as possible. Urethane caulk would conceivably be more forgiving as it would be self-leveling. However, having a 1/4" mound would be of concern to me. I measured the height of the original glass from the bottom of the pinchweld on a salvage car in the junkyard and it was 1/2". Glass measures 1/4" thk...so, that 1/4" mound of lead wouldn't leave any room for adhesive without interfering with how the stainless molding would sit against the glass. Then again, this is the rear window on a coupe...not, the back glass on an Elkie. Not sure they sit the same.
Initially I thought it was there for spacing but i would have figured it would be on both sides if that were the case, and looking at it now It could a source of a leak. and after calling safelite they said anything older than 1980 they wont do. they say that the availability of the glass is harder and they dont do just labor jobs even if i would have both pieces of glass. so now Im learning as much as I can about installing the glass myself because that seems like its the only way it will get done.

riddick75- G3GM Member

- Street Cred : 6
 Re: 75 el camino project.
got the front and side jams prepped, driver roof had a hole near the seam so that got filled
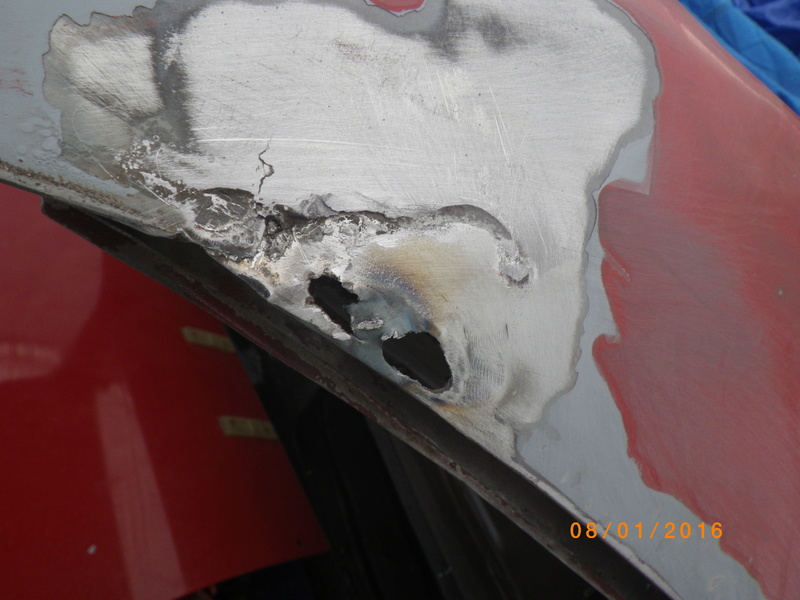
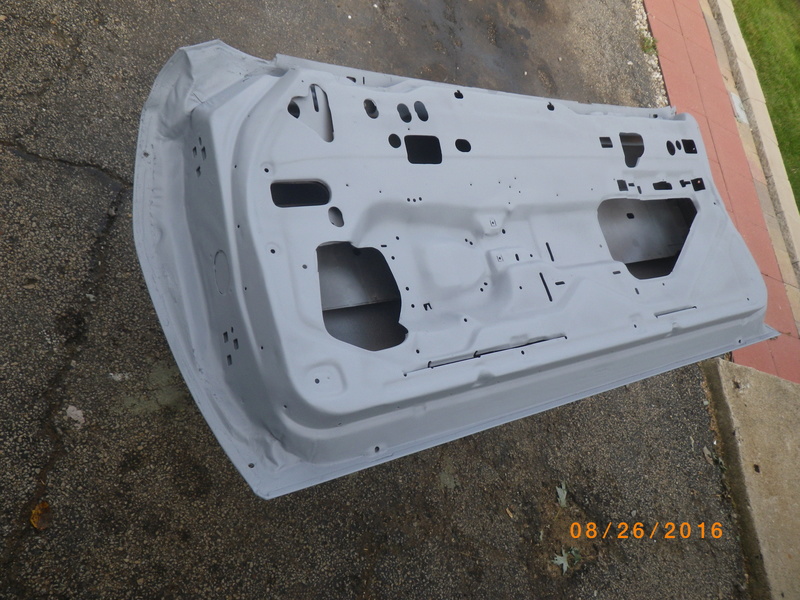
door jams and front window primed and inside of door primed

tore down cleaned and painted green (was red) steering column


door jams and front window primed and inside of door primed


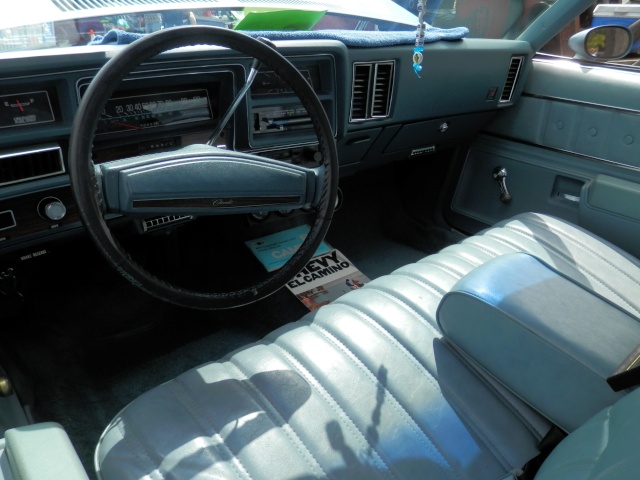
tore down cleaned and painted green (was red) steering column


riddick75- G3GM Member

- Street Cred : 6
 Re: 75 el camino project.
Great progress so far. I was reading thru your thread about glass install. The rear window can be installed with butyl the rear pinchweld should be painted. No primer is needed for butyl if it's over paint. The front windshield I would always urethane in. Epoxy sealer, run masking tape where you want the urethane to be then seam sealer then primer, then color. Remove the masking tape (3/4") then apply the urethane primer, then apply the urethane. Cut the tip so it forms a V that way when you're squeezing out the urethane it'll form an A shaped bead, roughly 1/2" wide at the bottom and about 1" tall tapered to 1/4 or less at the top. A 1/2" wide bead is all you need!! People make that so damn wide sometimes! Start at a top corner, run a continuous bead don't stop if you do make sure to blend into where you stopped by mixing the next bead into the previous one. Get urethane that doesn't need to be heated it'll squeeze out easier out of a calling gun. The glass guts have a gun that heats the tube, makes it more flowable. They do have easy squeeze tunes from 3m. There's no reason for using butyl on a front windshield anymore. It'll most likely leak down the road, plus it's not safe. I'm sure you can find an independent glass installer who would do the glass in your elco. The major chains don't want to have anything to do with the older stuff, mostly cause of rust in the channel, that'll cause leaks, be unsafe.
chevellelaguna- G3GM Enthusiast

- Street Cred : 16
Page 4 of 11 •  1, 2, 3, 4, 5 ... 9, 10, 11
 Similar topics
» '74 El Camino "Project Badass"
» MY DAILY DRIVER/PROJECT 73 EL CAMINO SS
» Classic Car Restoration Club: 1977 El Camino Project Car-Overview
» MY DAILY DRIVER/PROJECT 73 EL CAMINO SS
» Classic Car Restoration Club: 1977 El Camino Project Car-Overview
G3GM :: Media :: G3 Project Pictures
Page 4 of 11
Permissions in this forum:
You cannot reply to topics in this forum|
|
|




» Roll Call and Car showcase
» Central Texas Noob
» Welcome Keith Seymore
» Wanted: Front park lamp assemblies
» 75 Hurst Olds T-tpos
» G3 Chevy rims- help ID these
» 75 el camino project.
» Have had a few questions
» vinyl top removal