1977 Chevelle Malibu Classic Progress Photo's aka Mali
+40
pila
dynchel
Mcarlo77
Joe73
driveit
Hawk03
Fishgrinder
1973 454 MONTE
bracketchev1221
Limey SE
chevellelaguna
1973montec
Bruisr
bigredlaguna
jerry46765
BicknellWelding
geoff528
2fat2fly
Jim_Rockford
DiscoMalibu
Brainstain
Laguna Budman
Dubie
74MonteCarlo
JB2wheeler
WyldeBill66
Wallyuph
dragons_lair59
77ElClassic
Dead Man
Graham Perkins
jrb75
chromereverse
Checyxtc
74Guna
texan01
abajc3
JiMi_DRiX
orange Juiced
HDHugger
44 posters
G3GM :: Media :: G3 Project Pictures
Page 17 of 27
Page 17 of 27 •  1 ... 10 ... 16, 17, 18 ... 22 ... 27
 Re: 1977 Chevelle Malibu Classic Progress Photo's aka Mali
I bought a new breather & another one w/ built in PCV. They were cheap enough. The covers on it now are new- just need final clean up & paint but thanks.
As far as the clearance goes, it'll be a while before it goes back in the car but I'll watch for it. Thanks for the heads up. I think I'll be ok, seem to remember there was enough room. The bottom half of the clamshell will be on the car & the top will be installed on the engine block...in theory I should be able to mate them & just put the big bolt in after it's set in place. I'm hoping to be able to have the trans on there also & get it in in one shot. I have an engine balancer I plan to use.
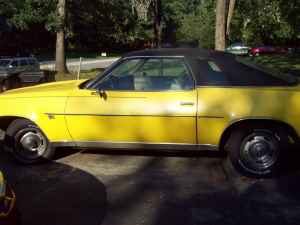
Found the old craigslist ad pics from b4 the car was bought today...lol


77mali- Donating Member

- Street Cred : 62
 Re: 1977 Chevelle Malibu Classic Progress Photo's aka Mali
Got the test stand almost done. If it wasn't for the mini blizzard it would have been. Will edit in pics tomorrow
( Didn't take any today )
)
Any way- still need to finish it off tomorrow & then hopefully by next weekend I'll be pretty much done with all the associated "little crap" & can fire it up.

The stand is more like a sled, LOL. I have the engine cradle fastened down with 1/2" x 3-1/2" coarse lag bolts. Using a combo of various length coarse screws & such, plus added some stud type reinforcing at stractegic points & some other bracing too. Should be fine- just got to remember to get a good sized extinguisher just to be safe.
( Didn't take any today
Any way- still need to finish it off tomorrow & then hopefully by next weekend I'll be pretty much done with all the associated "little crap" & can fire it up.
The stand is more like a sled, LOL. I have the engine cradle fastened down with 1/2" x 3-1/2" coarse lag bolts. Using a combo of various length coarse screws & such, plus added some stud type reinforcing at stractegic points & some other bracing too. Should be fine- just got to remember to get a good sized extinguisher just to be safe.

77mali- Donating Member

- Street Cred : 62

dynchel- Donating Member

- Street Cred : 40
 Re: 1977 Chevelle Malibu Classic Progress Photo's aka Mali
Be careful.....
pila- Donating Member

- Street Cred : 43
 Re: 1977 Chevelle Malibu Classic Progress Photo's aka Mali
I'll edit pics in previous post tomorrow. Thanks guys. 
Don't worry Bill- it's pretty darn solid. Has the lag bolts & almost an entire box of screws. It won't tip over ( & I'm adding heat shields too). Plus, I'm 99.2 % it won't leak anything either

Don't worry Bill- it's pretty darn solid. Has the lag bolts & almost an entire box of screws. It won't tip over ( & I'm adding heat shields too). Plus, I'm 99.2 % it won't leak anything either

77mali- Donating Member

- Street Cred : 62
 Re: 1977 Chevelle Malibu Classic Progress Photo's aka Mali
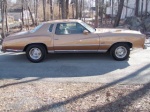
Paul,you should have contacted me about the valve covers,I had it out with mine, I ended up using one GM one and one china one . Painted them orange and done but yeah the gasket wouldnt stay on mine either. The breather hole is smaller on the GM one so I used the China one for that side since the breather with smaller hole was defective and caused me some greif and got tossed.I think it landed in the neighbors yard.
ant7377- G3GM Addict

- Street Cred : 36
 Re: 1977 Chevelle Malibu Classic Progress Photo's aka Mali
I like them, I just didn't check for the hole sizes 
I was no biggie- Spectrum makes the larger breathers & they have a breather w/ a built in PCV for the opposite side. They have an adapter kit also for the little plastic plugs they slide into on the covers. About $15-20 for everything at Autozone.
The stupid lip on the valve covers were a PITA w/ the gaskets sliding off but they met their match with the Ultra Black gasket sealant.
I'll get you the P/N's if you want, they're in my workshop, if you're going to hop the fence to retrieve it...LOL

77mali- Donating Member

- Street Cred : 62
 Re: 1977 Chevelle Malibu Classic Progress Photo's aka Mali
You know the thing was actually defective.THe damn dipstick came up and i though I broke a ring or something with all the blowby but it was because air couldnt come up through it it was crimped wrong. Its fine the way I have it Im going to leave it.

ant7377- G3GM Addict

- Street Cred : 36
 Re: 1977 Chevelle Malibu Classic Progress Photo's aka Mali
I have tried those PVC breathers from auto zone (two different times to be exact) and they didn't work well for me. The one time i was leaving for work and the engine started smoking, upon inspection i found oil was blowing right past the breather and pooling (and burning off the valve cover& exhaust). I installed a standard PVC right in the valve cover, the way Chevy did it, and never had another problem. I definitely looked better with the breather. Just my two cents. 

dynchel- Donating Member

- Street Cred : 40
 Re: 1977 Chevelle Malibu Classic Progress Photo's aka Mali
If that happens, I still have the regular style PCV. I'll be able to tell right away. They are not the best quality. A company on ebay sells billet style breathers & PCV's w/ housings you can take apart to clean the breather element & remove & replace the PCV unit for about $18 ea. I'm going that route once the motor is back in the car.

77mali- Donating Member

- Street Cred : 62
 Re: 1977 Chevelle Malibu Classic Progress Photo's aka Mali
THe other thing you can do instead of a breather is put a little tube to the bottom of the air cleaner assembly (stock style),there is usually a knockout on the base to install a barbed fitting. Then put a PCV on the other side of the motor to the carb.

ant7377- G3GM Addict

- Street Cred : 36
 Re: 1977 Chevelle Malibu Classic Progress Photo's aka Mali
Still have a few fasteners to install but this is pretty much it, less heat shields but I have to install exh manifolds 1st. I should add that as an extra measure of safety, the engine crane will also be thrown in the mix just in case. The cranes legs will also be used as a base for the radiator to sit on via 2 small self drilling screws.
4) 1/2" x 3-1/2" coarse lag bolts with lock washers are the primary point of attachment to the "stand/sled/whatever this is"
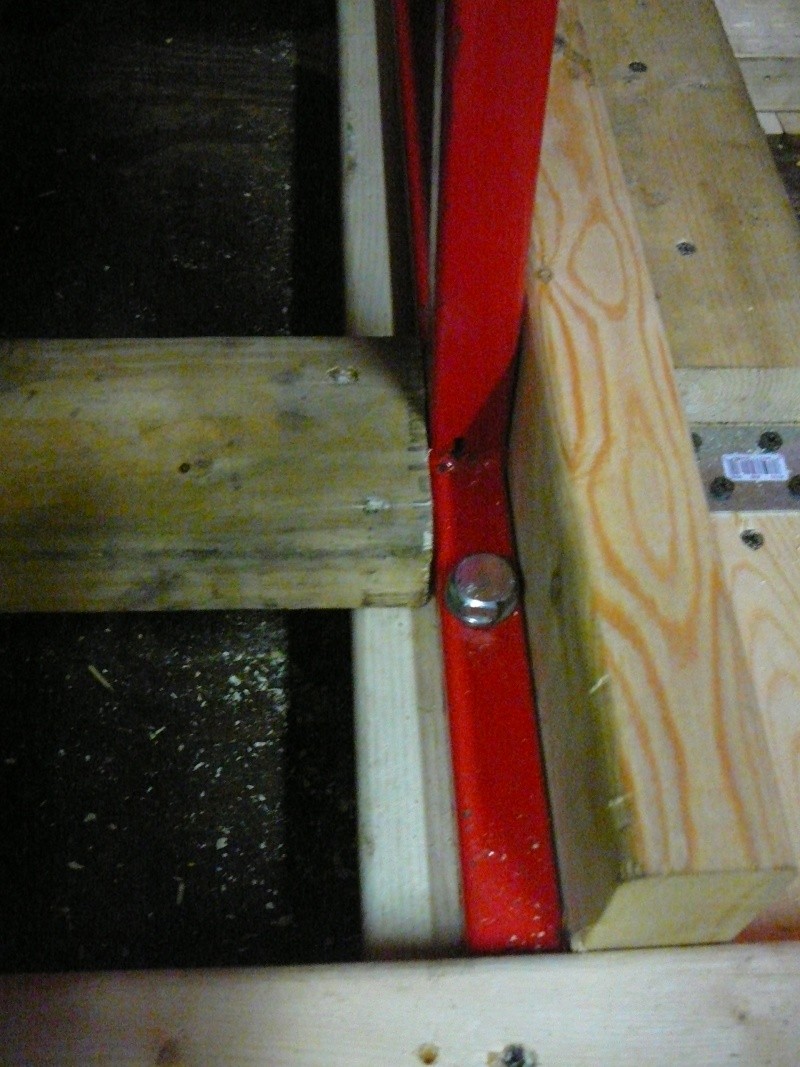
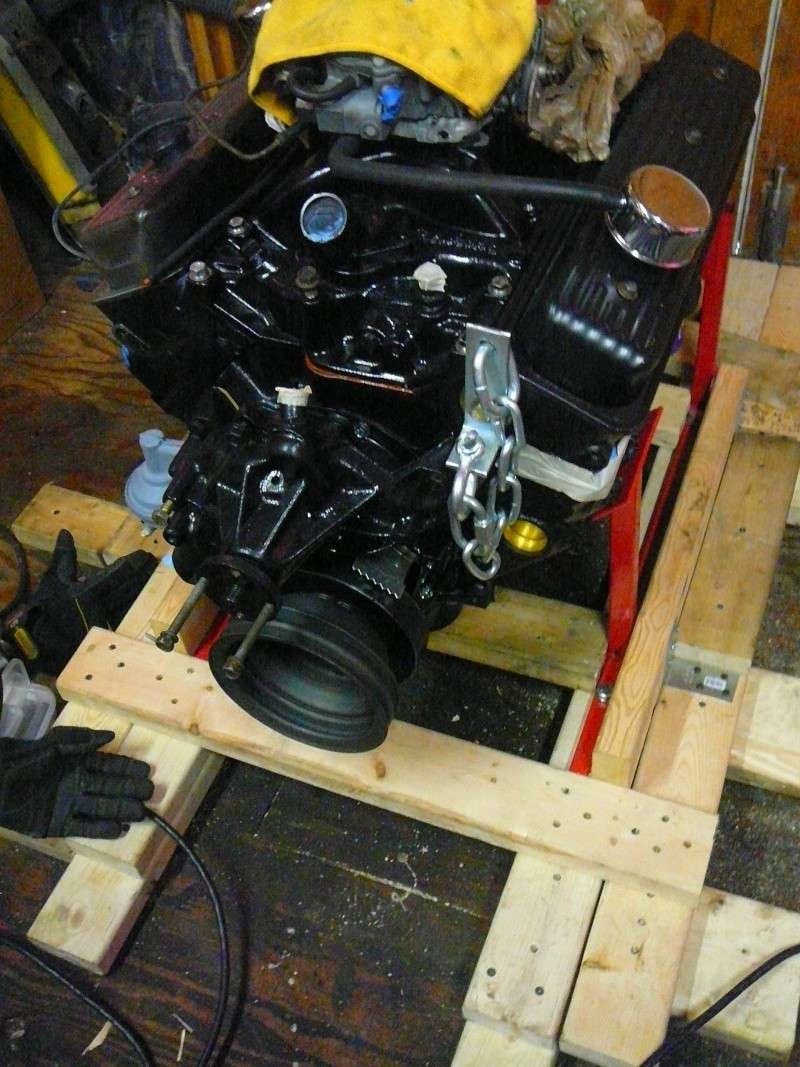
The little "step shelf" in the middle here is for reinforcing as well as a place to secure the battery & tray

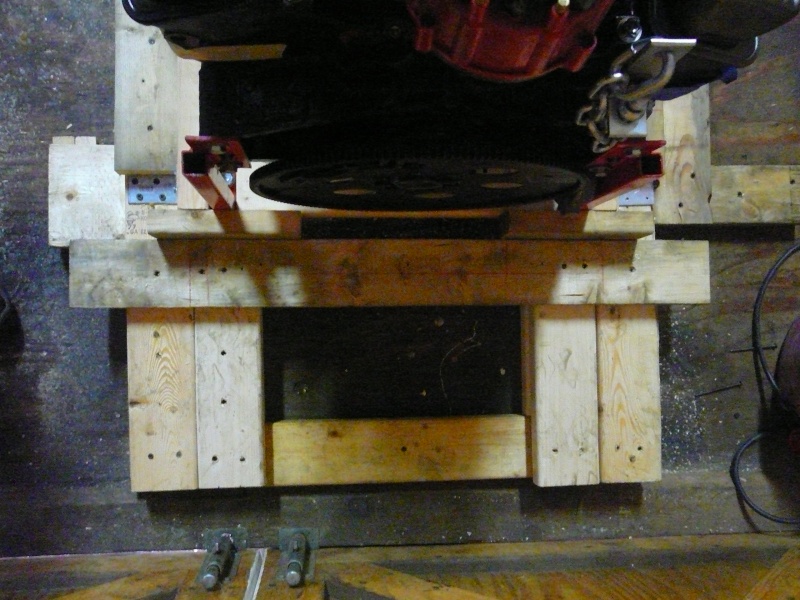
Rear view, center piece @ the bottom here will get 4 more screws to fasten to subfloor
4) 1/2" x 3-1/2" coarse lag bolts with lock washers are the primary point of attachment to the "stand/sled/whatever this is"


The little "step shelf" in the middle here is for reinforcing as well as a place to secure the battery & tray

Rear view, center piece @ the bottom here will get 4 more screws to fasten to subfloor


77mali- Donating Member

- Street Cred : 62
 Re: 1977 Chevelle Malibu Classic Progress Photo's aka Mali
Well, I'm going to pass on heat shields. A bit unconventional but this way the heats not a problem on the wood. 
I have some reducers for the collectors & will clamp on some pipe also in order for the exhaust to flow out of the workshop better.

I have some reducers for the collectors & will clamp on some pipe also in order for the exhaust to flow out of the workshop better.


77mali- Donating Member

- Street Cred : 62
 Re: 1977 Chevelle Malibu Classic Progress Photo's aka Mali
i thought you were building a malibu. not a speed boat....
1973 454 MONTE- Donating Member

- Street Cred : 36
 Re: 1977 Chevelle Malibu Classic Progress Photo's aka Mali
LOL! That remains to be seen.
Mercruisers are Chevy's after all
& That's totally where I got the idea.
Mercruisers are Chevy's after all
& That's totally where I got the idea.

77mali- Donating Member

- Street Cred : 62
 Re: 1977 Chevelle Malibu Classic Progress Photo's aka Mali
Actually there were some years that Mercruiser used the blue oval small blocks too, like way back in the 70s or 80s.
My boat has a 327 Chevy, Flagship conversion.
So,.... you are just about ready to do the break-in ?? Not to insult you, but I suppose you know that you need at least a half hour break-in at 2000 + RPM, and ZERO idling......or do you have a roller cam ?? I don't remember, since I have CRS......
My boat has a 327 Chevy, Flagship conversion.
So,.... you are just about ready to do the break-in ?? Not to insult you, but I suppose you know that you need at least a half hour break-in at 2000 + RPM, and ZERO idling......or do you have a roller cam ?? I don't remember, since I have CRS......
pila- Donating Member

- Street Cred : 43
 Re: 1977 Chevelle Malibu Classic Progress Photo's aka Mali
I'm getting there & yes. Let's leave the blue oval out, hose were dark days for Mercruiser. 
I just sprung for a new alternator yesterday it was difficult to find one with the correct clocking but NAPA came through for me. Need to get wiring, test gauges & tach wired up & maybe a new battery too but hopefully this weekend sometime.
By the way- I had idiot lights and there was a small brass manifold behind the intake that had a connector but I had him plug it as the car will now have a real pressure gauge. There is a hole on the block by the filter (not the one just above it on the housing but a little left of it). I'm assuming that this is a good spot to put the oil pressure sender as it was left uncovered by the builder. Is that the correct spot for it?

77mali- Donating Member

- Street Cred : 62
 Re: 1977 Chevelle Malibu Classic Progress Photo's aka Mali
I'm not sure about that particular hole. The one directly above the filter was used for oil pressure on the late 80s engines.
About the alternator, it can be clocked to where ever you want it, by removing the 4 case screws, loosen the case halves just slightly from each other, and turn the back half to where you need it to be. By splitting the case halves just about 1/16 ", the brushes wont slide off of the slip rings while the back half is turned. The core of the stator winding has to stay with the front half when splitting the case halves, since the internal wiring has to stay in position.
I have two alternators that I rebuilt as spares, the 63 amp type.
As far as idiot lights are concerned, I keep them hooked up even with gauges, since they do get more immediate attention, more than a gauge reading.
pila- Donating Member

- Street Cred : 43
 Re: 1977 Chevelle Malibu Classic Progress Photo's aka Mali
you can clock your own alt.
all you need is time and a toothpick.
good luck with the fire up.
all you need is time and a toothpick.
good luck with the fire up.

1973 454 MONTE- Donating Member

- Street Cred : 36
 Re: 1977 Chevelle Malibu Classic Progress Photo's aka Mali
I got the Alt yesterday already, I'm not that patient. LOL
I'll call the builder regarding location of the pressure sensor. Makes sense to me that it would be above the filter. Maybe they just closed off the wrong hole?
Thanks fellas. (Fingers crossed)
I'll call the builder regarding location of the pressure sensor. Makes sense to me that it would be above the filter. Maybe they just closed off the wrong hole?
Thanks fellas. (Fingers crossed)

77mali- Donating Member

- Street Cred : 62
 Re: 1977 Chevelle Malibu Classic Progress Photo's aka Mali
Flat tappet or roller ?? If it's flat tappet, it's gonna be quite noisy in your garage for about half an hour !! 
pila- Donating Member

- Street Cred : 43
 Re: 1977 Chevelle Malibu Classic Progress Photo's aka Mali
I have Comp Cams magnum "roller" tappets. I have hearing protectors too. 
This was last years head swap (with the old cam) before I pulled the motor after discovering the oil leak. It's only about 15 seconds but it was loud as heck w/ no mufflers (Turn it up):
https://www.youtube.com/watch?v=emp5DuaeDdw
This was last years head swap (with the old cam) before I pulled the motor after discovering the oil leak. It's only about 15 seconds but it was loud as heck w/ no mufflers (Turn it up):
https://www.youtube.com/watch?v=emp5DuaeDdw
Last edited by 77mali on Thu Aug 15, 2013 6:01 pm; edited 1 time in total

77mali- Donating Member

- Street Cred : 62
 Fire not in the hole
This weekend was a dud. Turns out I need to snag or fab a spacer for between the Alt & cylinder head on the back side where the long bolt goes- otherwise it'll be crooked. I should have caught that one. Also turns out I need a new battery too as the old one won't recharge past 40% & that won't give me enough to crank the motor. I think I need to recharge my-self & take a break from the car for a few days.


77mali- Donating Member

- Street Cred : 62
 Re: 1977 Chevelle Malibu Classic Progress Photo's aka Mali
Glad to hear you have roller tappets ! That spacer behind the alternator is one like I lost once, and had to make one !
And I know very well about needing a re-charge for yourself !
And I know very well about needing a re-charge for yourself !
pila- Donating Member

- Street Cred : 43
 Re: 1977 Chevelle Malibu Classic Progress Photo's aka Mali
Looky what I found with the steering pump stuff...I have no idea who put the spacer bracket with those items...  (Son of a *&^%!)
Man I really had a brain spasm. I new something was up...I'm looking at the Alt going...WTH is this ??
?? 
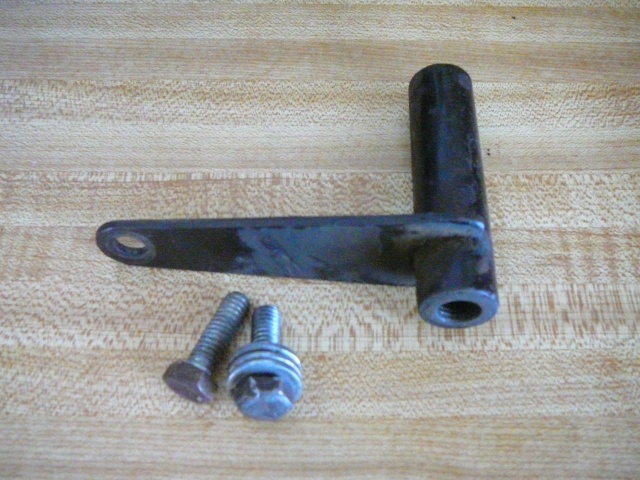
Man I really had a brain spasm. I new something was up...I'm looking at the Alt going...WTH is this
 ??
?? 

77mali- Donating Member

- Street Cred : 62
Page 17 of 27 •  1 ... 10 ... 16, 17, 18 ... 22 ... 27
 Similar topics
» Clunkers and Classic YouTube build 1977 Malibu Classic
» '77 Chevelle Malibu Classic - Disco Malibu
» 74 Chevelle Malibu Classic 454 with a 4-speed
» '77 Chevelle Malibu Classic - Disco Malibu
» 74 Chevelle Malibu Classic 454 with a 4-speed
G3GM :: Media :: G3 Project Pictures
Page 17 of 27
Permissions in this forum:
You cannot reply to topics in this forum|
|
|


» Roll Call and Car showcase
» Central Texas Noob
» Welcome Keith Seymore
» Wanted: Front park lamp assemblies
» 75 Hurst Olds T-tpos
» G3 Chevy rims- help ID these
» 75 el camino project.
» Have had a few questions
» vinyl top removal