1977 Chevelle Malibu Classic Progress Photo's aka Mali
+40
pila
dynchel
Mcarlo77
Joe73
driveit
Hawk03
Fishgrinder
1973 454 MONTE
bracketchev1221
Limey SE
chevellelaguna
1973montec
Bruisr
bigredlaguna
jerry46765
BicknellWelding
geoff528
2fat2fly
Jim_Rockford
DiscoMalibu
Brainstain
Laguna Budman
Dubie
74MonteCarlo
JB2wheeler
WyldeBill66
Wallyuph
dragons_lair59
77ElClassic
Dead Man
Graham Perkins
jrb75
chromereverse
Checyxtc
74Guna
texan01
abajc3
JiMi_DRiX
orange Juiced
HDHugger
44 posters
G3GM :: Media :: G3 Project Pictures
Page 1 of 27
Page 1 of 27 • 1, 2, 3 ... 14 ... 27 
 1977 Chevelle Malibu Classic Progress Photo's aka Mali
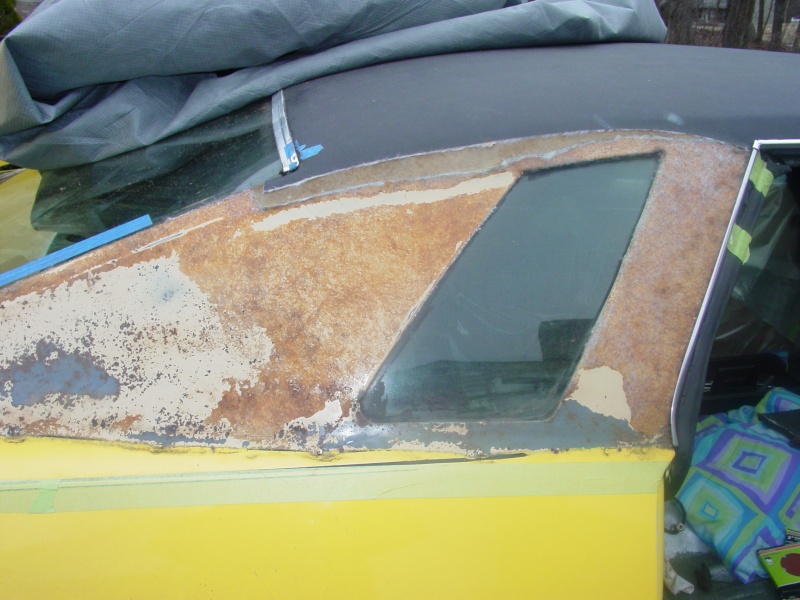
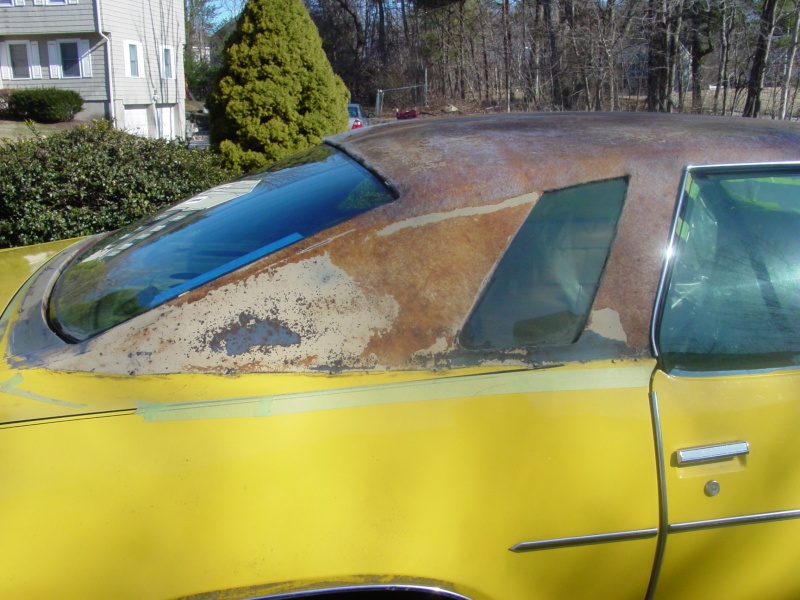
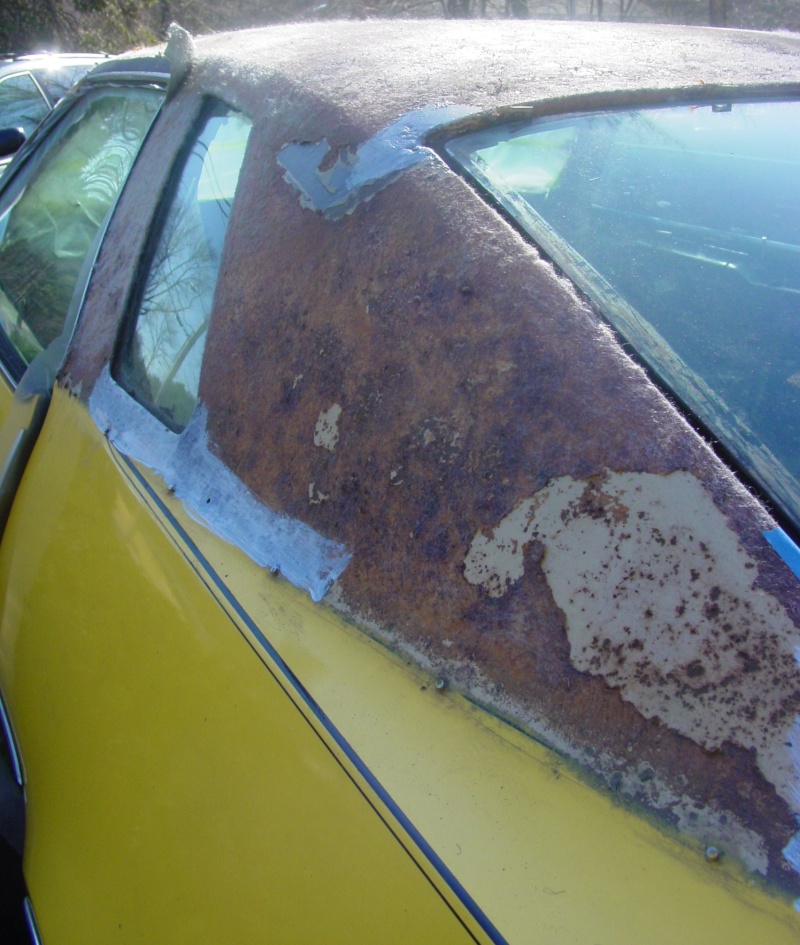
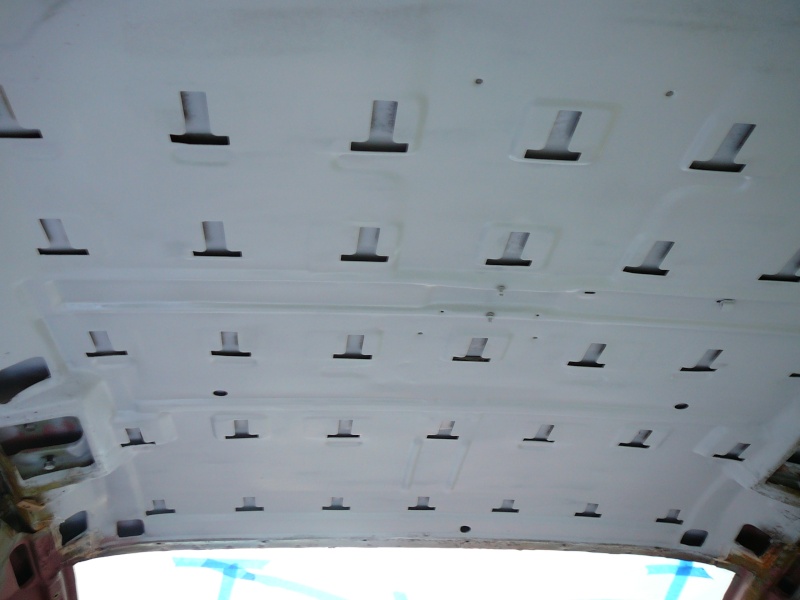
I picked up Mali last November up in NH. Found her on craigslist after hunting for over 2 years on every type of internet site available for classic cars. I new she was the one because she was solid, about 97% complete and most importantly, we could afford her! This project has been not only a reconnect with classic cars (that I've always loved) but restoring a car, to me, is the best therapy money can buy. Everyone needs a hobby to escape the day to day grind and old Mali has given me a chance to step out of my comfort zone and take on a different challenge. I will be posting progress pics here in the future for various things but I wanted to start with one of the first major challenges: Removal of 2 vinyl tops and the subsequent repair and restoration of the roof and surrounding body areas. All in all, I was pretty lucky there was no real "cancer" eating away at her. Another year out in the elements and it might have been a different story. Those studs are all ground down. She will not be getting a new vinyl roof covering.
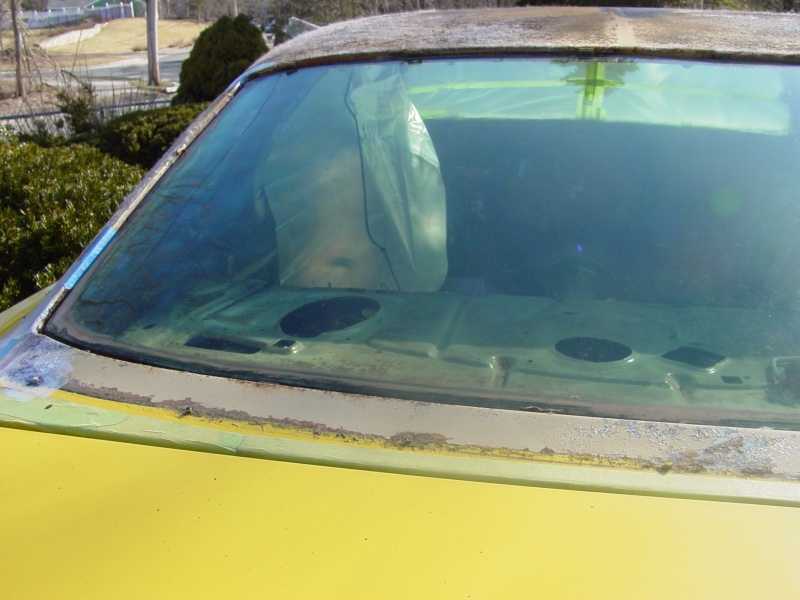
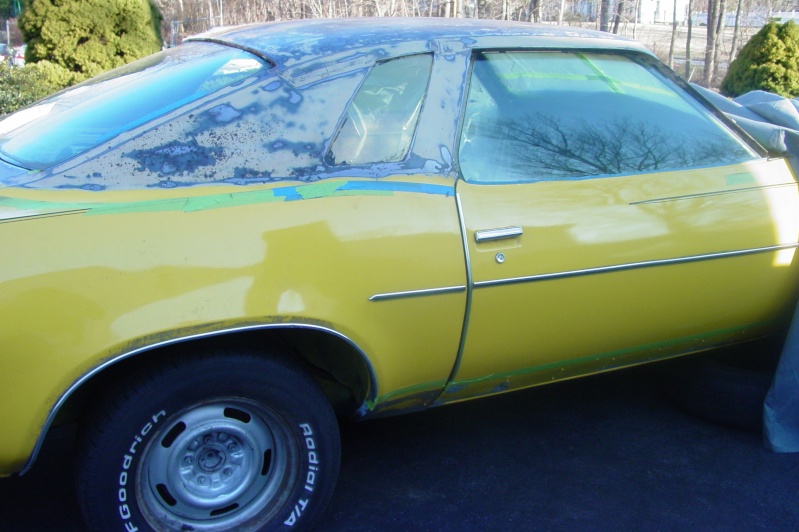
Here you can see the 30+ year old adhesive residue and the two tops. Look close cause the old "saddle" colored one looks like the adhesive!
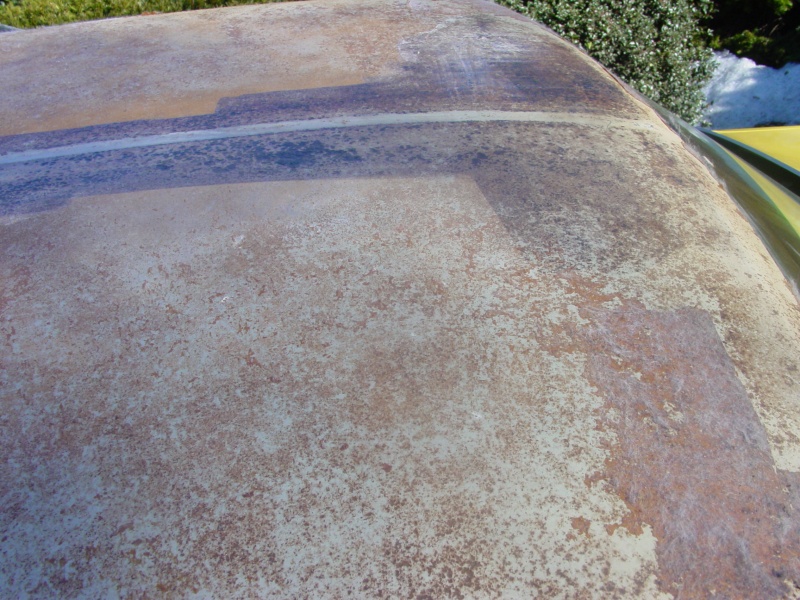
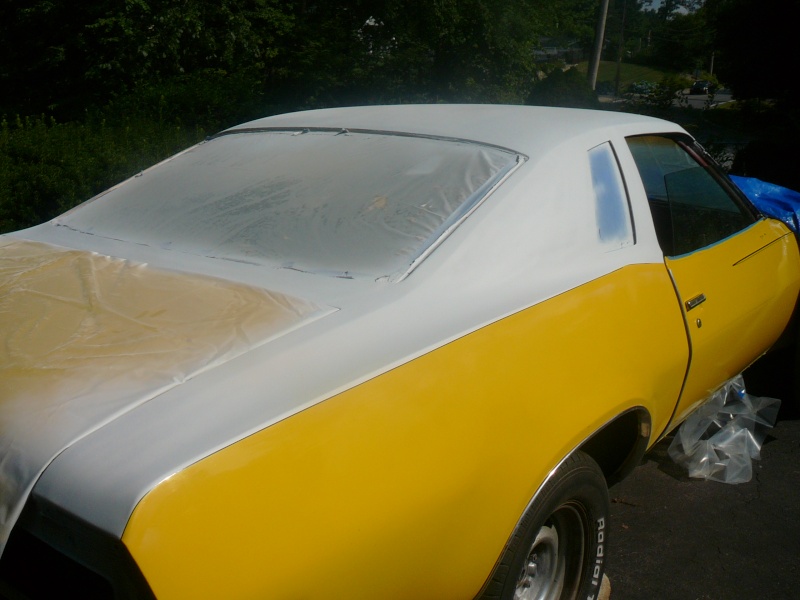
It's funny that the cleanest part of the roof was the center-line where the original top was stitched in the middle and where no adhesive was used!
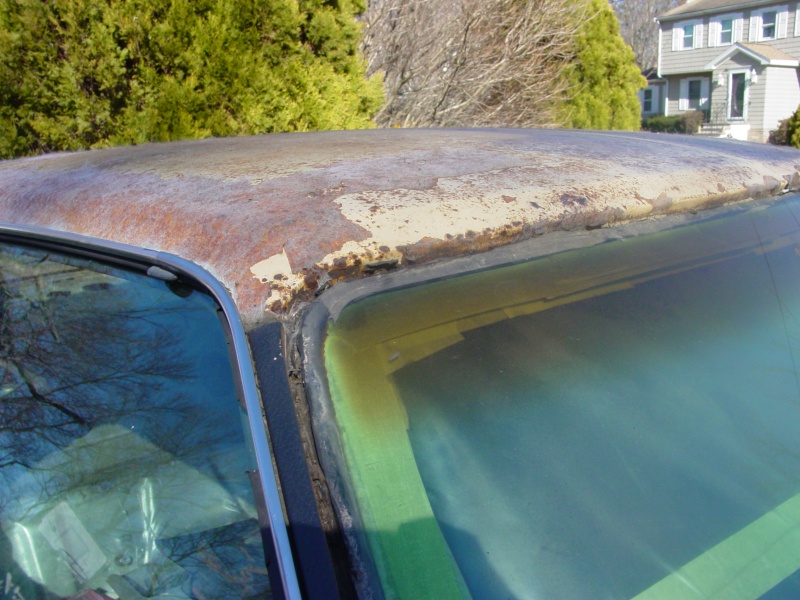

The "After"...1st coat was today...will wet sand and put on another coat of primer (Maybe 2 depending on how the wet sanding goes).
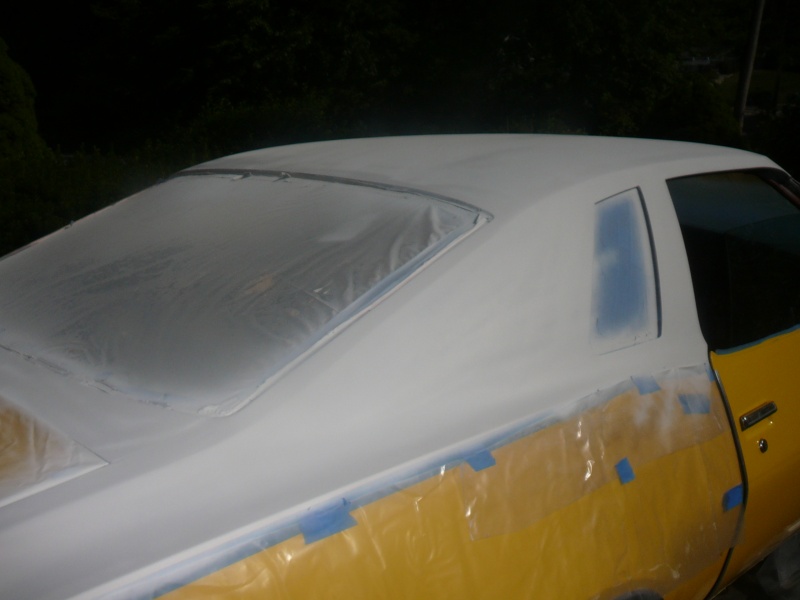
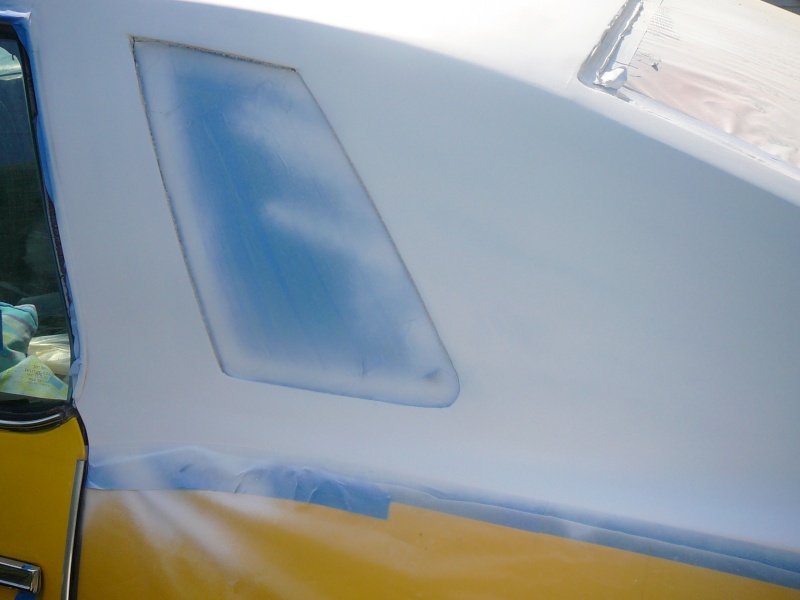
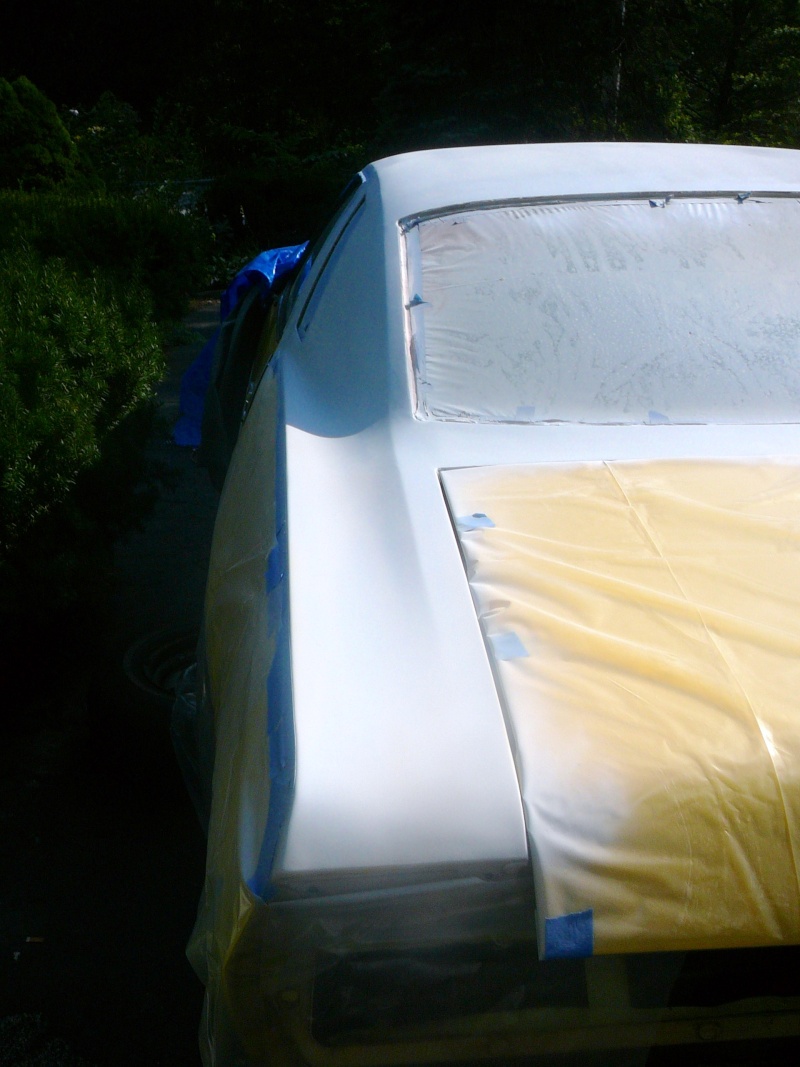

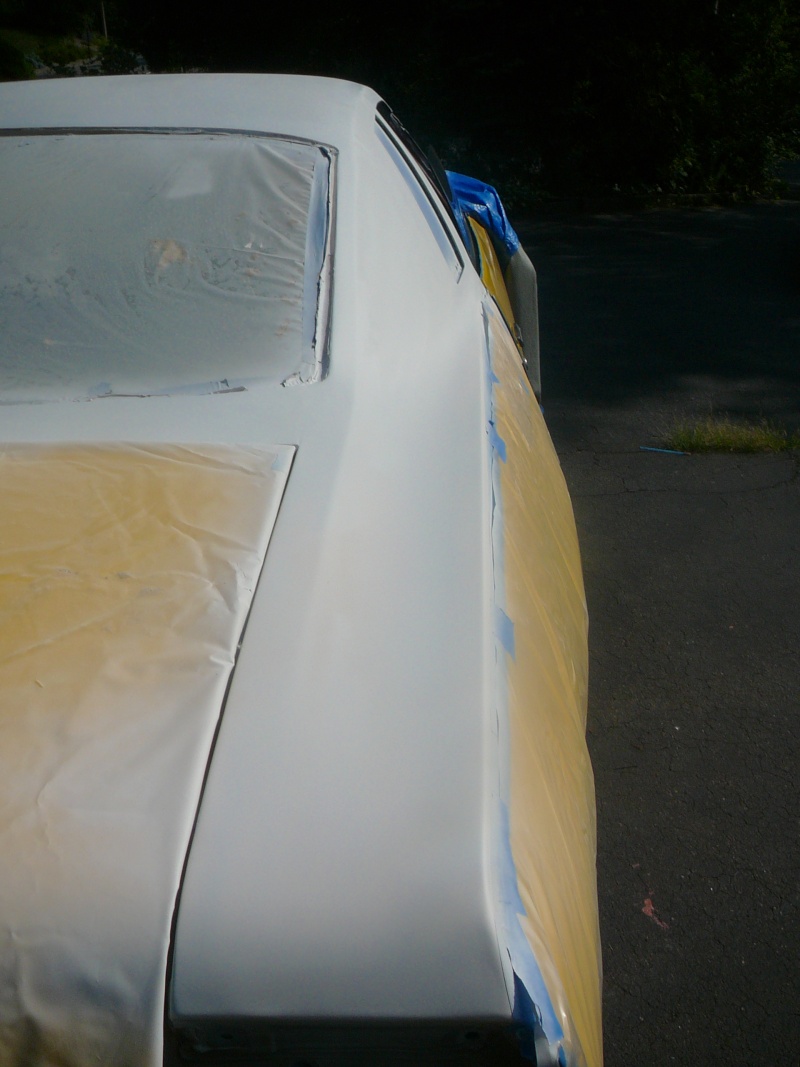
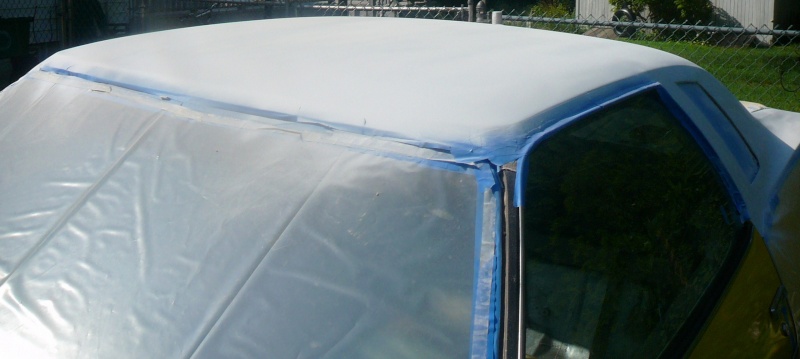
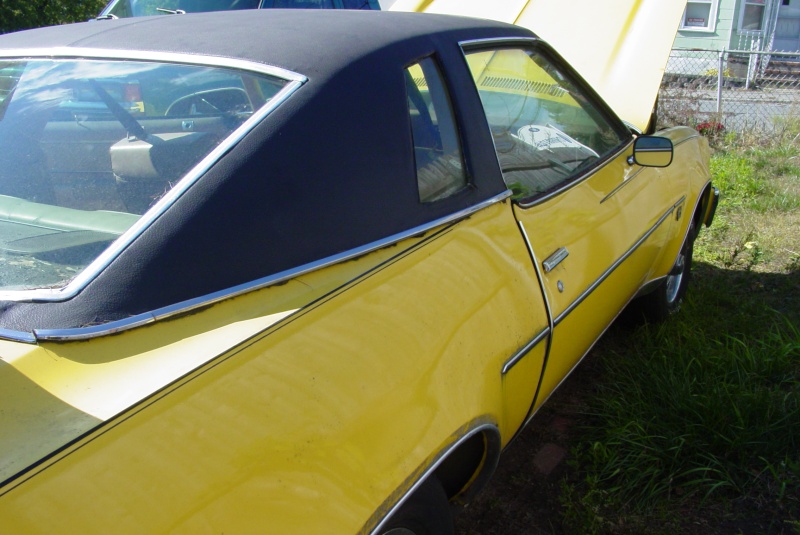
Here you can see the 30+ year old adhesive residue and the two tops. Look close cause the old "saddle" colored one looks like the adhesive!


It's funny that the cleanest part of the roof was the center-line where the original top was stitched in the middle and where no adhesive was used!


The "After"...1st coat was today...will wet sand and put on another coat of primer (Maybe 2 depending on how the wet sanding goes).


Last edited by 77mali on Wed Jul 27, 2011 6:41 pm; edited 3 times in total (Reason for editing : added pic)
77mali- Donating Member

- Street Cred : 62
 Re: 1977 Chevelle Malibu Classic Progress Photo's aka Mali
Keep up the good work. JB

JB2wheeler- G3GM Fanatic

- Street Cred : 28
 Re: 1977 Chevelle Malibu Classic Progress Photo's aka Mali
very nice buddy looks good so far, are you two toning it ??
___________________________________________
1977 Chevelle SE x2
One Mild original
one Wild NON original
Anthony

Limey SE- Management

- Street Cred : 98
 Re: 1977 Chevelle Malibu Classic Progress Photo's aka Mali
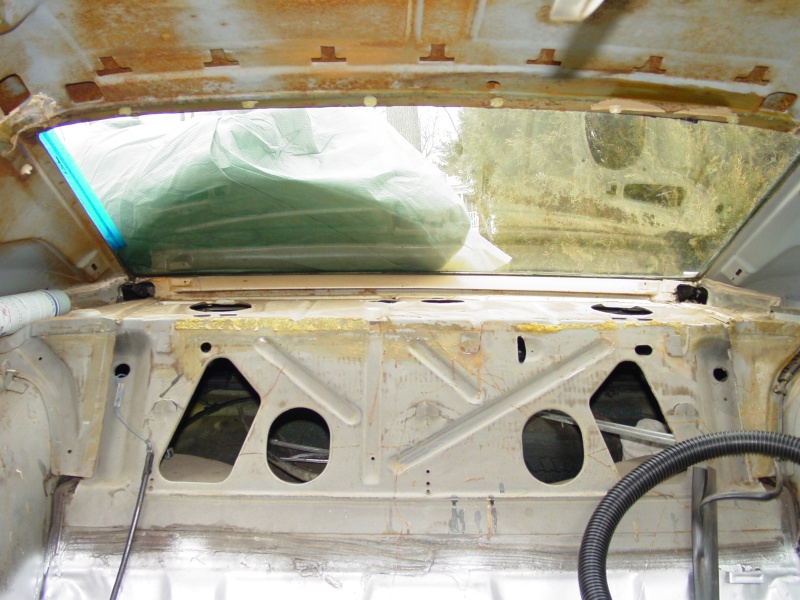
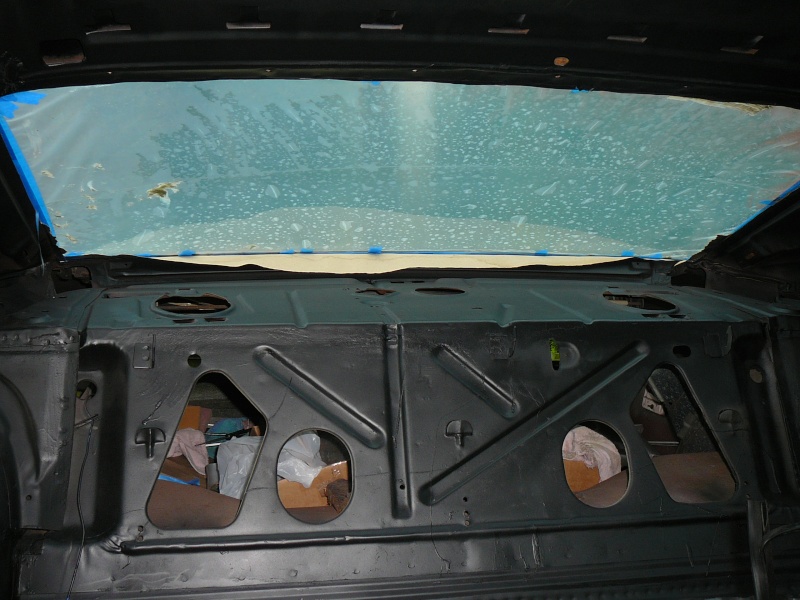
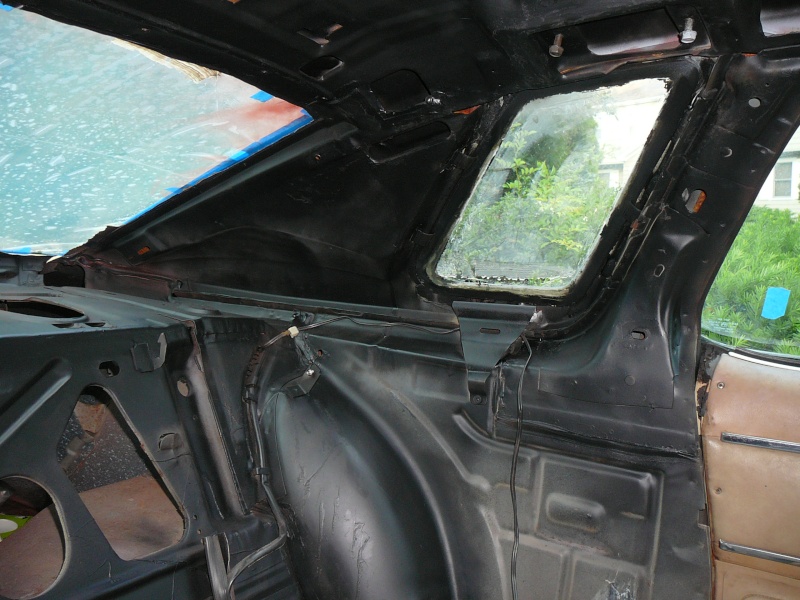
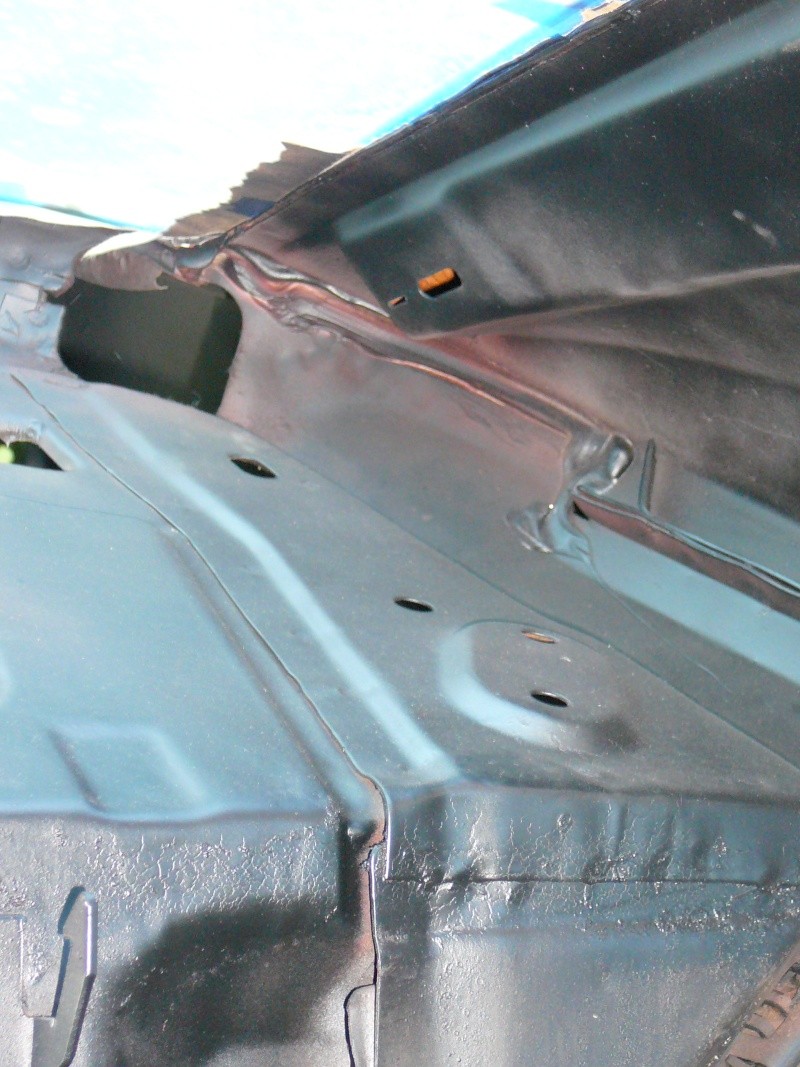
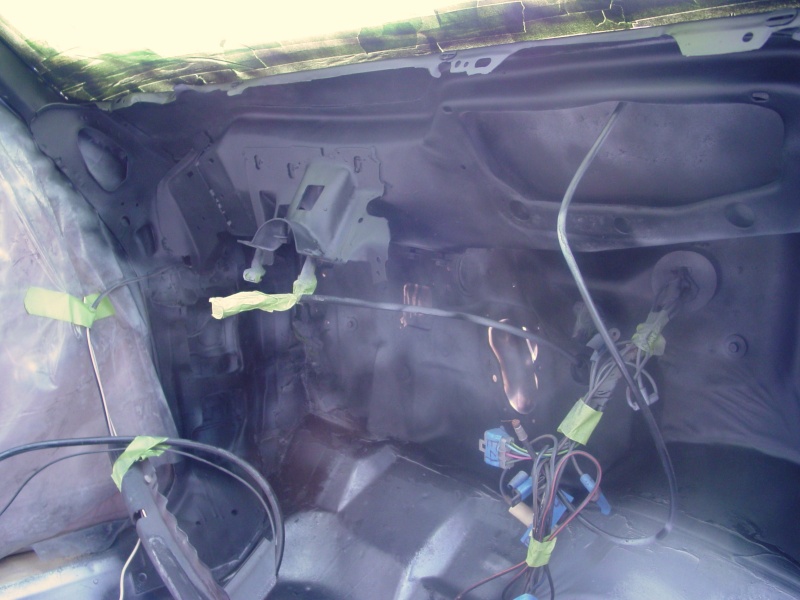
Thanks guys. Not sure of scheme yet...still pondering. Moving right back into the interior now which is another story. I spent the winter doing this to the interior did a boat load of other "little-stuff" too...





77mali- Donating Member

- Street Cred : 62
 Re: 1977 Chevelle Malibu Classic Progress Photo's aka Mali
Looks a lot like my interior during periods of the past 2 summers. I am still hoping to have time to get mine together and drive it some before the snow flies!
HDHugger- G3GM Member

- Street Cred : 6
 Re: 1977 Chevelle Malibu Classic Progress Photo's aka Mali
Looking good, keep it up
orange Juiced- G3GM Enthusiast

- Street Cred : 9
 Re: 1977 Chevelle Malibu Classic Progress Photo's aka Mali
Great log, can't wait to see the progress!
Just a question: Why would you wet sand the primer if you're putting one more coat? I would just do 220 or 320 on a longblock.
Just a question: Why would you wet sand the primer if you're putting one more coat? I would just do 220 or 320 on a longblock.
Fishgrinder- G3GM Member

- Street Cred : 4
 Re: 1977 Chevelle Malibu Classic Progress Photo's aka Mali
Fishgrinder wrote:Great log, can't wait to see the progress!
Just a question: Why would you wet sand the primer if you're putting one more coat? I would just do 220 or 320 on a longblock.
At this point 320 is too rough and would take off too much of the primer...there are some small imperfections still that will need wet sanding to blend into the first coat but they are small and can be done with 500/600 grit. This 1st coat was basically protect all the work from the elements too as the car is not in a garage....a blankie...tarp & weatherproof cover on it...LOL.

77mali- Donating Member

- Street Cred : 62
Fishgrinder- G3GM Member

- Street Cred : 4
 Re: 1977 Chevelle Malibu Classic Progress Photo's aka Mali
More body work today using Por15 (with marine clean and metal ready prep) on lower rear pass fender. Took all day to follow all steps and I'm very impressed w/ the Por15. Marine clean must be diluted w/ water...I made the mistake of misting it on the fender and ran for the hose! In the end no harm done thank goodness. The Por 15 is not very camera friendly you can see reflections in it when it hardens and I got the regular black, not semi gloss. After experimenting today, I'm a believer in these products they work great and the coating is as hard as a rock.
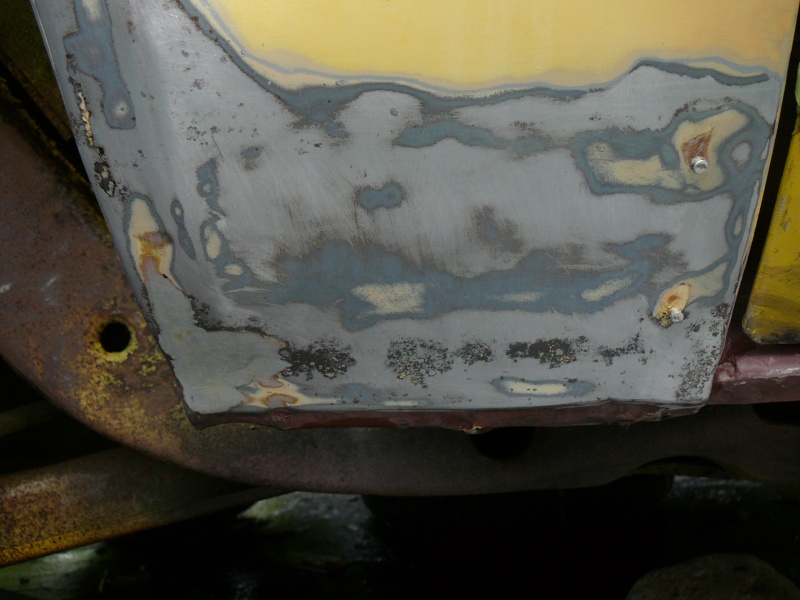
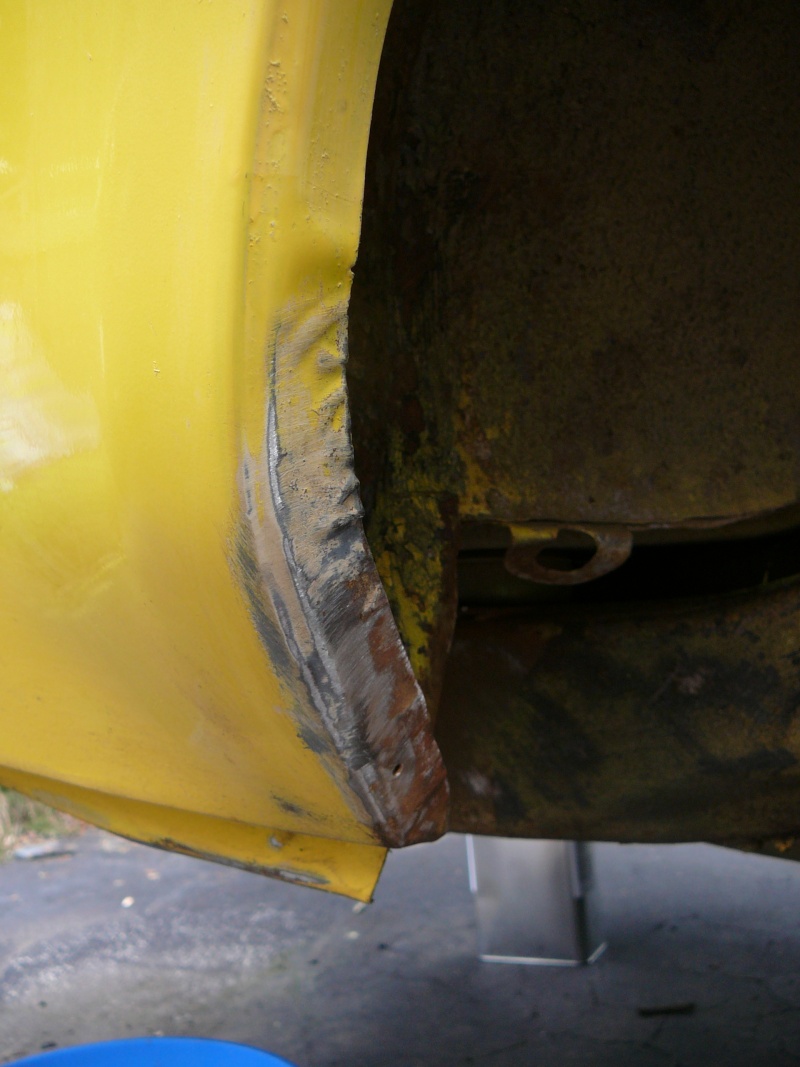
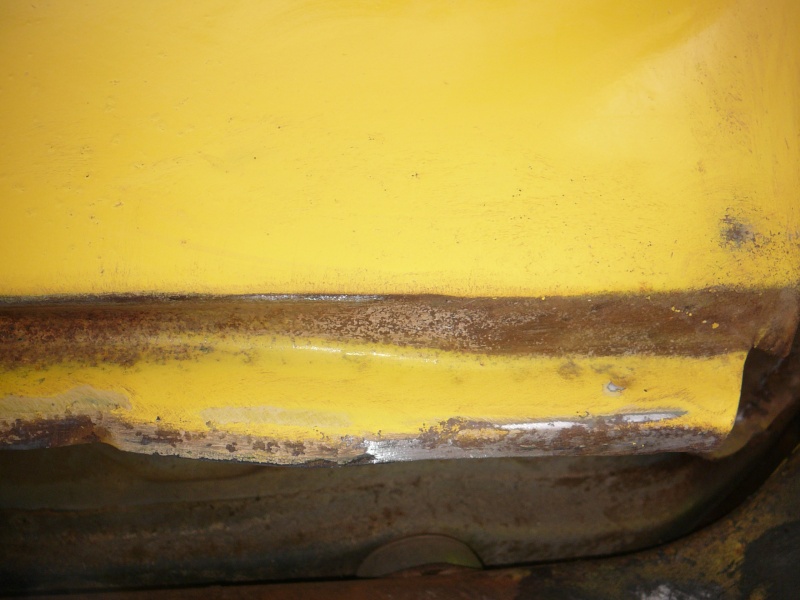

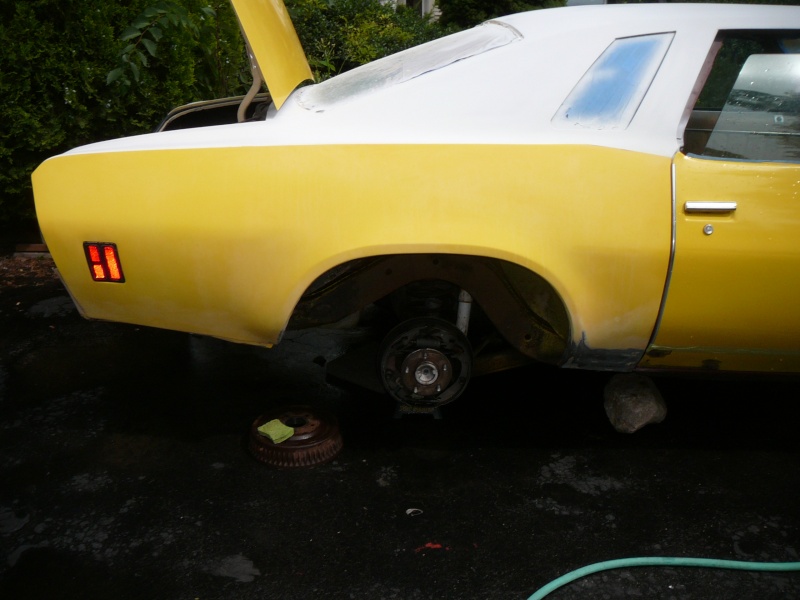

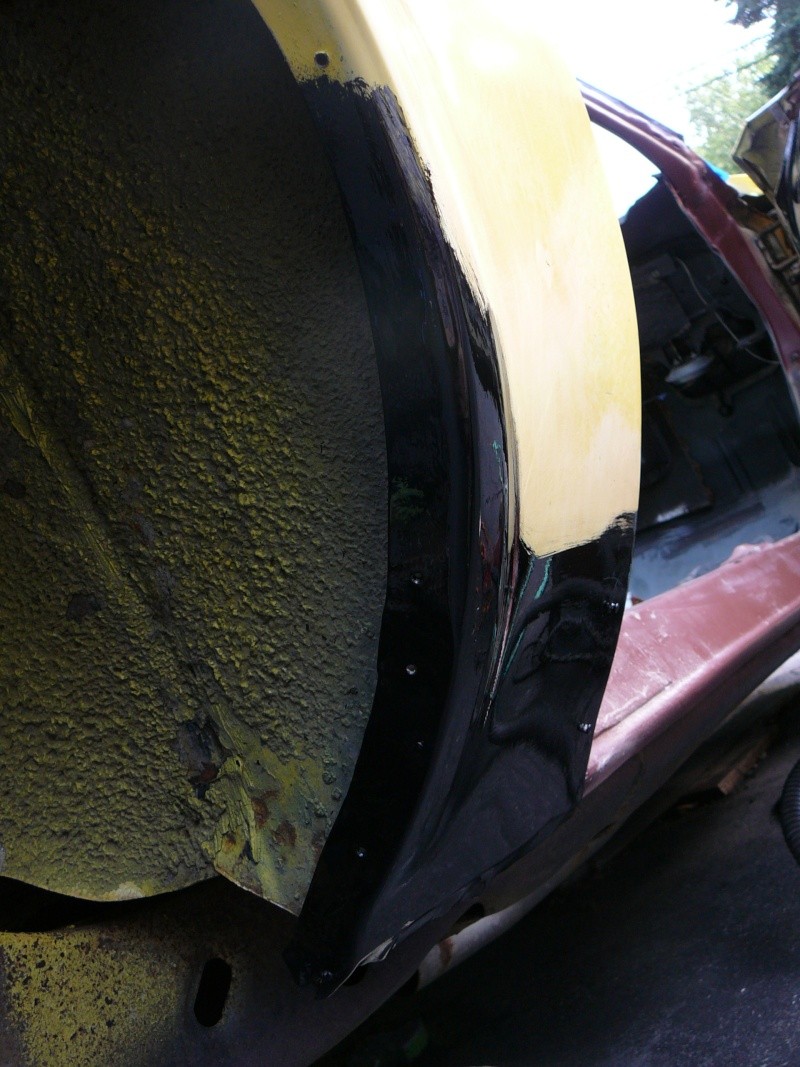

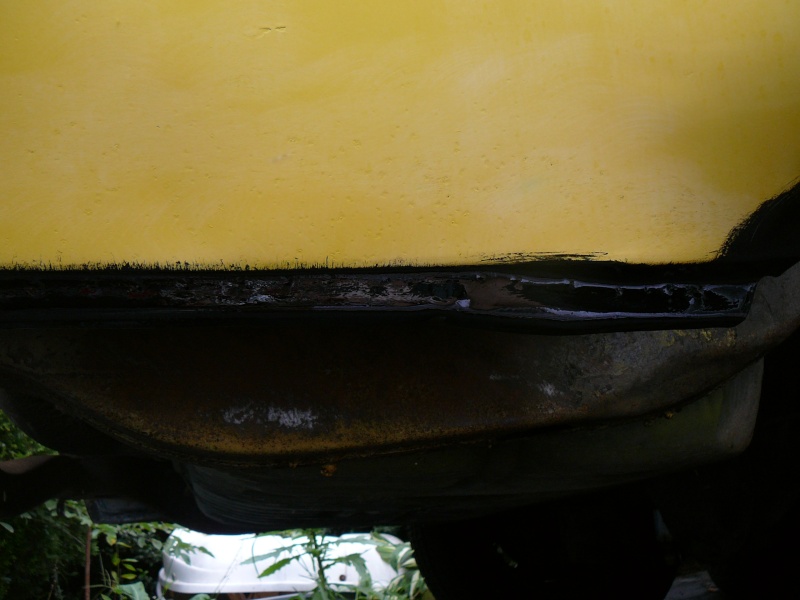
Here you can see the original Light Buckskin color :-)
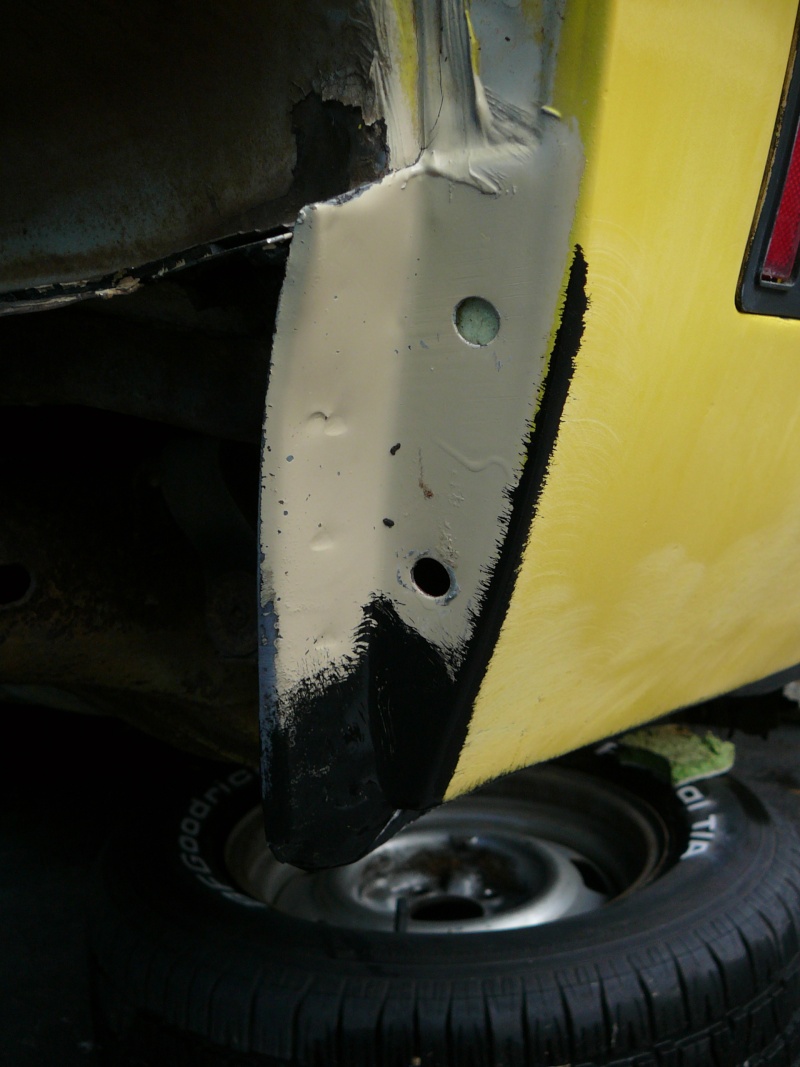


Here you can see the original Light Buckskin color :-)


77mali- Donating Member

- Street Cred : 62
 Re: 1977 Chevelle Malibu Classic Progress Photo's aka Mali
good progress Buddy the non stop ran for 3 days has me dead in water
___________________________________________
1977 Chevelle SE x2
One Mild original
one Wild NON original
Anthony

Limey SE- Management

- Street Cred : 98
 Re: 1977 Chevelle Malibu Classic Progress Photo's aka Mali
Nice work! Have you seen this for the firewall? I'm curious about getting one, but I'm not sure yet. How hard was it to remove everything like you did from the firewall? I'm mostly concerned about the air boxes, they look like the most work.
Firewall Insulation OPGI
Firewall Insulation OPGI

JiMi_DRiX- G3GM Enthusiast

- Street Cred : 3
 Re: 1977 Chevelle Malibu Classic Progress Photo's aka Mali
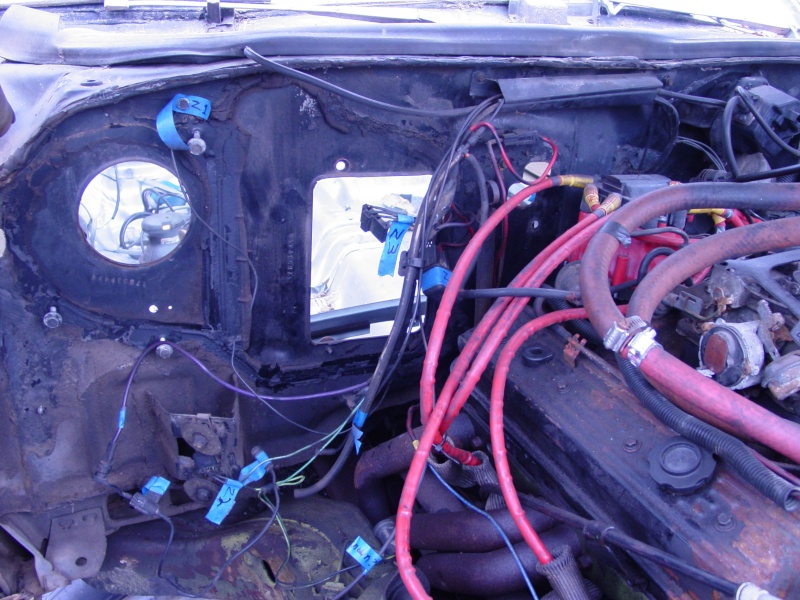
I Have seen that online but too late for me, the fire wall is done on mine. I reused the brown pad, it came off very easy and was in good shape. Had a lot of rust but during the winter I sanded , primed and then painted. Used rustoleum products..wish I'd known about the Por 15 then. My kick panel insulation was gone but S&S classics have some decent replacements (not exactly the same but very good).

The heater box and or A/C box (can't remember if one or both) bolt to both inside the car and in the engine, it;s a pain on the neck but if you're careful not a big deal. I will say that my pass side inner fender is off the car and that will make it easier to access some of the bolts. Here is a pic w. the stuff off.
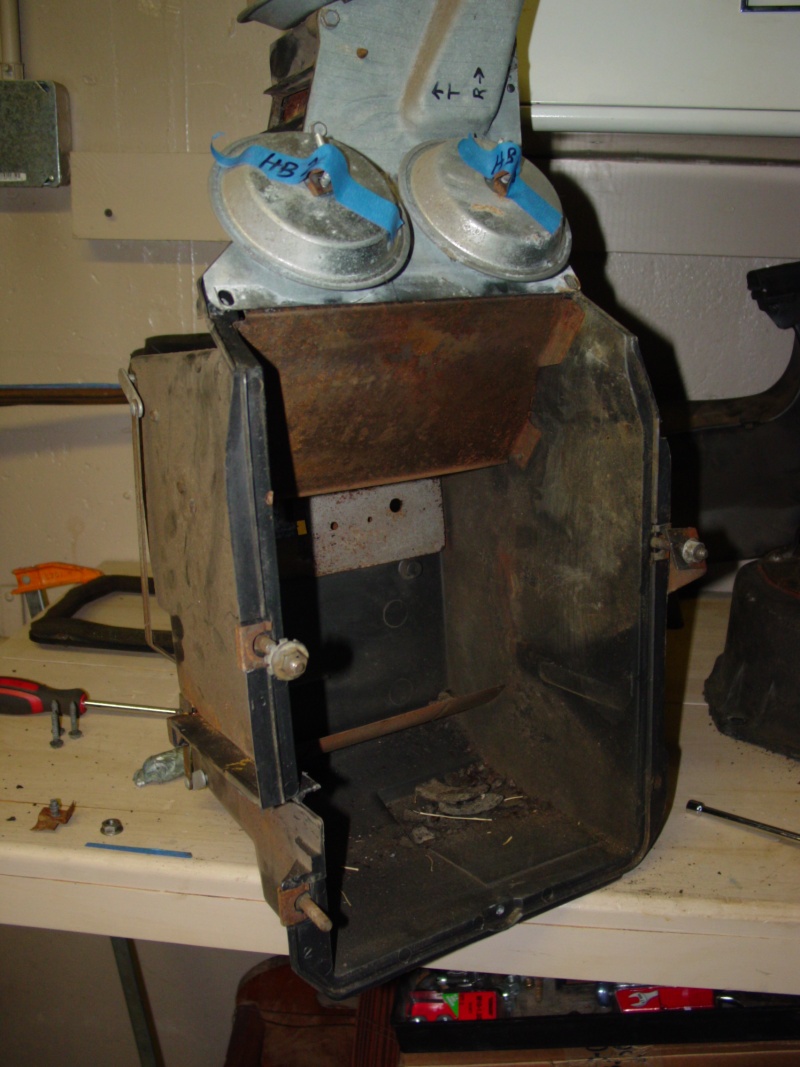
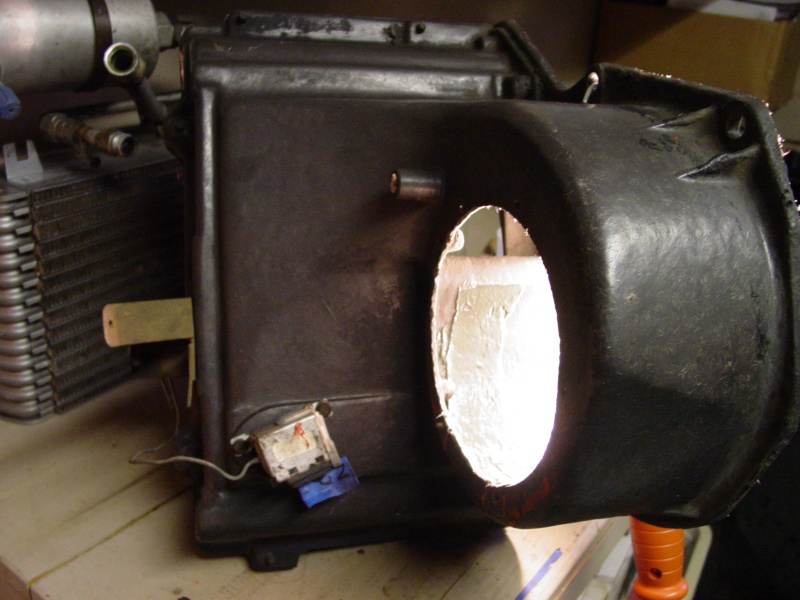
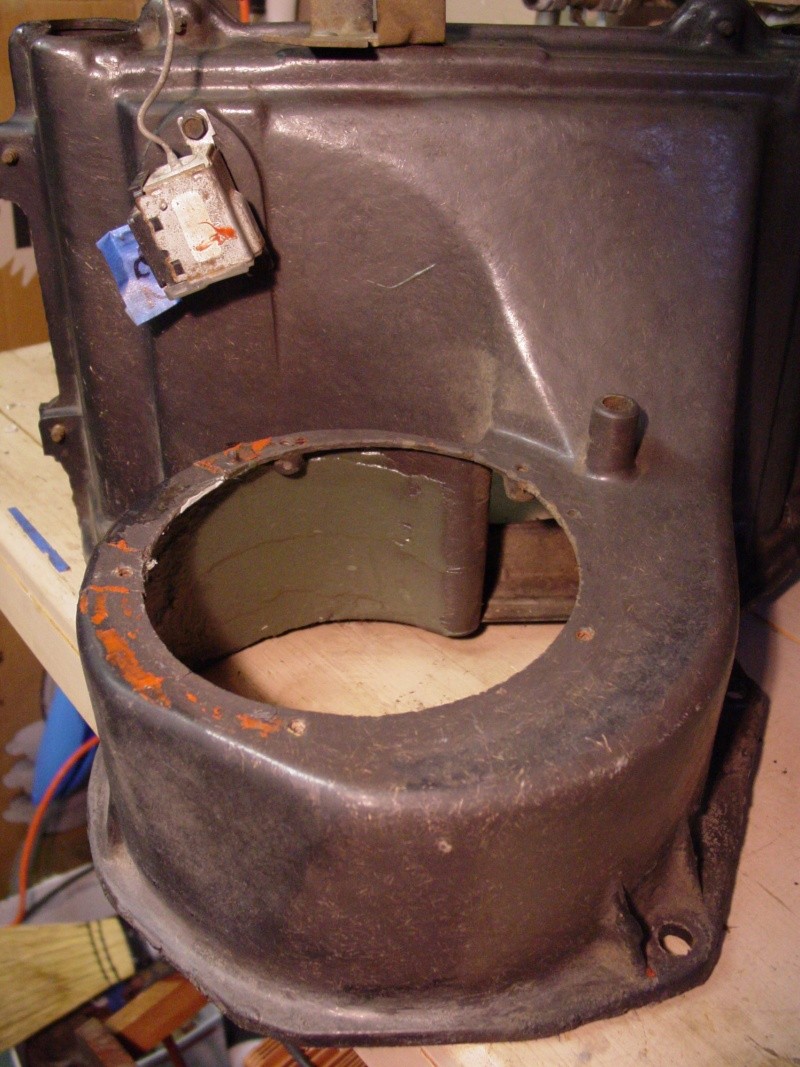
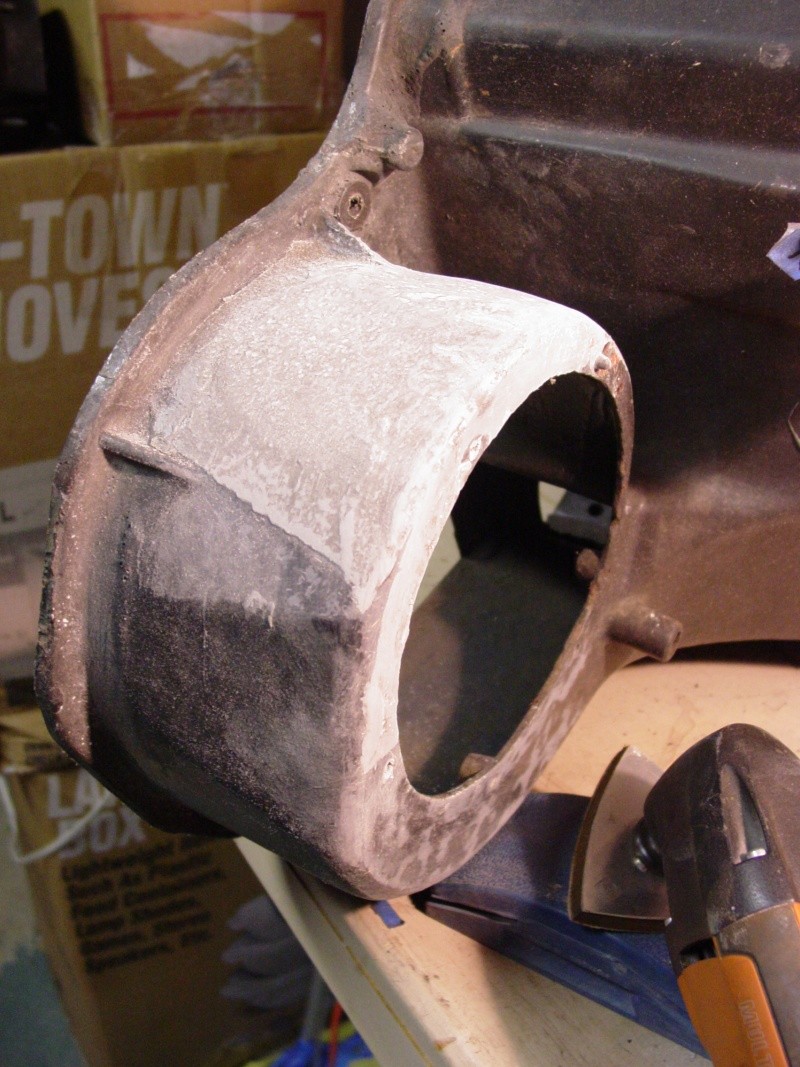
My heater box was in good shape the A/C box in the engine compartment needed work though. I took that out and used the green Bondo w/ the short fibers to patch it and then used Duplicolor for plastic in black, came out good. I did remove the small amount of rust scale on both this box and the Heater box door.


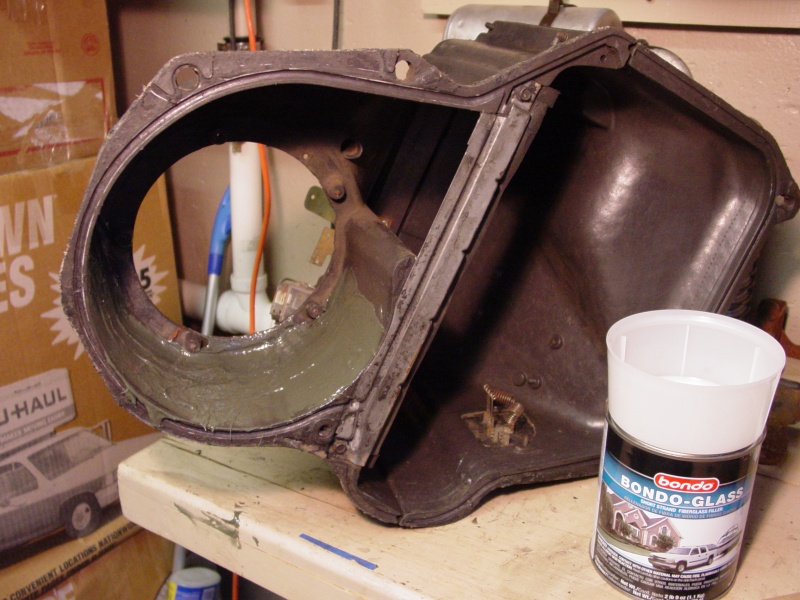
Using my drop light to heat the bondo...was a cold day in the workshop.
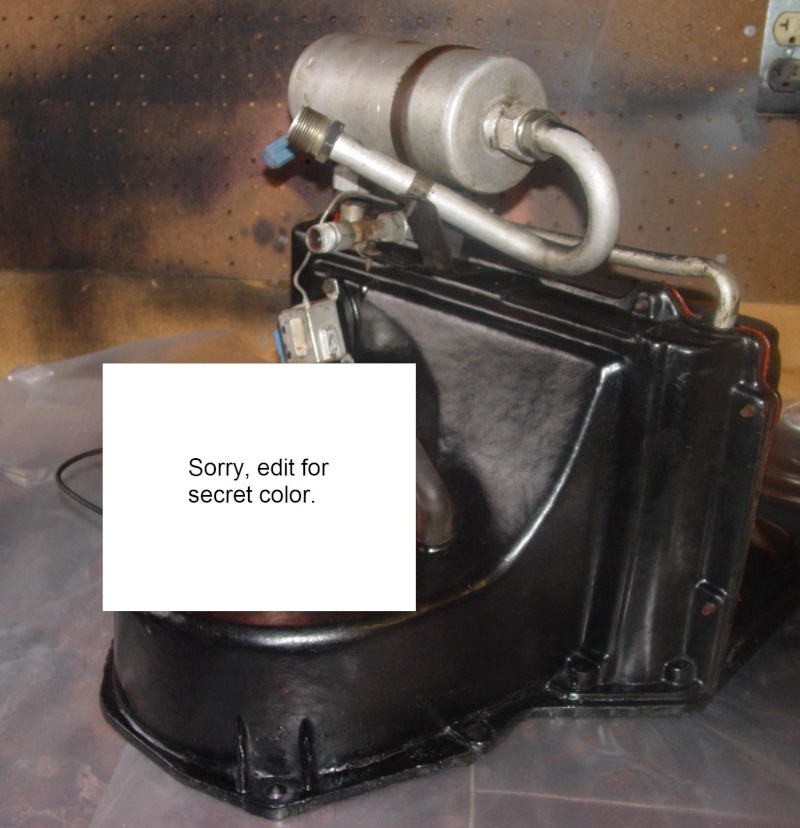
The end result. Heater motor hidden, sorry. Gotta have some secrets! Used red High Temp RTV Silicone to seal the two pieces & around the blower motor also.

The heater box and or A/C box (can't remember if one or both) bolt to both inside the car and in the engine, it;s a pain on the neck but if you're careful not a big deal. I will say that my pass side inner fender is off the car and that will make it easier to access some of the bolts. Here is a pic w. the stuff off.

My heater box was in good shape the A/C box in the engine compartment needed work though. I took that out and used the green Bondo w/ the short fibers to patch it and then used Duplicolor for plastic in black, came out good. I did remove the small amount of rust scale on both this box and the Heater box door.


Using my drop light to heat the bondo...was a cold day in the workshop.


The end result. Heater motor hidden, sorry. Gotta have some secrets! Used red High Temp RTV Silicone to seal the two pieces & around the blower motor also.


77mali- Donating Member

- Street Cred : 62
 Re: 1977 Chevelle Malibu Classic Progress Photo's aka Mali
Today was good! Got the Old Girl running. Turns out...new starter, batt cables, a little Seafoam in the tank, starter fluid, oil change w/ 1 substitute quart of Mystery Oil and the (almost totally) reinstalled column. Still may have to shim starter..thought I heard it spinning when I let off the key BUT..1st try and she cranked right over. I could not believe it as she's been sitting since last November. Now the fun starts...must rebuild carb & reinstall the right exhaust manifold, get an air cleaner and breather, reinstall the master cylinder & bleed the brakes, new pads ups front, Transmission gasket, rear bumper reinstall.....wait there's more but that's good for now LOL. Still don't know the casting number on the engine but on drivers side says 5.7L. Casting on right side cylinder head indicates swirl polish heads from a 305. Must replace those but good for now.
Hopefully by spring she'll be @ the inspection station. Will post some pics when the weather gets better!
Hopefully by spring she'll be @ the inspection station.


77mali- Donating Member

- Street Cred : 62
 Re: 1977 Chevelle Malibu Classic Progress Photo's aka Mali
nice, keep up the good work! the engine is probably a newer block, i have a couple of `99 vortec 350s and they also have a 5.7 stamped there. havent seen this on any of the other blocks i have, and they are all older.
its very possible that you have a roller cam too. as for the heads i`d recommend a set of used vortecs, shouldnt be too expensive and best bang for the buck IMO
its very possible that you have a roller cam too. as for the heads i`d recommend a set of used vortecs, shouldnt be too expensive and best bang for the buck IMO
abajc3- G3GM Member

- Street Cred : 3
 Re: 1977 Chevelle Malibu Classic Progress Photo's aka Mali
Well, the Lord giveth & the Lord taketh-away...Started her up this am no problem. Brought up to temp...no issues. Later on in the day she didn't turn over. Don't know if this is fuel issue, as carb is pretty shot. There was a bit of a rough idle and a backfire or two when running. Noticed when putting the exhaust manifold back on this PM that there was an oily residue on the #6 port. The rest were only "sooty" Maybe a ring there? Anyway, She's put back together and waiting for the bench seat to go back in temporarily and rest of the work on the column so I can hopefully drive it. What stinks is all I wanted to do was move her to a new spot. ARRGH!  Anyone else go through something similar?

77mali- Donating Member

- Street Cred : 62
 Re: 1977 Chevelle Malibu Classic Progress Photo's aka Mali
I'm going through that with my DD 95 Explorer. Here lately it's been the project car and the 77 has been the DD. Good thing it's dead reliable!
texan01- G3GM Member

- Street Cred : 6
 Re: 1977 Chevelle Malibu Classic Progress Photo's aka Mali
Well since last time I've made the decision to disassemble the engine and have the lower end components evaluated locally. I think it's a head gasket at best and possibly in addition a bad set of rings on two cylinders on the even side of the block. We'll go from there & hopefully will have it up to them in a couple of weeks. Thus far the entire front assembly minus the bumper is off the car. Radiator, radiator/condenser housing, fan, alternator, pulleys, belts, water pump, carb..etc...now cataloging all the pics for reassembly. Oh what fun. Here she is without her "teeth". Most parts are still worth restoring too which is good!
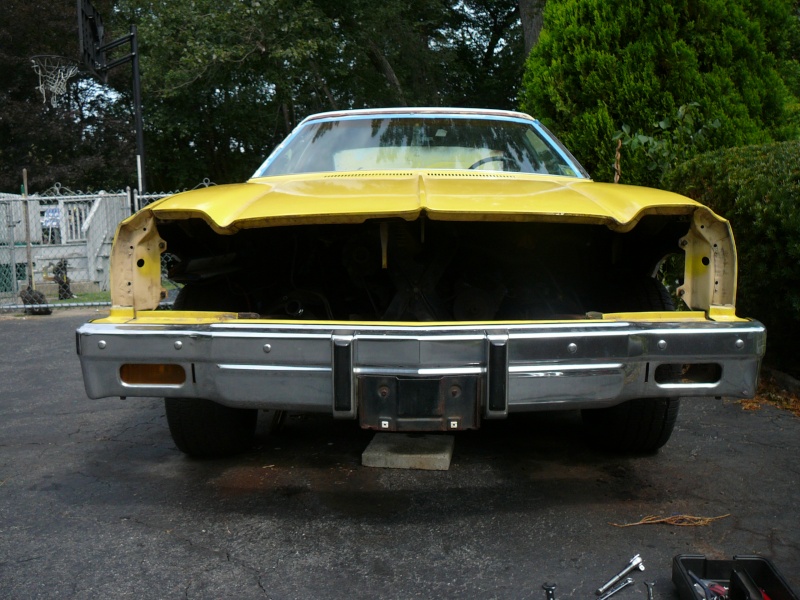
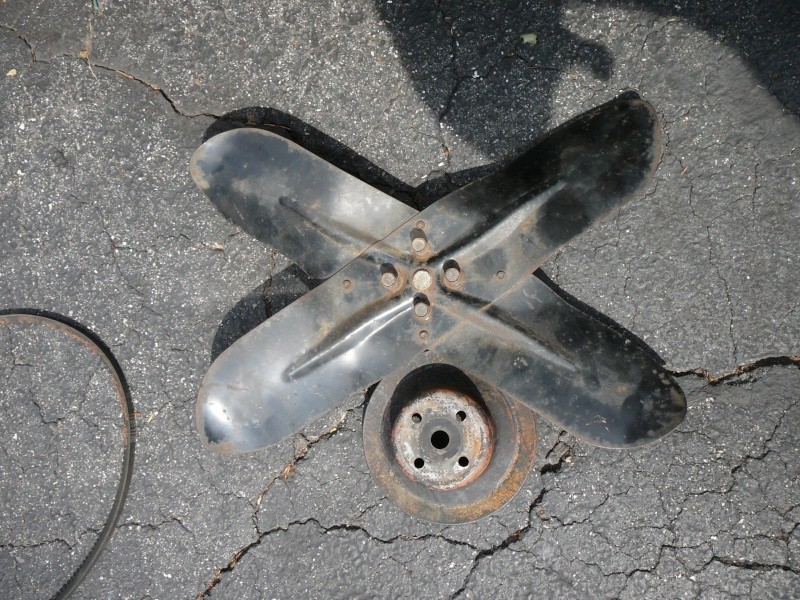

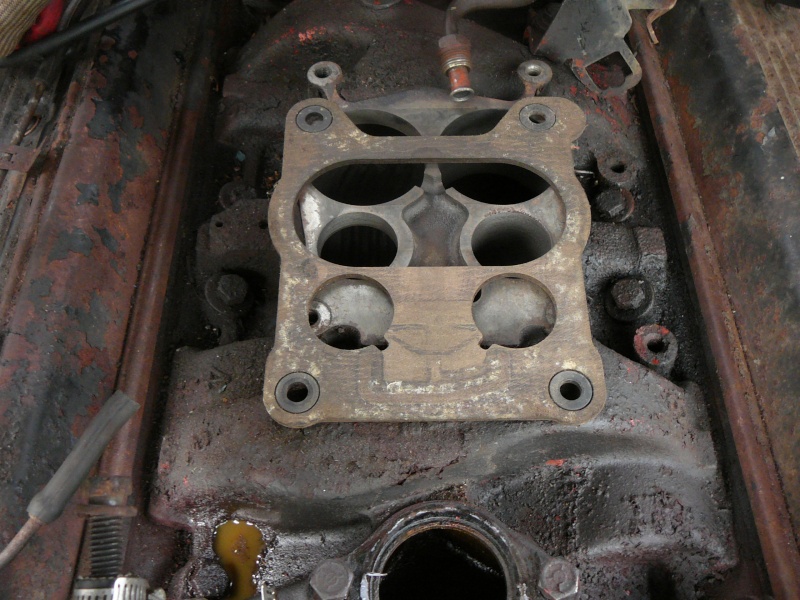

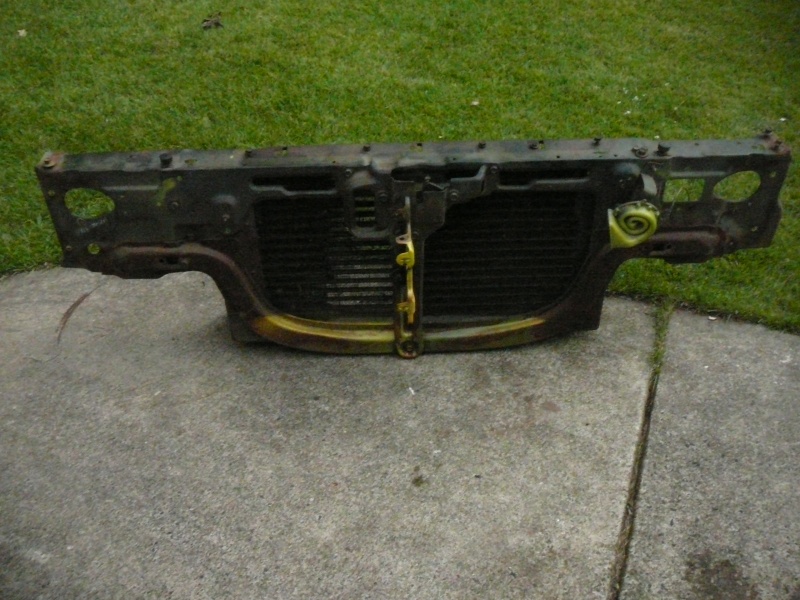


77mali- Donating Member

- Street Cred : 62
 Re: 1977 Chevelle Malibu Classic Progress Photo's aka Mali
Looks like you have a lot of clean-up to do on your engine installation. How many miles on the engine ?
Maybe the cylinder bores will accept a ridge ream, a honing, & new rings. Problem there is, cleaning the ring grooves on the pistons etc. Pain in the butt...
Got a ball-park figure on how much you can spend on the engine?
Maybe the cylinder bores will accept a ridge ream, a honing, & new rings. Problem there is, cleaning the ring grooves on the pistons etc. Pain in the butt...
Got a ball-park figure on how much you can spend on the engine?
pila- Donating Member

- Street Cred : 43
 Re: 1977 Chevelle Malibu Classic Progress Photo's aka Mali
Have a great shop up here to do all that. If needed will have them rebuild & balance the bottom end. With all that needs to be done to get her on the road...my time is at a premium. Would rather have it blueprinted & done up right. No idea how many miles on the engine, the body has 134k but engine is not the original 305.

77mali- Donating Member

- Street Cred : 62
 Re: 1977 Chevelle Malibu Classic Progress Photo's aka Mali
So I spoke to my engine shop & they did confirm that the heads are from a 305 but block is a 350 5.7 L. Going to swap heads for some 23 degree Vortec & will have to get new intake too as the old one will no longer work. Have not pulled the heads yet but will look at the cylinder walls once I do that to be sure there is no issues w/ the pistons & rings. I sent him this pic and he said by looking at it it was probably a low mileage engine that I should reuse w/ the better heads. Should make from 320-340 HP. Not to shabby for just cruising LOL just gotta remove all the grime & rust from the thing sitting. Wish me luck though!
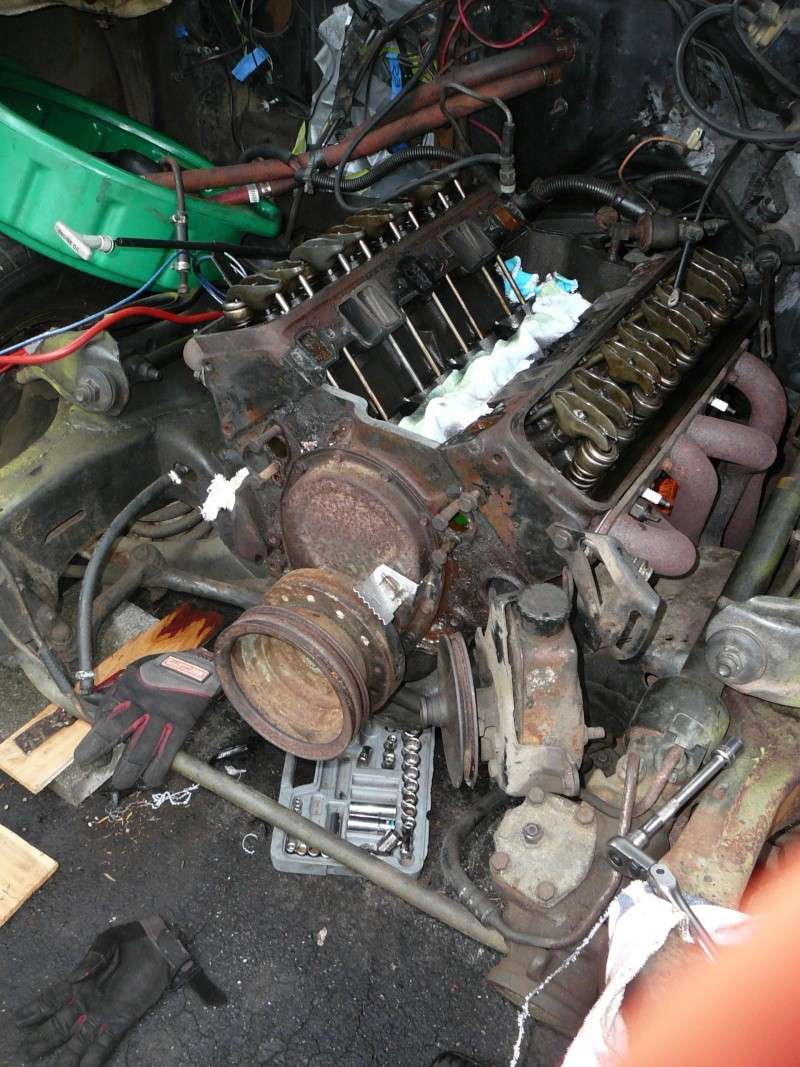
Edit- sent him this pic....prior to covering the oil galleries...
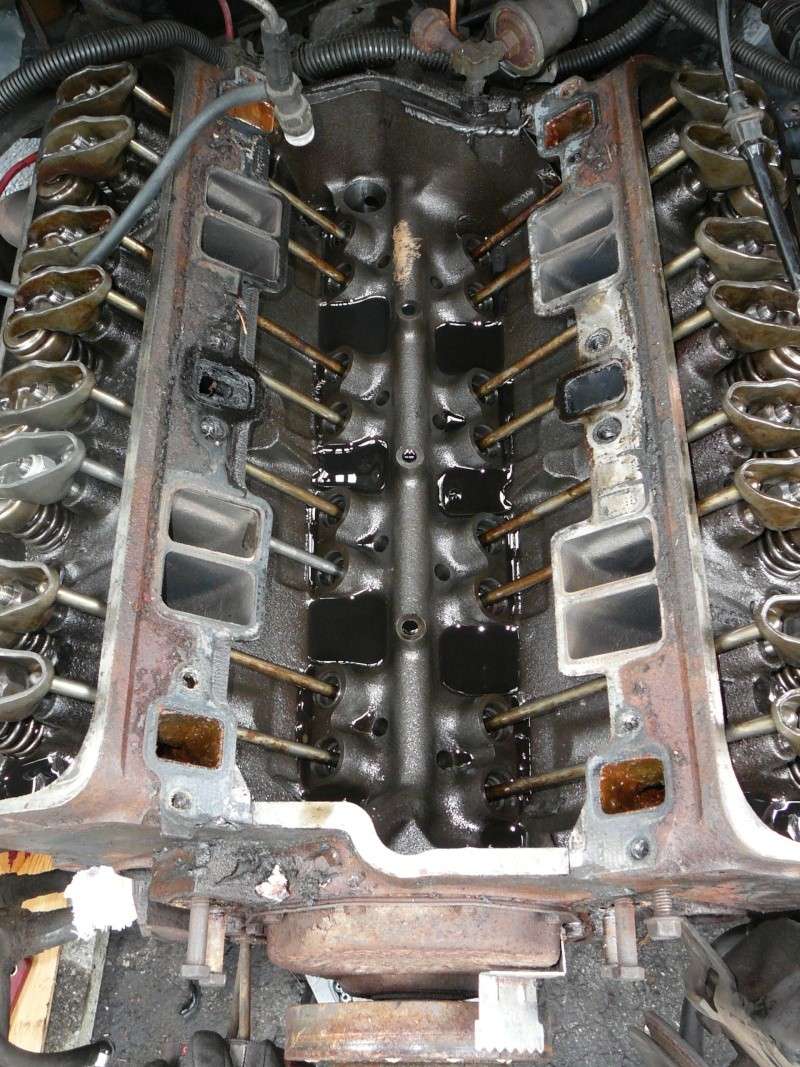

Edit- sent him this pic....prior to covering the oil galleries...

Last edited by 77mali on Sun Sep 25, 2011 7:25 am; edited 1 time in total

77mali- Donating Member

- Street Cred : 62
 Re: 1977 Chevelle Malibu Classic Progress Photo's aka Mali
The galleries do look clean! To late to turn around now Mali, keep up the good work 
Fishgrinder- G3GM Member

- Street Cred : 4
 Re: 1977 Chevelle Malibu Classic Progress Photo's aka Mali
Fishgrinder wrote:The galleries do look clean! To late to turn around now Mali, keep up the good work
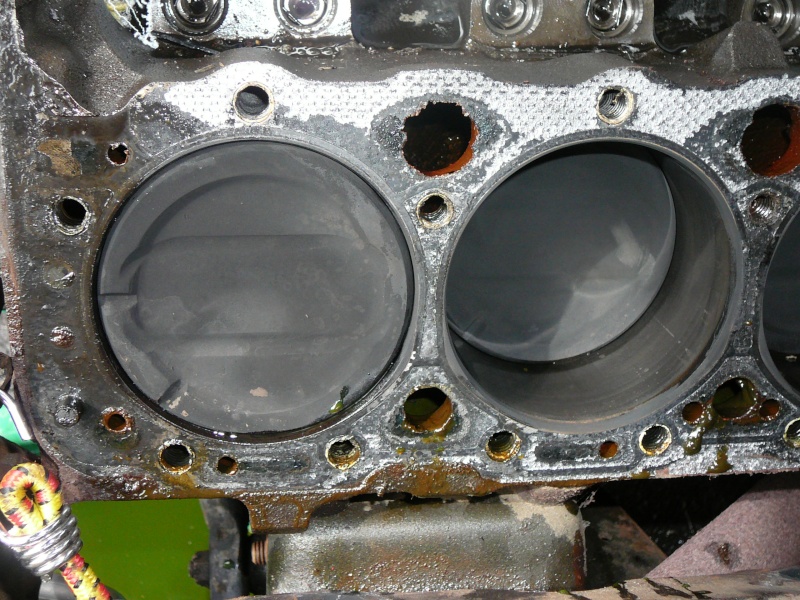
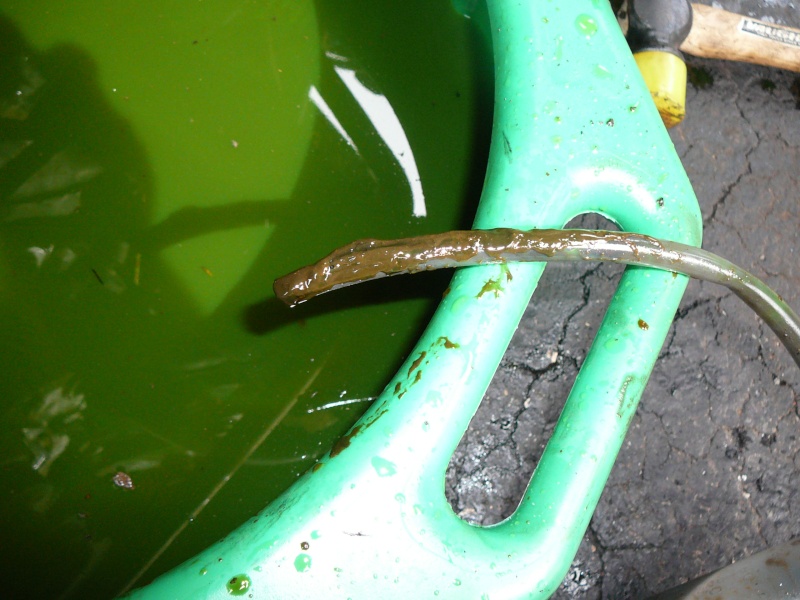
Yes they are, very. I owe my wife a can of Easy-Off oven cleaner...used it to clean out the bottom & cross over in the Air intake manifold. Worked good...the manifold was a little cleaner than the ports you see in the Heads in the previous pics. Good riddance to those! There is some carbon build up as well on the tops of the Pistons but nothing a little Seafoam won't cure. No grooves or rust inside there aside from the very top on some near where the gaskets were. I think once everything is back on, that will clear up as well. she also needs a reverse flush on the cooling chambers...I was not surprised to see a very "gunky" coolant slurry when I was pumping it out near the bolt holes...pretty gross.

77mali- Donating Member

- Street Cred : 62
 Re: 1977 Chevelle Malibu Classic Progress Photo's aka Mali
Finally got the engine casting # from the back of the block clean and legible. #14093638...circa 1987-1995. The research shows that this casting corresponds with assemblies that were either 2 or 4 bolt mains and came w/ either a flat tappet or roller cam. Mine are flat tap, so I'm assuming that it's a 2 bolt main. These engines went in everything from Camaro's & Blazer's to Pick-ups, so just your run of the mill block I suppose. I may pull the pan to check just for giggles after the new heads & intake go on, hopefully this weekend. Not sure after all if I'm going to rebuild the Q jet or get may end up going w/ a new or factory reconditioned Edelbrock Carb. The heads are a fairly new design by RHS & are aftermarket Vortec heads that mate w/ Edelbrock Vortec Performer intakes (not sure of this part #). I hope this turns out good as this set up will set me back some on the many other things that need to be done before road worthiness.

77mali- Donating Member

- Street Cred : 62
 Re: 1977 Chevelle Malibu Classic Progress Photo's aka Mali
pila wrote:Looks like you have a lot of clean-up to do on your engine installation. How many miles on the engine ?
Maybe the cylinder bores will accept a ridge ream, a honing, & new rings. Problem there is, cleaning the ring grooves on the pistons etc. Pain in the butt...
Got a ball-park figure on how much you can spend on the engine?
Heads/Intake/Gaskets approx 1K. (better than a total rebuild I suppose or crate motor).
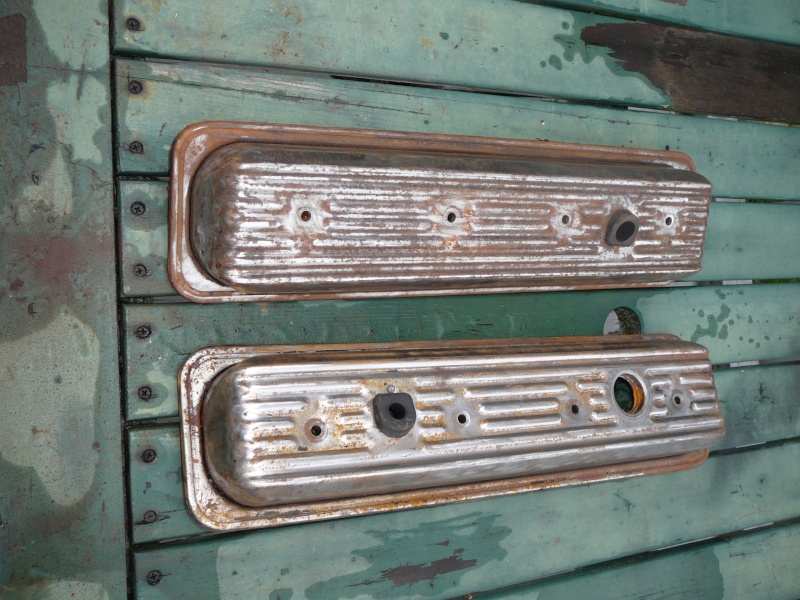
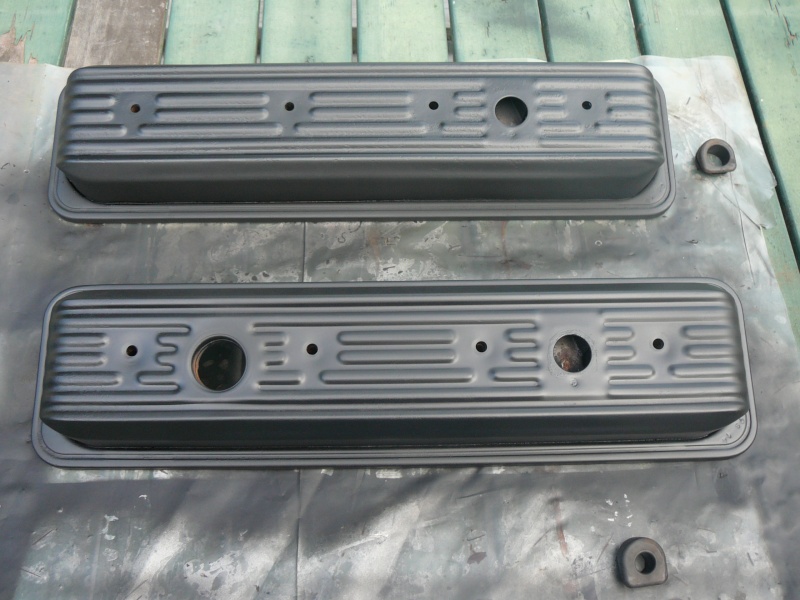
Reusing the rocker covers too...clean up & paint to save some $$.
Not perfect but will do for now.

77mali- Donating Member

- Street Cred : 62
Page 1 of 27 • 1, 2, 3 ... 14 ... 27 
 Similar topics
» Clunkers and Classic YouTube build 1977 Malibu Classic
» '77 Chevelle Malibu Classic - Disco Malibu
» 74 Chevelle Malibu Classic 454 with a 4-speed
» '77 Chevelle Malibu Classic - Disco Malibu
» 74 Chevelle Malibu Classic 454 with a 4-speed
G3GM :: Media :: G3 Project Pictures
Page 1 of 27
Permissions in this forum:
You cannot reply to topics in this forum|
|
|


» Roll Call and Car showcase
» Central Texas Noob
» Welcome Keith Seymore
» Wanted: Front park lamp assemblies
» 75 Hurst Olds T-tpos
» G3 Chevy rims- help ID these
» 75 el camino project.
» Have had a few questions
» vinyl top removal