1977 Chevelle Malibu Classic Progress Photo's aka Mali
+40
pila
dynchel
Mcarlo77
Joe73
driveit
Hawk03
Fishgrinder
1973 454 MONTE
bracketchev1221
Limey SE
chevellelaguna
1973montec
Bruisr
bigredlaguna
jerry46765
BicknellWelding
geoff528
2fat2fly
Jim_Rockford
DiscoMalibu
Brainstain
Laguna Budman
Dubie
74MonteCarlo
JB2wheeler
WyldeBill66
Wallyuph
dragons_lair59
77ElClassic
Dead Man
Graham Perkins
jrb75
chromereverse
Checyxtc
74Guna
texan01
abajc3
JiMi_DRiX
orange Juiced
HDHugger
44 posters
G3GM :: Media :: G3 Project Pictures
Page 9 of 27
Page 9 of 27 •  1 ... 6 ... 8, 9, 10 ... 18 ... 27
 Re: 1977 Chevelle Malibu Classic Progress Photo's aka Mali
If you do have to pull the tailshaft housing, it might be a good time to do the math and decide if a new speedo gear on the tailshaft is necessary. Especially if the rear diff ratio has been changed. The worm gear on the shaft is an easy swap.
77ElClassic- Donating Member

- Street Cred : 5
 Re: 1977 Chevelle Malibu Classic Progress Photo's aka Mali
I think it's all good but will check them & the end-play. The rear end is staying- 3.08.
 4 the tips.
 4 the tips.
77mali- Donating Member

- Street Cred : 62
 Re: 1977 Chevelle Malibu Classic Progress Photo's aka Mali
I like the new avatar.

77ElClassic- Donating Member

- Street Cred : 5
 Re: 1977 Chevelle Malibu Classic Progress Photo's aka Mali
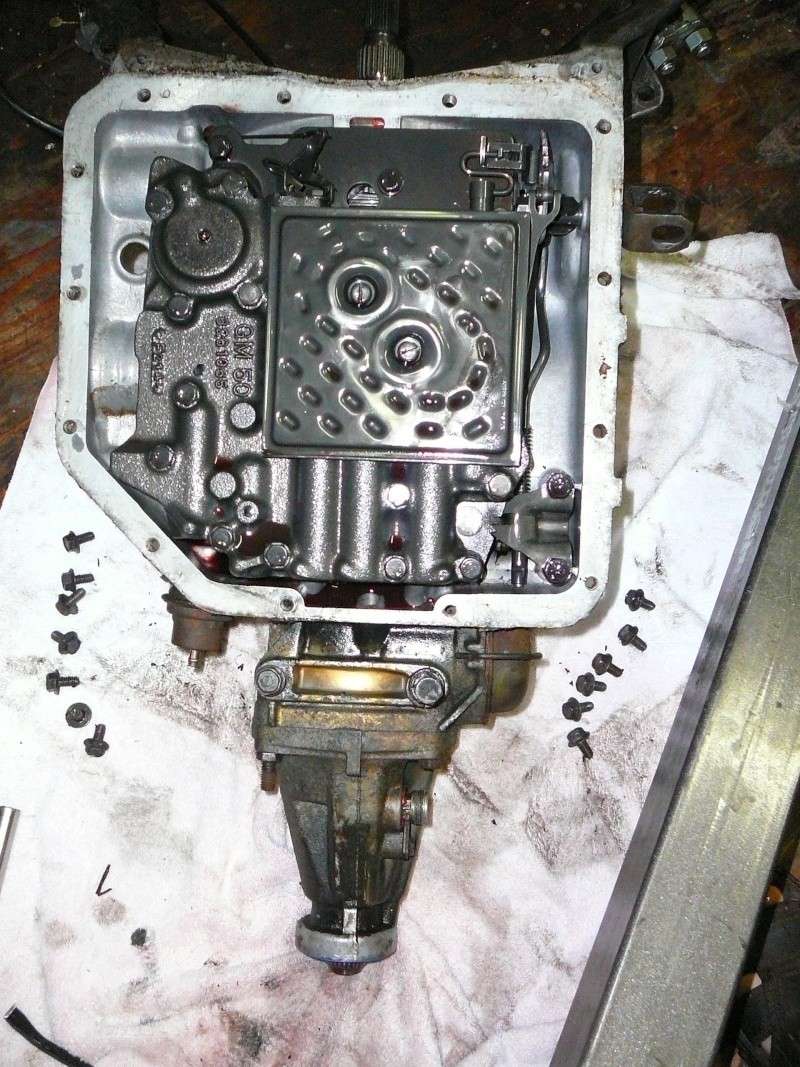
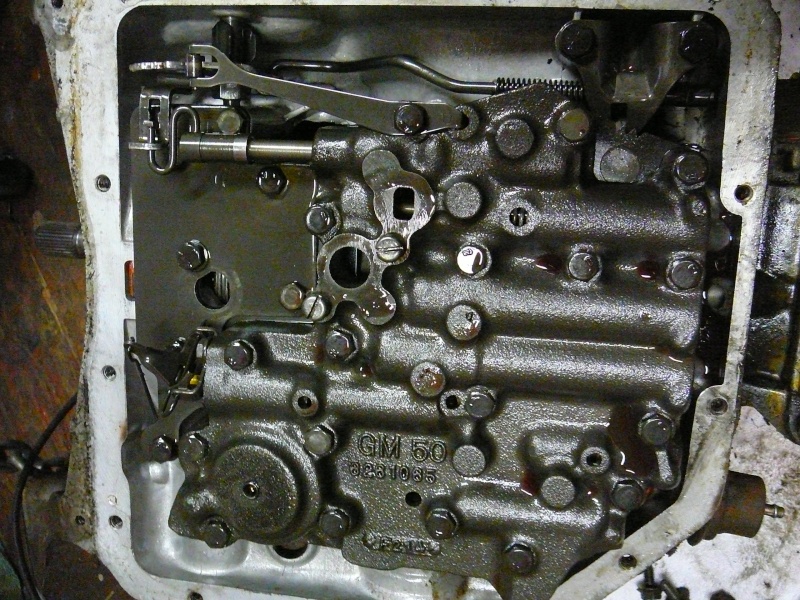
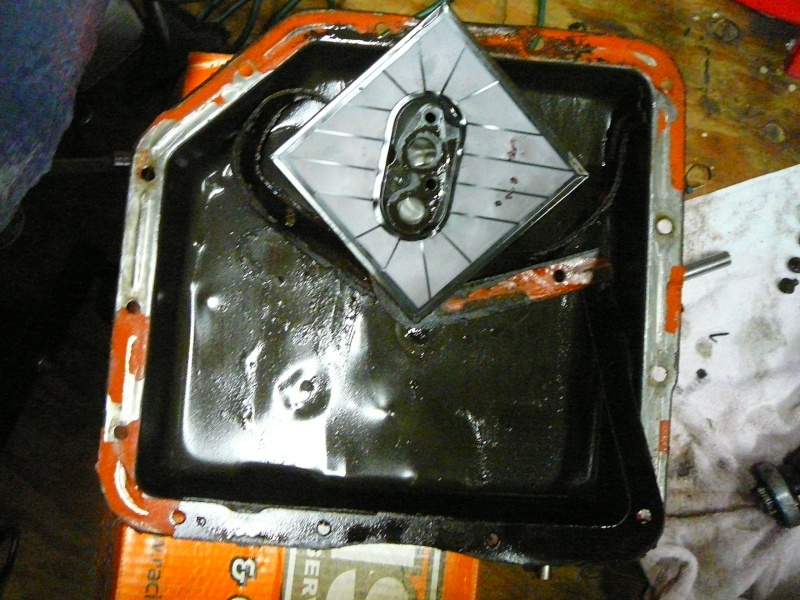
Finally caught a break on something!


77mali- Donating Member

- Street Cred : 62
 Re: 1977 Chevelle Malibu Classic Progress Photo's aka Mali
I've never had the good fortune to open one up and find it that clean.

77ElClassic- Donating Member

- Street Cred : 5
 Re: 1977 Chevelle Malibu Classic Progress Photo's aka Mali
Yeah- thank goodness, I've about had it with surprises. Some small particles on one segment of the filter which have me wondering where the heck they're coming from (maybe from the bottom of the pan during draining or when it got flipped upside-down)? The fluid was fairly clean at 1st but I had it up on the engine crane like a stuck pig and towards the end the color changed from a normal bright red to a blood/maroon color. The flange on the pan looks decent w/ a small dent near one of the bolt holes and someone tried to patch up around the gasket with RTV  . I can't understand that at all, as you need to remove the pan in order to put rtv on it- why not just do it right, clean the surfaces & install a new gasket?
  I have to check it for warping but at a quick glance it looks OK.

77mali- Donating Member

- Street Cred : 62
 Re: 1977 Chevelle Malibu Classic Progress Photo's aka Mali
You just have to hammer the bolt hole areas of the pan rail, to get it flat again. Some folks glue the gasket to the pan, with weather-strip cement, to allow for the pan rail not being very flat.
The trans looks really clean alright.......
The trans looks really clean alright.......
pila- Donating Member

- Street Cred : 43
 Re: 1977 Chevelle Malibu Classic Progress Photo's aka Mali
I have a nice straight piece of I-beam...for just such an occasion, nail sets, and a mapp torch 

77mali- Donating Member

- Street Cred : 62
 Re: 1977 Chevelle Malibu Classic Progress Photo's aka Mali
You really don't need to heat the pan rails to tap them flat. It's just soft sheet steel.
pila- Donating Member

- Street Cred : 43
 Re: 1977 Chevelle Malibu Classic Progress Photo's aka Mali
LOL- I was joking about the mapp. It would prob melt the pan. 

77mali- Donating Member

- Street Cred : 62
 Re: 1977 Chevelle Malibu Classic Progress Photo's aka Mali
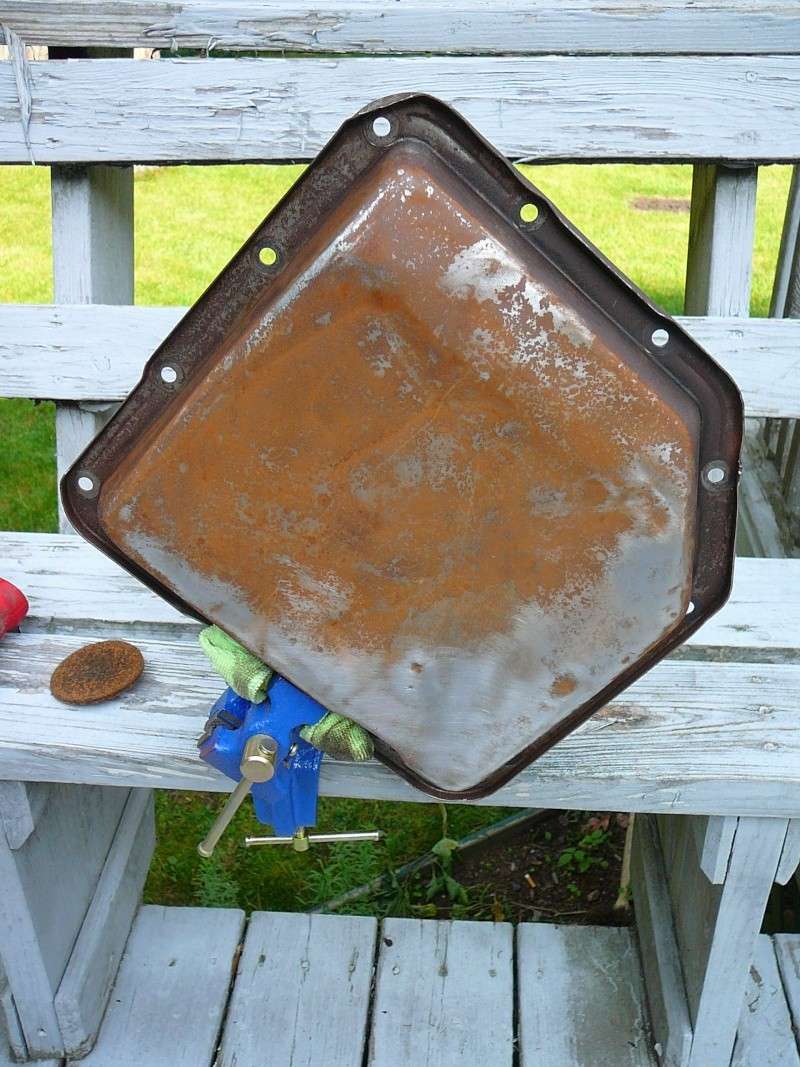
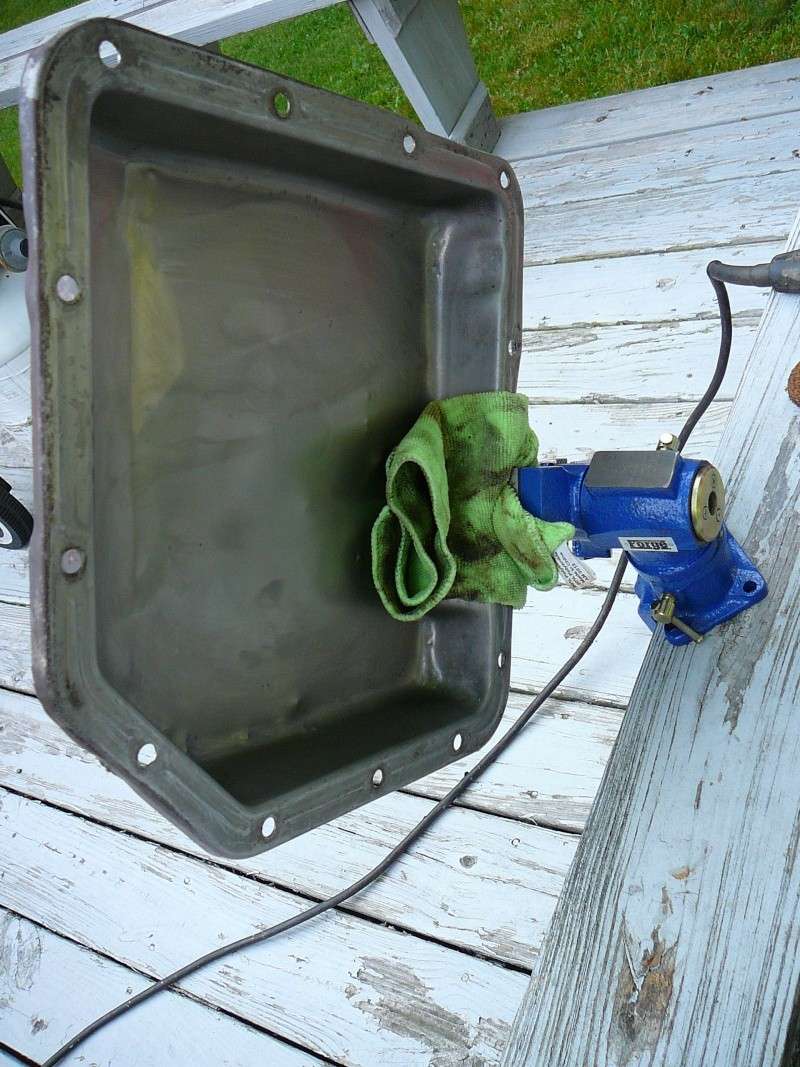
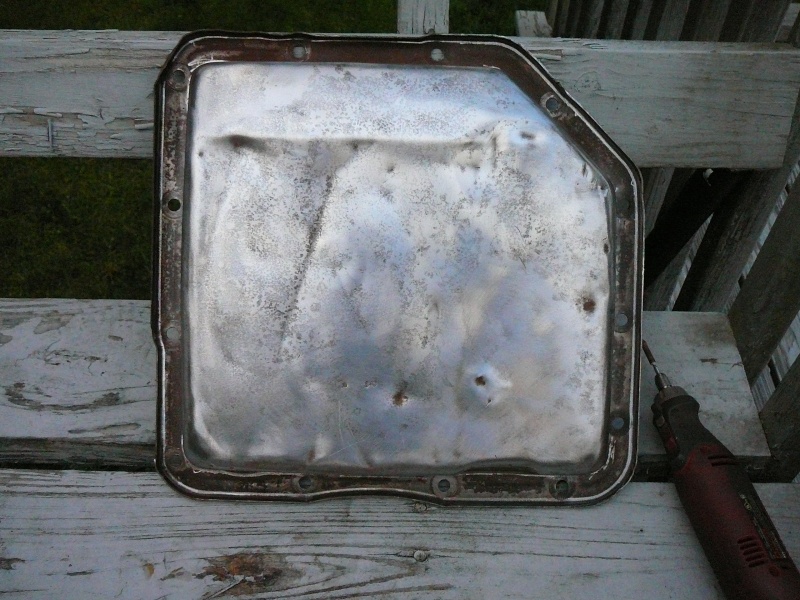
Spent some time today restoring the trans pan....
Before anyone says I'm bonkers for spending time to restore a $25.00 pan...it was more for body work practice than saving the pan. Also I got a new filter/gasket kit @ Autozone today- in stock (well they had the 1) and only $7.50!
Used degreaser and then some 3" 3M disc "scuff pads"...coarse then medium. Then broke out the Dremel and attachments to get all the nooks. Not quite done yet, still small amount of rust & will play with knocking down the dents tomorrow. Also needs some bending in a few spots.


77mali- Donating Member

- Street Cred : 62
 Re: 1977 Chevelle Malibu Classic Progress Photo's aka Mali
It sure has a bunch of dents & creases in it. Maybe someone had a floor jack under it in the past. Should be easy enough to flatten it out though. Ever think about a drain plug kit for it ? They are simple to install, and make fluid changes a lot less messy. Don't remember where I bought the last one.
pila- Donating Member

- Street Cred : 43
 Re: 1977 Chevelle Malibu Classic Progress Photo's aka Mali
A drain plug kit is in the works for sure. I can't imagine why GM didn't have one in these. I bought a new oil pan and might use the drain plug from my old pan on it.

77mali- Donating Member

- Street Cred : 62
 Re: 1977 Chevelle Malibu Classic Progress Photo's aka Mali
The early TH350s had a drain plug in them. Then GM got cheap and wanted to save a buck, so they quit putting them in.
pila- Donating Member

- Street Cred : 43
 Re: 1977 Chevelle Malibu Classic Progress Photo's aka Mali
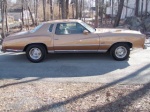
I have a drain plug on my 77 from GM, Looks original too,its handy. Ive never seen another GM pan like that,maybe it was a dealer item.
ant7377- G3GM Addict

- Street Cred : 36
 Re: 1977 Chevelle Malibu Classic Progress Photo's aka Mali
ant7377 wrote:I have a drain plug on my 77 from GM, Looks original too,its handy. Ive never seen another GM pan like that,maybe it was a dealer item.
You have a 454 though, so you have a THM400, right?

77mali- Donating Member

- Street Cred : 62
 Re: 1977 Chevelle Malibu Classic Progress Photo's aka Mali
On my 77 its a th 350

ant7377- G3GM Addict

- Street Cred : 36
 Re: 1977 Chevelle Malibu Classic Progress Photo's aka Mali
Well much hammering later....
Used JB Weld Epoxy to "even out" the remaining surface irregularities, sanded, buffed (still not perfect but who cares it's practice), used Duplicolor engine enamel as 1st coat and then coated with rubberized undercoat. Will also recoat with the enamel as the undercoat is paintable. Drain plug was off the shelf at Advanced Auto Parts- a Dorman product- they had a few sizes. Will edit in the part number. I could have sat there and used progressivly finer sand paper to get it dead on but hey- it's just a pan & next time the filter/fluid is changed I think I'll splurge and get this one: http://www.jegs.com/i/JEGS+Performance+Products/555/60180/10002/-1
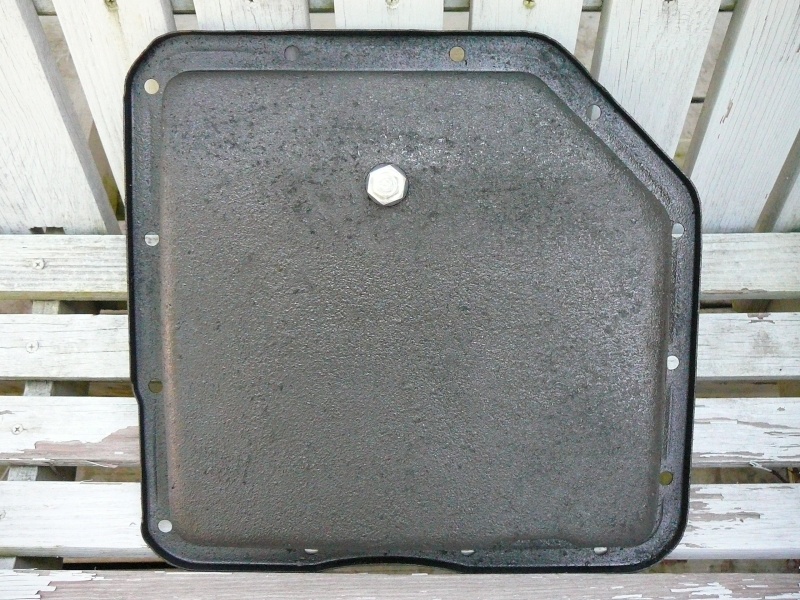

Used JB Weld Epoxy to "even out" the remaining surface irregularities, sanded, buffed (still not perfect but who cares it's practice), used Duplicolor engine enamel as 1st coat and then coated with rubberized undercoat. Will also recoat with the enamel as the undercoat is paintable. Drain plug was off the shelf at Advanced Auto Parts- a Dorman product- they had a few sizes. Will edit in the part number. I could have sat there and used progressivly finer sand paper to get it dead on but hey- it's just a pan & next time the filter/fluid is changed I think I'll splurge and get this one: http://www.jegs.com/i/JEGS+Performance+Products/555/60180/10002/-1


77mali- Donating Member

- Street Cred : 62
 Re: 1977 Chevelle Malibu Classic Progress Photo's aka Mali
Don't want to rain on your parade, but the oil pan gets pretty hot, and may do damage to your finish, like the undercoating. You'll just have to see how it holds up, and tell us !! 
pila- Donating Member

- Street Cred : 43
 Re: 1977 Chevelle Malibu Classic Progress Photo's aka Mali
The engine enamel is rated for 500 degrees...the rubberized coat is now sandwiched between 2 coats of it. We'll see...worst case it flakes off. The rubberized coating is tough to apply evenly...it likes to shoot out like "Silly String" & it looks like  Semi gloss black does not change the color too much either. When I do the rear wheel wells I'm leaning towards a bed liner material & some new spray equipment.
 Semi gloss black does not change the color too much either. When I do the rear wheel wells I'm leaning towards a bed liner material & some new spray equipment.
77mali- Donating Member

- Street Cred : 62
 Re: 1977 Chevelle Malibu Classic Progress Photo's aka Mali
Someone on another forum mentioned using bed-liner in the wheel wells. He said it was hard to get clean (?) That stuff is really tough from what I've seen though.
pila- Donating Member

- Street Cred : 43
 Re: 1977 Chevelle Malibu Classic Progress Photo's aka Mali
I'd clear coat it, perhaps it might help with dirt particles not being able to accumulate in the nooks of the liner.(?) 
LOL- on a side note I'm reading the instructions for the pan gasket and it tells me the ultimate torque for the bolts is 180 INCH Pounds....Translation- 10 ft lbs. Thought that was funny.
LOL- on a side note I'm reading the instructions for the pan gasket and it tells me the ultimate torque for the bolts is 180 INCH Pounds....Translation- 10 ft lbs. Thought that was funny.

77mali- Donating Member

- Street Cred : 62
 Re: 1977 Chevelle Malibu Classic Progress Photo's aka Mali
The new gaskets that are around these days are quite good, when the directions are followed. Getting both surfaces clean and dry seems to be the key. My '92 pick up still has the original rocker ( valve ) cover gaskets, and I've had it apart a few times. They are the blue silicone type.
pila- Donating Member

- Street Cred : 43
 Re: 1977 Chevelle Malibu Classic Progress Photo's aka Mali
That's what I have too for the valve covers. They last forever.
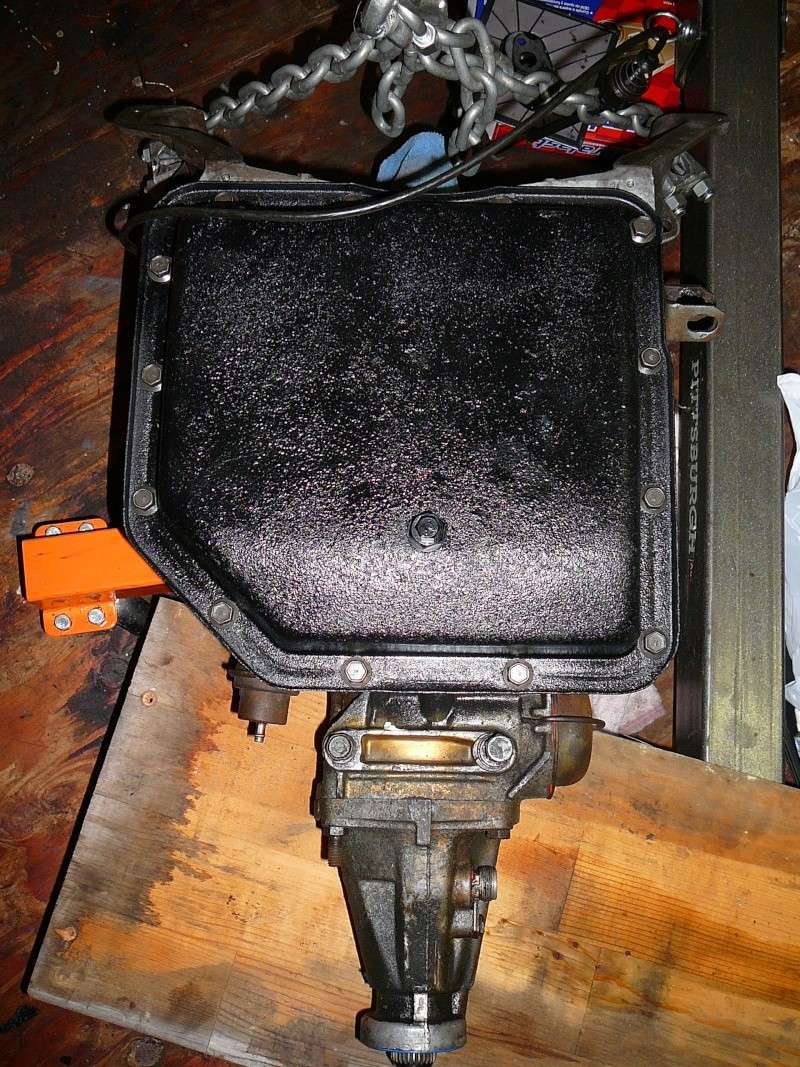
The directions for the trans pan said to put a light coat of grease on the clean deck surface. Gasket is thick in comparison to the one that was on there which was felt. The grease (I used lithium- very lightly applied by thumb) seems to help the gasket stick ever so slightly so as to not move around when fitting the pan on the gasket. The new one is a neoprene type rubber, very dense. I put it on tonight but I'm going to refer to the 77 manual for the torque spec's and sequence. Plan to have that done this weekend and get it out of my way for a while.
Edit: Doesn't look that bad I guess

Last edited by 77mali on Sat Jul 14, 2012 2:32 pm; edited 1 time in total

77mali- Donating Member

- Street Cred : 62
Page 9 of 27 •  1 ... 6 ... 8, 9, 10 ... 18 ... 27
 Similar topics
» Clunkers and Classic YouTube build 1977 Malibu Classic
» '77 Chevelle Malibu Classic - Disco Malibu
» 74 Chevelle Malibu Classic 454 with a 4-speed
» '77 Chevelle Malibu Classic - Disco Malibu
» 74 Chevelle Malibu Classic 454 with a 4-speed
G3GM :: Media :: G3 Project Pictures
Page 9 of 27
Permissions in this forum:
You cannot reply to topics in this forum|
|
|


» Roll Call and Car showcase
» Central Texas Noob
» Welcome Keith Seymore
» Wanted: Front park lamp assemblies
» 75 Hurst Olds T-tpos
» G3 Chevy rims- help ID these
» 75 el camino project.
» Have had a few questions
» vinyl top removal