1977 Chevelle Malibu Classic Progress Photo's aka Mali
+40
pila
dynchel
Mcarlo77
Joe73
driveit
Hawk03
Fishgrinder
1973 454 MONTE
bracketchev1221
Limey SE
chevellelaguna
1973montec
Bruisr
bigredlaguna
jerry46765
BicknellWelding
geoff528
2fat2fly
Jim_Rockford
DiscoMalibu
Brainstain
Laguna Budman
Dubie
74MonteCarlo
JB2wheeler
WyldeBill66
Wallyuph
dragons_lair59
77ElClassic
Dead Man
Graham Perkins
jrb75
chromereverse
Checyxtc
74Guna
texan01
abajc3
JiMi_DRiX
orange Juiced
HDHugger
44 posters
G3GM :: Media :: G3 Project Pictures
Page 6 of 27
Page 6 of 27 •  1 ... 5, 6, 7 ... 16 ... 27
77mali- Donating Member

- Street Cred : 62
 Re: 1977 Chevelle Malibu Classic Progress Photo's aka Mali
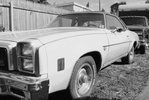
NICE! Must have been a long day, if you're taking pictures in the dark.
BicknellWelding- Donating Member

- Street Cred : 3
 Re: 1977 Chevelle Malibu Classic Progress Photo's aka Mali
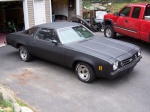
Yep- could barely see the engine it was so dark!
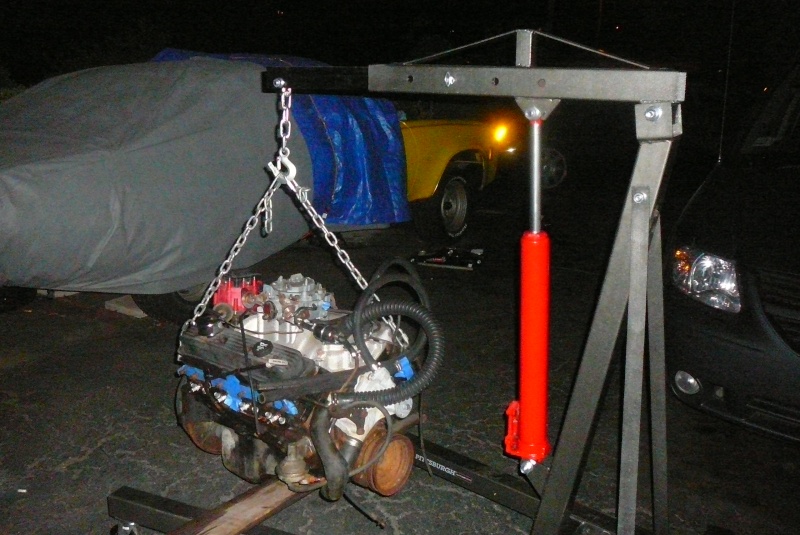
It took from about 3 to 8...then had to put away all the stuff & the hood. The engine itself was easy once I figured out I had to remove the top of the clam shell in order for it to drop a little. The driveway is not level where the car is (and she's a fatso), so had to jack the front a bit on both sides to get the crane's legs under the lower control arms.
Trans will be next once the engine is on it's stand. Maybe Monday...


77mali- Donating Member

- Street Cred : 62
 Re: 1977 Chevelle Malibu Classic Progress Photo's aka Mali
I heard many people say that they take it out from the side cuz it's easier.
1973 454 MONTE- Donating Member

- Street Cred : 36
 Re: 1977 Chevelle Malibu Classic Progress Photo's aka Mali
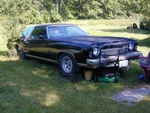
It wasn't that bad at all...just time consuming & for a first timer, a bit of a learning curve. If it was on a level slab, would have been easier I think. Now that the engine is out I might try and move it to a new spot. it's literally not moved in about a year & a half and she's starting to sink into the asphalt!


77mali- Donating Member

- Street Cred : 62
 Re: 1977 Chevelle Malibu Classic Progress Photo's aka Mali
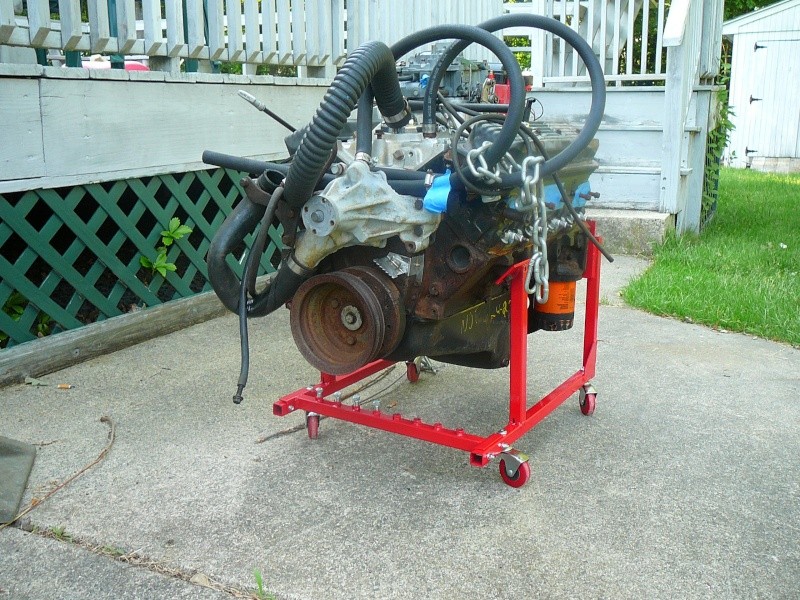
Best $39.00 I've spent in a while. I found this on craigslist here locally in Hudson, NH- brand new, manufactured by Atlas Equipment. The engine cradle is handy as heck- although the casters on this model are a bit wimpy. I'm going to modify it into a test stand/cradle, in the near future and get some better casters on it. There are similar ones avail through Summit/Jegs..etc.


77mali- Donating Member

- Street Cred : 62
 Re: 1977 Chevelle Malibu Classic Progress Photo's aka Mali
Yeah those work great, I have three of em! A 350 on one, a locked up 283 on the other and a 250 straight six on the third one. Obviously the front mounts didn't bolt to the six, just put a couple blocks under the oil pan. I can still move em to get to my other stash of crap 

DiscoMalibu- G3GM Member

- Street Cred : 7
 Re: 1977 Chevelle Malibu Classic Progress Photo's aka Mali
I don't have any store-bought stands, but made a few, just to sit the engines on, no casters.. I have a Buick V6 and a Chev 350 on stands I made, and one for the big block Caddy engines.
pila- Donating Member

- Street Cred : 43
 Re: 1977 Chevelle Malibu Classic Progress Photo's aka Mali
Stinks not having a pick up truck...Don't laugh too hard, OK? LOL
Took me like an hour on Sunday to go about 50 feet from the driveway to the workshop. I calls it "Yankee Ingenuity" or Where there's a will, there's a way. On to some engine work this weekend
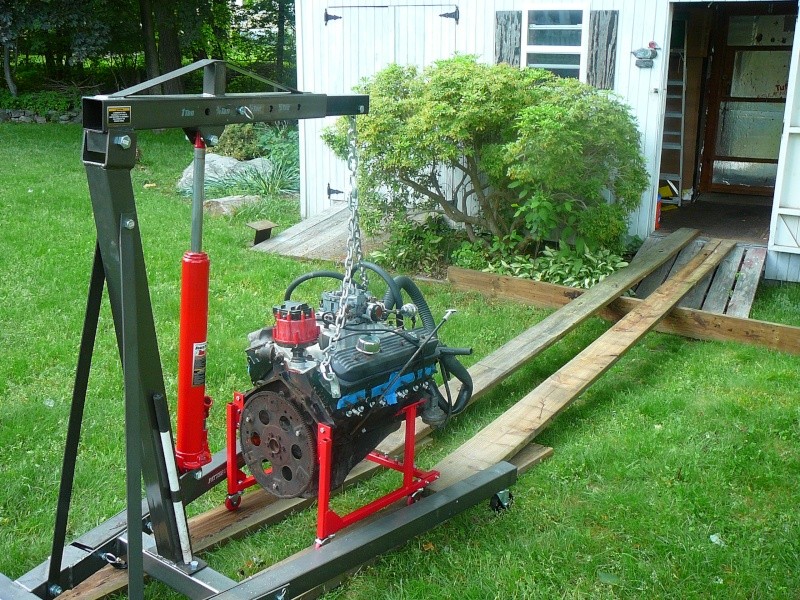
Took me like an hour on Sunday to go about 50 feet from the driveway to the workshop. I calls it "Yankee Ingenuity" or Where there's a will, there's a way. On to some engine work this weekend


77mali- Donating Member

- Street Cred : 62
 Re: 1977 Chevelle Malibu Classic Progress Photo's aka Mali
were there is a will there is way.

Wallyuph- Donating Member

- Street Cred : 31
 Re: 1977 Chevelle Malibu Classic Progress Photo's aka Mali
I am not laughing ...well sort of I have done similar things but in gravel driveway gotta love good ol thinkin when yu drinkin type o thang LOL

Limey SE- Management

- Street Cred : 98
 Re: 1977 Chevelle Malibu Classic Progress Photo's aka Mali
Removing the distributor is a way to save the cap if you accidently hit it with the chain etc.
I believe I got a lot done in the old days, when I didn't have all the equipment I have now, so whatever it takes, like you are doing, is the way I did it too. It's called "determination"
I believe I got a lot done in the old days, when I didn't have all the equipment I have now, so whatever it takes, like you are doing, is the way I did it too.
pila- Donating Member

- Street Cred : 43
 Re: 1977 Chevelle Malibu Classic Progress Photo's aka Mali
I started drinking after the engine was in the shop....a nice big glass of Merlot with 400 mg of Ibuprofen! 
I had no prob with the parts on top & the chains. There were C- clips you could open & close that came with them and off-set brackets to bolt on the heads. I cut the chains myself at Sears Hardware after measuring @ home. I'll take a pic of the set up & post it. I had to modify what I "borrowed" from Autozone a bit but over all was pretty happy and didn't care about the old valve covers- which got a bit scratched.
Edit: Here are the chain Anchors that came from Autozone: Note the heads are off & they are currently not in the recommended location for removal & installation. The chain that came w/ it is way too short & there is also another piece that goes on the hook that the clips go into but I did not use it.
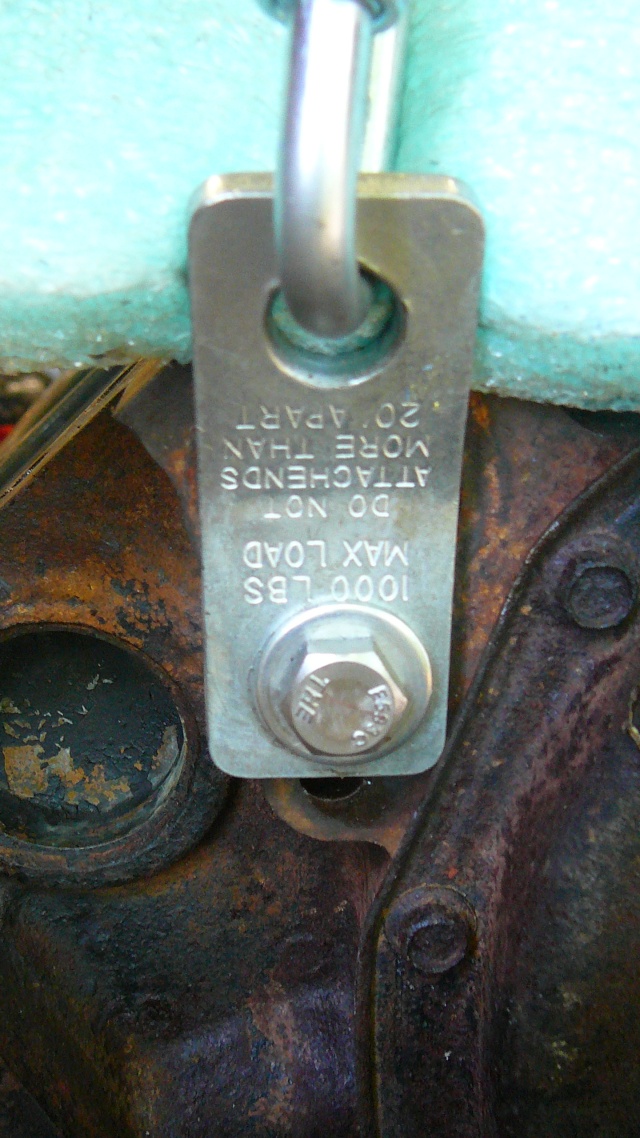
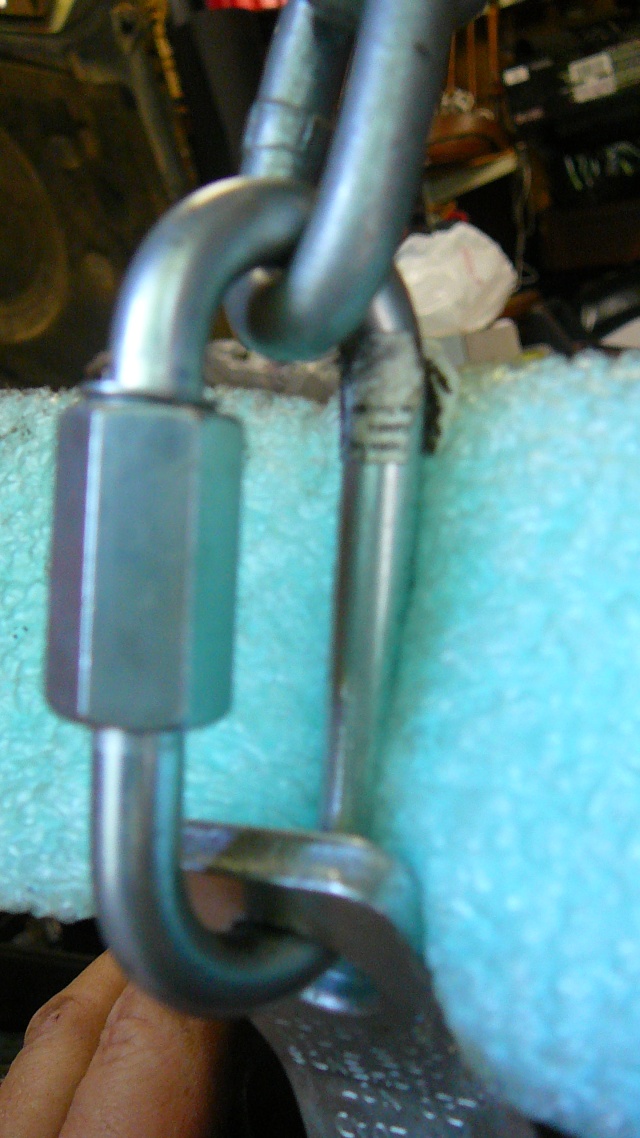


Last edited by 77mali on Mon Jun 11, 2012 7:16 am; edited 1 time in total

77mali- Donating Member

- Street Cred : 62
 Re: 1977 Chevelle Malibu Classic Progress Photo's aka Mali
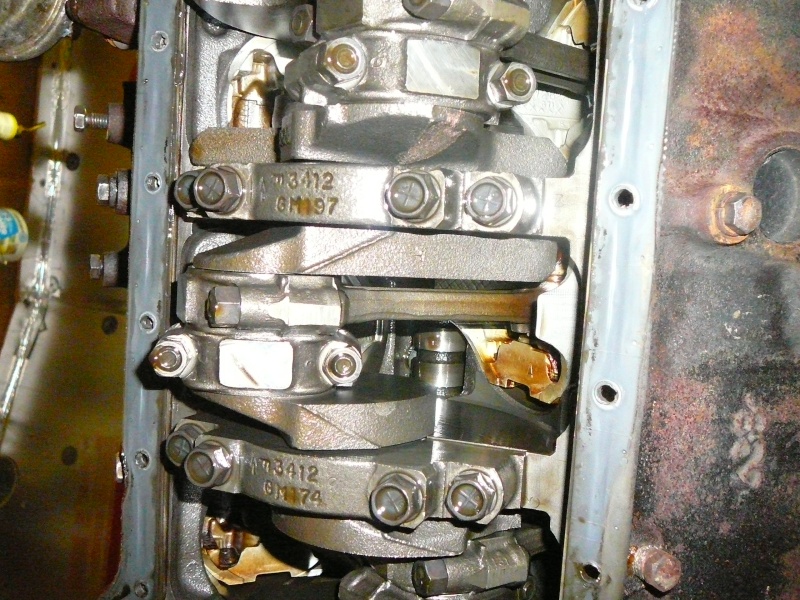
Doth mine eyes deceive me?? 


77mali- Donating Member

- Street Cred : 62
 Re: 1977 Chevelle Malibu Classic Progress Photo's aka Mali
The engine looks pretty clean, including the 4-bolt mains !
pila- Donating Member

- Street Cred : 43
 Re: 1977 Chevelle Malibu Classic Progress Photo's aka Mali
Imagine my pleasant surprise!!! But I'm concerned about the varnished gas on the underside of the pistons...does that mean the rings are letting gas through into the crank case or is that normal?  Maybe it's just oil...we'll see.

77mali- Donating Member

- Street Cred : 62
 Re: 1977 Chevelle Malibu Classic Progress Photo's aka Mali
Was it gooie like varnished gas or did those drops wipe off like oil? It doesn't look like gas, drops hanging of the cam. 
What the heck did that motor come out of, run the numbers?
What the heck did that motor come out of, run the numbers?

DiscoMalibu- G3GM Member

- Street Cred : 7
 Re: 1977 Chevelle Malibu Classic Progress Photo's aka Mali
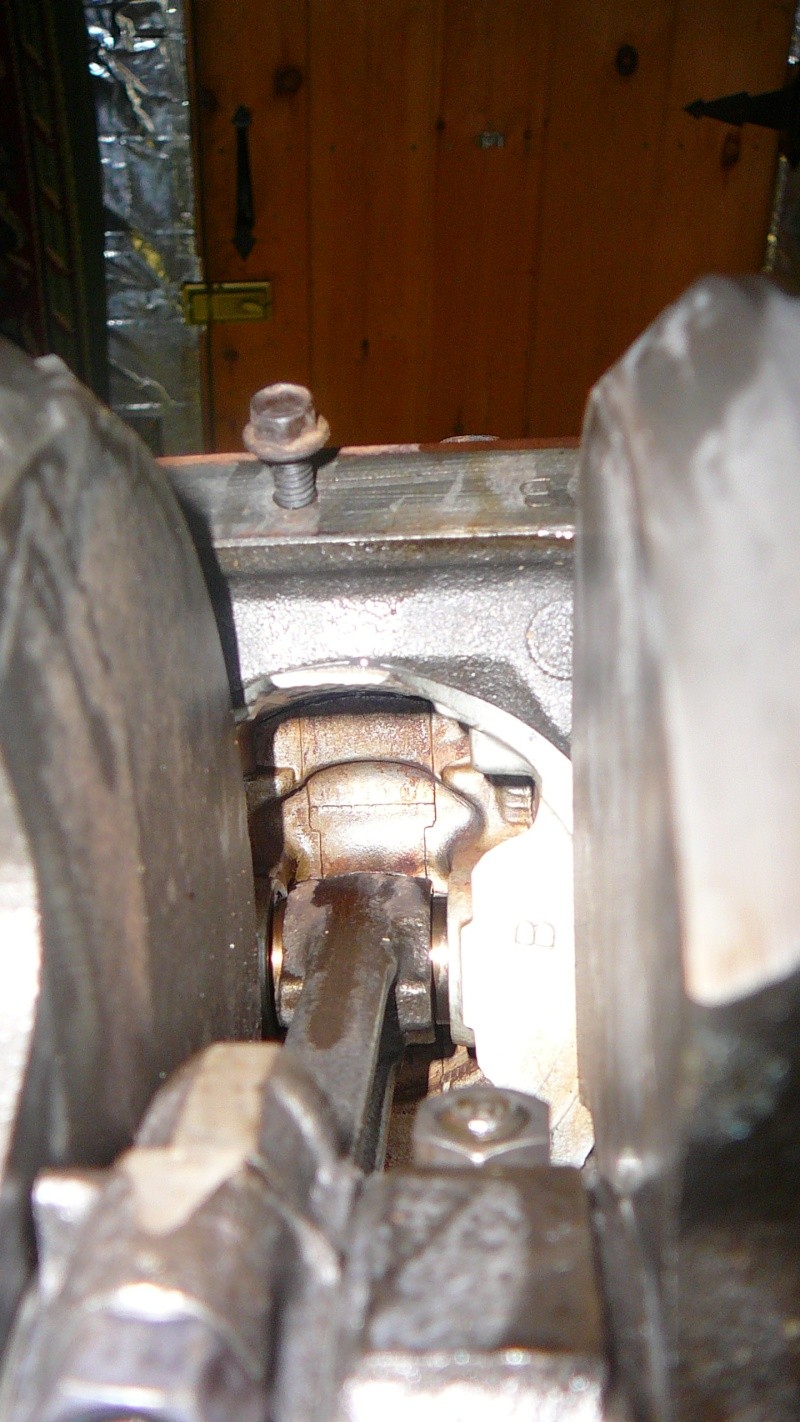
Got some Brake Clean today 2 for $7 @ Autozone on sale, LOL. I got the chlorinated version, so I'll hit the bottom of the pistons and examine.
The motor has a story all it's own. I am not sure what it came out of, could have been a whole bunch of cars, suv or truck. The block casting indicates that they were built as either 2 or 4 bolt mains. Very common block that is popular & meets spec's for circle track racing applications & is one of the 2 base blocks for the GM ZZ4 crate motor (or so I've read online doing some research). It's basically this block http://www.summitracing.com/parts/NAL-12561723/?rtype=10
I still have to confirm the crank casting & the bore size. The last digit on the crank is a toss up so It could have been used in a Mercruiser engine or maybe a HO 350 application from the era. It was cast on Novemeber 2,1988 (LO28) but was decked and all the VIN info is gonzo. I have a feeling someone tried building it up & spent some $$ but when I got the car they had put swirl polish 305 heads on it to increase compression.
Funny thing, the casting date is the exact day that I shook hands & the offer was accepted for her in 2010. I still wish that she had her original motor but I hope that it got rebuilt and is somewhere else, maybe in another 70's A body.
Edit: I don't think it's gas thank goodness. They are still not 100% clean but with some more cleaner it should all come off. I think because it gets so hot in the chamber that oil sloshing around will just accumulate there.

Last edited by 77mali on Mon Jun 11, 2012 8:04 am; edited 3 times in total

77mali- Donating Member

- Street Cred : 62
 Re: 1977 Chevelle Malibu Classic Progress Photo's aka Mali
So this is the Engine assembly date code I think- bottom of block.

Anyone know what the heck this means? {H11 627}....on Rear of block on drivers side, upper left from the flexplate.
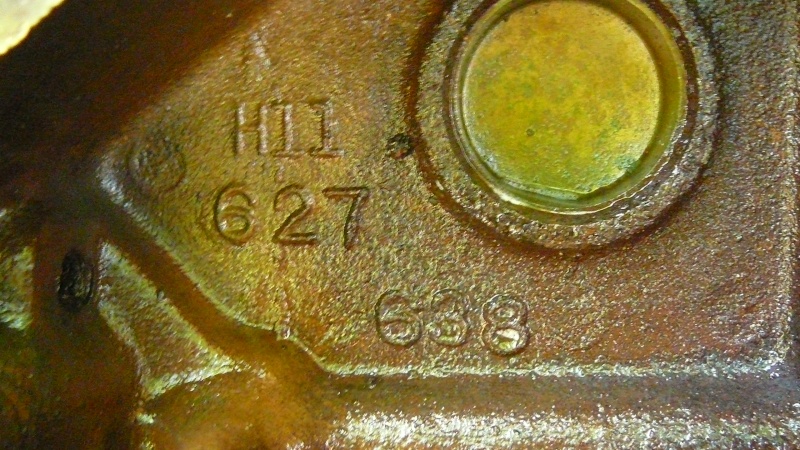

Anyone know what the heck this means? {H11 627}....on Rear of block on drivers side, upper left from the flexplate.


77mali- Donating Member

- Street Cred : 62
 Re: 1977 Chevelle Malibu Classic Progress Photo's aka Mali
[quote="74MonteCarlo"]Very nice. My dad took the fender wells for his 70 Chevelle to be chemically dipped (stripped) and e-coated. Haven't gotten them back yet. Cant wait to see them.[/quote
Okay...just spent a large part of today sanding down just the outer side of the RH inner fender well. What a p.i.t.a.! This idea of chemically dipping is sounding pretty good right now. How did your dad's fender wells turn out? What are your referring to as "e-coated"?
Paul...what did you do with the inside of your wells? Was confused with your posting of pics last Feb. showing one with shiny new black paint and another orange. Which way did you end up going?
Mcarlo77- Donating Member

- Street Cred : 78
 Re: 1977 Chevelle Malibu Classic Progress Photo's aka Mali
Steve, one is still in red primer & one is finished. I used Por-15 (2 coats) as a base & for rust proofing on them and then Duplicolor High Build primer (2 coats). The one that is finished is in semi-gloss black Duplicolor enamel- 2 more "light coats", wet on wet. They will also be clear coated. I have not finished because of the ongoing engine work and may change the color to a flatter black depending on what happens with the engine bay color. For prep I used Por-15 Marine Clean degreaser & sanded all the heavier rust w/ some 2" discs I think I started with 120, then 220 & finished with hand held sanding pads- medium then fine grit, which I also used to get into the crevasses when using the discs. The grime is a killer to get off but make sure you degrease as much as possible before sanding. Use HOT water to rinse off the degreaser and dry with compressed air if you have it. I put the Hot water in a garden type hand-pump sprayer, makes it much easier to rinse them. I was thinking about a textured rubberized coating for the underside but decided since using the Por-15, it would not be necessary. I will be using it on the rear fenders however to refresh the factory look.

77mali- Donating Member

- Street Cred : 62
 Re: 1977 Chevelle Malibu Classic Progress Photo's aka Mali
I personally like to get parts media blasted or as I did the whole car with plastic media. It will find more little spots that the metal is thin or weak but not warp the metal as it does not get as hot as sand blasting does or even grinding it to much for to long can warp the metal also. The top photo show the pin holes I sure I would have missed if not for the media blasting.
After getting car back from media balsting and wiping down with wax and grease remover. I Buzed the car with 80 grit da paper. I misted a light coat of PHIX from protective products and used a maroon scuff pad on the whole body to get rid of the surface rust that starts as soon as metal is exsposed to air with no paint. Then wipe it down with a damp rag and turns Phix to like a zinc coating. Then shot every thing with PPG DP 90 epoxy primer. Then it could sit untill I was ready to do any body work.
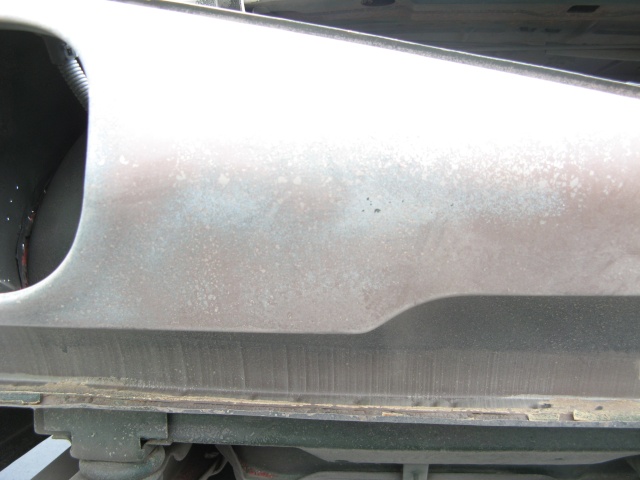
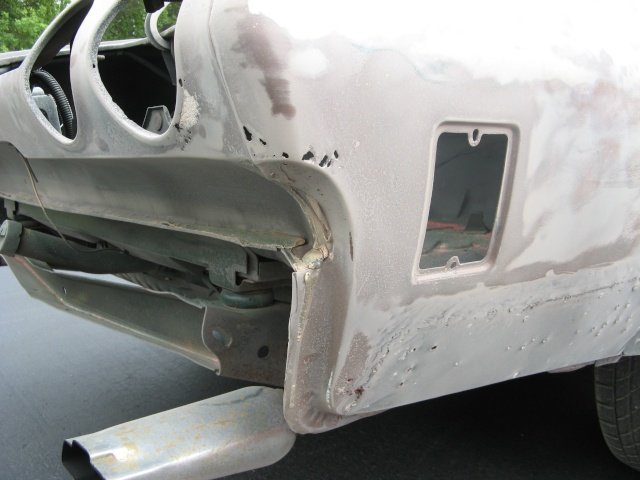
After getting car back from media balsting and wiping down with wax and grease remover. I Buzed the car with 80 grit da paper. I misted a light coat of PHIX from protective products and used a maroon scuff pad on the whole body to get rid of the surface rust that starts as soon as metal is exsposed to air with no paint. Then wipe it down with a damp rag and turns Phix to like a zinc coating. Then shot every thing with PPG DP 90 epoxy primer. Then it could sit untill I was ready to do any body work.


Wallyuph- Donating Member

- Street Cred : 31
 Re: 1977 Chevelle Malibu Classic Progress Photo's aka Mali
Thanks for the info, guys!
Paul...is the POR 15 sandable? I've heard much about it, but have never worked with it. My rust was pretty much under the battery tray and fortunately, wasn't rusted through. Just some patches of significant pitting. I was using my Dremel steel wire wheels to clean inside the pits as best I could. Figured I'd maybe use a skim coat of JB Weld to fill them. Might be better to paint some POR 15 instead?
Wally...I like your line of thinking. Did you do your own plastic mediablasting? Or, can you recommend somewhere I can take these? The outside of these wells was time consuming...didn't help that it was like 93 yesterday with a dewpoint of around 70.

Mcarlo77- Donating Member

- Street Cred : 78
 Re: 1977 Chevelle Malibu Classic Progress Photo's aka Mali
Hey that makes for a lot of water in compressor tank in weather like that. I have a small sand blaster for little parts like brackets and such. But for my car and a few friends have used .LNE blasting in Cambridge. Here is his website. http://www.lneblasting.com/cambridge-mn-sandblasting.htm
I drove my car into the shop as best as I could the thing bearly ran when I got it. I told him he would have to do a nuteral drop to get it to move but he said great as most dont run. I had him blast the whole car and door jamb with doors on he got almost all of jambs clean. it was 4 years ago when I got the car done and I think he was slow as when I called he asked how soon I could have it there so I was dropping it off the next day. He called me two days later to say it was done. I have before and after photos if you want to see some let me know.
The only thing I would have done different is use a open trailer to get it home. I used a unclosed trailer and the trailer was full of pink plastic beeds and so was the car. He blew it out but when it bounces down the road it falls out of every where.
My friend Al used my open trailer that I have now on his 54 chev and by the time he got home to St Cloud it was all blowen out.
If you run some parts up there you can stop in. Im right on the way.

Wallyuph- Donating Member

- Street Cred : 31
 Re: 1977 Chevelle Malibu Classic Progress Photo's aka Mali
If it's a mid-late 80s block, there will be id number (like 10051184) on the machined surface above the oil filter housing.
Is it a one piece or two piece rear main seal?
Does it have a mechanical fuel pump provision?
Does the crank have a pilot bushing/bearing in it?
What heads are on it? Are they center bolt valve covers?
In reality, heads matter more than block ID once you know it’s at least a 350…
Since you know it's a four bolt main, it sort of defaults it to a truck 350 displacement if it is indeed from late 80s.
Thanks -
jerry46765- Donating Member

- Street Cred : 20
Page 6 of 27 •  1 ... 5, 6, 7 ... 16 ... 27
 Similar topics
» Clunkers and Classic YouTube build 1977 Malibu Classic
» '77 Chevelle Malibu Classic - Disco Malibu
» 74 Chevelle Malibu Classic 454 with a 4-speed
» '77 Chevelle Malibu Classic - Disco Malibu
» 74 Chevelle Malibu Classic 454 with a 4-speed
G3GM :: Media :: G3 Project Pictures
Page 6 of 27
Permissions in this forum:
You cannot reply to topics in this forum|
|
|



» Roll Call and Car showcase
» Central Texas Noob
» Welcome Keith Seymore
» Wanted: Front park lamp assemblies
» 75 Hurst Olds T-tpos
» G3 Chevy rims- help ID these
» 75 el camino project.
» Have had a few questions
» vinyl top removal