'74 El Camino "Project Badass"
+23
Joe73
thatfnthing
74Malibu383
bigredlaguna
Damon23
Limey SE
Hs1973
77camino
SSTOOLMAN
pila
77ElClassic
crice63
impalamonte
JB2wheeler
Mcarlo77
77mali
DaveFury
alowerlevel
riddick75
testpilot61
knightfan26917
Roadcaptain S3
chevellelaguna
27 posters
G3GM :: Media :: G3 Project Pictures
Page 6 of 7
Page 6 of 7 •  1, 2, 3, 4, 5, 6, 7
 Re: '74 El Camino "Project Badass"
Nice to see you are still hanging in there. I must say you are really cleaver when you hit a speed bump you always Seem to find your Way around it. It must be a :pita: always Being slowed Down by lack of parts availeble. Keep it up.

Hs1973- G3GM Enthusiast

- Street Cred : 14
 Re: '74 El Camino "Project Badass"
Thank you!
I don't have any chance to leave it lol, need to finish it anyway.
Yes, lack of parts is depressing
I don't have any chance to leave it lol, need to finish it anyway.
Yes, lack of parts is depressing
builtnotbought- G3GM Member

- Street Cred : 3
 Re: '74 El Camino "Project Badass"
As for turning all 4 tailights red... I don't think you have to cut anything. A buddy of mine did it and he did not mention having cut anything. Yes the bulb will set lower in the housing on the original back up lens but it will work. The only problem he had was he put blue dots in all 4 lens and the two backup housings did not turn purple because of the bulb not being centered.

77camino- G3GM Enthusiast

- Street Cred : 8
 Re: '74 El Camino "Project Badass"
77camino wrote:As for turning all 4 tailights red... I don't think you have to cut anything. A buddy of mine did it and he did not mention having cut anything. Yes the bulb will set lower in the housing on the original back up lens but it will work. The only problem he had was he put blue dots in all 4 lens and the two backup housings did not turn purple because of the bulb not being centered.
Sorry, didn't understand about blue dots, you mean leds instead of lamps or additional leds?
Yes, I checked this thing about lamp not centered before ordering. If using usual lamp it shines evenly, just like the outer.
My housings have protrusions, and lenses have grooves in different places on outer and inner lenses. So you just can't replace inner and outer lenses without making new groove in necessary place. But I don't know how aftermarket repros will look like. Hope the same.

builtnotbought- G3GM Member

- Street Cred : 3
 Re: '74 El Camino "Project Badass"
Blue dots were very popular in the 50s and 60s. You had to drill a hole in the center of your tailight and install a small blue glass lens. If your lenses were small enough and you got the hole centered directly in front of the bulb, they would appear to be purple while applying the brakes.


77camino- G3GM Enthusiast

- Street Cred : 8
 Re: '74 El Camino "Project Badass"
Hs1973 wrote:Nice to see you are still hanging in there. I must say you are really cleaver when you hit a speed bump you always Seem to find your Way around it. It must be a :pita: always Being slowed Down by lack of parts availeble. Keep it up.
X2. You are doing an awesome job!

thatfnthing- Donating Member

- Street Cred : 65
 Re: '74 El Camino "Project Badass"
Wow77camino wrote:Blue dots were very popular in the 50s and 60s. You had to drill a hole in the center of your tailight and install a small blue glass lens. If your lenses were small enough and you got the hole centered directly in front of the bulb, they would appear to be purple while applying the brakes.
It's like blue leds in front park lights nowadays that became illegal)
thatfnthing wrote:Hs1973 wrote:Nice to see you are still hanging in there. I must say you are really cleaver when you hit a speed bump you always Seem to find your Way around it. It must be a :pita: always Being slowed Down by lack of parts availeble. Keep it up.
X2. You are doing an awesome job!
Thank you very much!

builtnotbought- G3GM Member

- Street Cred : 3
 Re: '74 El Camino "Project Badass"
Are the blue front parking lights legal in all states? I have been seeing a few here in Wisconsin. I was thinking those guys are going to get ticketed!
My son with his ungodly obnoxious Subaru's would get pulled over for blue looking HID's
headlights.
My son with his ungodly obnoxious Subaru's would get pulled over for blue looking HID's
headlights.

SSTOOLMAN- Donating Member

- Street Cred : 7
 Re: '74 El Camino "Project Badass"
I really don't know if they are illegal or not. I don't worry to much about it because my car is not on the streets all that much. I had two sets of lenses for my first El Camino which I drove to high school. Original ones for daily use and the blue dot ones for Friday and Saturday night cruising.

77camino- G3GM Enthusiast

- Street Cred : 8
 Re: '74 El Camino "Project Badass"
Just did a quick search about this, and it's a gray area in the law that varies from state to state. The best explanation I found is that they are not legal, but not illegal either. Basically, if they make the light output look purple instead of red, then you stand a chance of being harassed about them.
This is an old style that the current gen hasn't really kept, so I say run them if you got them.
This is an old style that the current gen hasn't really kept, so I say run them if you got them.
bigredlaguna- G3GM Senior Member

- Street Cred : 53
 Re: '74 El Camino "Project Badass"
This is awesome77camino wrote:I really don't know if they are illegal or not. I don't worry to much about it because my car is not on the streets all that much. I had two sets of lenses for my first El Camino which I drove to high school. Original ones for daily use and the blue dot ones for Friday and Saturday night cruising.

builtnotbought- G3GM Member

- Street Cred : 3
 Re: '74 El Camino "Project Badass"
Here in Europe you can Get away with blue dots, but if a cop see it and goes by the book you get a ticket. But in general the old classic cars get left alone if they are not to radical modified. But if you put blue or any other color leds or similar, in your modern car you are going to get a ticket. And on top the police can have your licens plates impounded until you have been to checking station, where they check your car is street legal. That we have to do every 2 years here. So blue leds can come with a lot of trouble and a hefty Price. All modifaction of any of the lights are illegal here. So is alot of other mods, you cant up the horses to more than 20 procent of the cars original output. Bigger brakes are a no no unless its tüv aproved. So if you like to modify your car, you need to read the rule book closely before doing any mods. Denmark is a bad country for petroleum heads.

Hs1973- G3GM Enthusiast

- Street Cred : 14
 Re: '74 El Camino "Project Badass"
Five months went away like 5 min so let's update some information on project.
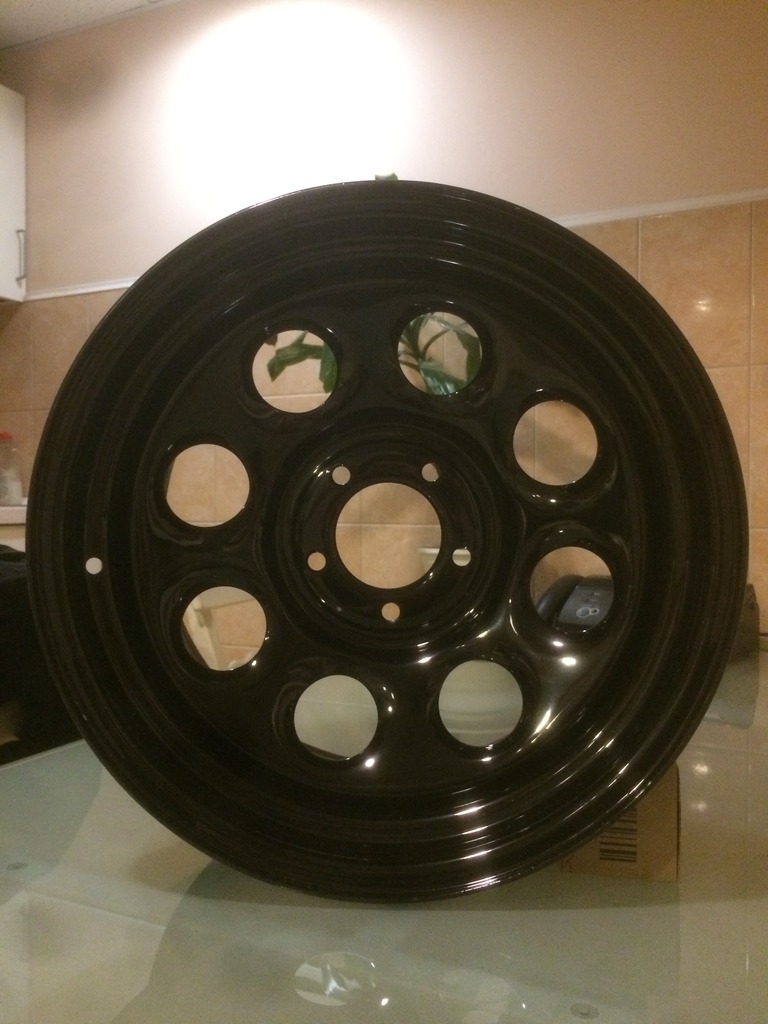
I ordered 17x9 cragars as I told before in Finland, Helsinki. Of coarse they will ship from US too. They costed me around 700 euro, about 760$ lol, twice more expensive than if I was an US citizen. I asked my friend who was going there to drive to the shop and give 100% pre-order payment. Seller warned me if I need round wheels I need to stay away from steelies but I ordered them anyway as had no other choice.
3 or 4 weeks later somewhere in the beginning of March I drove to Helsinki to 40th Anniversary American car show and besides that visited shop to pick up my new wheels. Picked them and made 400km home across the EU border and customs for free.
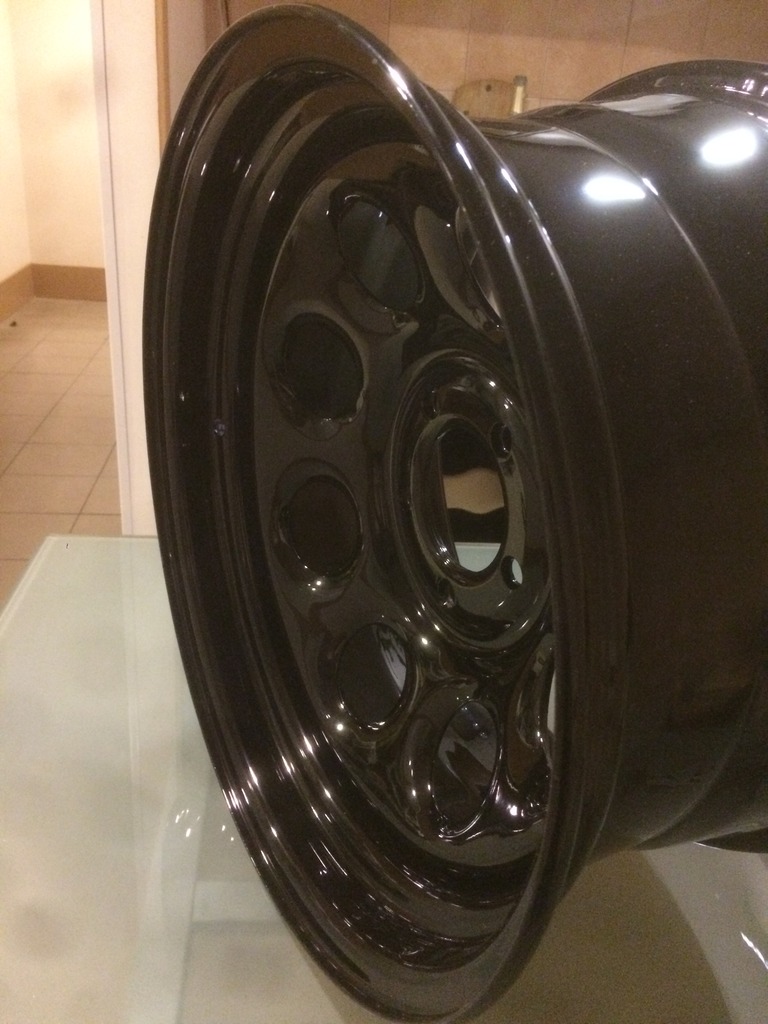
Black. Heavy. Shiny. Beautiful. Strong. and Square. Yes later at tireshop when mounting/balancing tires - 2 wheels had minor deviations from round shape, 2 other - jumped very well on balancing machine. Bad, sad, I don't know what quality wheels Cragar made years ago, but now what I got - are not the wheels for highway driving.
Dirt driving - yes. But money = quality anyway, so no regrets.
ps. I measured, face is about 5-6mm thick metal sheet, lip and barrel about 3mm thick. Now I have an ill dream to convert them to 3 piece

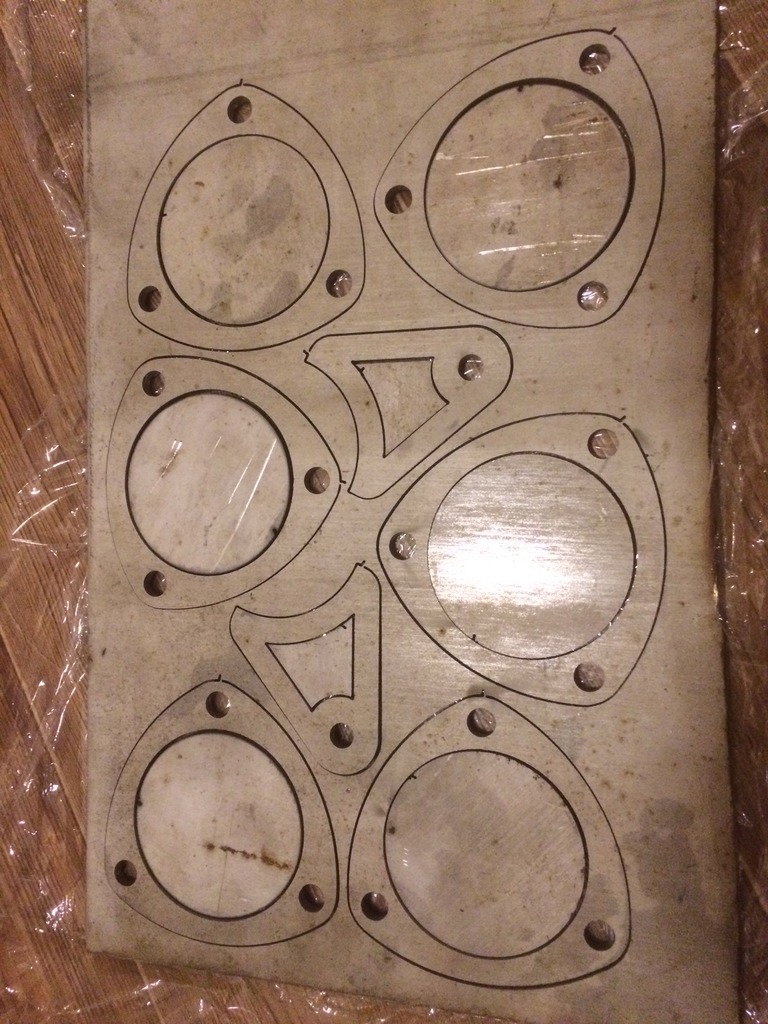
Then, after weeks of searching pieces of stainless steel, not to buy full factory sheet, I found a piece of 6mm ssteel and cutted some flanges and brackets for my new exhaust. It's one sentence here but it took really several months to get the product out drawings. First set that I got back from cutting was made from aluminium, but I gave them stainless steel material.
Wrong

Stainless
Then finished wrapping all chrome moldings into black gloss vinyl.
Ordered new set of seat belts that I wanted from Retrobelts. Got them and installed. A lot of bolts/nuts/brackets in kit and pretty good quality of chinese production. Sad the don't produce GM logo buttons. It was hard not to spoil rear side pilar panels because after re-trim they became thicker and moved from their factory places a little, of coarse moving away opening for pilar belt mount. Belts look cool, but are not as comfortable as modern 3 point belts. THey were the last puzzle in interior so I mounted last rear molding above the window and - interior is ready, need to make good photos to show you.
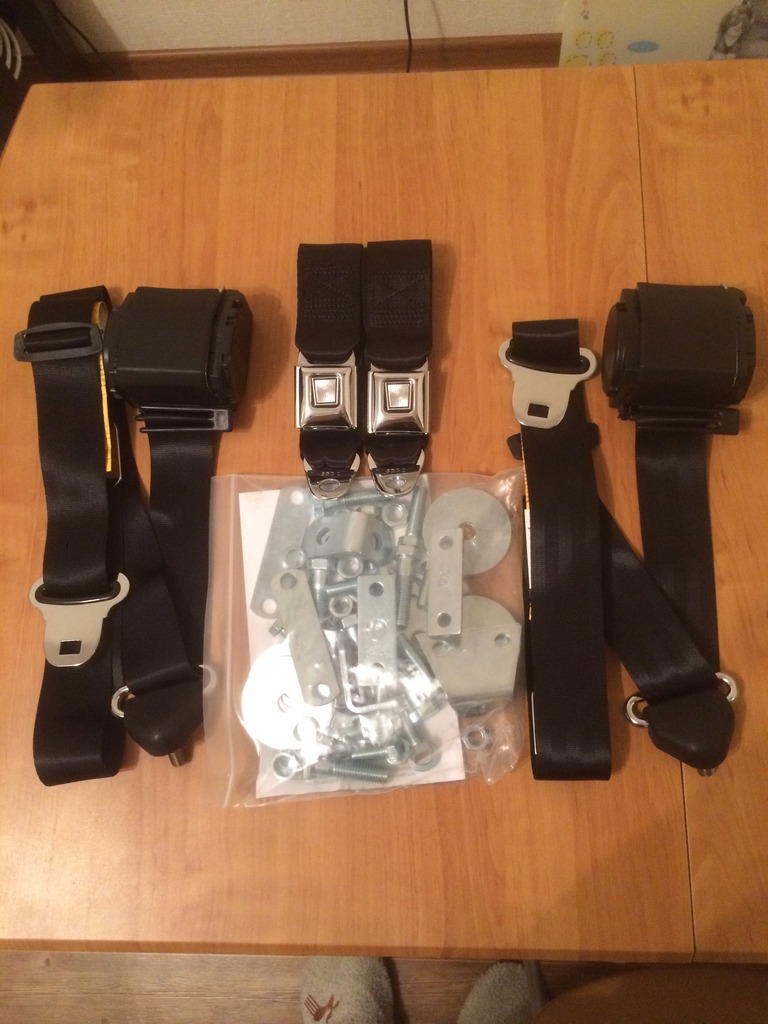
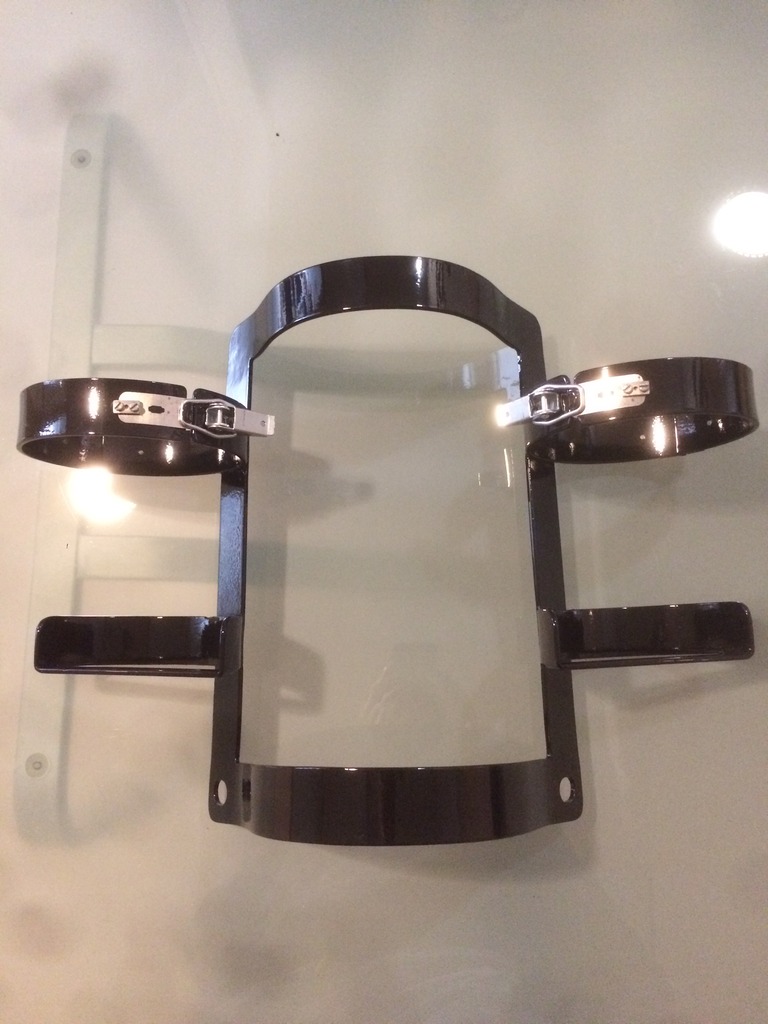
Powder coated black my fire extinguishers holder and refilled extinguishers themselves, came out great.
One more thing to do was to made new front shocks lower mounts on stock a-arms. Now I know, if anybody want to use Ridetech longest stroke Shockwaves with stock a-arms - don't do this anyway. They are not designed to work with each other together. I think Ridetech doesn't know this too. There is no suspension travel at all, car doesn't lay down because lower shock mount is too high and doesn't go up at all because upper arm's stop bump meet frame and doesn't alloy air bag to inflate fully.
So, I didn't have wheels that time to measure how they fill in the wheel arch and to measure how low I can go not to lay car on the headers. Headers, who was that genious who made third bolt looking down on flange, not up but down
I bought some opel astra gtc steelies that have 5x115 and 72mm hub diameter. Widened bolt circle holes to fit 5x120.65 and made 73 hub from 72. Then widened wheels from 7 to 9" and cutted out center to made 0 backspace and copy soft 8. Mounted new 275/40 tires and we were ready to go measuring. That was fun.
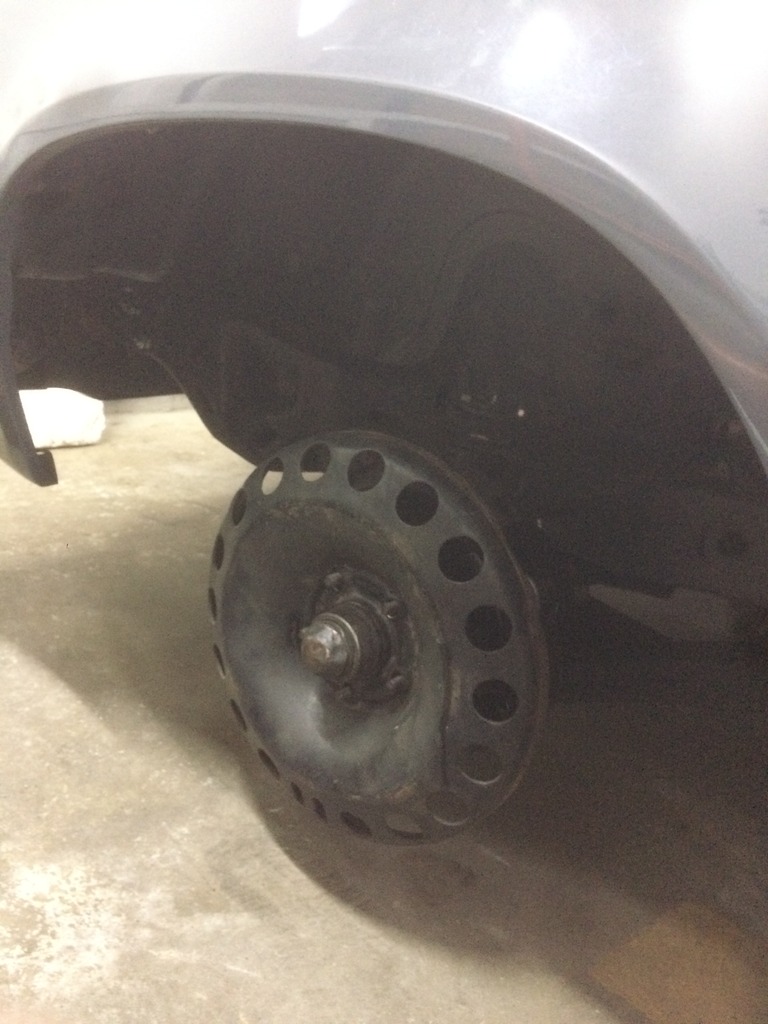
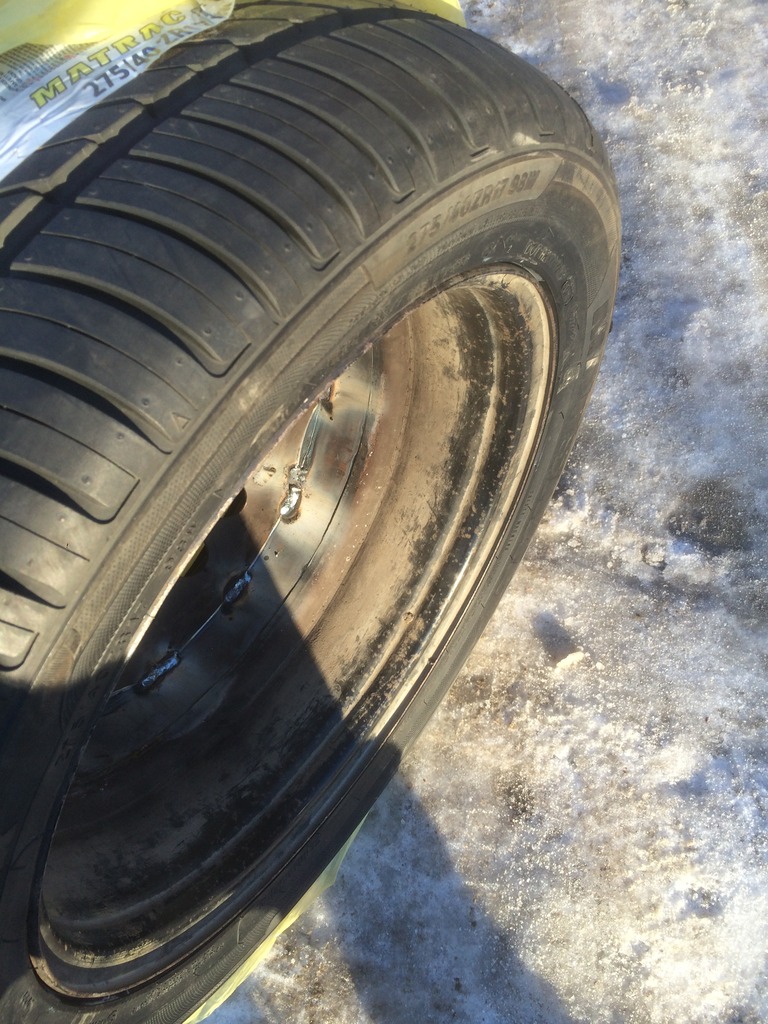
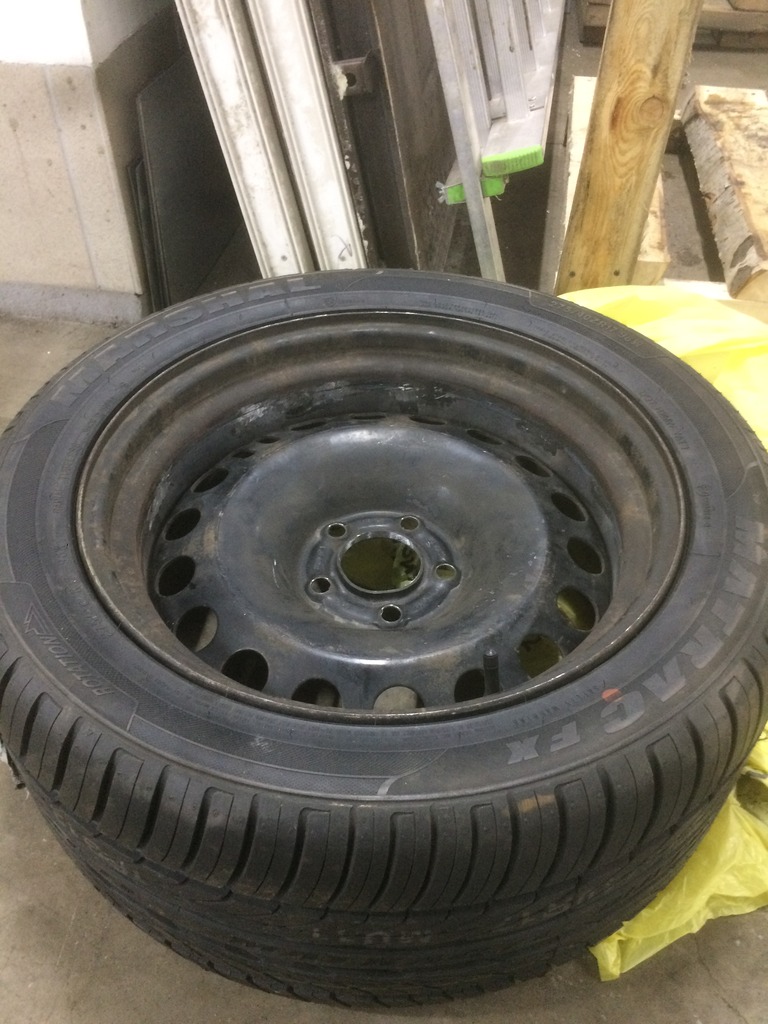
After several attempts I got the number - 3 cm lowering lower shock mounts will be great to stay safe with ground/headers clearance and steering sleeves/frame clearance. Still have enough space to bolt in lower a-arm stopbump if I want later, and a little space where upper a-arms are touching inner fenders.
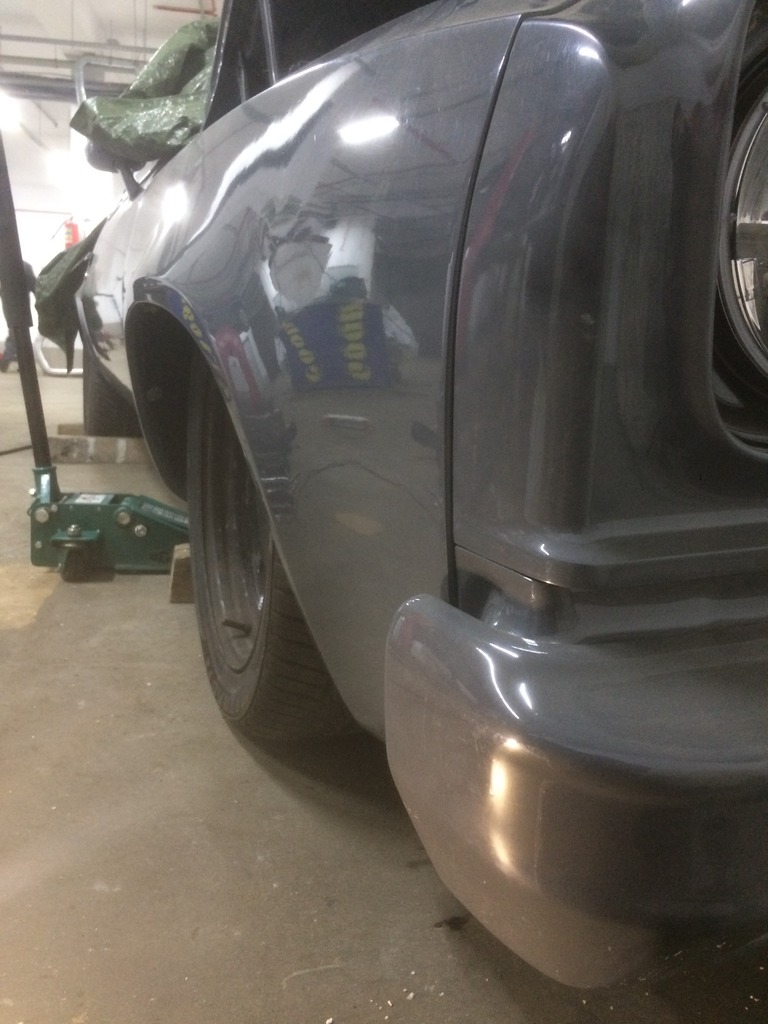

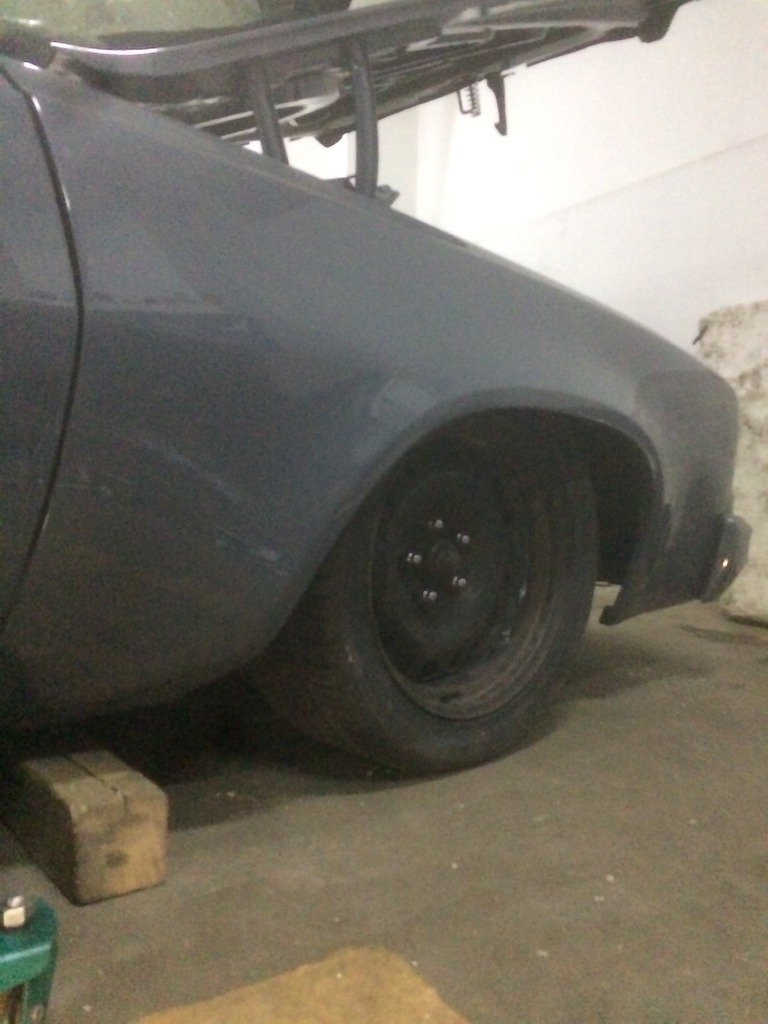
As for the wheel - it felt cool inside the fender without hitting anything.
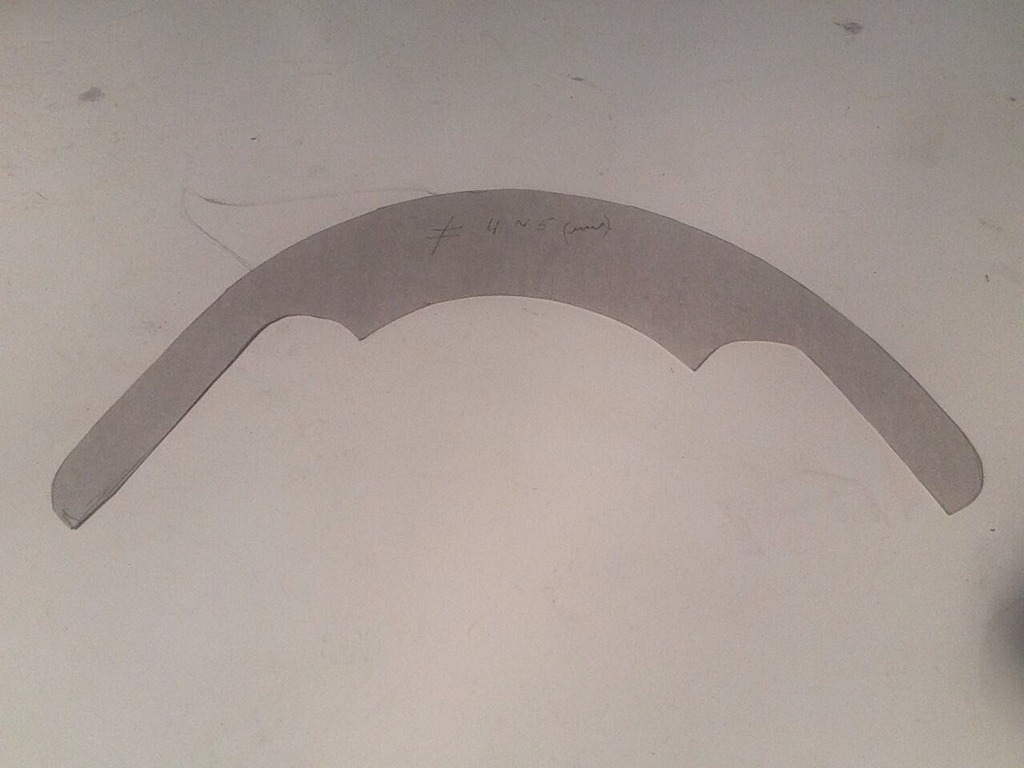
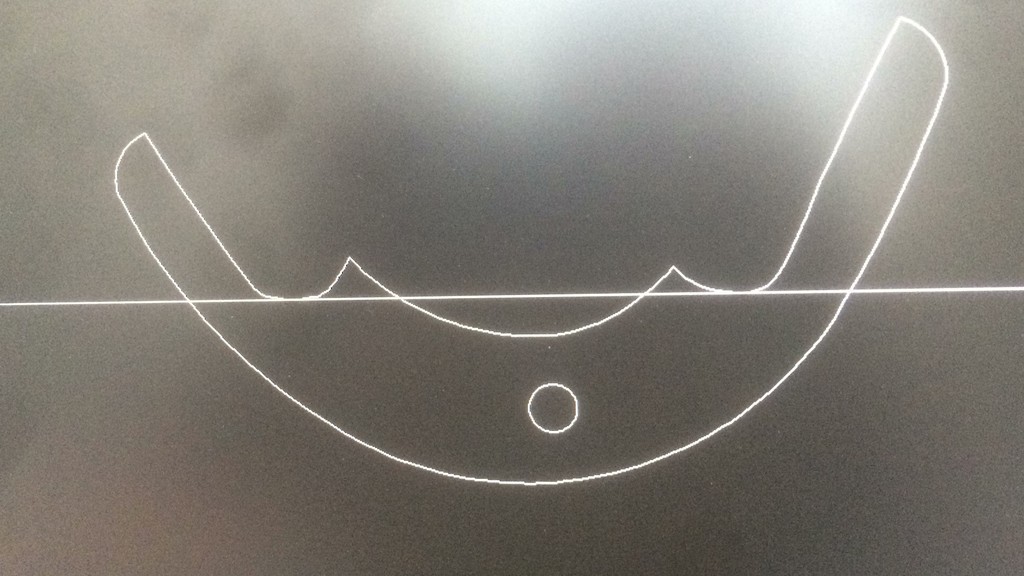
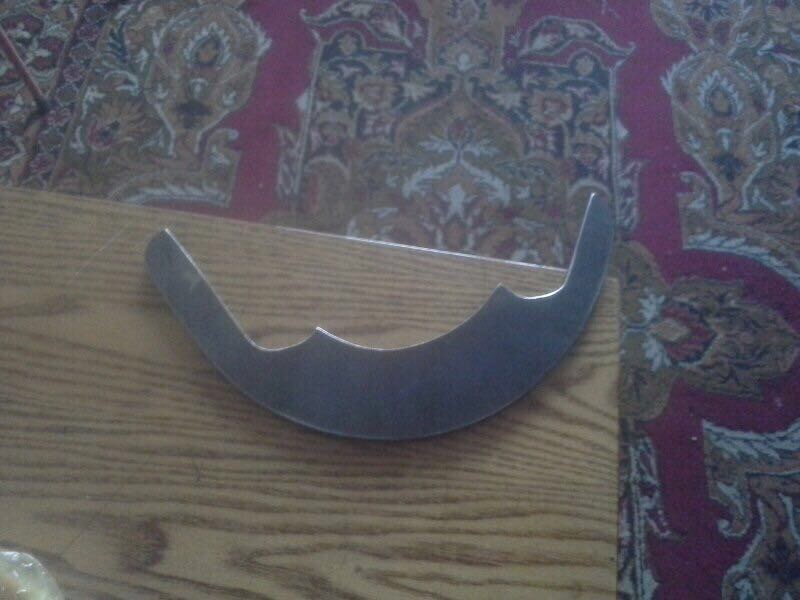
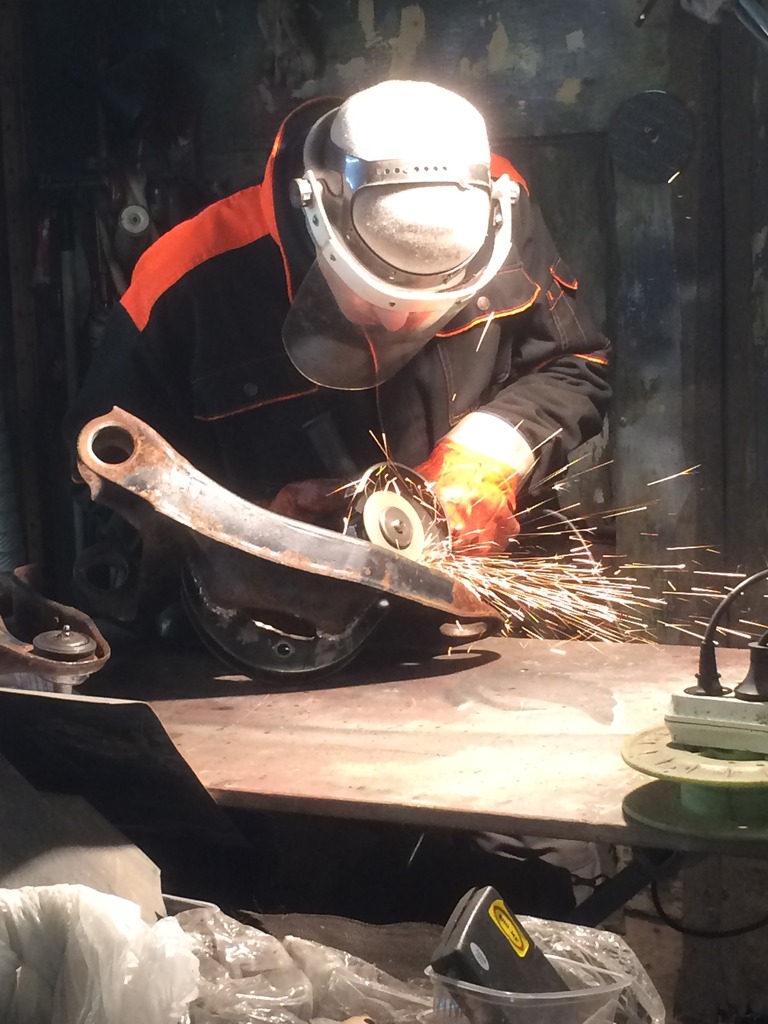
So what we do later, my metal man draw some ribs on paper, I redraw them in AutoCad and then cutted from high strength 4mm steel. After that ribs were corrected and welded to my second set of lower a-arms.


to be continued...
I ordered 17x9 cragars as I told before in Finland, Helsinki. Of coarse they will ship from US too. They costed me around 700 euro, about 760$ lol, twice more expensive than if I was an US citizen. I asked my friend who was going there to drive to the shop and give 100% pre-order payment. Seller warned me if I need round wheels I need to stay away from steelies but I ordered them anyway as had no other choice.
3 or 4 weeks later somewhere in the beginning of March I drove to Helsinki to 40th Anniversary American car show and besides that visited shop to pick up my new wheels. Picked them and made 400km home across the EU border and customs for free.
Black. Heavy. Shiny. Beautiful. Strong. and Square. Yes later at tireshop when mounting/balancing tires - 2 wheels had minor deviations from round shape, 2 other - jumped very well on balancing machine. Bad, sad, I don't know what quality wheels Cragar made years ago, but now what I got - are not the wheels for highway driving.
Dirt driving - yes. But money = quality anyway, so no regrets.
ps. I measured, face is about 5-6mm thick metal sheet, lip and barrel about 3mm thick. Now I have an ill dream to convert them to 3 piece


Then, after weeks of searching pieces of stainless steel, not to buy full factory sheet, I found a piece of 6mm ssteel and cutted some flanges and brackets for my new exhaust. It's one sentence here but it took really several months to get the product out drawings. First set that I got back from cutting was made from aluminium, but I gave them stainless steel material.
Wrong

Stainless

Then finished wrapping all chrome moldings into black gloss vinyl.

Ordered new set of seat belts that I wanted from Retrobelts. Got them and installed. A lot of bolts/nuts/brackets in kit and pretty good quality of chinese production. Sad the don't produce GM logo buttons. It was hard not to spoil rear side pilar panels because after re-trim they became thicker and moved from their factory places a little, of coarse moving away opening for pilar belt mount. Belts look cool, but are not as comfortable as modern 3 point belts. THey were the last puzzle in interior so I mounted last rear molding above the window and - interior is ready, need to make good photos to show you.

Powder coated black my fire extinguishers holder and refilled extinguishers themselves, came out great.


One more thing to do was to made new front shocks lower mounts on stock a-arms. Now I know, if anybody want to use Ridetech longest stroke Shockwaves with stock a-arms - don't do this anyway. They are not designed to work with each other together. I think Ridetech doesn't know this too. There is no suspension travel at all, car doesn't lay down because lower shock mount is too high and doesn't go up at all because upper arm's stop bump meet frame and doesn't alloy air bag to inflate fully.
So, I didn't have wheels that time to measure how they fill in the wheel arch and to measure how low I can go not to lay car on the headers. Headers, who was that genious who made third bolt looking down on flange, not up but down
I bought some opel astra gtc steelies that have 5x115 and 72mm hub diameter. Widened bolt circle holes to fit 5x120.65 and made 73 hub from 72. Then widened wheels from 7 to 9" and cutted out center to made 0 backspace and copy soft 8. Mounted new 275/40 tires and we were ready to go measuring. That was fun.


After several attempts I got the number - 3 cm lowering lower shock mounts will be great to stay safe with ground/headers clearance and steering sleeves/frame clearance. Still have enough space to bolt in lower a-arm stopbump if I want later, and a little space where upper a-arms are touching inner fenders.


As for the wheel - it felt cool inside the fender without hitting anything.
So what we do later, my metal man draw some ribs on paper, I redraw them in AutoCad and then cutted from high strength 4mm steel. After that ribs were corrected and welded to my second set of lower a-arms.


to be continued...

builtnotbought- G3GM Member

- Street Cred : 3
 Re: '74 El Camino "Project Badass"
Man Nice Progress Looking good
___________________________________________
1977 Chevelle SE x2
One Mild original
one Wild NON original
Anthony

Limey SE- Management

- Street Cred : 98
 Re: '74 El Camino "Project Badass"
You are doing some beautiful work, and are clearly not afraid to tackle some hard mods to make things work the way you want. 


thatfnthing- Donating Member

- Street Cred : 65
 Re: '74 El Camino "Project Badass"

Nice work on your project sir. I don't mean to sound like a dumba$$, but what is this for?

fasrnur- G3GM Enthusiast

- Street Cred : 9
 Re: '74 El Camino "Project Badass"
That sucks about the wheels. I take for granted that we have everything within our fingertips here and out of round wheels would be as easy as returning or getting a call tag sent to us. I bought the same wheels and had a inch added to the outside of two of them. They spun on the machine smooth as silk and needed minimum weight. the other two that were new out of the box had a little shake on the machine but once the tire was mounted they too were smooth. My son bought a set of steel wheels used and three shook the machine but as soon as they put his tires on they smoothed out. Hopefully you have the same result.
I too was wondering what that piece you made was for.
I too was wondering what that piece you made was for.
Damon23- G3GM Member

- Street Cred : 5
 Re: '74 El Camino "Project Badass"
I believe that piece is for the lower mount for his air ride. The factory location on the a-arm is too short for the system to work properly.

bigredlaguna- G3GM Senior Member

- Street Cred : 53
 Re: '74 El Camino "Project Badass"
Sorry for not ressponding for so long.
As I understand all or most part of my photos in this thread became invisible as photobucket canceled free loading or did something else to block them from other users. If this is so (I can see only several photos logged in/or out) feel free to ask any questions on the build, I will try to answer everybody.
As for old photos I will try to refill old info but when I have lots of free time. Sorry again.
The build is continued anyway.


I will upload photos with another service, it's russian photobank, I think everybady allover the world can see it's photos, if not, tell me please, thank you!
I ordered a bunch of staff in the end of november 16, made a deal on black friday first time, and of coarse new bushings and ball joints were in this parcel too.
So it was February and still there was no parcel at my door. March, April...got the news that my parcel got stuck at russian customs with no hope of leave. F*ck them all on russian customs and all politician too.
It was april, 4 months of waiting. Thanks my shipping company after several times of requests they agreed to re-order full parcel again.
So it was smth around May 17 when I got my parcel that I ordered in November 16. It was a holiday.
The week after new bushings took their place in new a-arms and went into the car. So, front lower A-arms were modified, powder coated and sucessfully installed, but spring pockets were widened to have a little more room as on full deflated position shocks gave more angle. Now I have 13.5cm stroke on the front suspension and can go down leaving 1.5-2cm between the header flange and the ground, and can go up I think higher than stock.


Exhaust was custom made in the end of spring. After 1.5 days it was ready. So now I have Hooker stainless headers with 3" outlet, then goes 3" stainless pipes with H-pipe, then dual cutouts (bought Badlandz standart ones) with turndowns, then Flowmaster mufflers that I got with car (just cleaned them) and turndowns before the axle.
Yes it became quieter than straight headers but not so much as I expected.
We tried to find any info how to make ideal h-pipe but found very little so we made cross pipe in comfortable place for us. May be it's too long but I think it sounds like it must sound.
As for cutouts, one motor worked only from 14V and spinned much slower then second. I sent it back to states and ggt new one succesfully. I'm a little proud to have full stainless exhaust that I always wanted to build but now I think as it was mistake to build it 3" as it's loud to much even with closed cuouts and interior noise insulation but maybe it's all because of turndowns looking to the ground before the axle.
Another annoying thing is that it hanges too low but I can do nothing with that, maybe going oval pipes will help this.


Of coarse after a 2-3 weeks of using I bend one cutout turndown going reward out of the service. And hell yes, this summer I made 900 miles if odometer is healthy and most of this miles are made around services
Sound, with H-pipe it got such a resonation (don't know how it's called right) on high rpm that make shivers appear on all body, it's so cool revving, it got some expensive music notes! As for straight pipe sound plus h-pipe resonation - it sounds hell crazy loud and powerfull, I can't describe this.
And it's heavy. Got to change rear rubber hangers from LADA to Tahoe's to keep it. On photos system hanges a little askew because after all fight with right header it's still not on the same height as left.
Bought nice Moroso racing nuts for wheels =)

Always wanted to put on some splitter under front bumper, but Randy's spoiler was expensive with shipment and again would take time to wait. So decided to make it myself. Two evenings with drawing some sketches, cutting, drawing, cutting and spoiler was ready from paper. Tried to make it functional to bring air to radiator.
Well, designing something your own is pretty cool but takes too much time and patience


Draw it in Autocad, sent to advertisement company and they cut it for me from advertisement plastic panel with aluminium sheets on both sides.


Made some brackets to stock lower bumper bolts, powdercoated them, wrapped spoiler in gloss black film to match other black parts and mounted. Not Randy's but myself spoiler.


Rear white side was painted black later


I think came out pretty cool! Photos don't show it.

The other day I tried to make some tyre stencils, again my own. Created them, draw, pre-cut and painted. Twice or three times, used some primer, then tried plastidip, no result, didn't find paint that will last long on rubber. But it looks great.


Here is a photo of how I replaced rear bed door handle. It's a 70-72 elco latch and handle inside 73-77 door. One side latch drive is lengthened and central latch is mounted to the cover.
Thanks Steve Mcarlo77 very much for parts! I know I need to clean or change most of the bolts in car for new shiny ones.


First time washed the car and polished in 6 hands. Likely most of the scratches that I made during assembling went away. But water was inside interior trought side glass and under my plastic cover in the bed.


As I understand all or most part of my photos in this thread became invisible as photobucket canceled free loading or did something else to block them from other users. If this is so (I can see only several photos logged in/or out) feel free to ask any questions on the build, I will try to answer everybody.
As for old photos I will try to refill old info but when I have lots of free time. Sorry again.
The build is continued anyway.
Thank you sir!Limey SE wrote:Man Nice Progress Looking good
I think these are not hard mods on the world's car scene but for me - it's definitely sothatfnthing wrote:You are doing some beautiful work, and are clearly not afraid to tackle some hard mods to make things work the way you want.

fasrnur wrote:
Nice work on your project sir. I don't mean to sound like a dumba$$, but what is this for?
Yes those are brackets for lower shock mount to relocate it about an inch lower to let shocks/bags have full factory travel. I thought I described it somewhere up in the thread, I will look.bigredlaguna wrote:I believe that piece is for the lower mount for his air ride. The factory location on the a-arm is too short for the system to work properly.
Drive is ok up to 80-90km/h but then shake like crazy. I can see with eye on the balancing machine that wheels are not roundDamon23 wrote:That sucks about the wheels. I take for granted that we have everything within our fingertips here and out of round wheels would be as easy as returning or getting a call tag sent to us. I bought the same wheels and had a inch added to the outside of two of them. They spun on the machine smooth as silk and needed minimum weight. the other two that were new out of the box had a little shake on the machine but once the tire was mounted they too were smooth. My son bought a set of steel wheels used and three shook the machine but as soon as they put his tires on they smoothed out. Hopefully you have the same result.
I too was wondering what that piece you made was for.
I will upload photos with another service, it's russian photobank, I think everybady allover the world can see it's photos, if not, tell me please, thank you!
I ordered a bunch of staff in the end of november 16, made a deal on black friday first time, and of coarse new bushings and ball joints were in this parcel too.
So it was February and still there was no parcel at my door. March, April...got the news that my parcel got stuck at russian customs with no hope of leave. F*ck them all on russian customs and all politician too.
It was april, 4 months of waiting. Thanks my shipping company after several times of requests they agreed to re-order full parcel again.
So it was smth around May 17 when I got my parcel that I ordered in November 16. It was a holiday.
The week after new bushings took their place in new a-arms and went into the car. So, front lower A-arms were modified, powder coated and sucessfully installed, but spring pockets were widened to have a little more room as on full deflated position shocks gave more angle. Now I have 13.5cm stroke on the front suspension and can go down leaving 1.5-2cm between the header flange and the ground, and can go up I think higher than stock.


Exhaust was custom made in the end of spring. After 1.5 days it was ready. So now I have Hooker stainless headers with 3" outlet, then goes 3" stainless pipes with H-pipe, then dual cutouts (bought Badlandz standart ones) with turndowns, then Flowmaster mufflers that I got with car (just cleaned them) and turndowns before the axle.
Yes it became quieter than straight headers but not so much as I expected.
We tried to find any info how to make ideal h-pipe but found very little so we made cross pipe in comfortable place for us. May be it's too long but I think it sounds like it must sound.
As for cutouts, one motor worked only from 14V and spinned much slower then second. I sent it back to states and ggt new one succesfully. I'm a little proud to have full stainless exhaust that I always wanted to build but now I think as it was mistake to build it 3" as it's loud to much even with closed cuouts and interior noise insulation
Another annoying thing is that it hanges too low but I can do nothing with that, maybe going oval pipes will help this.


Of coarse after a 2-3 weeks of using I bend one cutout turndown going reward out of the service. And hell yes, this summer I made 900 miles if odometer is healthy and most of this miles are made around services
Sound, with H-pipe it got such a resonation (don't know how it's called right) on high rpm that make shivers appear on all body, it's so cool revving, it got some expensive music notes! As for straight pipe sound plus h-pipe resonation - it sounds hell crazy loud and powerfull, I can't describe this.
And it's heavy. Got to change rear rubber hangers from LADA
Bought nice Moroso racing nuts for wheels =)

Always wanted to put on some splitter under front bumper, but Randy's spoiler was expensive with shipment and again would take time to wait. So decided to make it myself. Two evenings with drawing some sketches, cutting, drawing, cutting and spoiler was ready from paper. Tried to make it functional to bring air to radiator.
Well, designing something your own is pretty cool but takes too much time and patience


Draw it in Autocad, sent to advertisement company and they cut it for me from advertisement plastic panel with aluminium sheets on both sides.


Made some brackets to stock lower bumper bolts, powdercoated them, wrapped spoiler in gloss black film to match other black parts and mounted. Not Randy's but myself spoiler.


Rear white side was painted black later


I think came out pretty cool! Photos don't show it.

The other day I tried to make some tyre stencils, again my own. Created them, draw, pre-cut and painted. Twice or three times, used some primer, then tried plastidip, no result, didn't find paint that will last long on rubber. But it looks great.


Here is a photo of how I replaced rear bed door handle. It's a 70-72 elco latch and handle inside 73-77 door. One side latch drive is lengthened and central latch is mounted to the cover.
Thanks Steve Mcarlo77 very much for parts! I know I need to clean or change most of the bolts in car for new shiny ones.


First time washed the car and polished in 6 hands. Likely most of the scratches that I made during assembling went away. But water was inside interior trought side glass and under my plastic cover in the bed.


builtnotbought- G3GM Member

- Street Cred : 3
 Re: '74 El Camino "Project Badass"
One evening I decided to make a waterproof cover for the full car. Some measurments and after several weeks in upholstery shop it was ready. Later this waterproof material showed his back side. It was so rude that made again all this little scrratches, it was fail. Need to remade cover from another material or to add something underneath the existing one.


In that last half year delivery parcel I also got new rear lights housings and lenses. Quality is pretty good but silver/red paint on lenses is too thin. I cutted several slots in inner lenses to fit housings and we are ready to go!


Made wheels alignment for second time at my new ride height.
Removing old housings and installing new ones without taking of rear bumper is a real bloody hell.
Russian licence plates are one of the ugliest plates in the world but I need to put them on anyway when driving. Made them on powerful magnets.


Then changed oil in the rear axle. Teeth are looking good

Gave some wrap touch to knew spindle caps

And, ta daaaaam, in the beginning of summer 17 elco made it first trip around the city!!!


If I remember clearly, +/- 6 years went from stock to this look


In that last half year delivery parcel I also got new rear lights housings and lenses. Quality is pretty good but silver/red paint on lenses is too thin. I cutted several slots in inner lenses to fit housings and we are ready to go!


Made wheels alignment for second time at my new ride height.
Removing old housings and installing new ones without taking of rear bumper is a real bloody hell.
Russian licence plates are one of the ugliest plates in the world but I need to put them on anyway when driving. Made them on powerful magnets.


Then changed oil in the rear axle. Teeth are looking good

Gave some wrap touch to knew spindle caps

And, ta daaaaam, in the beginning of summer 17 elco made it first trip around the city!!!


If I remember clearly, +/- 6 years went from stock to this look


builtnotbought- G3GM Member

- Street Cred : 3
 Re: '74 El Camino "Project Badass"
Really nice job, i like it!
tropdeprojet- Donating Member

- Street Cred : 5
 Re: '74 El Camino "Project Badass"
Excellent job! Do you get a lot of attention with it? People want to know what it is?

thatfnthing- Donating Member

- Street Cred : 65
 Re: '74 El Camino "Project Badass"
Thank you!thatfnthing wrote:Excellent job! Do you get a lot of attention with it? People want to know what it is?
We have here in Saint-Petersburg about 6-7 elco of this generation, but only 2-3 of them make activity on the roads. So most of the time people don't know what it is, especially because I have no badges at all. Even Make of my car is unknown for some people
Yes it turns heads a lot
 Cool thing is that when you are waiting a tow sitting under the hood hiding from the frying sun in the center of the crossroad - everybody gave you thumb up anyway but they don't understand that car is dead at the moment
 Thank you!tropdeprojet wrote:Really nice job, i like it!

builtnotbought- G3GM Member

- Street Cred : 3
 Re: '74 El Camino "Project Badass"
That looks awesome man!! All the hard work really came through in the end.
Showtime73- Donating Member

- Street Cred : 1
Page 6 of 7 •  1, 2, 3, 4, 5, 6, 7
 Similar topics
» 75 el camino project.
» MY DAILY DRIVER/PROJECT 73 EL CAMINO SS
» Classic Car Restoration Club: 1977 El Camino Project Car-Overview
» MY DAILY DRIVER/PROJECT 73 EL CAMINO SS
» Classic Car Restoration Club: 1977 El Camino Project Car-Overview
G3GM :: Media :: G3 Project Pictures
Page 6 of 7
Permissions in this forum:
You cannot reply to topics in this forum


» Roll Call and Car showcase
» Central Texas Noob
» Welcome Keith Seymore
» Wanted: Front park lamp assemblies
» 75 Hurst Olds T-tpos
» G3 Chevy rims- help ID these
» 75 el camino project.
» Have had a few questions
» vinyl top removal