Update :1973 Monte Carlo Body off frame resto. Now with LS!
+24
Iggy
Hawk03
thatfnthing
76 Malibu
REVINKEVIN / Mr. 600+HP
Zaptiah
fasrnur
TW Monte
Hs1973
ant7377
Damon23
Circuit Rider
77mali
99B4C
75Pontiac-Pride
77cruiser
Dinomyte
marks454ss
driveit
bitterfitter
pila
Joe73
dynchel
1973montec
28 posters
G3GM :: Media :: G3 Project Pictures
Page 1 of 6
Page 1 of 6 • 1, 2, 3, 4, 5, 6 
 Update :1973 Monte Carlo Body off frame resto. Now with LS!
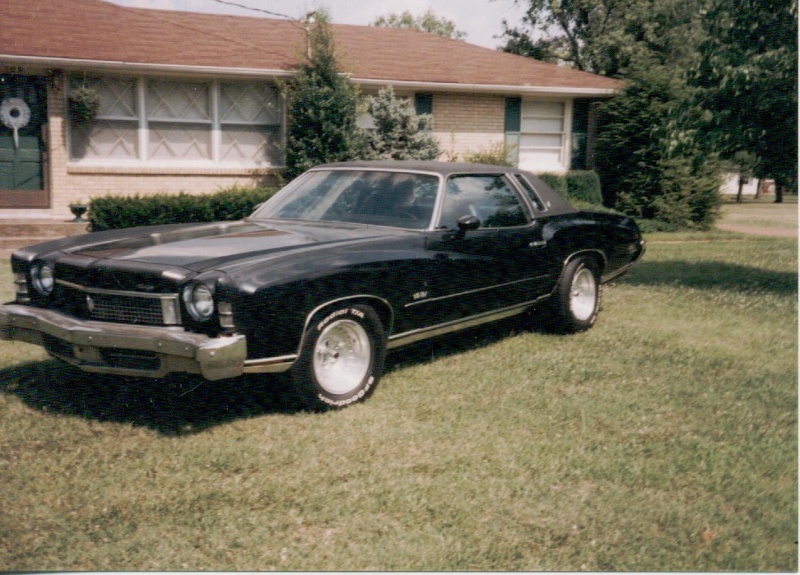
This is the car I started with. Full optioned minus the sunroof.
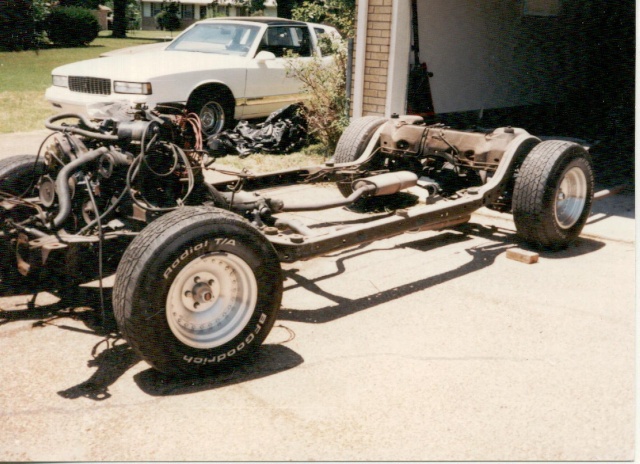
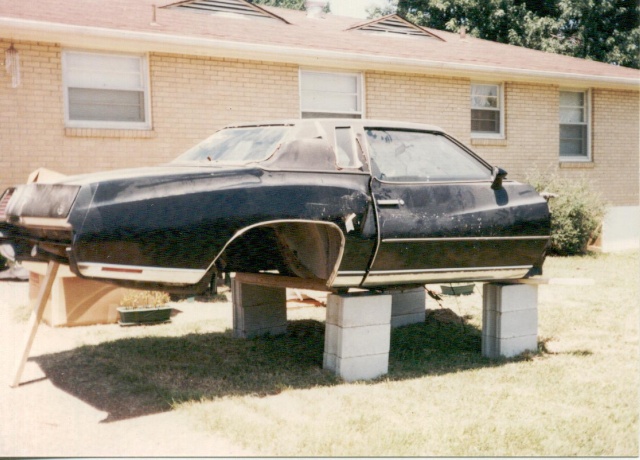
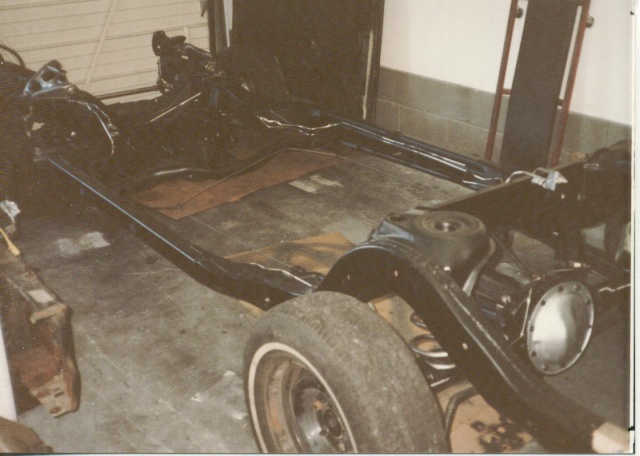
So , once the body was off the frame. I could start the chassis. Sandblasted all frame related hard parts.
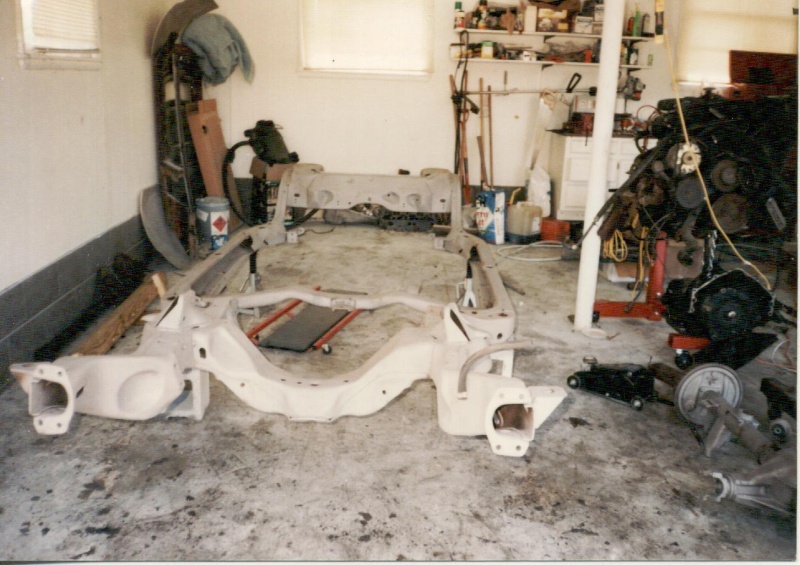
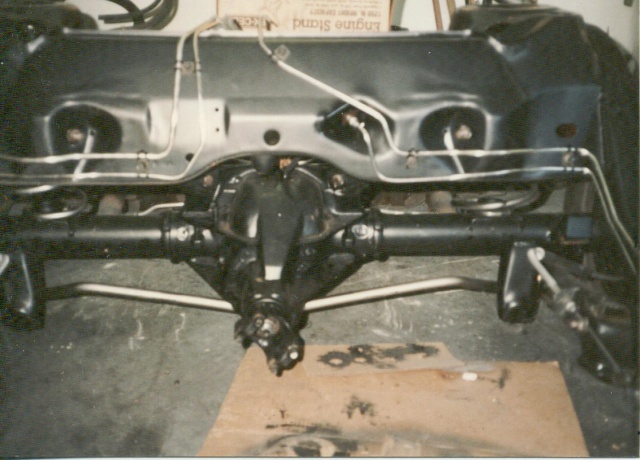
Then the rebuild began. Coated everyting with POR-15 through a remote spray pot. At this point the rearend had been totally rebuilt with a Auburn Pos. added with 3.42 gears. PST polygraphite bushing throughout. Stainless hard brake lines. Springs, sway bars , etc. painted a different color for detail.
Then , I wanted to run stainless throught the car. Only one problem. At the time , no companies were offering stainless fuel lines from the motor to the tank. So , I talked to the owner of Classic Tube and he said he didnt have any but would like to find some clean specimens to make patterns and offer those for sales in the future for owners of our cars. During the conversation , I told him I may have what he needed to make that happen. I sent mine to him he made patterns and he only charged me for the materials.
At this point , I was ready to start on the body. But , once I got into it , I found a lot of rust in the area around the opera windows and the dog-leg around the rear window being a Tennessee car all its life and not sheltered. I call got in touch with an individual in Colorado that had a set of quarters specially for the 73 as NOS. But , what he wanted for them was not appealing ! There had to be a better way !!
So my search went out west . With a Hemmings magazine I started calling junkyards out west. If one guy didnt have one...he had a buddy that had junkyard. So after two weeks of searching I found one in New Mexico. I sent a disposable camera to the owner of the junkyard and asked that he take specific pictures in specific areas. He did and it revealed a totally rust free car. We agreed on the price and went to pick it up. That a story in its self. Some good together time for me and my brother as adults.
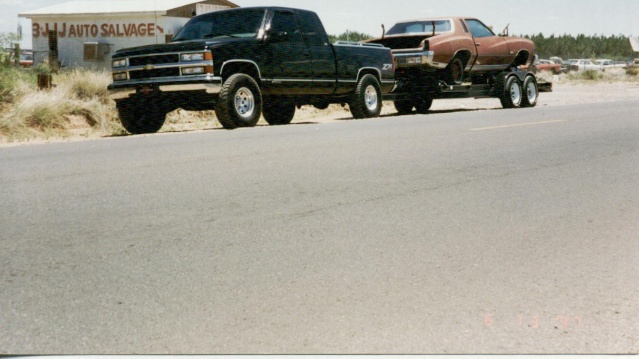
Got the car back to Tennessee and started the process of stripping the body and then transferring it onto the newly built chassis. I found the build sheet of the desert car. Built full optioned in Fremont California. Per the build sheet. It was a Fleet Executive car. Has the designation typed on the build sheet.

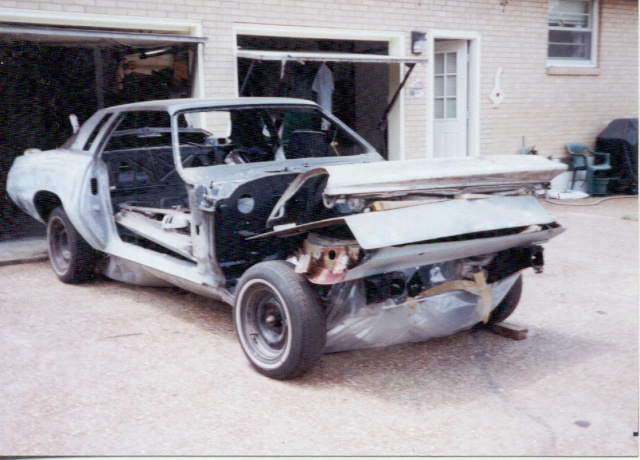
I got lucky. When I got the body down to metal. No prior work had ever been performed on the car nor could I find evidence of where the car had been wacked. So I coated the complete interior with the POR-15. Under the body. Trunk. I taped off the area where the Vinyl roof is to go back on as this was a solid car and didnt want the possibility of rust to start in those areas that are prevalent on our cars. Matter of fact, early in its life someone had removed the vinyl roof which I believe saved it ! But , I wanted the vinyl back on...I think our cars look better with it. Without it....it is like a suit with the wrong shoes ! Extra doors and fenders left over from the desert car in these pics.

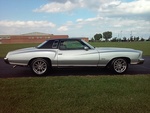
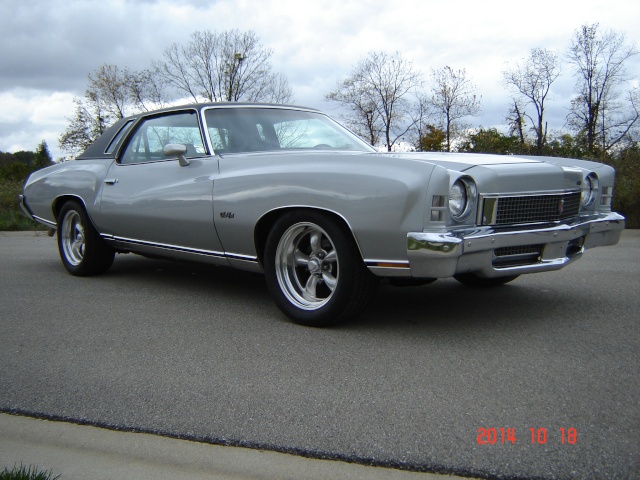
From there I had the car painted. 1996 Camaro Sebring Silver Metallic.I have painted several cars but I knew that with this I would not be able to achieve the results I wanted. I had very little knowledge of the two step process of water based base coat / clear coat. Better left to a man that has had 30 years with a spray gun in his hand. Left up to me...I would spent as much on materials repainting and repainting again to get it the way I wanted. I feel I was money ahead to pay someone with the high cost of materials the way they are now.
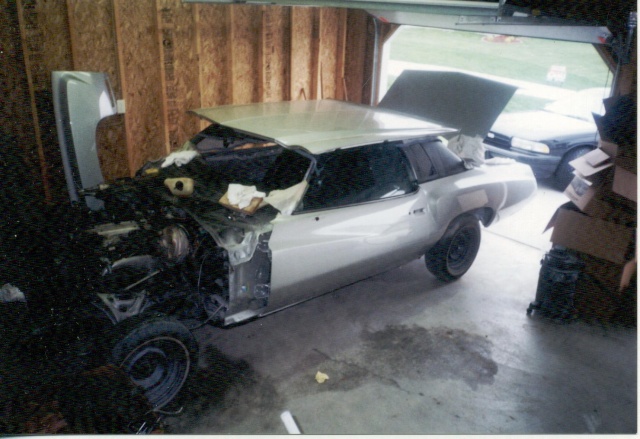
Putting the car back together.
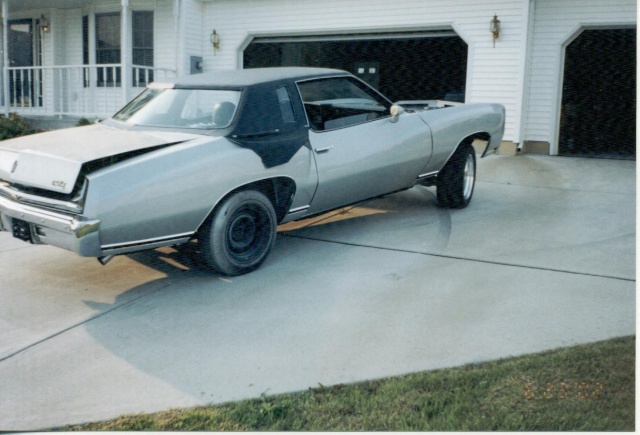
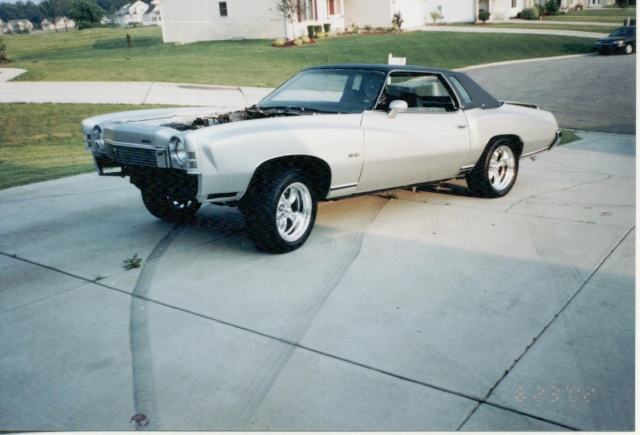
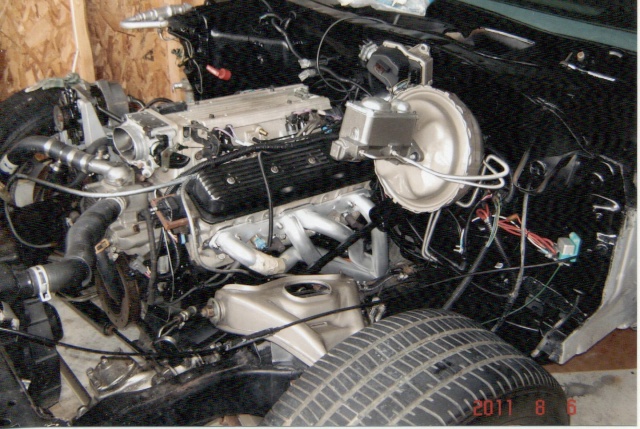
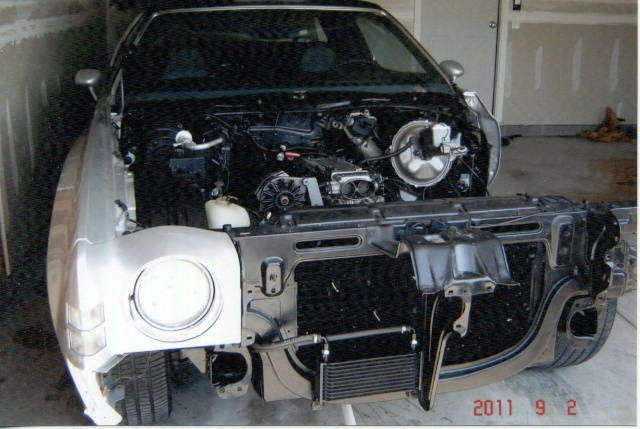
Found a great low mile LT1 / 4L60 TRANS package from a 93 Camaro to put in the car. To get it in the car and keep the A/C on the lower right side of the motor I INSTALLED a motor mount from a 68 Biscayne. I orginally wanted to put a 572 in the car. Hence the big block springs in the previous pictures. So, I tore the front end back down and took 8" of coil out to bring the car down to a better front end height. The reason I went with the LT1 is because I already had one in my 96 IMPALA SS and was satisfied with its performance. The Impala at 4300 lbs was a hand full if you caught it sideways....so I knew a lighter car, the Monte....it would be fine.
Notice the relocation of the horn relay lower on the firewall. Located the blower fan relay inside the cowl. Both items to clean up the firewall a little. 1996 Impala Trans. cooler.

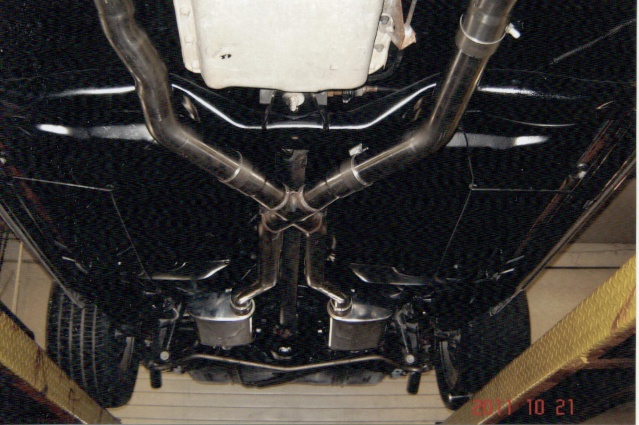
Underneath the car. From this view you cant see the fuel tank from a 96 Impala SS. Fits well with half inch of clearace between the frame rails. Also , gained a gallon of fuel capacity from the original to 23 gallons. Stainless Exhaust.
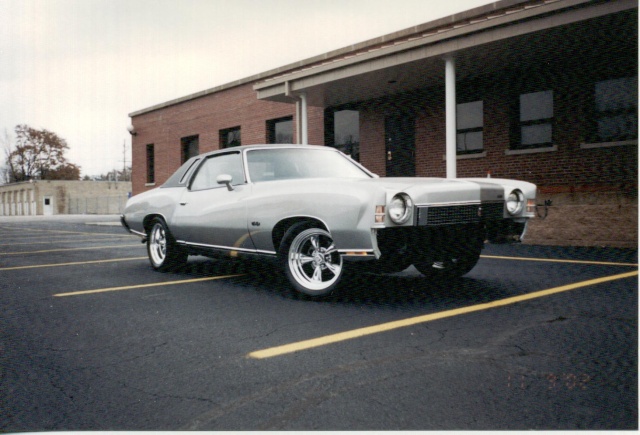
Most of the chrome on the car is NOS. (85%) Years of accumulation. When I found parts in the original wrappers...I bought them.
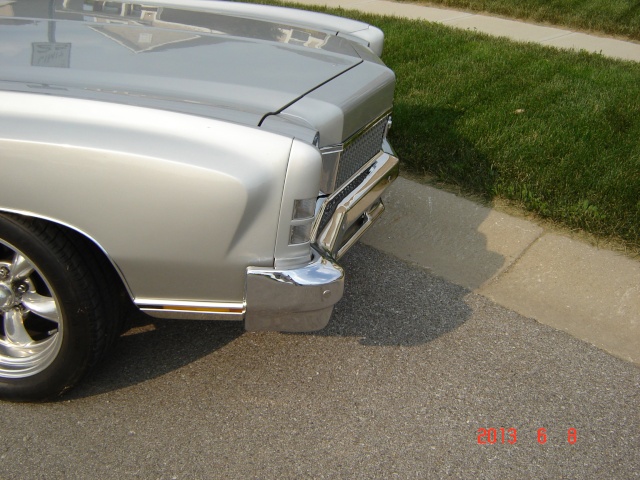
Now with a bumper tuck...



So , once the body was off the frame. I could start the chassis. Sandblasted all frame related hard parts.

Then the rebuild began. Coated everyting with POR-15 through a remote spray pot. At this point the rearend had been totally rebuilt with a Auburn Pos. added with 3.42 gears. PST polygraphite bushing throughout. Stainless hard brake lines. Springs, sway bars , etc. painted a different color for detail.

Then , I wanted to run stainless throught the car. Only one problem. At the time , no companies were offering stainless fuel lines from the motor to the tank. So , I talked to the owner of Classic Tube and he said he didnt have any but would like to find some clean specimens to make patterns and offer those for sales in the future for owners of our cars. During the conversation , I told him I may have what he needed to make that happen. I sent mine to him he made patterns and he only charged me for the materials.

At this point , I was ready to start on the body. But , once I got into it , I found a lot of rust in the area around the opera windows and the dog-leg around the rear window being a Tennessee car all its life and not sheltered. I call got in touch with an individual in Colorado that had a set of quarters specially for the 73 as NOS. But , what he wanted for them was not appealing ! There had to be a better way !!
So my search went out west . With a Hemmings magazine I started calling junkyards out west. If one guy didnt have one...he had a buddy that had junkyard. So after two weeks of searching I found one in New Mexico. I sent a disposable camera to the owner of the junkyard and asked that he take specific pictures in specific areas. He did and it revealed a totally rust free car. We agreed on the price and went to pick it up. That a story in its self. Some good together time for me and my brother as adults.

Got the car back to Tennessee and started the process of stripping the body and then transferring it onto the newly built chassis. I found the build sheet of the desert car. Built full optioned in Fremont California. Per the build sheet. It was a Fleet Executive car. Has the designation typed on the build sheet.

I got lucky. When I got the body down to metal. No prior work had ever been performed on the car nor could I find evidence of where the car had been wacked. So I coated the complete interior with the POR-15. Under the body. Trunk. I taped off the area where the Vinyl roof is to go back on as this was a solid car and didnt want the possibility of rust to start in those areas that are prevalent on our cars. Matter of fact, early in its life someone had removed the vinyl roof which I believe saved it ! But , I wanted the vinyl back on...I think our cars look better with it. Without it....it is like a suit with the wrong shoes ! Extra doors and fenders left over from the desert car in these pics.


From there I had the car painted. 1996 Camaro Sebring Silver Metallic.I have painted several cars but I knew that with this I would not be able to achieve the results I wanted. I had very little knowledge of the two step process of water based base coat / clear coat. Better left to a man that has had 30 years with a spray gun in his hand. Left up to me...I would spent as much on materials repainting and repainting again to get it the way I wanted. I feel I was money ahead to pay someone with the high cost of materials the way they are now.

Putting the car back together.


Found a great low mile LT1 / 4L60 TRANS package from a 93 Camaro to put in the car. To get it in the car and keep the A/C on the lower right side of the motor I INSTALLED a motor mount from a 68 Biscayne. I orginally wanted to put a 572 in the car. Hence the big block springs in the previous pictures. So, I tore the front end back down and took 8" of coil out to bring the car down to a better front end height. The reason I went with the LT1 is because I already had one in my 96 IMPALA SS and was satisfied with its performance. The Impala at 4300 lbs was a hand full if you caught it sideways....so I knew a lighter car, the Monte....it would be fine.
Notice the relocation of the horn relay lower on the firewall. Located the blower fan relay inside the cowl. Both items to clean up the firewall a little. 1996 Impala Trans. cooler.


Underneath the car. From this view you cant see the fuel tank from a 96 Impala SS. Fits well with half inch of clearace between the frame rails. Also , gained a gallon of fuel capacity from the original to 23 gallons. Stainless Exhaust.


Most of the chrome on the car is NOS. (85%) Years of accumulation. When I found parts in the original wrappers...I bought them.
Now with a bumper tuck...


Last edited by impalamonte on Sat Oct 18, 2014 4:03 pm; edited 1 time in total
impalamonte- G3GM Enthusiast

- Street Cred : 18
TW Monte likes this post
 Re: Update :1973 Monte Carlo Body off frame resto. Now with LS!
Good to see the story in pictures! Huge amount of work, came out great!

thatfnthing- Donating Member

- Street Cred : 65

driveit- Donating Member

- Street Cred : 15
 Re: Update :1973 Monte Carlo Body off frame resto. Now with LS!
Very nice. I like the way you mounted (what I assume is) your trans cooler. I might borrow that idea. Top work!
77mali- Donating Member

- Street Cred : 62
 Re: Update :1973 Monte Carlo Body off frame resto. Now with LS!
Yes, beautiful car. What brand exhaust is that? And if you look under the rear of the car, can you see the mufflers lower than the axle?? thanks

Joe73- Donating Member

- Street Cred : 83
 Re: Update :1973 Monte Carlo Body off frame resto. Now with LS!
The exhaust system is a Magnaflow for our cars. It does need some messaging to go in. And , I have Hedman mid-length headers. I installed the Mid-length because I did not want to drag full length units as I plan to go down another inch on the suspension.
You can not see the mufflers below the axle. Looks that way due to angle of picture. But , once you get them in you wish everybody could as they are mirror finish stainless.
You can not see the mufflers below the axle. Looks that way due to angle of picture. But , once you get them in you wish everybody could as they are mirror finish stainless.

impalamonte- G3GM Enthusiast

- Street Cred : 18
 Re: Update :1973 Monte Carlo Body off frame resto. Now with LS!
Cool. Thanks for the info. I dont like when you can see the mufflers from the back view. Are those mufflers "center out"? Any idea of the magnaflow kit number? Thanks

Joe73- Donating Member

- Street Cred : 83

1973montec- Donating Member

- Street Cred : 17

dynchel- Donating Member

- Street Cred : 40
 Re: Update :1973 Monte Carlo Body off frame resto. Now with LS!
2.5" Center out. Kit 15894.

impalamonte- G3GM Enthusiast

- Street Cred : 18
 Re: Update :1973 Monte Carlo Body off frame resto. Now with LS!
Cool, thank you.

Joe73- Donating Member

- Street Cred : 83
 Re: Update :1973 Monte Carlo Body off frame resto. Now with LS!
impalamonte wrote:2.5" Center out. Kit 15894.
Same one I used.

thatfnthing- Donating Member

- Street Cred : 65
 Re: Update :1973 Monte Carlo Body off frame resto. Now with LS!
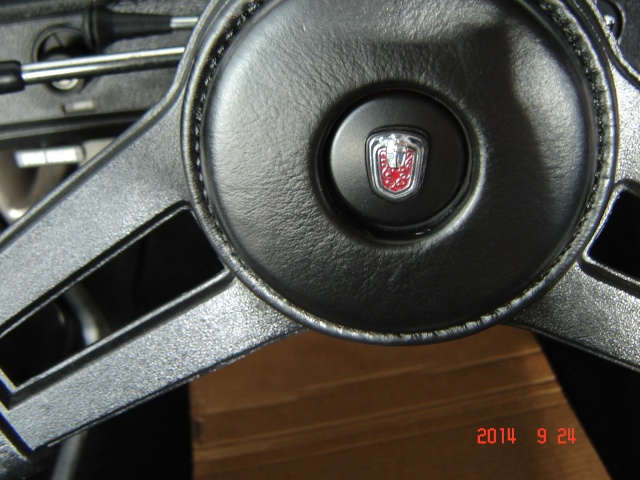
Wanted to give an update from my summer projects. Mostly finished the interior. But , I do have some things I want to address. Next spring will be opportunity.
SEM products were used for the refinish of panels. Stock interiors.com....supplied the carpet , headliner. Oh...and the headliner...a 12 hour job to get it right !! Yes the posts on the subject are correct...very time consuming. You will need a heat gun to pull / shrink areas to tighten things up. I am very much an amateur.

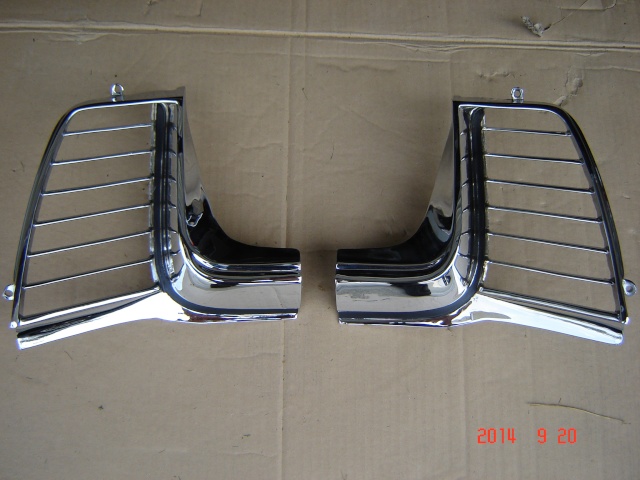
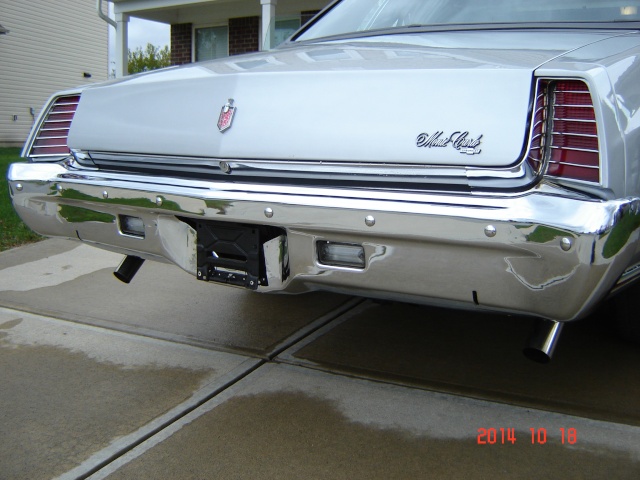
I had my taillight bezels re-chromed and have recently installed them along with my NOS rear bumper.
SEM products were used for the refinish of panels. Stock interiors.com....supplied the carpet , headliner. Oh...and the headliner...a 12 hour job to get it right !! Yes the posts on the subject are correct...very time consuming. You will need a heat gun to pull / shrink areas to tighten things up. I am very much an amateur.


I had my taillight bezels re-chromed and have recently installed them along with my NOS rear bumper.


impalamonte- G3GM Enthusiast

- Street Cred : 18

77mali- Donating Member

- Street Cred : 62
 Re: Update :1973 Monte Carlo Body off frame resto. Now with LS!
Wow! Really nice! Dont know how i missed this. Love the way it sits. What rear springs?
ant7377- G3GM Addict

- Street Cred : 36
 Re: Update :1973 Monte Carlo Body off frame resto. Now with LS!
Outstanding !!  And having done it myself, I know how much work it was !
pila- Donating Member

- Street Cred : 43
 Re: Update :1973 Monte Carlo Body off frame resto. Now with LS!
Awesome work, as always! Can't wait to hear the review on well those seats ride -- my wife got one look at those and wants 'em. Which ProCar model were they?

thatfnthing- Donating Member

- Street Cred : 65
 Re: Update :1973 Monte Carlo Body off frame resto. Now with LS!
Thanks for the compliments guys.
"ant7377" : those are stock rear springs. but , conversing the member " thatfnthing" I am going to "steal" his set up though.
"thatfnthing" : These are Rallye Series seats from Procar , http://procarbyscat.com/seats/Rally
I search around and found best price at Summit.
These are more comfortable what little time I have spent in them as they do recline. The swivels as we all know do not and on long rides are not " that " comfortable. What I have found so far as well ...is that the side bolsters are rather high and makes it a little bit of a chore to get out...

impalamonte- G3GM Enthusiast

- Street Cred : 18
 Re: Update :1973 Monte Carlo Body off frame resto. Now with LS!
Impalamonte - Just saw this old post and had to say I love the car. Looks like you spent alot of time getting it right. We all can only hope ours turn out as nice. How hard was it to put that motor trans combo into the car? Alot of wiring and tweeking or no?
bitterfitter- Donating Member

- Street Cred : 9
 Re: Update :1973 Monte Carlo Body off frame resto. Now with LS!
I really love this 73. Just added it to the list of cars I want to own someday.

driveit- Donating Member

- Street Cred : 15
 Re: Update :1973 Monte Carlo Body off frame resto. Now with LS!
Bitterfitter , driveit....thanks for the compliments. Bitterfitter, the install was not that difficult. Wiring was very clean as i used a Painless harness for the LT1. Easy instructions and tech. support when needed. This motor is based on OBD 1 configuration. I brought the computer inside the car installing it on top of the glove compartment in the dash.So the only wiring really seen is to the injectors. All wiring was wrapped with convoluted tube. I probably have 20 hours in the wiring alone just hiding a better part of it. Just recently I had the computer tuned by an outside resourse to maximize the parameters based on my few mods including tire size,gearing. Aggrevation has really ben minimal.

impalamonte- G3GM Enthusiast

- Street Cred : 18
 Re: Update :1973 Monte Carlo Body off frame resto. Now with LS!
I think I have an hour or two in on the wiring for your car, also. 

thatfnthing- Donating Member

- Street Cred : 65
 Re: Update :1973 Monte Carlo Body off frame resto. Now with LS!
Agreed...you have been a tremendous wealth of wiring help in area that i am weak.

impalamonte- G3GM Enthusiast

- Street Cred : 18
 Re: Update :1973 Monte Carlo Body off frame resto. Now with LS!
impalamonte, your Monte looks awesome! What did you use for the body bushings?
99B4C- G3GM Member

- Street Cred : 4
 Re: Update :1973 Monte Carlo Body off frame resto. Now with LS!
Beautiful car. You sure do nice work.
marks454ss- Donating Member

- Street Cred : 1
Page 1 of 6 • 1, 2, 3, 4, 5, 6 
 Similar topics
» MOTOR TREND CAR OF THE YEAR-------1973 MONTE CARLO
» A-Body Chevy Monte Carlo Fest
» Submit your rides for a G3 2015 Calendar
» A-Body Chevy Monte Carlo Fest
» Submit your rides for a G3 2015 Calendar
G3GM :: Media :: G3 Project Pictures
Page 1 of 6
Permissions in this forum:
You cannot reply to topics in this forum|
|
|


» Roll Call and Car showcase
» Central Texas Noob
» Welcome Keith Seymore
» Wanted: Front park lamp assemblies
» 75 Hurst Olds T-tpos
» G3 Chevy rims- help ID these
» 75 el camino project.
» Have had a few questions
» vinyl top removal