1977 Chevelle Malibu Classic Progress Photo's aka Mali
+40
pila
dynchel
Mcarlo77
Joe73
driveit
Hawk03
Fishgrinder
1973 454 MONTE
bracketchev1221
Limey SE
chevellelaguna
1973montec
Bruisr
bigredlaguna
jerry46765
BicknellWelding
geoff528
2fat2fly
Jim_Rockford
DiscoMalibu
Brainstain
Laguna Budman
Dubie
74MonteCarlo
JB2wheeler
WyldeBill66
Wallyuph
dragons_lair59
77ElClassic
Dead Man
Graham Perkins
jrb75
chromereverse
Checyxtc
74Guna
texan01
abajc3
JiMi_DRiX
orange Juiced
HDHugger
44 posters
G3GM :: Media :: G3 Project Pictures
Page 11 of 27
Page 11 of 27 •  1 ... 7 ... 10, 11, 12 ... 19 ... 27
 Re: 1977 Chevelle Malibu Classic Progress Photo's aka Mali
I would use washers under the nut and bolt assembly to get those bolts good and tight.
P.S.
I like your new avatar ! Would make a good t-shirt ! Or Billboard.
P.S.
I like your new avatar ! Would make a good t-shirt ! Or Billboard.
ant7377- G3GM Addict

- Street Cred : 36
 Re: 1977 Chevelle Malibu Classic Progress Photo's aka Mali
ant7377 wrote:I would use washers under the nut and bolt assembly to get those bolts good and tight.
P.S.
I like your new avatar ! Would make a good t-shirt ! Or Billboard.
For sure on the washers....& thanks. "Barry" has got to go...being from MA- Romney's no prize but at least he's not a communist. I'll e-mail you the pic if you want to make a shirt.

77mali- Donating Member

- Street Cred : 62
 Re: 1977 Chevelle Malibu Classic Progress Photo's aka Mali
Be careful when popping the spindle housing. The 77s are different than the rest as they used larger brakes all the way around. The negative affect of this difference is less steel (strength) in the housing itself. I tried "assisting" mine with a hammer and ended up moving the caliper mounts about a half inch without realizing.
77ElClassic- Donating Member

- Street Cred : 5
 Re: 1977 Chevelle Malibu Classic Progress Photo's aka Mali
Thanks.
Plan on using 1 or 2 2x4's between the arms and a jack under the lower. Will also be getting some coil spring compressors to hold that bad-boy on there good too.
Plan on using 1 or 2 2x4's between the arms and a jack under the lower. Will also be getting some coil spring compressors to hold that bad-boy on there good too.

77mali- Donating Member

- Street Cred : 62
 Re: 1977 Chevelle Malibu Classic Progress Photo's aka Mali
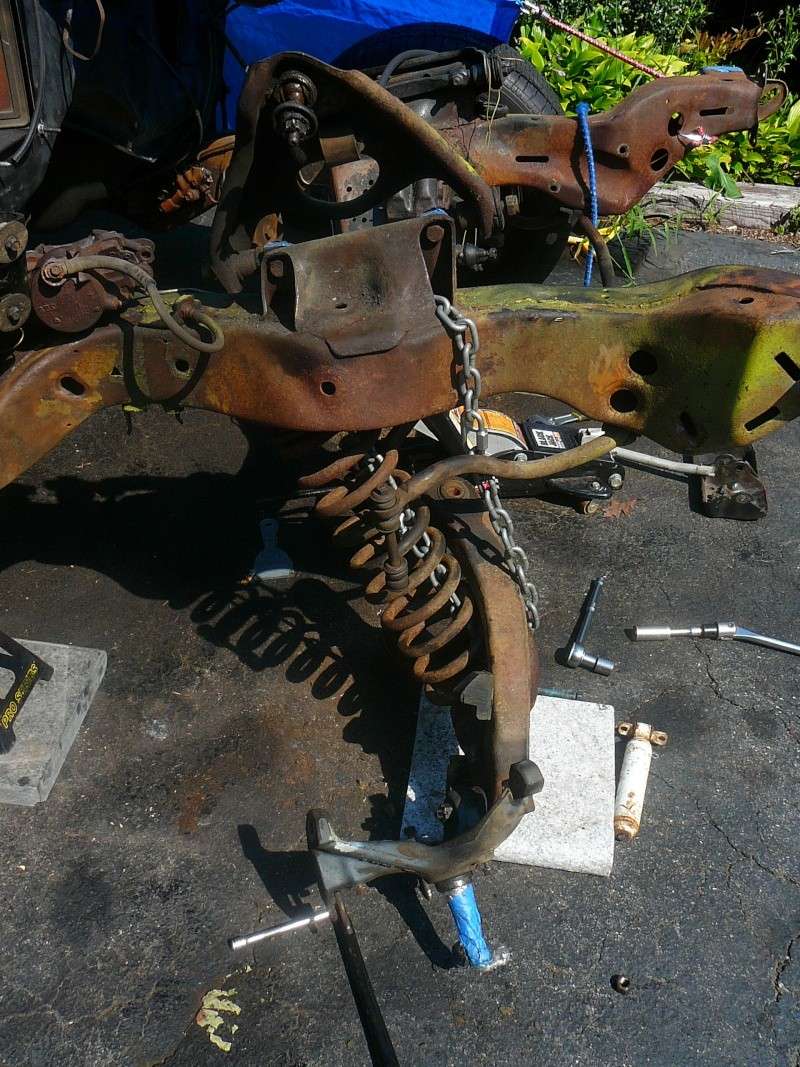
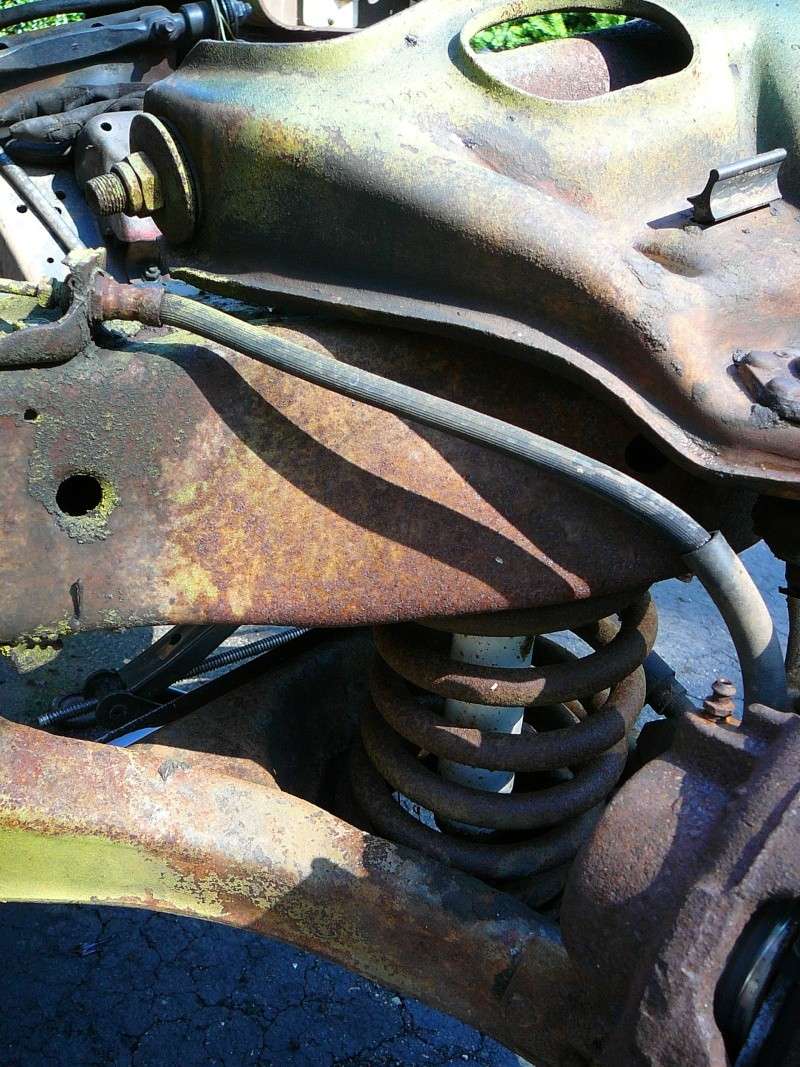
There are certain jobs that you may want to consider not doing. Removing control arms & coil springs is one of them. 
I did end up using a made up "spreader" tool but stopped after popping the upper ball joint. I will get the lower one removed off the car. In retrospect, I think i should have started bottom to top. Will try it that way on the other side to see if I can get them both popped.
I ended up having to cut the shaft of the shock in order to get it out as the bushings and the top of the shock were crap. Let's just say, the chain through the coil & lower arm came in handy & no damage to man or machine. There is a ton of compressed force in these coils, they look three times larger uncompressed as the do when they are installed on the vee-hicle.
This job was a PITA but one side down, one more to go. The upper ball joint boot is toast so I decided to go the extra mile and will replace them all as well as new bushings and all that jazz for the arms & steering. Links and such are good and will be cleaned up & reused. Thinking also I will opt to go a bit beefier on the sway bar end links. Also considering what to do for new shocks, might go with a coil over set up if I can find a set like Spohn's for decent money....
Will edit in some pics after I do some prep & cleaning.

77mali- Donating Member

- Street Cred : 62
 Re: 1977 Chevelle Malibu Classic Progress Photo's aka Mali
77ElClassic wrote:Be careful when popping the spindle housing. The 77s are different than the rest as they used larger brakes all the way around. The negative affect of this difference is less steel (strength) in the housing itself. I tried "assisting" mine with a hammer and ended up moving the caliper mounts about a half inch without realizing.
What is different from the previous years? This is the first ive ever heard of this,when you say larger brakes is it larger rotors or are the calipers different, are the pads the same?

ant7377- G3GM Addict

- Street Cred : 36
 Re: 1977 Chevelle Malibu Classic Progress Photo's aka Mali
Rotors are larger & larger drums in the back too. Don't know about the calipers.

77mali- Donating Member

- Street Cred : 62
 Re: 1977 Chevelle Malibu Classic Progress Photo's aka Mali
77mali wrote:Rotors are larger & larger drums in the back too. Don't know about the calipers.
some previous years were this way My basket 74 Malibu had the 11" on rear and the larger rotors on front but like I said it was a basket before I got it so could have been switched, but both my 76's had the larger brakes as well as the 77 SE

Limey SE- Management

- Street Cred : 98
 Re: 1977 Chevelle Malibu Classic Progress Photo's aka Mali
My '75 Elco project has '77 rotors etc up front, and they are identical to the old junky '75 parts that I scrapped. When I had two Elcos, a '76, and a '77, the rear drums were 11-inch. I'm using the '77 parts on the back also, on the '75. The stock '75 has 9 or 9.5 ( don't remember) on the rear, and so does my '74 Malibu. I still have the '75 rear end, and it's a 2.73 gear, if anyone needs it 
Never ever heard of any different diameter on the front rotors. Maybe ? I'll take a look in the parts catalog....
Never ever heard of any different diameter on the front rotors. Maybe ? I'll take a look in the parts catalog....
pila- Donating Member

- Street Cred : 43
 Re: 1977 Chevelle Malibu Classic Progress Photo's aka Mali
OK.....so I did some checking.. one item...front calibers are the same from '73 to '76, with the '77 having a different part number, maybe because of metric hose connections.
Second item I found was rear wheel cylinders are the same from '73 to '75, and have a 7/8 " bore ( with the small drums) and '76 & '77 have 15/16" bore, likely because of the bigger bigger 11 " drums.
Couldn't find part numbers for the front rotors, but parts stores like Autozone list them as all the same from '73 thru '77
pila- Donating Member

- Street Cred : 43
 Re: 1977 Chevelle Malibu Classic Progress Photo's aka Mali
I think the front rotors on the 77 are 11" versus 10" on earlier years...I'll measure mine but in the grand scope...it's minimal differences up front. The rear drums were beefed up from earlier years. There most likely were also option codes in earlier years for combo's with the better suspension packages & base models versus other styles, Big block vs. Small block...etc., or so I've read. Regardless if you want bigger brakes- it's an easy upgrade & you can get up to 12" rotors up front on any year I believe.

77mali- Donating Member

- Street Cred : 62
 Re: 1977 Chevelle Malibu Classic Progress Photo's aka Mali
77mali wrote:There are certain jobs that you may want to consider not doing. Removing control arms & coil springs is one of them.
I did end up using a made up "spreader" tool but stopped after popping the upper ball joint. I will get the lower one removed off the car. In retrospect, I think i should have started bottom to top. Will try it that way on the other side to see if I can get them both popped.
I ended up having to cut the shaft of the shock in order to get it out as the bushings and the top of the shock were crap. Let's just say, the chain through the coil & lower arm came in handy & no damage to man or machine. There is a ton of compressed force in these coils, they look three times larger uncompressed as the do when they are installed on the vee-hicle.
This job was a PITA but one side down, one more to go. The upper ball joint boot is toast so I decided to go the extra mile and will replace them all as well as new bushings and all that jazz for the arms & steering. Links and such are good and will be cleaned up & reused. Thinking also I will opt to go a bit beefier on the sway bar end links. Also considering what to do for new shocks, might go with a coil over set up if I can find a set like Spohn's for decent money....
Will edit in some pics after I do some prep & cleaning.



77mali- Donating Member

- Street Cred : 62
 Re: 1977 Chevelle Malibu Classic Progress Photo's aka Mali
Try drilling a hole in each side of the shock shaft. Then use a all chisel and split the nut. Alot easier than trying to cut shaft. As for the joints, I leave the nuts on about 3/4 of an inch than knock the bottom first. Than there is pressure still to knock the top the same way. You will need a compressor to get springs back in.
1973 454 MONTE- Donating Member

- Street Cred : 36
 Re: 1977 Chevelle Malibu Classic Progress Photo's aka Mali
A spring compressor is recommended to put the front springs back in. I used a compressor my first time but that was the last time. I've done front springs on camaros, chevelle and even 2wd suburbans. The engine has to be in the car for the extra weight to do it. Just have the car on jack stands so you can push the lower arm down to almost vertical. Put the spring in the chassis cup and lift the lower arm up to keep it in place. Spin the spring so the end of the coil will line up with the indentation in the lower arm. Put a floor jack under the ball joint and jack it up a little. As it goes in, either give it kick with the bottom of your boot or use a long crow bar. Slide the crow bar between the coils and into the hole in the lower arm where the shock bolts in. Just pry it up a little to guide it into the lower arm cup. Jack it up some more. Once it close, just kick it and it will pop into place. Then just lift the spindle and place it on the ball joint.
Might sound scary but it really isnt. The upper part of the spring is in the chassis cup so it cant come out. Your compressing up so it will only shoot downward IF the floor jack fails. Real easy and quick job. I have big block, heavy duty with a/c front springs in my chevelle and they were just as easy to put in.
Just decide which way you would like to go.

Joe73- Donating Member

- Street Cred : 83
 Re: 1977 Chevelle Malibu Classic Progress Photo's aka Mali
Chris, what do you use to hold the top of the shock to keep it from spinning in there? Book says an opened end wrench but holy cow, it's wicked small and not much to hold onto. Couldn't use the compressor because the shock wasn't budging.
I cut the shaft, then sliced through the top part with my Dremmel tool. No "dame framage" either lol. I put the chain through the coil & lower arm for safety (as you can see in the pic...'cause you can die if one hits you.) It was kinda fun and scary @ the same time...made a big pop!
If it's the same BS I'll try it your way on the other side. Thanks!

77mali- Donating Member

- Street Cred : 62
 Re: 1977 Chevelle Malibu Classic Progress Photo's aka Mali
Joe,
Engine is going in after the bay & suspension are done, won't get it back for a while yet but thanks. I'll feel better w/ the spring compressors after my little battle with the R shock.
Engine is going in after the bay & suspension are done, won't get it back for a while yet but thanks. I'll feel better w/ the spring compressors after my little battle with the R shock.

77mali- Donating Member

- Street Cred : 62
 Re: 1977 Chevelle Malibu Classic Progress Photo's aka Mali
You don't need to hold shaft. Just drill out nut.

1973 454 MONTE- Donating Member

- Street Cred : 36
 Re: 1977 Chevelle Malibu Classic Progress Photo's aka Mali
Engine is officially being built (starting) next week. I brought the block there 7/19  . Might opt to go with a mild cam upgrade...undecided on the type but I'm thinking of Comp Cams XE 262 H...Max stated HP is about 350 with a "noticeable" idle. About 1500-5500 RPM range....anyone out there running something similar in a 350?
The stroke will remain unchanged @ 348...thought about a 376 but would have to get a new crank rather than exchanging mine which needs machining & he has 348's ready to go. Too much $$$$...Hope I hit the powerball though...then I'd get that 427 that keeps haunting me in my dreams.

The stroke will remain unchanged @ 348...thought about a 376 but would have to get a new crank rather than exchanging mine which needs machining & he has 348's ready to go. Too much $$$$...Hope I hit the powerball though...then I'd get that 427 that keeps haunting me in my dreams.


77mali- Donating Member

- Street Cred : 62
 Re: 1977 Chevelle Malibu Classic Progress Photo's aka Mali
So went by the engine shop yesterday & gave my deposit...should be done by next week. Wasn't all that bad of a lead time I suppose.
The gentleman's wife (who works there too) is sometimes "tough". She quarreled with him (in front of me) because he is going to torque down the heads to the block & he's not charging me, to help me out a little too because I'm getting the new cam...etc...(you know how guy's are, right?)...She was all like: "We can't consider this a partial assembly anymore"....she doesn't get it.
PS- no offense meant to any lady's....one bad apple doesn't spoil the bushel.
Last edited by 77mali on Thu Oct 18, 2012 10:52 pm; edited 1 time in total

77mali- Donating Member

- Street Cred : 62
 Re: 1977 Chevelle Malibu Classic Progress Photo's aka Mali
Whats the big deal about torqueing the heads ? 25 minutes work? Remarkable.

ant7377- G3GM Addict

- Street Cred : 36
 Re: 1977 Chevelle Malibu Classic Progress Photo's aka Mali
ant7377 wrote:Whats the big deal about torqueing the heads ? 25 minutes work? Remarkable.
IDK? 25 mins for me maybe 10 per side for them. Sheeeeesh.

77mali- Donating Member

- Street Cred : 62
 Re: 1977 Chevelle Malibu Classic Progress Photo's aka Mali
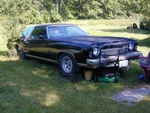
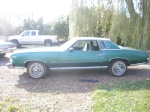
Keep up the good work! Your car looks like a good solid car. My 76 looked like that when I pulled the vinyl roof off.
Thanks Graham
Thanks Graham
Graham Perkins- G3GM Member

- Street Cred : 2
 Re: 1977 Chevelle Malibu Classic Progress Photo's aka Mali
Thanks Graham,
She is pretty solid just many worn out parts over 30 years old. Sheet metal is good and IMO body work is the killer on the budget and not so much the mechanical aspects. I'd say the body is about 90% good. The spots that scare me the most are in the rear underside, lots of "pitting" on the passengers side up under the rear seat but I think it's salvageable, like the roof was.
She is pretty solid just many worn out parts over 30 years old. Sheet metal is good and IMO body work is the killer on the budget and not so much the mechanical aspects. I'd say the body is about 90% good. The spots that scare me the most are in the rear underside, lots of "pitting" on the passengers side up under the rear seat but I think it's salvageable, like the roof was.

77mali- Donating Member

- Street Cred : 62
 Re: 1977 Chevelle Malibu Classic Progress Photo's aka Mali
After I did the rear right side rear floor in my Elco, I used fiberglass mat and epoxy resin, to lay two layers on top of the steel floors behind the seat. The idea was to keep water from laying on the metal floor, if the rear window leaked etc. or windows got left open & rain came in & soaked the carpet.. every little bit helps...... 
Your project is coming along good, and you are learning new ways to get things apart !
Your project is coming along good, and you are learning new ways to get things apart !
pila- Donating Member

- Street Cred : 43
 Re: 1977 Chevelle Malibu Classic Progress Photo's aka Mali
Great minds think alike. 
I did something similar top side in the R/Rear but I used Por15 over the rust then filled the recesses with the fiber reinforced (short hairs) green bond-o. I kept the drain but pitched the fiberglass to the drain on all sides, with the rear section of the pan coming up about 3/16"~1/4".
All that rot, is usually from the rear window and or opera/quarter windows leaking (the most annoying flaw in my opinion, on these cars). The Butyl sealant they used was pretty good for the body seams but SUX around glass- at least that's what I've found on mine.

77mali- Donating Member

- Street Cred : 62
Page 11 of 27 •  1 ... 7 ... 10, 11, 12 ... 19 ... 27
 Similar topics
» Clunkers and Classic YouTube build 1977 Malibu Classic
» '77 Chevelle Malibu Classic - Disco Malibu
» 74 Chevelle Malibu Classic 454 with a 4-speed
» '77 Chevelle Malibu Classic - Disco Malibu
» 74 Chevelle Malibu Classic 454 with a 4-speed
G3GM :: Media :: G3 Project Pictures
Page 11 of 27
Permissions in this forum:
You cannot reply to topics in this forum|
|
|


» Roll Call and Car showcase
» Central Texas Noob
» Welcome Keith Seymore
» Wanted: Front park lamp assemblies
» 75 Hurst Olds T-tpos
» G3 Chevy rims- help ID these
» 75 el camino project.
» Have had a few questions
» vinyl top removal