1973 Chevelle SS, 350, 4spd. build
+41
zucchi
76 Malibu
Joe73
76Chevelle2Tone
S3TPI
Sinister
77camino
Flywheel
crice63
bracketchev1221
73ss
clanceman427
thatfnthing
Limey SE
fasrnur
g3chevy / Mr Pontiac
Roadcaptain S3
Mcarlo77
Hawk03
ant7377
1975 S3
77mali
jerry46765
Jeff-45
1cheapshot
dynchel
JF74chevelle
Tom Kochevar
Hs1973
dine73ss
Damon23
alowerlevel
driveit
chevellelaguna
RossK73
marks454ss
impalamonte
Dinomyte
Wallyuph
BK-75
1973montec
45 posters
G3GM :: Media :: G3 Project Pictures
Page 13 of 17
Page 13 of 17 •  1 ... 8 ... 12, 13, 14, 15, 16, 17
 Re: 1973 Chevelle SS, 350, 4spd. build
Amazing job Joe! Can't wait to see it finished. This is great motivation for the rest of us.

g3chevy / Mr Pontiac- Donating Member

- Street Cred : 35
 Re: 1973 Chevelle SS, 350, 4spd. build
It sounds fantastic, great work Joe, you're a craftsman.

Flywheel- G3GM Member

- Street Cred : 4
 Re: 1973 Chevelle SS, 350, 4spd. build
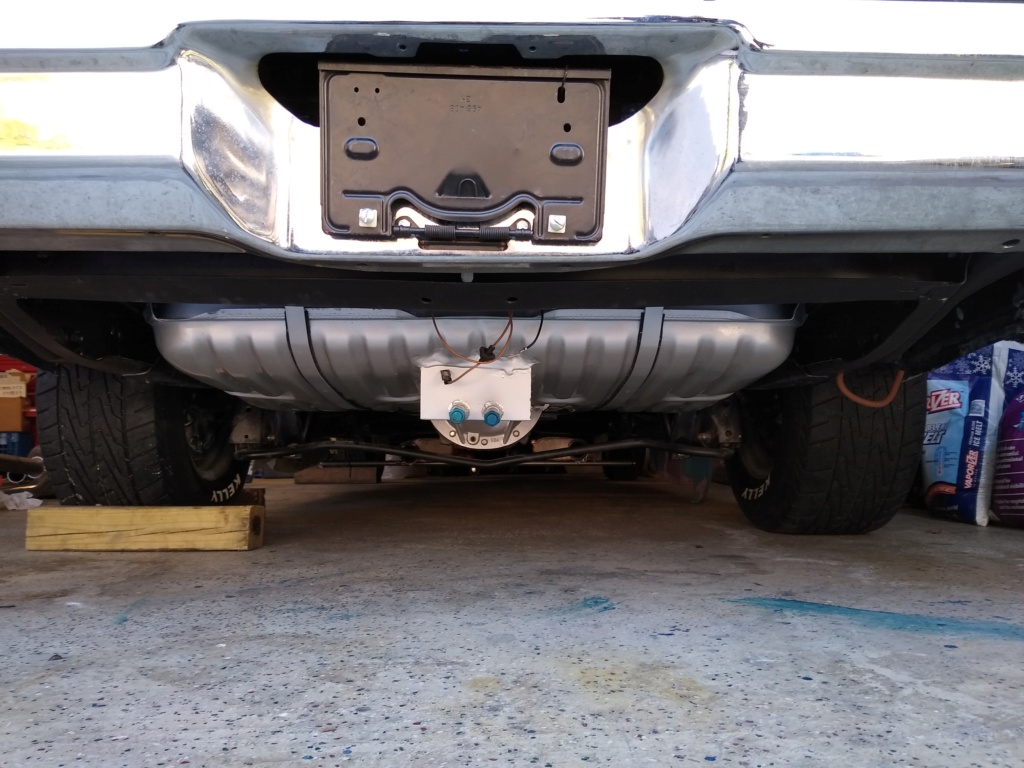
What are your fuel system plans Joe? I see a sump hanging there.

73ss- G3GM Enthusiast

- Street Cred : 11
 Re: 1973 Chevelle SS, 350, 4spd. build
I'm running a hi volume mechanical pump. I put the sump on the tank back in 1987. Havent used it. I dont really need it but its cool on the original tank. I even have a Fram HPG1 remote high performance filter from back in the 80s that I was going to put on the rear frame rail. But no need for that either.

Joe73- Donating Member

- Street Cred : 83
 Re: 1973 Chevelle SS, 350, 4spd. build
Joe,sounds fantastic!! I'm sure we will be out at some cruises/car shows this summer.
ant7377- G3GM Addict

- Street Cred : 36
 Re: 1973 Chevelle SS, 350, 4spd. build
Joe73 wrote:I'm running a hi volume mechanical pump. I put the sump on the tank back in 1987. Havent used it. I dont really need it but its cool on the original tank. I even have a Fram HPG1 remote high performance filter from back in the 80s that I was going to put on the rear frame rail. But no need for that either.
I usually put some kind of remote filter right off the tank outlet and remove the sock off the tank pickup. That way it is never a question of the sock being dirty and having to drop the tank. I've used the fram filters for that.
bracketchev1221- G3GM Enthusiast

- Street Cred : 16
 Re: 1973 Chevelle SS, 350, 4spd. build
bracketchev1221 wrote:Joe73 wrote:I'm running a hi volume mechanical pump. I put the sump on the tank back in 1987. Havent used it. I dont really need it but its cool on the original tank. I even have a Fram HPG1 remote high performance filter from back in the 80s that I was going to put on the rear frame rail. But no need for that either.
I usually put some kind of remote filter right off the tank outlet and remove the sock off the tank pickup. That way it is never a question of the sock being dirty and having to drop the tank. I've used the fram filters for that.
Thanks Ray. I love the look of it but this engine doesnt need it. I built it for decent power and good sound. Its a 355 (my original numbers matching block) with 10:1 compression, 200cc Promaxx aluminum heads, Comp Cams 292 duration, 750 Vacuum Demon. Coupled to my factory M20 with dialed scattershield and dual friction clutch, out to 4.10s with an Eaton posi. Quench at .040 with thin gasket. Dizzy set at 34 degrees, with advance at idle.
Should go ok. Not looking for a max effort build. Would love to run some drag radials but I dont want to start breaking things with the clutch. I've already dropped the driveshaft a couple times and ripped the lower control arm front frame mounts off twice.

Joe73- Donating Member

- Street Cred : 83
 Re: 1973 Chevelle SS, 350, 4spd. build
No no joe. Its not for ANY performance gains at all. Just saying, I use it and take the sock off the sender. How many times does someone have a fuel issue and the first question is the condition of the sock? This way, you can open the filter mounted off the tank.

bracketchev1221- G3GM Enthusiast

- Street Cred : 16
 Re: 1973 Chevelle SS, 350, 4spd. build
bracketchev1221 wrote:No no joe. Its not for ANY performance gains at all. Just saying, I use it and take the sock off the sender. How many times does someone have a fuel issue and the first question is the condition of the sock? This way, you can open the filter mounted off the tank.
Gotcha Ray. Thanks

Joe73- Donating Member

- Street Cred : 83
 Re: 1973 Chevelle SS, 350, 4spd. build
Joe73 wrote:First time out of the garage in 5 years. First time out of the garage with the new paint. I painted it Oct. 2016 .
https://www.youtube.com/watch?v=IGsDDJ18aqI&feature=youtu.be
Awesome! Lovin' the sound your cam is making.
77mali- Donating Member

- Street Cred : 62
 Re: 1973 Chevelle SS, 350, 4spd. build
Thanks Paul. It will sound way better when the exhaust it out the back. Now theres just mufflers on the end of the headers.

Joe73- Donating Member

- Street Cred : 83
 Re: 1973 Chevelle SS, 350, 4spd. build
Last edited by Joe73 on Tue Mar 31, 2020 9:20 pm; edited 1 time in total

Joe73- Donating Member

- Street Cred : 83
 Re: 1973 Chevelle SS, 350, 4spd. build
Joe on one of my Other forums They Just offered for sale the Topper you are talking about Let me get Link
___________________________________________
1977 Chevelle SE x2
One Mild original
one Wild NON original
Anthony

Limey SE- Management

- Street Cred : 98
 Re: 1973 Chevelle SS, 350, 4spd. build
Joe I dont know what years these are for so Forgive me for that
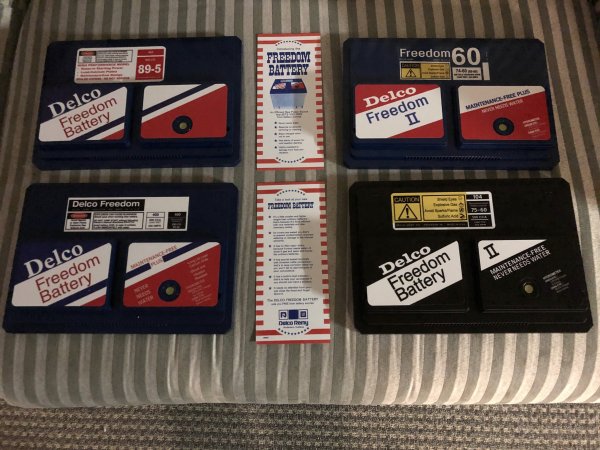
For a limited time, you can get your choice of the 4 toppers avail and a free battery brochure, these are hard to find, some cars had them in the glovebox paperwork. 1 topper, 1 brochure, $65 plus $15 Priority ship in the CONUS. ( includes $50 insc insc. if more is needed, you can add more if you like. ) 2 toppers can ship for the $15, but only has $50 insc.)
Get your car ready for spring. These toppers fit a 78 series battery, white interstate battery’s looks closest to factory, smaller battery’s will have a slight over hang on end. But hardly noticeable. hurry, this deal won’t last long.
Eye is not a decal, All 4 toppers have the 2 pc plexi eye that looks real.

___________________________________________
1977 Chevelle SE x2
One Mild original
one Wild NON original
Anthony

Limey SE- Management

- Street Cred : 98
 Re: 1973 Chevelle SS, 350, 4spd. build
You would have to google what years, what batteries were available and used in what models. I think those toppers are for cars in the late 70 early 80s but you would have to check. I have the R89s for the group 78 battery. Side terminal. That was stock for 73.

Joe73- Donating Member

- Street Cred : 83
 Re: 1973 Chevelle SS, 350, 4spd. build
If my memory is correct, I’m pretty sure that my fathers new 1977 El Camino had one of the two batteries on the left side of that picture. I remember my dad and grandfather trying to figure out what the little green lens was for. At 9 years old if they were under the hood so was I!!

77camino- G3GM Enthusiast

- Street Cred : 8
 Re: 1973 Chevelle SS, 350, 4spd. build
Ok, its time to address the trim on the car. I ended up buying the Harbor Freight bench buffer (orange one for $52). Runs exceptionally smooth, has great rpm and does not bog down when you push on it. Also picked up a steel stand for it off FB markteplace.
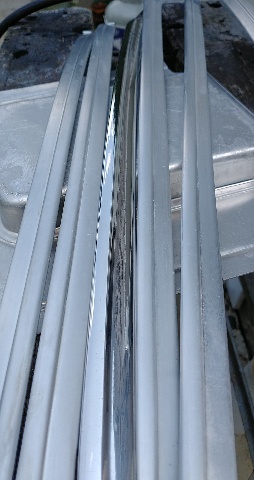
I coated the parts with Easy Off brand oven cleaner and let it sit about 10 minutes. Then a quick scuff with some red scotchbrite pads. Then rinse with water. About 90% of the anodize came off on the first shot. I was impressed. I tried the "great value" walmart oven cleaner and it didnt do too to well.
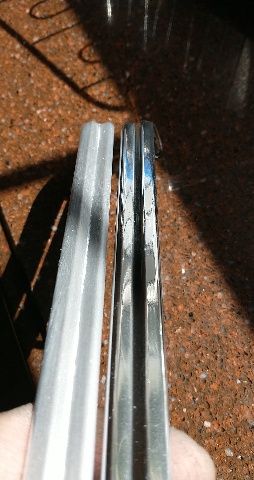
Got all the anodize off and inspected the pieces. Usual nicks and dings but nothing bad. I found that if any nick was a bit deep, I used a "used" scotchbrite Roloc on the air grinder to gently remove the nick. Same grinder you would use to remove a gasket off the engine. The Roloc works great and quick. Then I sanded all the pieces with some 600 wet, then 800, then 1000. I didnt go crazy and any very light pits I left alone. Any dings I worked out with a small punch and small screwdriver working slowly.
Then I used some Brown Tivoli cutting rouge on the buffer which brings out a nice shine in just one pass. I wore leather gloves for better control and because the piece gets hot when your buffing. After the Brown Trivoli, I went with the Green rouge for stainless steel. Again works very well. I tried some White rouge after the green but it didnt really do anything so I kept with the brown and green.
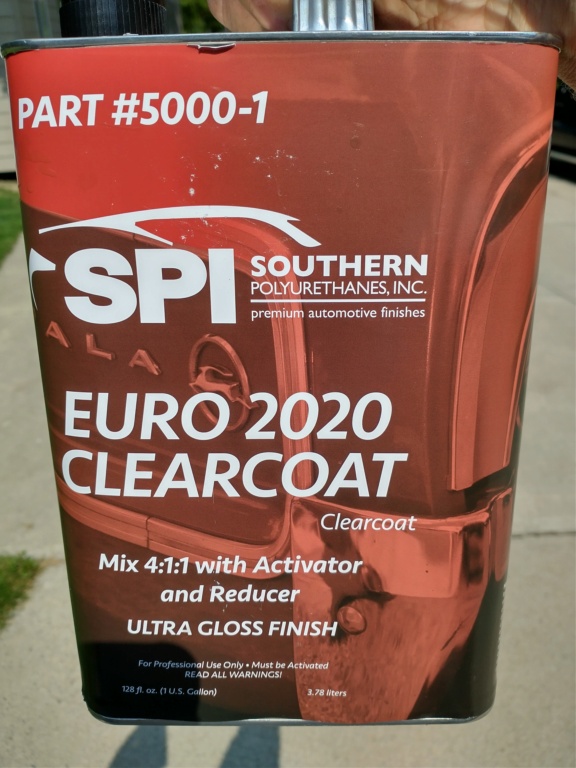
Wiped the parts with alcohol and then mineral based Wax and Grease remover. I then shot some Southern Polyurethane Euro clear because its a harder clear designed for mercedes and bmw cars and used by wheel refinishers. I used Universal Clear when I painted my car. I shot one quick coat with a 20 minute flash, then the second coat.
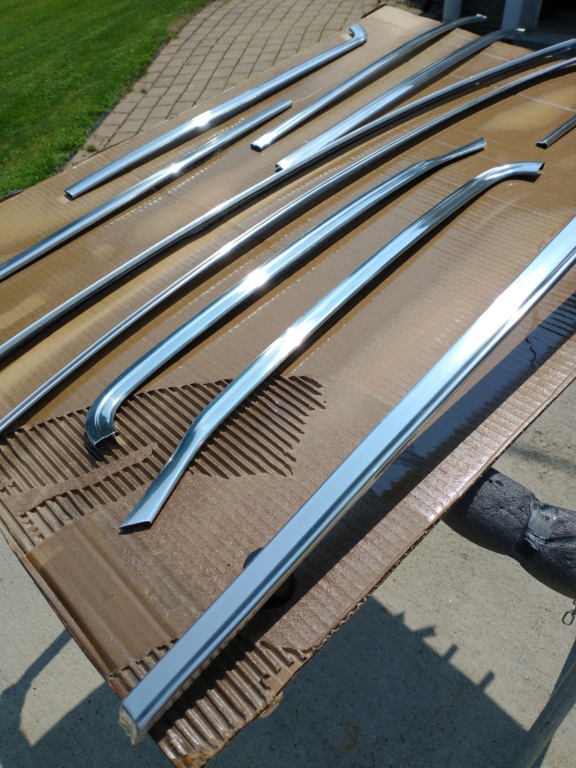
All in all, I saved a bunch of money by doing it myself (and there arent any guys local to me to drop them off). It went pretty quick with the most time being the sanding. They now have an almost mirror finish and some good clear so they dont oxidize. Basically took a full day to have them close to done. Little touch ups on the buffer the next day.
Heres some pics. First two (2) pics show the stripped trim compared to a polished piece. The stripped trim has a satin finish but easily comes up to a shine.


Joe73- Donating Member

- Street Cred : 83
 Re: 1973 Chevelle SS, 350, 4spd. build
Thank you for the Tips Joe Mine are in desperate need of this
___________________________________________
1977 Chevelle SE x2
One Mild original
one Wild NON original
Anthony

Limey SE- Management

- Street Cred : 98
 Re: 1973 Chevelle SS, 350, 4spd. build
Very nice work.
I refinished mine as well. Not as extensive as you Joe.
Then had mine clear powder coated.
I refinished mine as well. Not as extensive as you Joe.
Then had mine clear powder coated.
impalamonte- G3GM Enthusiast

- Street Cred : 18
 Re: 1973 Chevelle SS, 350, 4spd. build
Thanks. Clear powder coated, very nice. I thought of that but my powder coat guy didnt recommend clear for my intake explaining that it would yellow over time. Dont know if thats because of the heat or what. I think clear powdercoat on the trim would be the way to go.

Joe73- Donating Member

- Street Cred : 83
 Re: 1973 Chevelle SS, 350, 4spd. build
Any tips for getting the clutch adjusted properly?
Have a project together but not quite sure where to BEST make the clutch adjustments?
Thanks
Have a project together but not quite sure where to BEST make the clutch adjustments?
Thanks
Sinister- G3GM Member

- Street Cred : 0
 Re: 1973 Chevelle SS, 350, 4spd. build
Easiest way would be as follows. The object it to have the correct "free play". Free play is the amount the clutch pedal moves just until the throw out bearing contacts the fingers of the pressure plate. If you look at your Z bar, bottom leg which connects to the adjustable pushrod. Its the pushrod that goes into the clutch fork. The pushrod goes into the bottom hole on the Z bar. There should be a hole above the bottom hole. If you loosen the nut on the adjustment rod and adjust it so it goes into the TOP hole and pushes the clutch fork rearward so that it LIGHTLY contacts the pressure plate fingers, your are perfect. Just snug up the nut and put the rod back in the bottom hole. Your pedal free play should now be about 1" to 1 14/4" before its has pressure meaning its contacting the pressure plate fingers.
I highly recommend "dialing in" your bellhousing or scattershield !! There is info on the net on how to do that. It will make everything operate smoother and you will have less wear and tear on the input shaft and bearing from misalignment.
Good luck with your project.
I highly recommend "dialing in" your bellhousing or scattershield !! There is info on the net on how to do that. It will make everything operate smoother and you will have less wear and tear on the input shaft and bearing from misalignment.
Good luck with your project.

Joe73- Donating Member

- Street Cred : 83
Sinister likes this post
 Re: 1973 Chevelle SS, 350, 4spd. build
I wish i had just half the knowledge you do Joe on our cars. I have messed with chevys and mopars for 30 plus years, and i dont know half of it.

Hs1973- G3GM Enthusiast

- Street Cred : 14
Page 13 of 17 •  1 ... 8 ... 12, 13, 14, 15, 16, 17
G3GM :: Media :: G3 Project Pictures
Page 13 of 17
Permissions in this forum:
You cannot reply to topics in this forum|
|
|




» Roll Call and Car showcase
» Central Texas Noob
» Welcome Keith Seymore
» Wanted: Front park lamp assemblies
» 75 Hurst Olds T-tpos
» G3 Chevy rims- help ID these
» 75 el camino project.
» Have had a few questions
» vinyl top removal