Front control arm interchange
+8
dynchel
pila
Limey SE
Pontichev327
wokrdan AKA BU Balls
Mcarlo77
Tom77
1973montec
12 posters
Page 2 of 4
Page 2 of 4 •  1, 2, 3, 4
 Re: Front control arm interchange
That is a whole other story! I am planning on using these springs now. Either way, I have to compress the new ones to get them in there.
bitterfitter- Donating Member

- Street Cred : 9
 Re: Front control arm interchange
Tip I learned here from LSANTI76 if you're using these:

It will be easy:
1. Remove the threaded arm from the compressor shaft
2. Insert the compressor in the spring with the open end of the shaft pointed up and insert it into the shock mount hole in the pocket so it sticks out into the access hole in the upper control arm
3. Put on a couple large steel fender washers on the top of the shaft via the access hole in the upper control arm, then thread on the tightening nut
4. Hook the free arm on the spring as low as possible
5. Oil the threads on the compressor shaft liberally to prevent galling them
6. Wrap a chain around the spring and control arms for good measure
7. Start cranking from the top of the upper control arm -- it will gradually pull the spring upward into the pocket
To install, reverse the process.

thatfnthing- Donating Member

- Street Cred : 65
 Re: Front control arm interchange
I though about doing something like this but I thought I checked and the shock mounting hole was too small. Maybe it was just a little corroded. I will give this a shot tonight, if I get a chance. ----So after I compress the spring, I should remove the lower control arm, and then unwind the compressor to decompress the spring, and remove the spring. Does this way allow enough travel to decompress the spring for removal? I just don't want to run out of threads when removing the spring. Thanks again
bitterfitter- Donating Member

- Street Cred : 9
 Re: Front control arm interchange
If your compressor is long enough, yes. Maybe you want to hook the fingers a coil or two higher up on the spring to give you some more margin for error. It worked fine for mine, and the ones coming out were ridiculously tall springs.

thatfnthing- Donating Member

- Street Cred : 65
 Re: Front control arm interchange
Let me get this right. You dismantle the compressor, then insert the "long bolt" part of it through the shock holes, downwards. Then thread the threaded piece with the arms onto the bottom. Then hook the spring onto it?
So basically, the nut that you tighten is on top of the shock hole and your pulling the spring up into the pocket?
Thanks guys.
So basically, the nut that you tighten is on top of the shock hole and your pulling the spring up into the pocket?
Thanks guys.

Joe73- Donating Member

- Street Cred : 83
 Re: Front control arm interchange
Yep, or go up from below like you were installing the shock. Whichever way works. Sorry if I goofed it earlier -- you don't need the 'free' arm of the compressor. Lack of caffeine. 
Be sure to use a couple fender washers for strength, though -- the pressure WILL deform them, and one may not be enough. And chain it to be sure.
Be sure to use a couple fender washers for strength, though -- the pressure WILL deform them, and one may not be enough. And chain it to be sure.

thatfnthing- Donating Member

- Street Cred : 65
 Re: Front control arm interchange
SO I finally got to working on the front end last night. The spring compressor was useless! I could not get it to fit through the shock mountng hole. The hole was too small and the inner fender was in the way. I decided to chain the spring to the lower control arm, jack under the arm to take some pressure, seperate the upper ball joint and let down the jack slowly. Once the jack was all the way down, I removed the jack, seperated the lower ball joint and removed the spindle. Then I left the chain on, but loose and with a very little prying , the spring came out with no issues. Removed both arms and replaced with new ones. This is where I had to end for the night. Getting the lower control arm in place was kinda harder than I remembered. I will be heading to the garage today to button up this side and start on the next.
I will be reusing my springs but would like to cut them. Any suggestions on how much? I have looked through all the posts on here and I figure anywhere from 1 to 2 coils. Before starting I measured and figured I would like to sit around 3" to 3 1/2" inches lower when finished.
I will be reusing my springs but would like to cut them. Any suggestions on how much? I have looked through all the posts on here and I figure anywhere from 1 to 2 coils. Before starting I measured and figured I would like to sit around 3" to 3 1/2" inches lower when finished.
bitterfitter- Donating Member

- Street Cred : 9
 Re: Front control arm interchange
My experience is one coil will drop it appx one inch. I have never tried to go much lower (by cutting springs) so I can't tell you if two coils will give you two inches etc. You might want consider two inch drop spindles, with one coil cut. just my .002

dynchel- Donating Member

- Street Cred : 40
 Re: Front control arm interchange
Thanks for the info. Looks like my schedule will not let me get to this till tommorrow, so I have more time to think about it.
bitterfitter- Donating Member

- Street Cred : 9
 Re: Front control arm interchange
I bought 2 inch drop spindles for the front and HD springs. I ended up an inch higher that I started. I love how it handles with the HD springs up front, but it is nose high. hate it.
Springs are getting at least 2 coils cut out when it warms back up.
Springs are getting at least 2 coils cut out when it warms back up.

driveit- Donating Member

- Street Cred : 15
 Re: Front control arm interchange
So I got time today after plans changed. I finished the passeneger side and set it down. Perfect! 3" lower.... I ended up cutting off 1 1/2 coils.

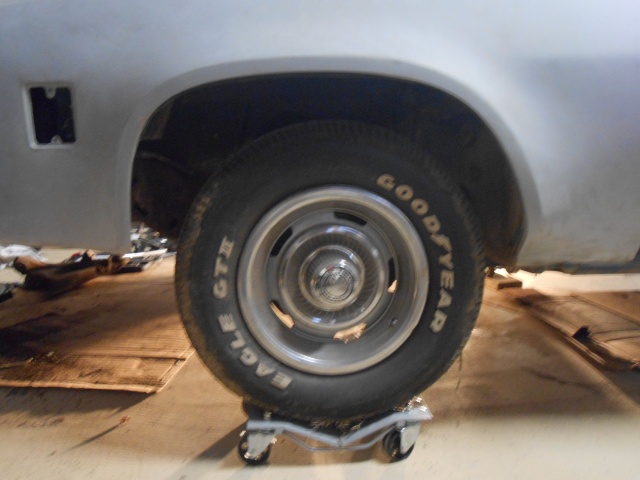
 " />Here is the drivers side that is a good before shot...

 " />Here is the passenger side after I took out 1 1/2 coils and put it back together.
 " />Here is the drivers side that is a good before shot...
 " />Here is the passenger side after I took out 1 1/2 coils and put it back together.
bitterfitter- Donating Member

- Street Cred : 9
 Re: Front control arm interchange
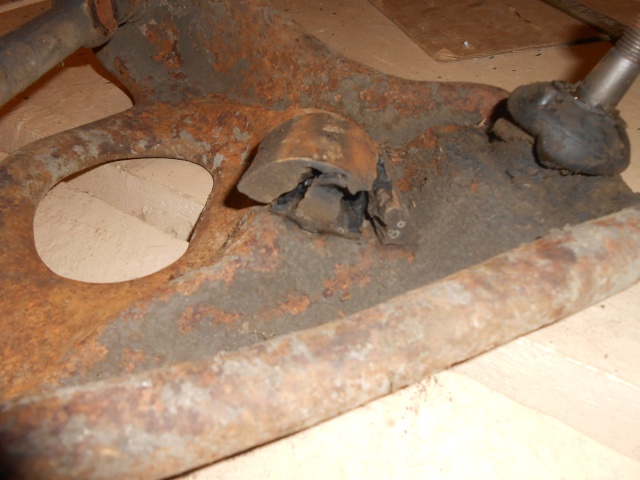
Do you think the front end was ready for a rebuild??
[img] [/img]
[img] [/img]
Should of just left it alone and hoped for the best.....
[img]
 [/img]
[img]
 [/img]
Should of just left it alone and hoped for the best.....
bitterfitter- Donating Member

- Street Cred : 9
 Re: Front control arm interchange
That's good for another 100,000. 

dynchel- Donating Member

- Street Cred : 40
 Re: Front control arm interchange
Wow, and I thought my control arm bushings were rough when I did them last year... 
I gotcha beat on the upper bump stops, though. My springs were so tall they were hammered completely flat. You couldn't tell what shape they used to be.
I gotcha beat on the upper bump stops, though. My springs were so tall they were hammered completely flat. You couldn't tell what shape they used to be.

thatfnthing- Donating Member

- Street Cred : 65
 Re: Front control arm interchange
What bushings ?  She should ride nice now !!!

Joe73- Donating Member

- Street Cred : 83
 Re: Front control arm interchange
After you set the car on the ground, it will still settle a bit more after you drive it around. I cut 1-1/2" out of my springs and it looked great until I drove for a day. Then it was too low for me, so I started over. It might be perfect for you though, so this is just a heads up notice that it might settle some more!

Pontichev327- G3GM Enthusiast

- Street Cred : 7
 Re: Front control arm interchange
I can't remember ever seeing front suspension parts worn as bad as in that picture !
There's a simpler way to remove the front springs, and it shown in an old Chilton's Auto manual I have. Too much to type in here at this point. I may scan it in order to post it sometime.
There's a simpler way to remove the front springs, and it shown in an old Chilton's Auto manual I have. Too much to type in here at this point. I may scan it in order to post it sometime.
pila- Donating Member

- Street Cred : 43
 Re: Front control arm interchange
Wish mine would have settled a bit. I halfway believe they have gotten taller.

driveit- Donating Member

- Street Cred : 15
 Re: Front control arm interchange
what kind of h/d springs did you install? It sounds like whatever you used was way to much for your application. In h/s a buddy put a 455 in a '79 cutlass and put springs spec'ed for a '74 olds s/w 455 springs with a/c. Let's just say he had the same problem as you (except he didn't have the drop spindles). The big joke was asking him if it was four wheel drive.driveit wrote:Wish mine would have settled a bit. I halfway believe they have gotten taller.

dynchel- Donating Member

- Street Cred : 40
 Re: Front control arm interchange
Pontichev327 wrote:After you set the car on the ground, it will still settle a bit more after you drive it around. I cut 1-1/2" out of my springs and it looked great until I drove for a day. Then it was too low for me, so I started over. It might be perfect for you though, so this is just a heads up notice that it might settle some more!
Settling a bit more would be fine with me. I was shotting for 3" or more just to be safe. I would not mind one bit if it goes down a little more. This was also with just one side installed. I still have to finish the drivers side to see where it sits when level. I just came in from working on it. The drivers side lower back bolt for the control arm was seized into the sleeve. After quite a few choice words, I cut out the bolt and moved on. I have the upper control arm instaled and the lower is in place with one bolt and a drift pin holding it there. I hope to get a new bolt soon and finish up the suspension. Then it is steering time. I am on the fence about replacing my gear box. It seems to be damp in a few spots. I would love to get into a quick ratio box for little cost though. Hate to spent big money on a new one.
bitterfitter- Donating Member

- Street Cred : 9
 Re: Front control arm interchange
Three words for you............. Junk Yard Crawl
for the Camaro / Trans Am IIRC and maybe the Blazer ( mid ninety's )
for the Camaro / Trans Am IIRC and maybe the Blazer ( mid ninety's )

Limey SE- Management

- Street Cred : 98
 Re: Front control arm interchange
Limey wrote:Three words for you............. Junk Yard Crawl
for the Camaro / Trans Am IIRC and maybe the Blazer ( mid ninety's )
Can you elaborate... What vehicles I would be looking for? What is IIRC? Are we talking full size or s-10 blazers?
bitterfitter- Donating Member

- Street Cred : 9
 Re: Front control arm interchange
My guess is iirc would be a iroc camaro. The m/c SS gear box is usually the box of choice and available from rock auto (according to car craft magazine)

dynchel- Donating Member

- Street Cred : 40
 Re: Front control arm interchange
I will have to check how reasonable these are? Any year SS? 84-88 I assume.
Last edited by bitterfitter on Sun Jan 19, 2014 7:18 pm; edited 1 time in total
bitterfitter- Donating Member

- Street Cred : 9
 Re: Front control arm interchange
Yeah, I think all the g body SS boxs are the same.

dynchel- Donating Member

- Street Cred : 40
Page 2 of 4 •  1, 2, 3, 4
Page 2 of 4
Permissions in this forum:
You cannot reply to topics in this forum|
|
|


» Roll Call and Car showcase
» Central Texas Noob
» Welcome Keith Seymore
» Wanted: Front park lamp assemblies
» 75 Hurst Olds T-tpos
» G3 Chevy rims- help ID these
» 75 el camino project.
» Have had a few questions
» vinyl top removal