73 Chevelle
+9
77mali
Joe73
73 Guy
alleyball4
Limey SE
Wallyuph
1973 454 MONTE
pila
73chevy350
13 posters
G3GM :: Media :: G3 Project Pictures
Page 1 of 1
 73 Chevelle
Well I'm out of work and have time to tear into my car, which i haven't had time for the last 2 1/2 years. I'm doing a cheap paint job myself, and I've already recovered the seat upholstery. Today I just pulled the engine and trans to put in a different engine and degrease and paint the engine bay and frame.
Here's a bunch of pictures showing what i'm up against.


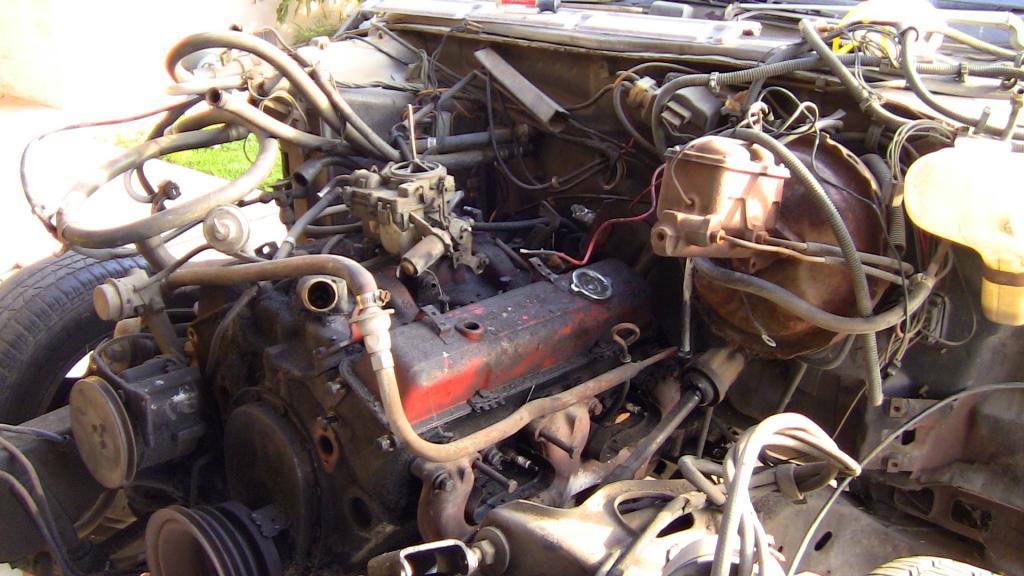
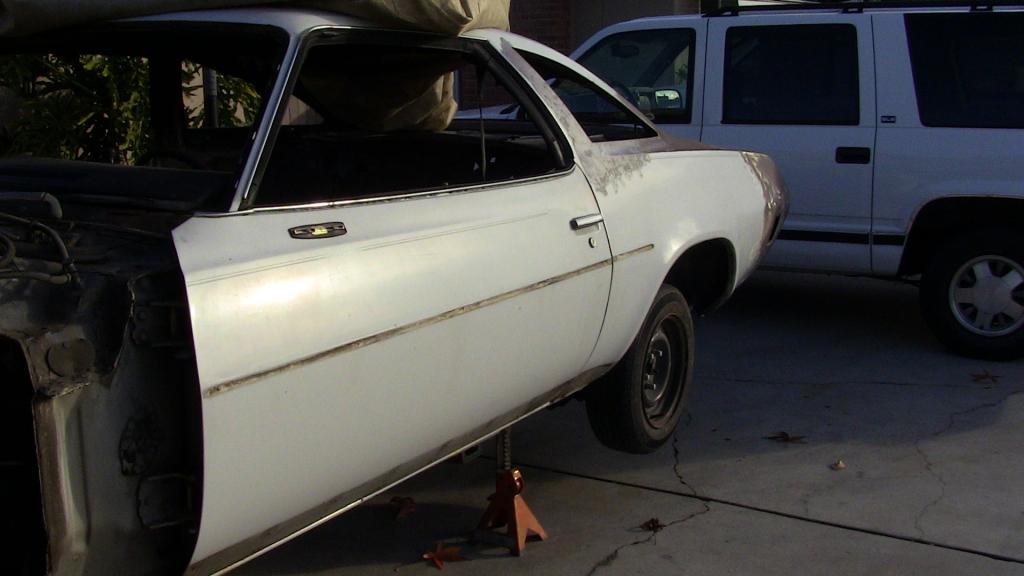


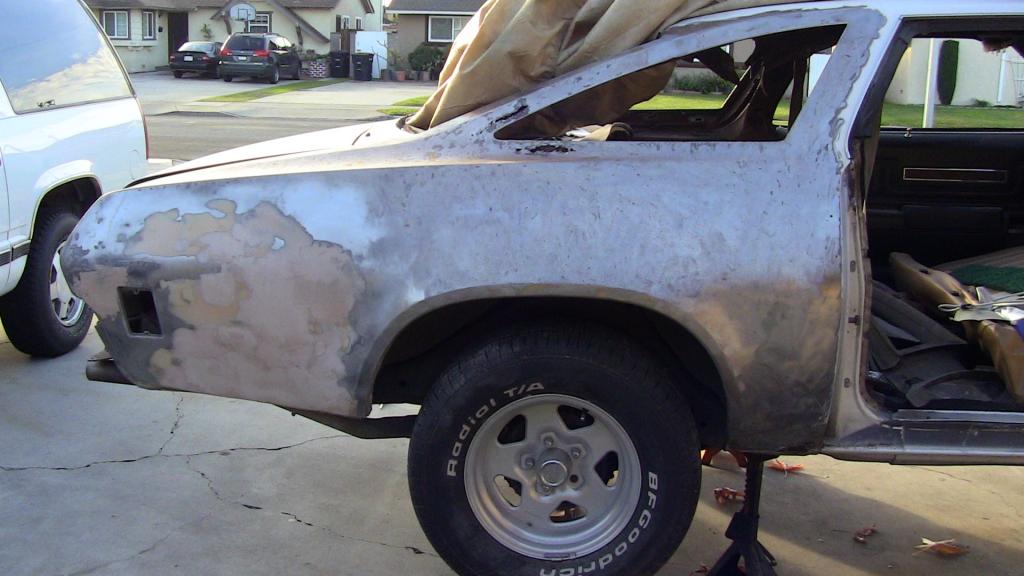
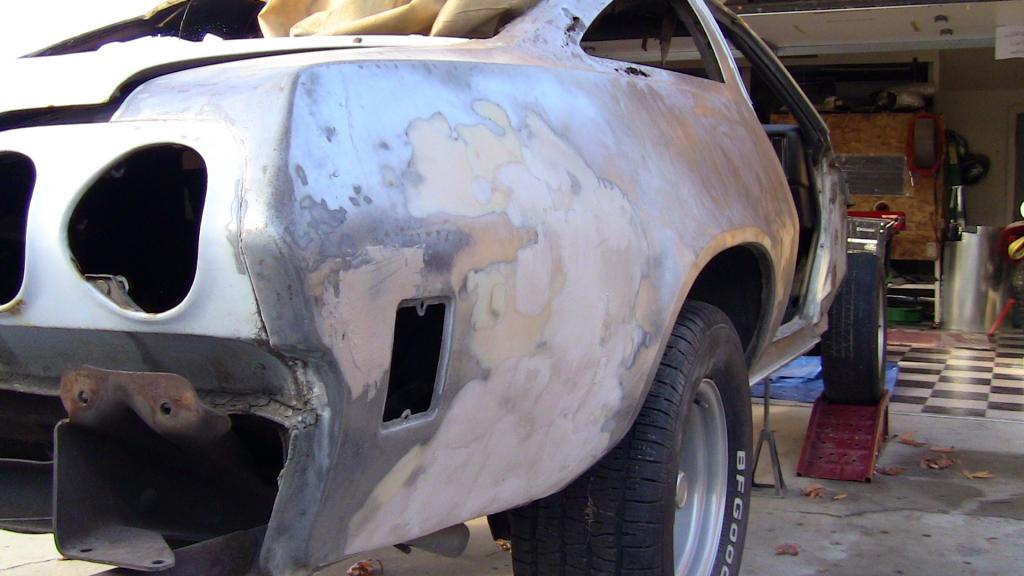
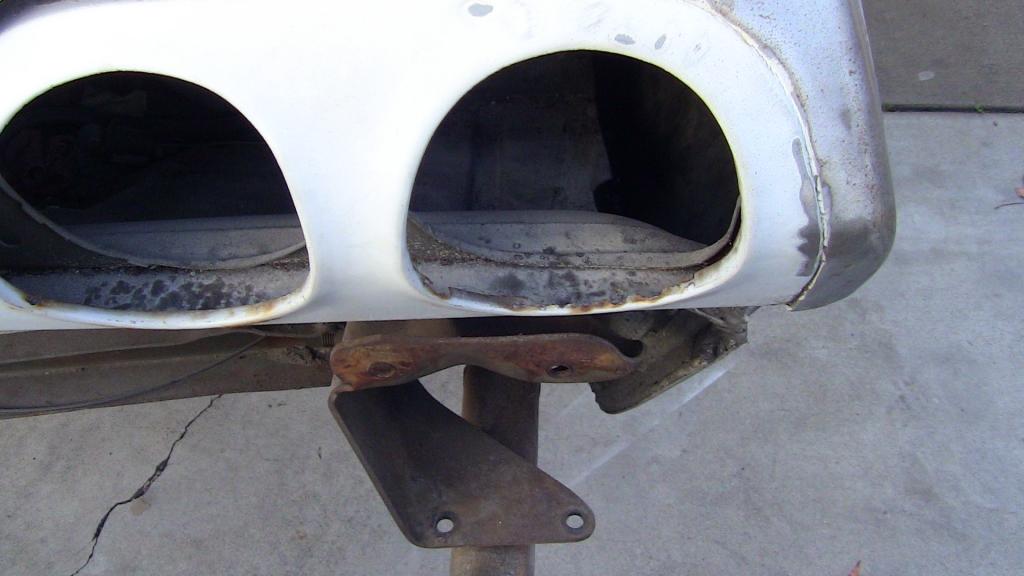


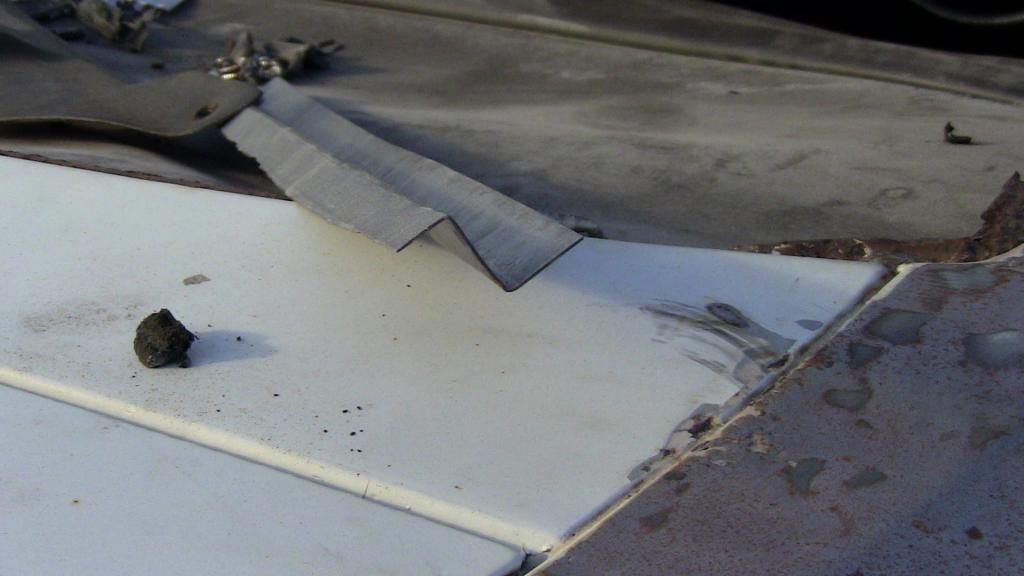

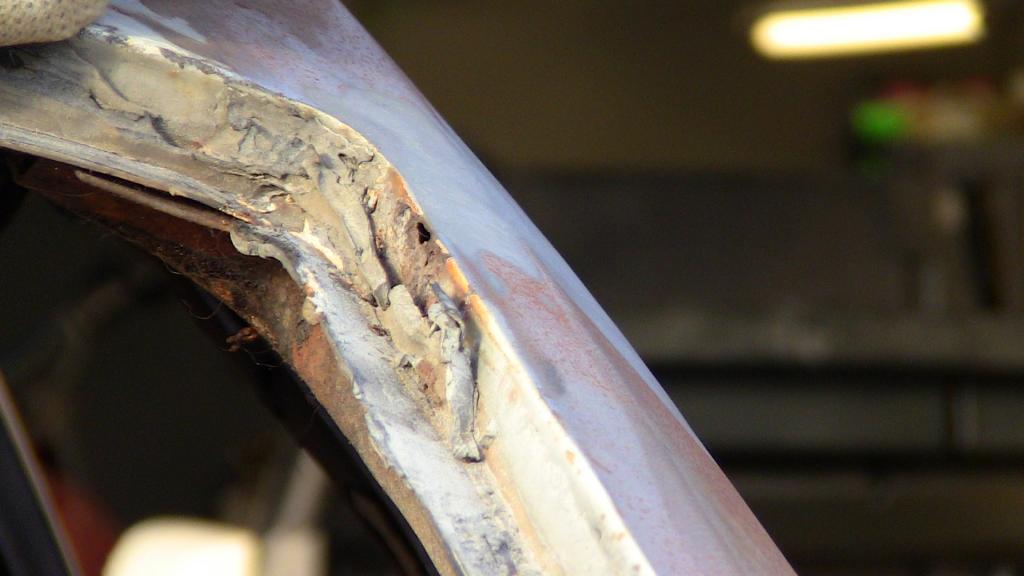
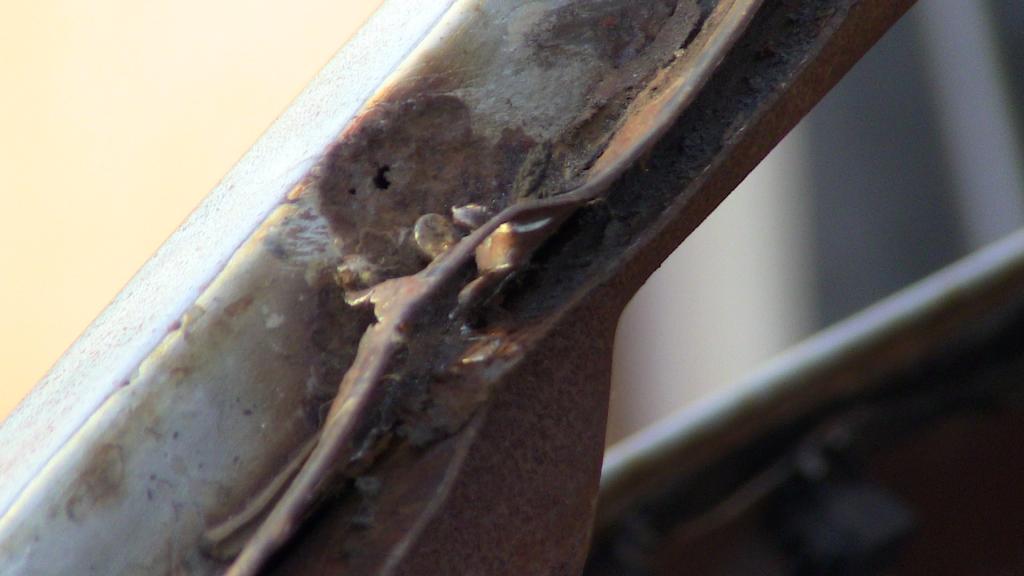


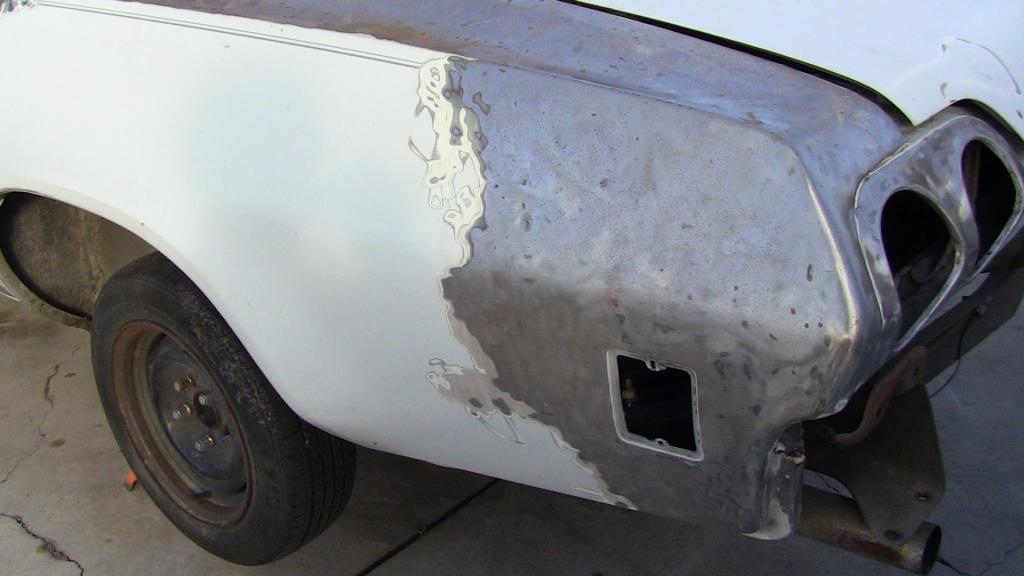
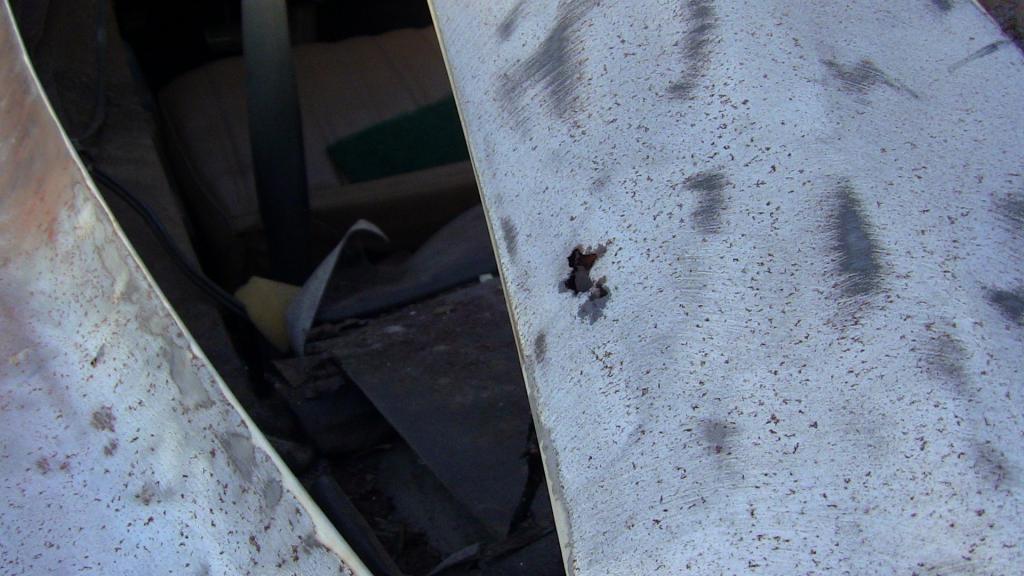

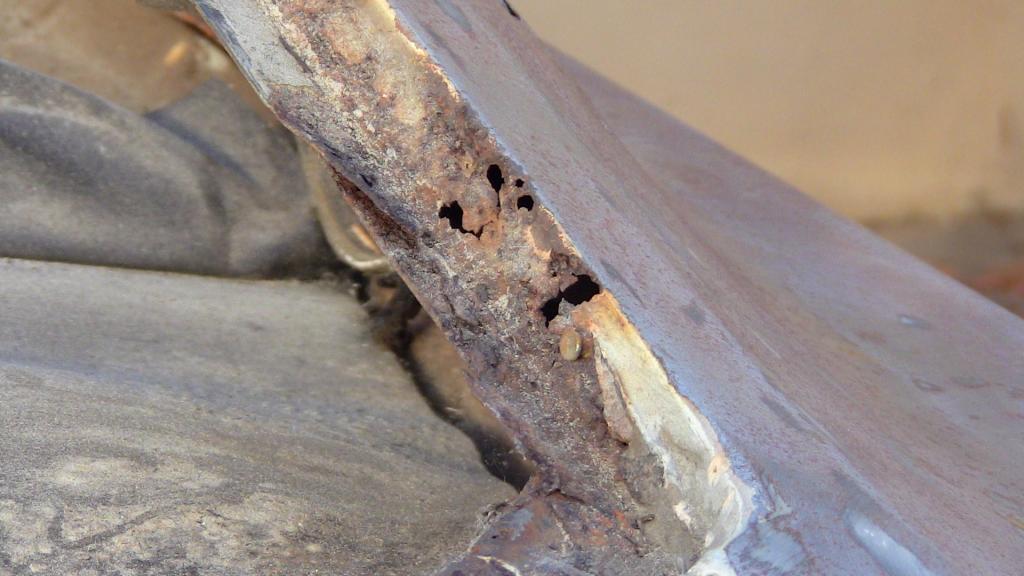
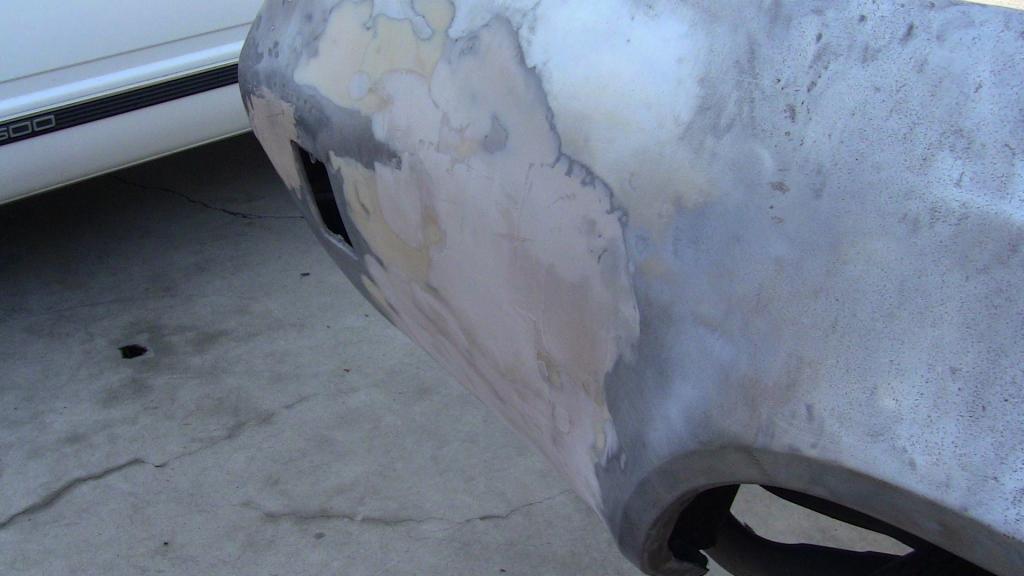
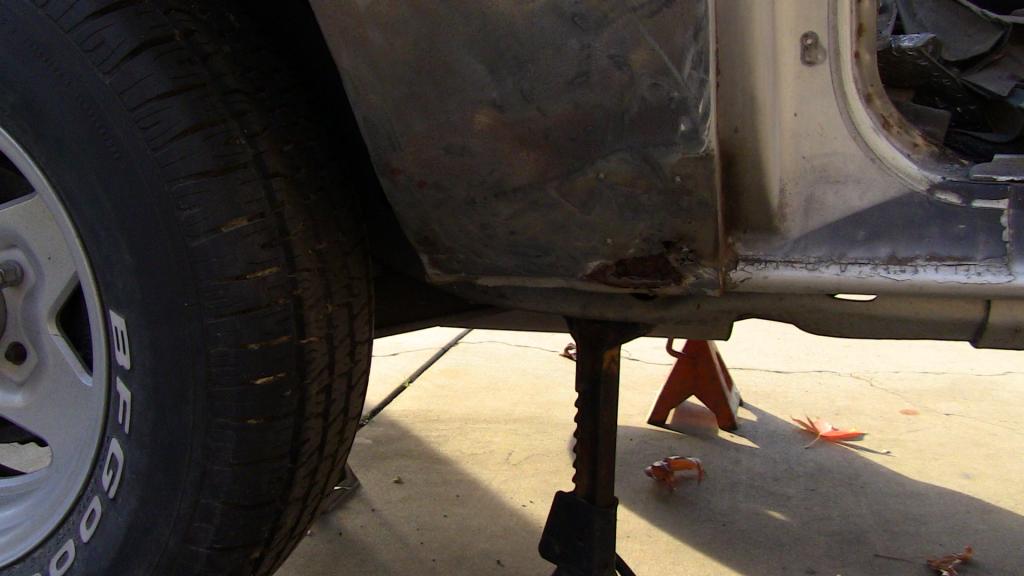
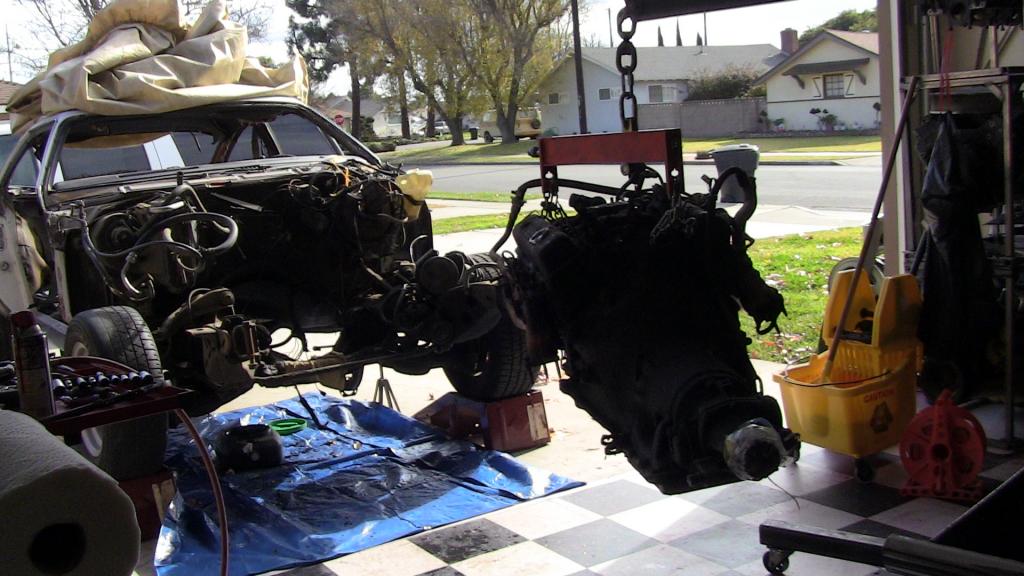
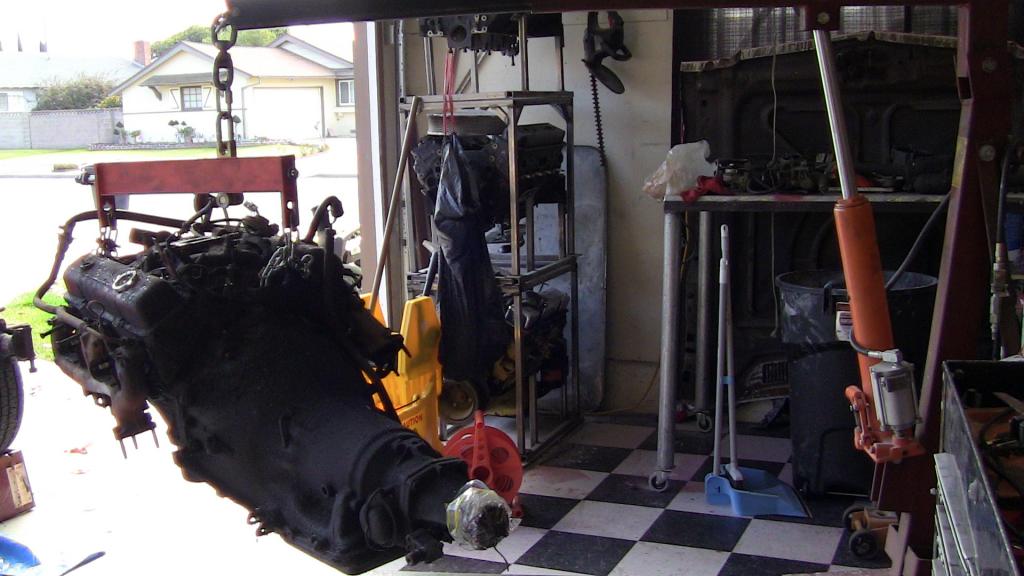
I hope to make some serious progress on this in the next few weeks, but we all know how that goes.
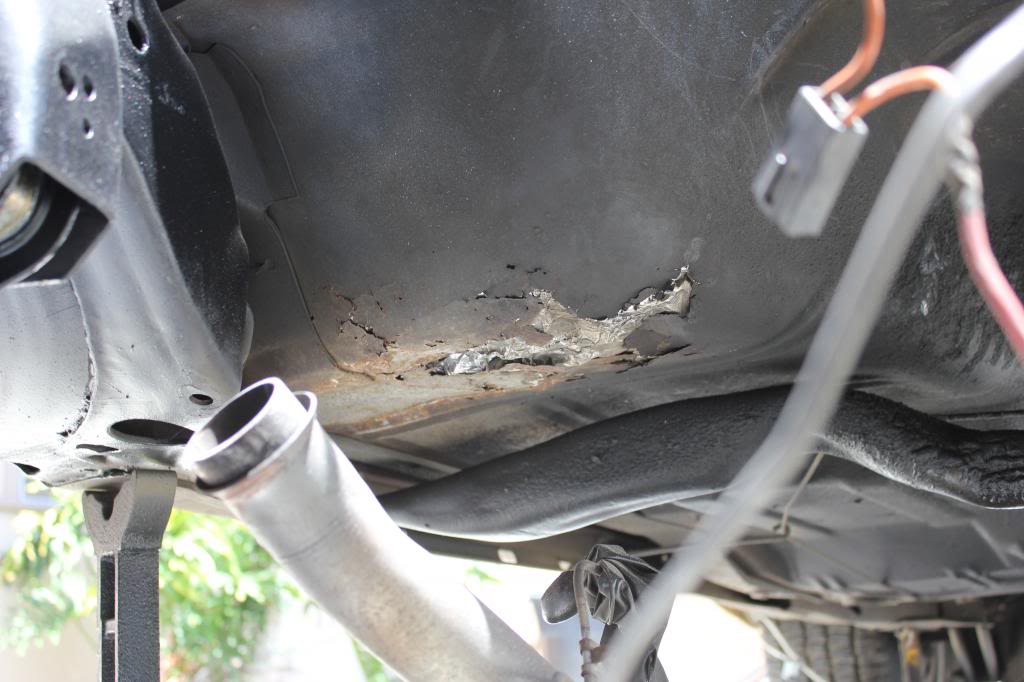
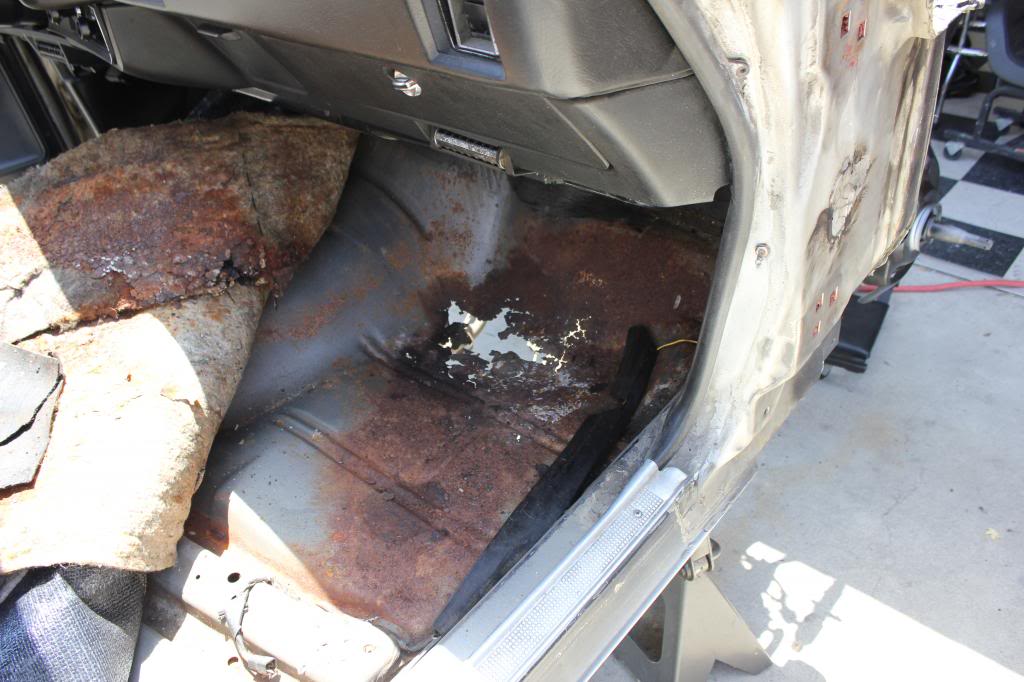
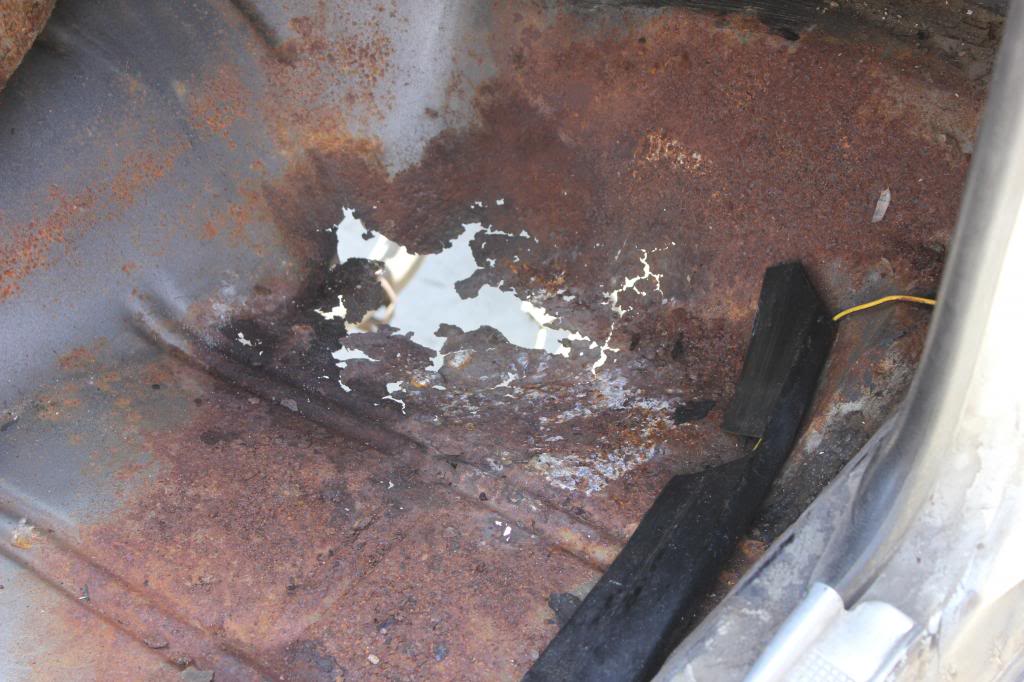
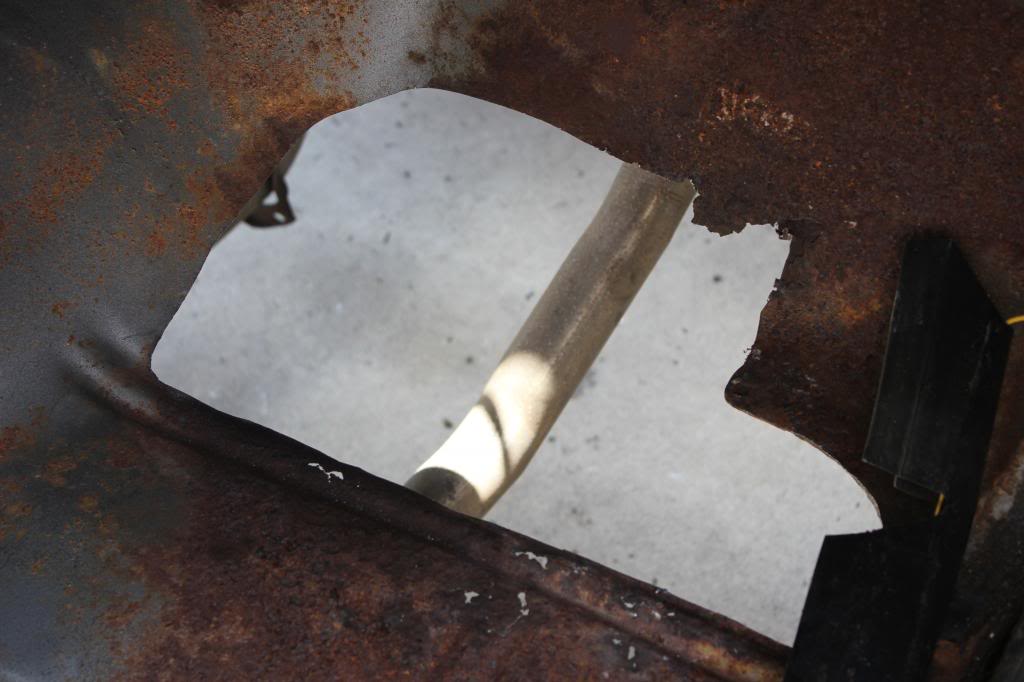
When i pulled the engine/trans I found some rust holes on the floorboards as well I'll have to weld some patches in.
Here's a bunch of pictures showing what i'm up against.


I hope to make some serious progress on this in the next few weeks, but we all know how that goes.
When i pulled the engine/trans I found some rust holes on the floorboards as well I'll have to weld some patches in.
73 Guy- G3GM Newbie

- Street Cred : 0
 Re: 73 Chevelle
https://www.youtube.com/watch?v=fbOshyp4UL8&feature=youtu.be
73 Guy- G3GM Newbie

- Street Cred : 0
 Re: 73 Chevelle
All & all I'd say it's pretty solid & certainly worth all the effort. Nice job so far, keep it up as best you can & good luck.
77mali- Donating Member

- Street Cred : 62
 Re: 73 Chevelle
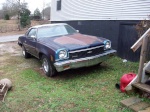
Gotta hate the roof rust on these things, mine was filled with it.
73chevy350- G3GM Newbie

- Street Cred : 0
 Re: 73 Chevelle
Covering rust pits, after sanding etc and using some metal prep on them, works OK with the products: All-metal, and the other one: Metal-To-Metal. Both are water proof, while the Bondo type fillers are not.
pila- Donating Member

- Street Cred : 43
 Re: 73 Chevelle
Well I was making progress, I got started degreasing the frame and crossmember. I knocked off an unbeleviable amount of old grease and crud from the frame and I still have to go over it with a grinder. I got the steering linkage removed as a whole, removed the gear box. Stopped there and began trying to wash all of these parts in a parts washer to knock the heavy grease off them, then I was going to sandblast them.
I got started sandblasting one of the hood hinges, and then my old craftsman 3hp air compressor gave out. And I just converted it to run on 240 volts, and it really seamed to like that change, but running it sooo much while sandblasting overheated it. I've been waiting for this thing to kick the bucket.
So my car progress got derailed for the last few days. I had to shop around for a new compressor. So for $100, I found a 60 gallon 90's coleman "black max" with a mythical 6.5 hp motor that only draws 15 amps on 240, so i guess thats closer to a 3hp motor. The guy said it ran like new last time he used it years ago, but it was at a commercial shop and he never got it hooked up there. So i bought it taking a chance. Comparing the new motor to my old one, the new one seems almost twice as long so it should be a beefier motor whatever the horsepower really is.
Well I got it wired up, and this new one was shooting a lot of the air pressure out of the head gasket and so the compressor never turned off. I had my meters amp clamp on it to monitor it, it started off around 2 amps with no pressure in the tank, and built all the way up to 28 amps. Once I realized it was never going to shut off because the cylinder head was shooting all the pressure out of it (around 125 psi and never got above that) I turned off the switch. Well that was all she wrote, I could never get the pump to turn back on again.
I disassembled the motor, found out you really have to push harder than I was to reset that big red reset button. I took the back of the motor apart, and there's a switch with contact points that I found were pretty ugly looking, but the real problem was that the start capacitor, rated at around 161 mfd, was only reading 69mfd. That is probably why the motor was pulling almost twice as many amps as it was rated for.
So I just picked up a 8 dollar capacitor, got the reset button reset, and will file the breaker points clean inside the motor.
I stopped by harbor freight and picked up a new compressor motor:

So hopefully Ill end up with a working air compressor to finish my sandblasting when all is said and done. I plan on taking my old 30 gallon tank, and putting it inline/ in series with the 60 gallon tank to end up with 90 gallons. Hopefully that should give me a big improvement on sandblasting.
Take a look at my photobucket library up there and see all the dirt and grime Im trying to clean up.
73 Guy- G3GM Newbie

- Street Cred : 0
 Re: 73 Chevelle
That crud is such a pain to get off. I found that after the degreaser sits a bit and does it's job rinsing it with very, very hot water helps a lot. I use a 3 gal "Acid" sprayer (made by Chapin) around when doing this. It helps control the amount of water used and ultimately you make less of a mess in the driveway.
Nice pics & too bad about your compressor but looks like you'll be better off w/ the new set up.
Nice pics & too bad about your compressor but looks like you'll be better off w/ the new set up.

77mali- Donating Member

- Street Cred : 62
 Re: 73 Chevelle
Lots of work ahead of you, but you seem to have things under control. Pretty hard to do body work without a compressor. It's a valuable tool.
Keep up the good fight !!
BILL
Keep up the good fight !!
BILL
pila- Donating Member

- Street Cred : 43
 Re: 73 Chevelle
looks like you're making good progress.
With my sandblasting, I ended up having to go with a two-stage 60 gallon compressor. My one-stage wouldn't handle it for very long. If I had the money, I would have found me a three-stage, but I would have had to have an electrician out to redo my panel.... and that could get pricey.
The rust you have rust are the normal spots that many of us with 73's have had to deal with.
Keep us updated, and let us know if you need anything, and I hope you can find a job soon, as well.

alleyball4- Donating Member

- Street Cred : 5
 Re: 73 Chevelle
When it comes to air compressors the rule of thumb is to buy as big as you can afford as it will "never be big enough". I went through 3 compressors over the years and now bought a 80 gallon 5 hp upright two stage with a cooler and muffler on it. It seams huge but for normal day of work using mostly a staple gun it only runs ounce or twice a day. It will keep up steady with sand blasting when needed.The one before was running all the time and it was a 60 gallon two stage.

Wallyuph- Donating Member

- Street Cred : 31
 Re: 73 Chevelle
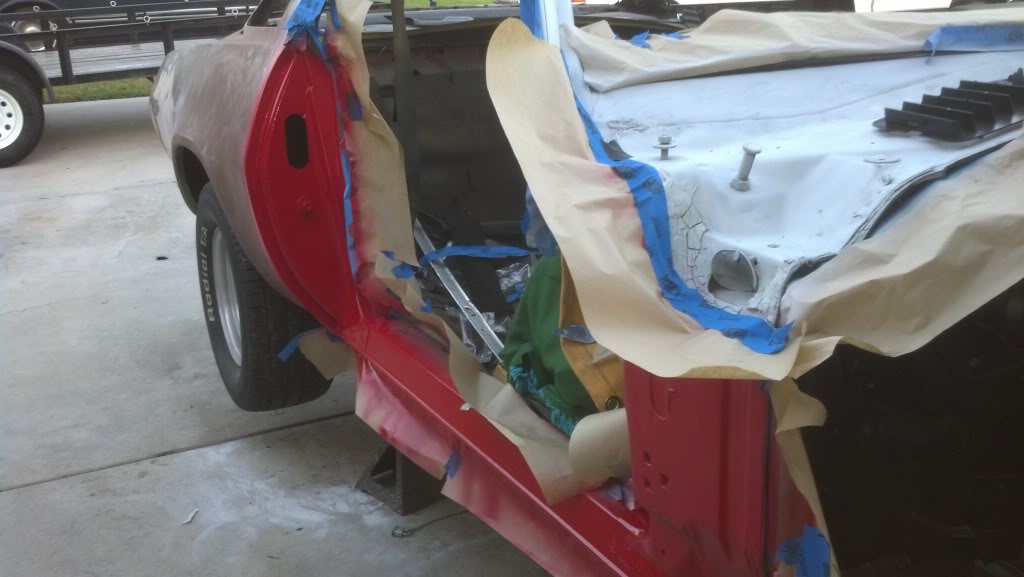
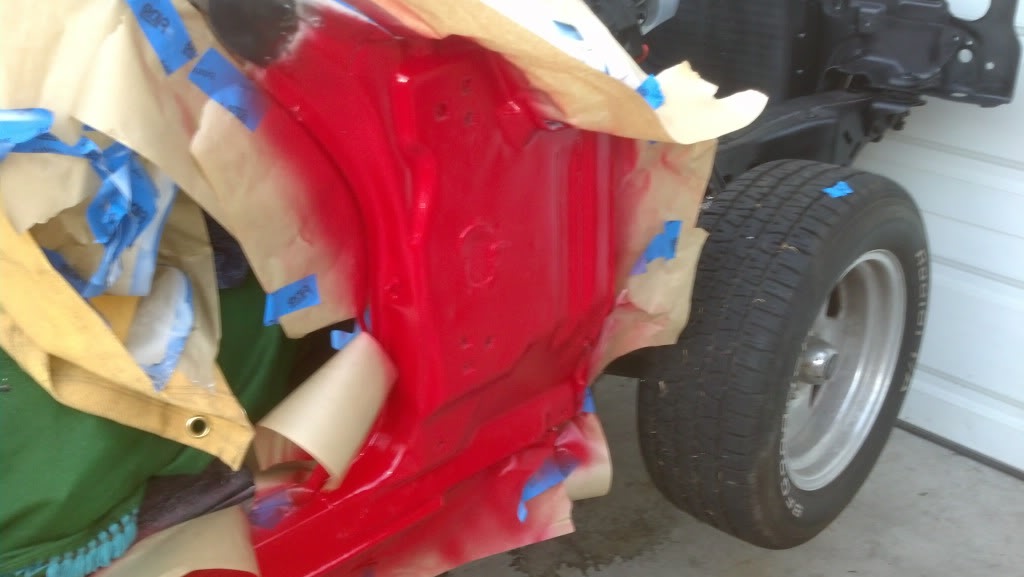
hey folks, i've been away from her a while. Just trying to get my car back on the road. I plan on painting the car with rustoleum, (cheap) and am trying to fix all the rust spots along the way. I'm at the tail end of it all. I've removed the front end and sand blasted, primered, and painted pretty much everything under the hood. I've got the engine and trans painted and installed. Got the front core support back on and the condensor and radiator.
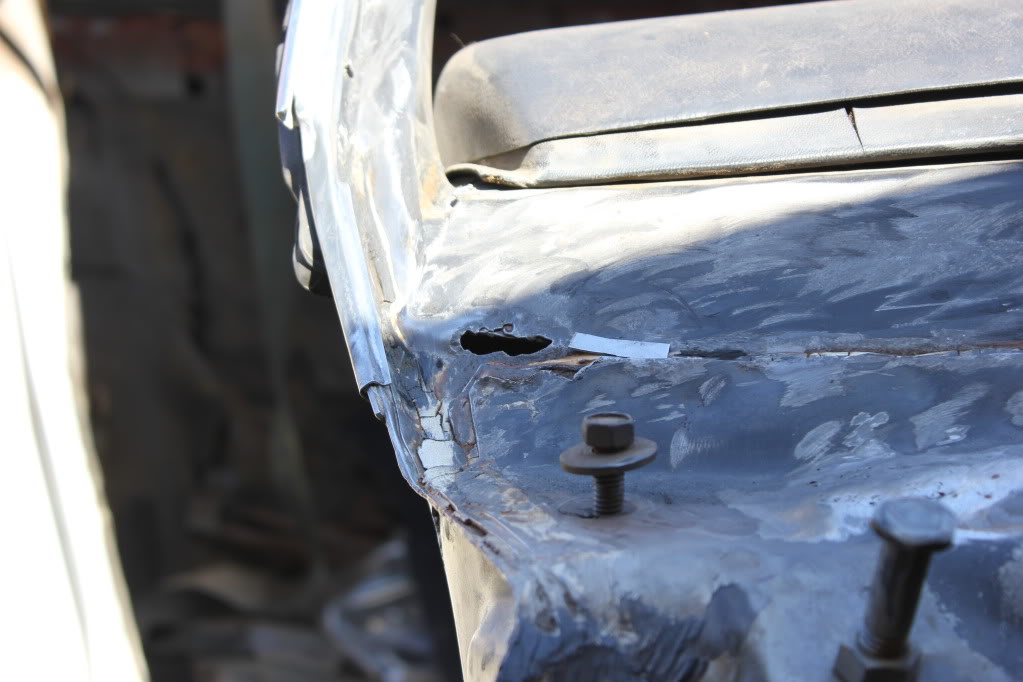
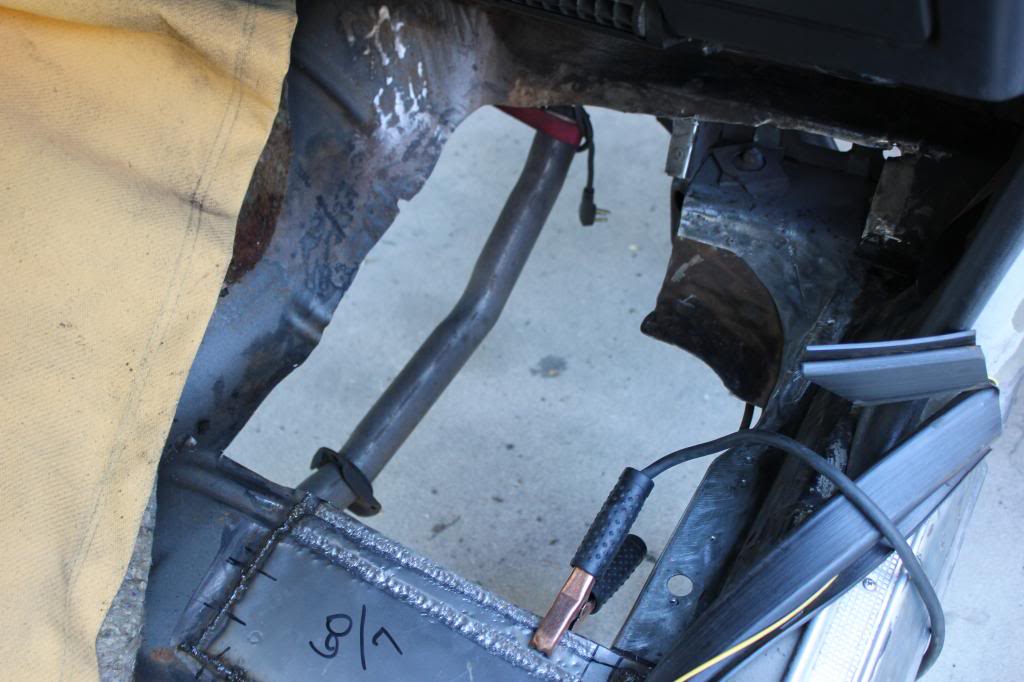
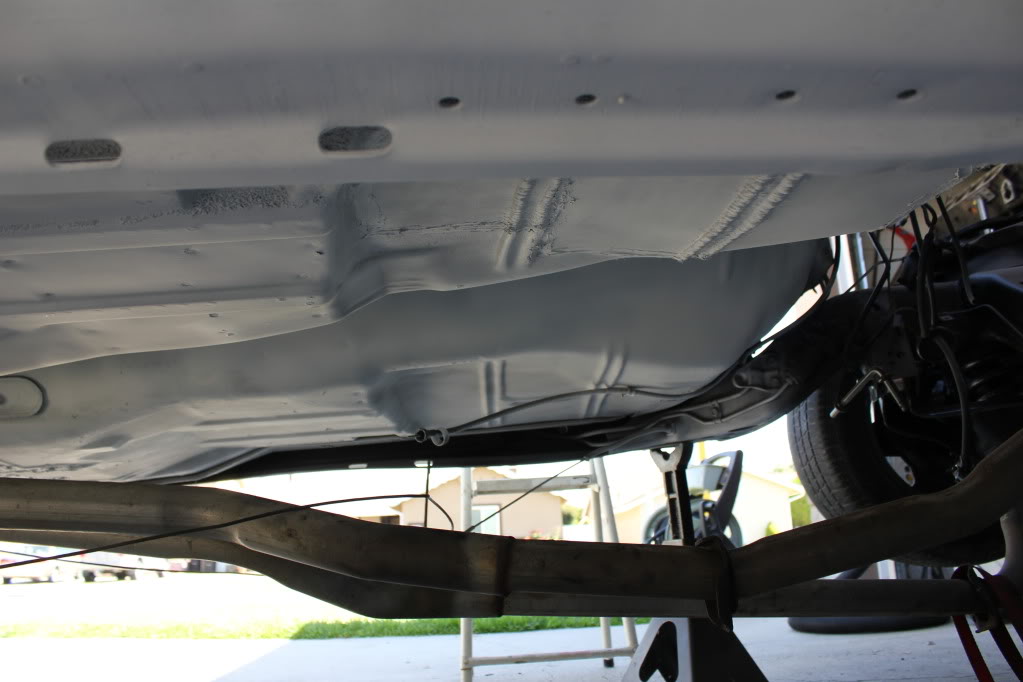
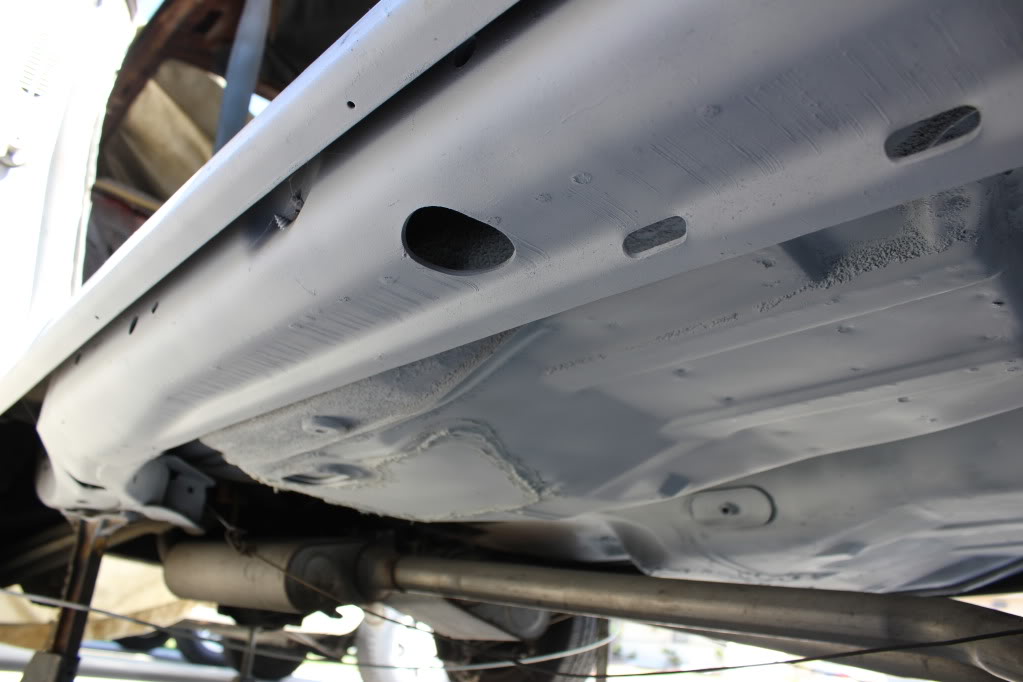
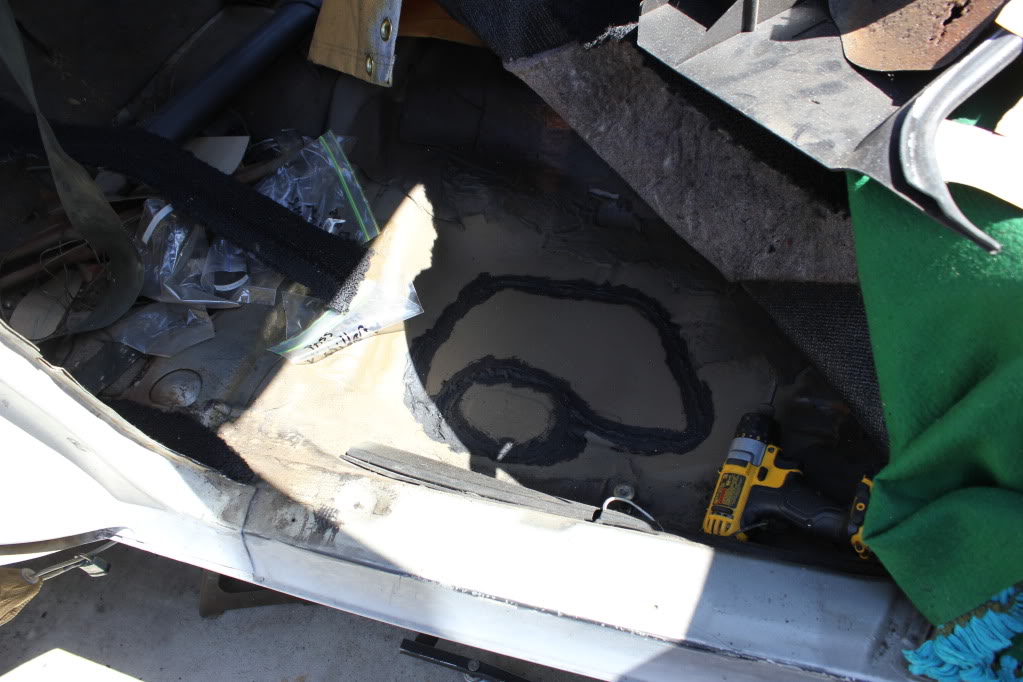
I had some pretty bad rust that I fixed on all four corners of the floor boards. I think I know how the front floor boards rotted out- when I removed the front windshield I can see where there is an open seam that probably should have been sealed with seam sealer. On the passenger side of the base of the windshield area, I had a one inch hole underneath the glue area.
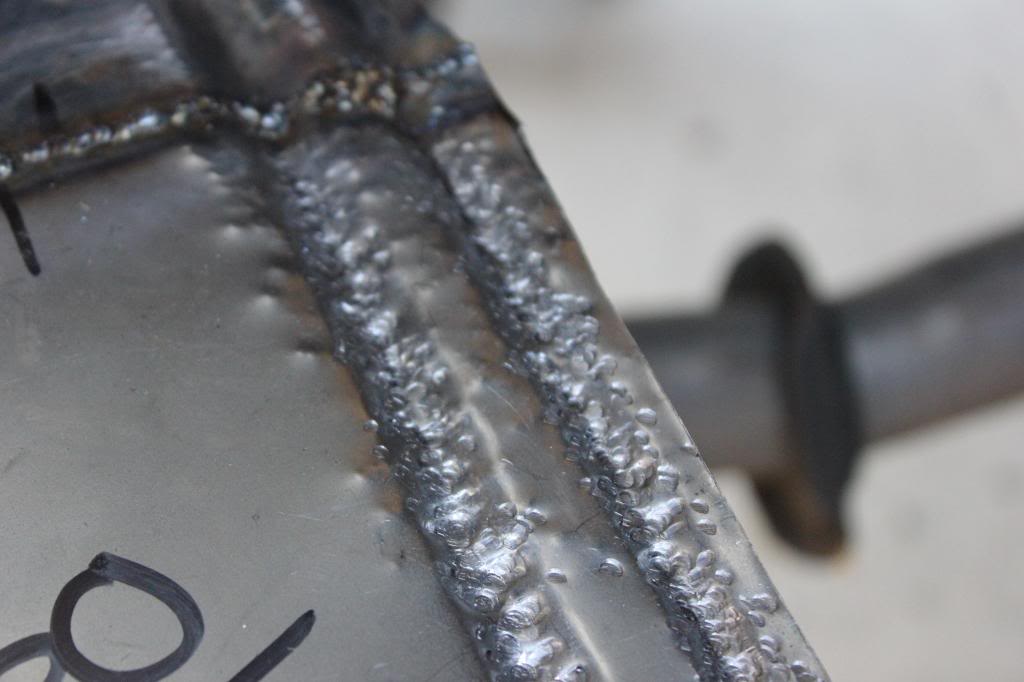
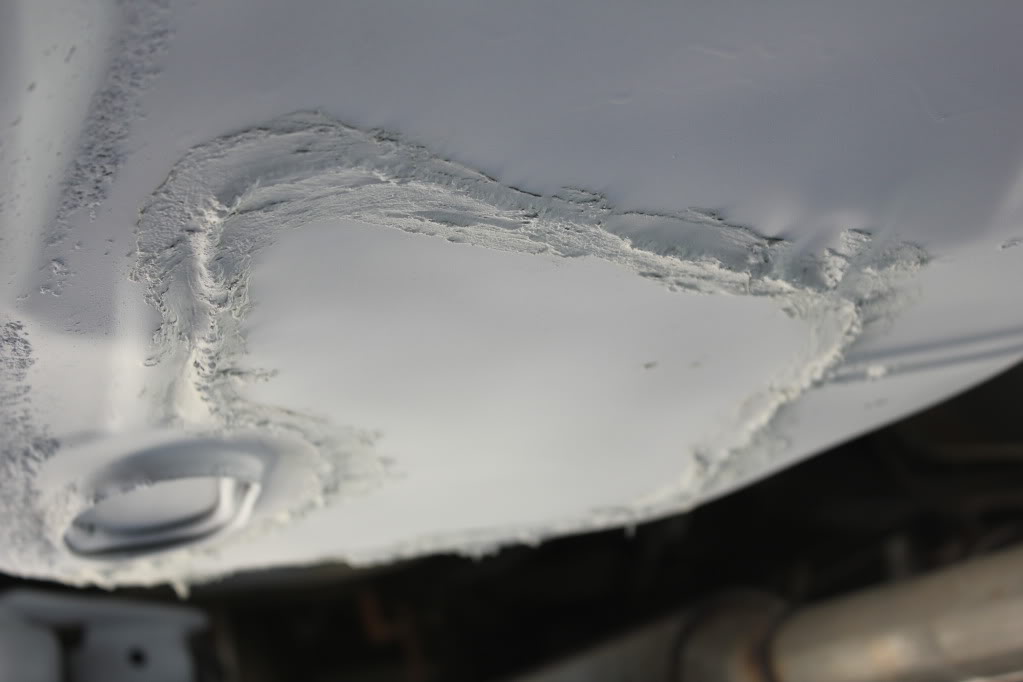
I've gone ahead and welded up all the holes, patched the floor boards, and installed seam sealer on the base of the windshield. And as far as seam sealer goes, when I welded up my patches on my floor boards, I used seam sealer on the bottom (outside) and seam sealer on the inside of each welded area I patched in. It's probably overkill, but I want to know my repairs will never die an early death because I had some pin holes in my welds I missed.
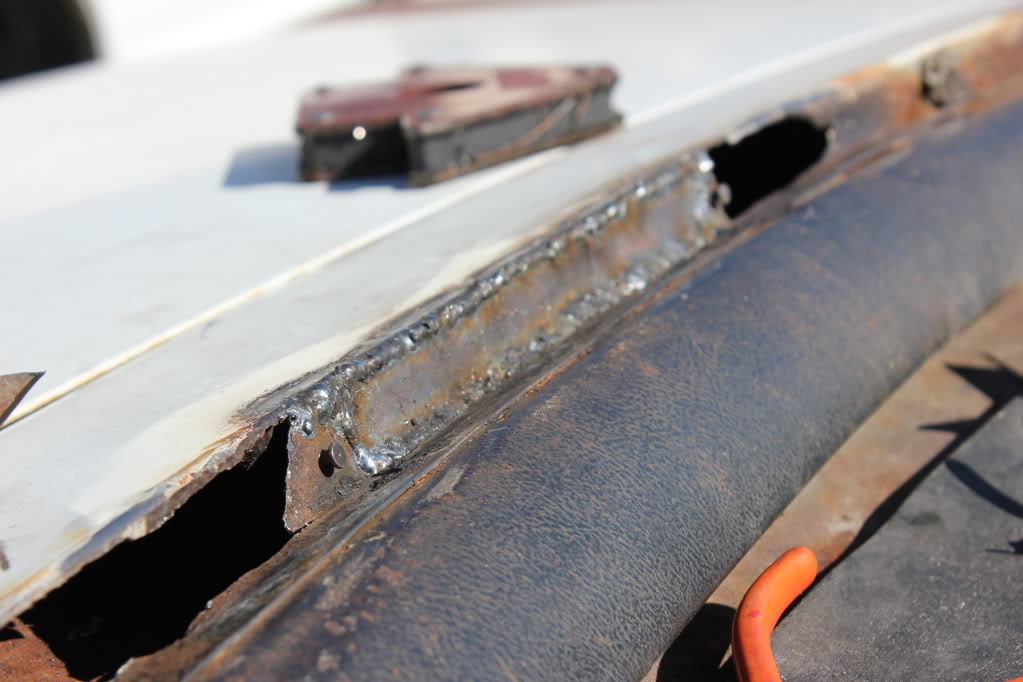
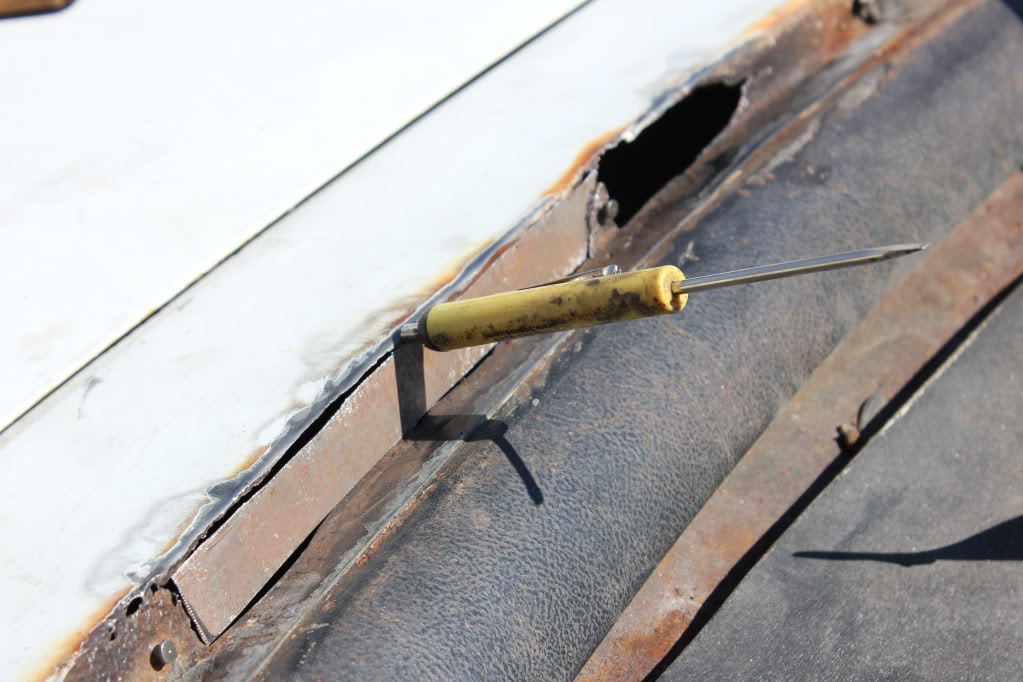
I still have to weld up the rusted out rear window channels and rot on the upper quarter panel below the drivers rear quarter glass area. This channel repair job is one I've been dreading the most on this whole car. I made up some patches in the chape of a "z" to create new channels, but I'm not sure how to go about it all. But I will be diving into it soon.
Heres some pictures, I'm too far along to post pictures from beginning to end. Here's some of the latest ones. I'm taking this car on a freight train ride to completion by the next two weeks. So wish me luck that I can hang the front end, weld up the rotted out metal, and paint the car here soon.


73 Guy- G3GM Newbie

- Street Cred : 0
 Re: 73 Chevelle
wow 73 Guy where you located ? That's some nice weldin I need some rear quarters put on !!

Limey SE- Management

- Street Cred : 98
 Re: 73 Chevelle
ditto Limey's comments ... that's a great job of welding

alleyball4- Donating Member

- Street Cred : 5
 Re: 73 Chevelle
thanks for the comments guys. I'm in southern california but I'm headed to south carolina soon! I'm just a beginner welder, this car is one of only a handful of projects I've attempted since owning a mig welder. I love welding, I hate grinding welds!
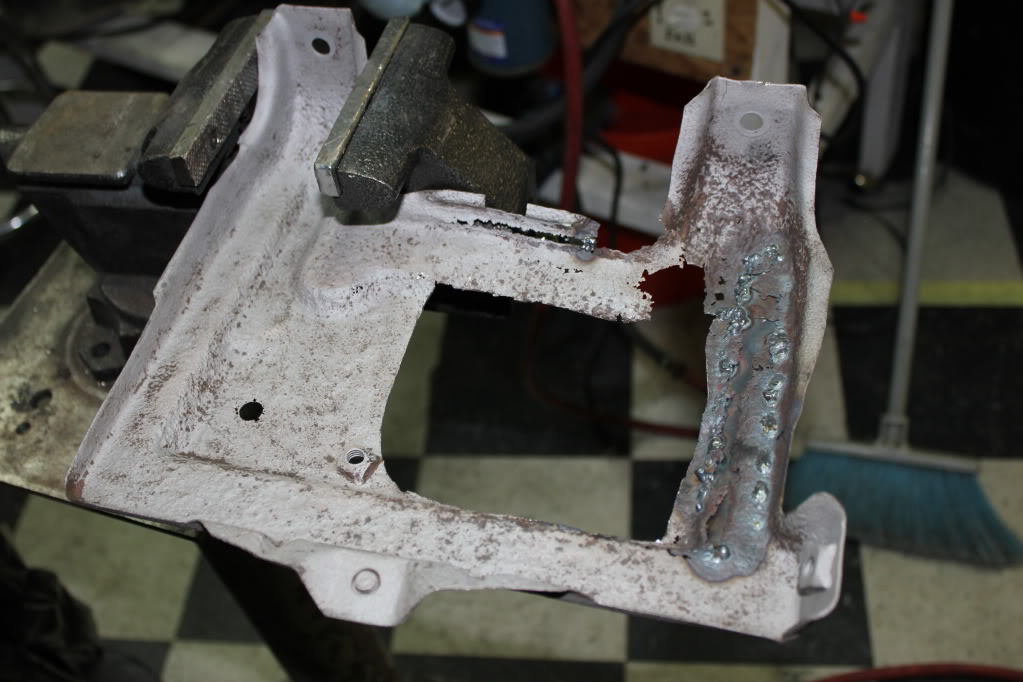
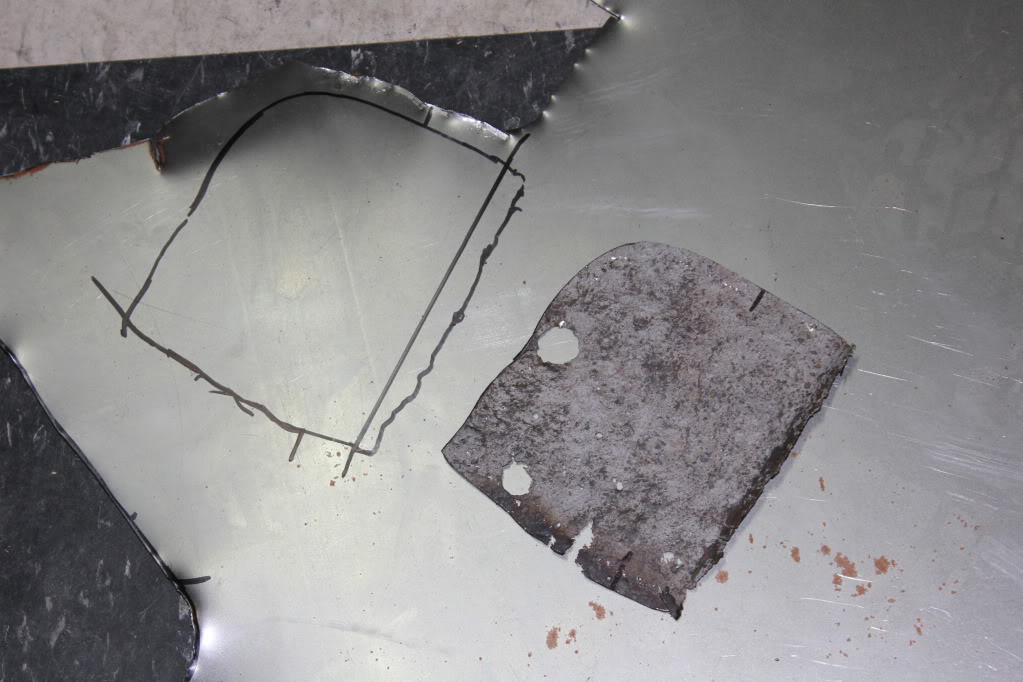
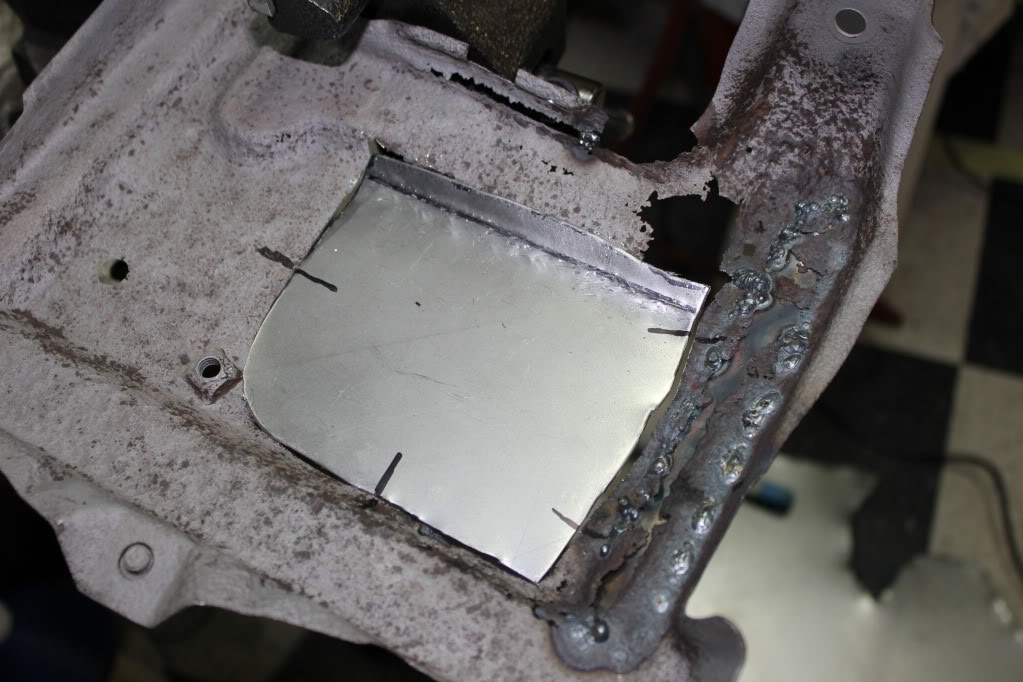
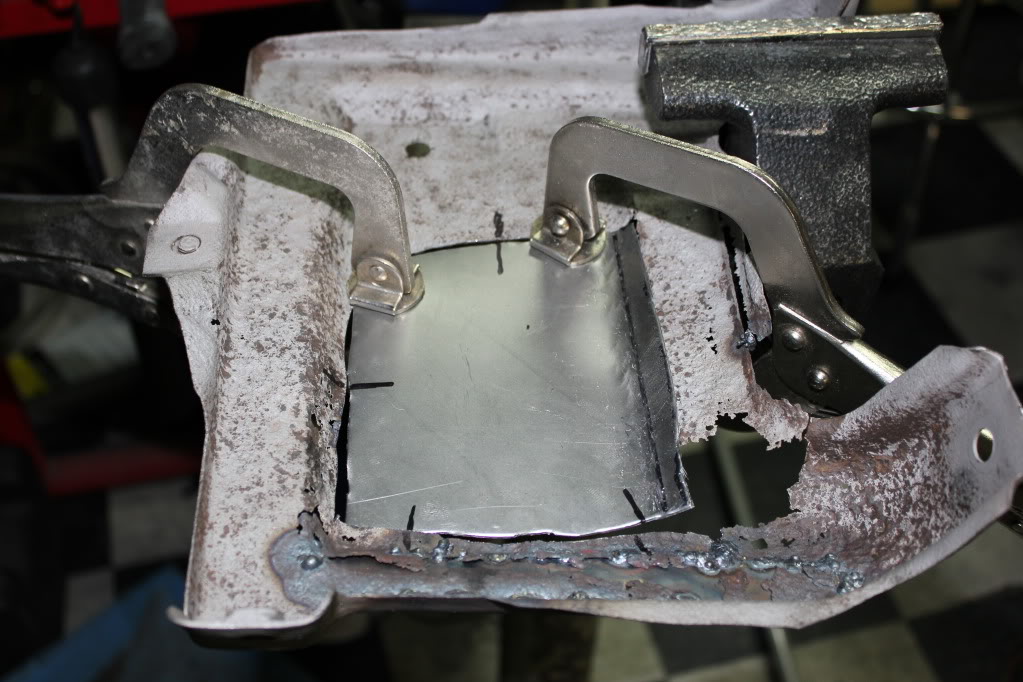
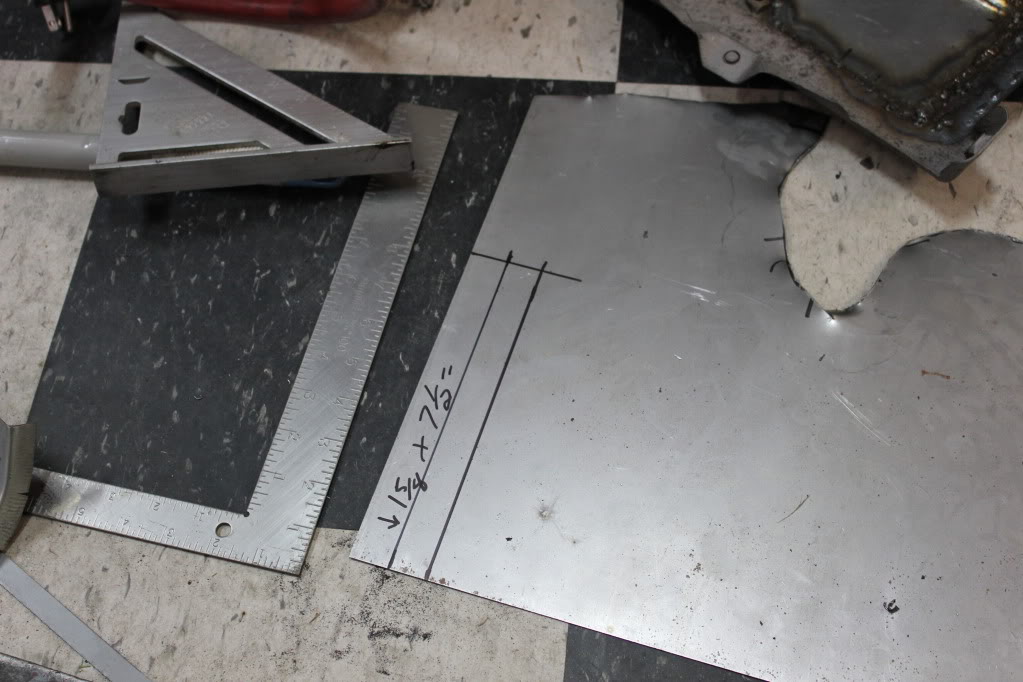
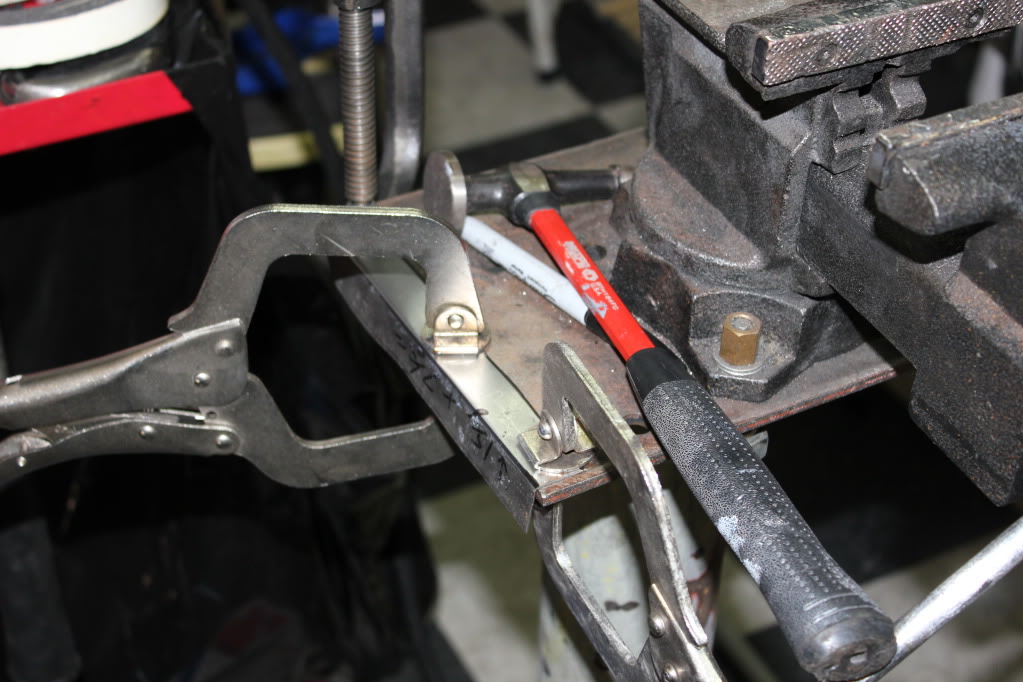
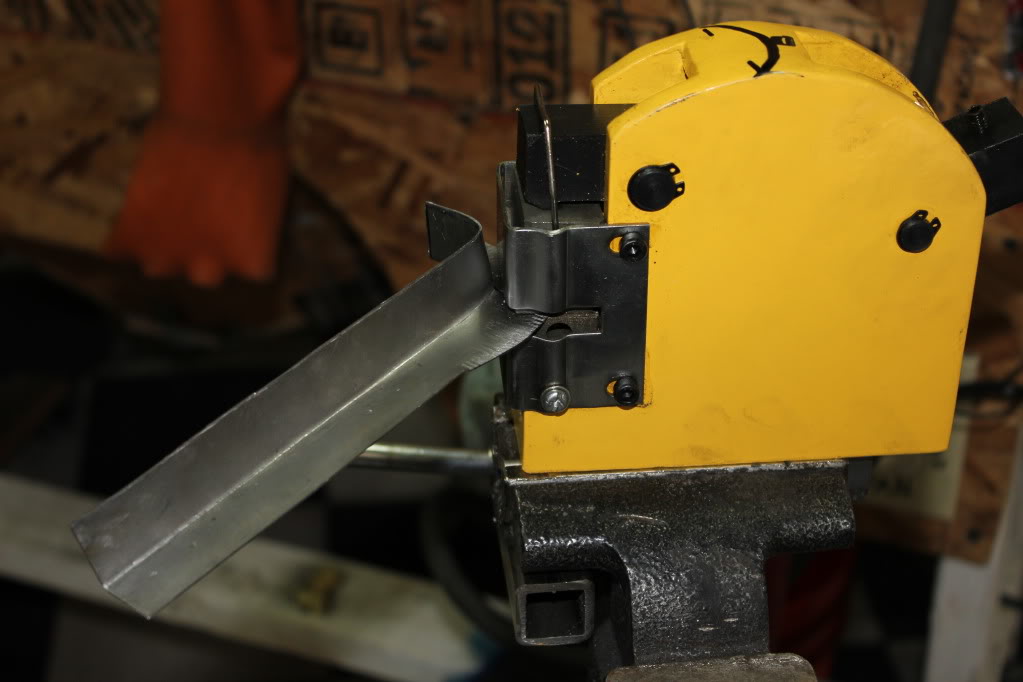
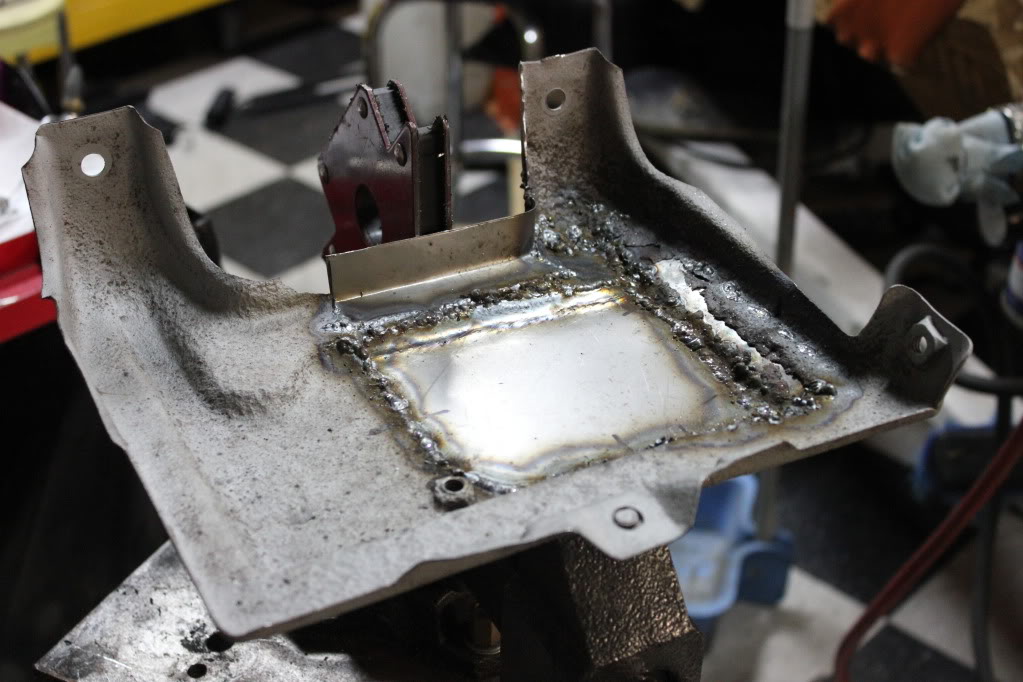
Here's some more pics from work I've been doing the last two days. Just been working on the rear window channels, and trying to bring my battery tray back from the dead.
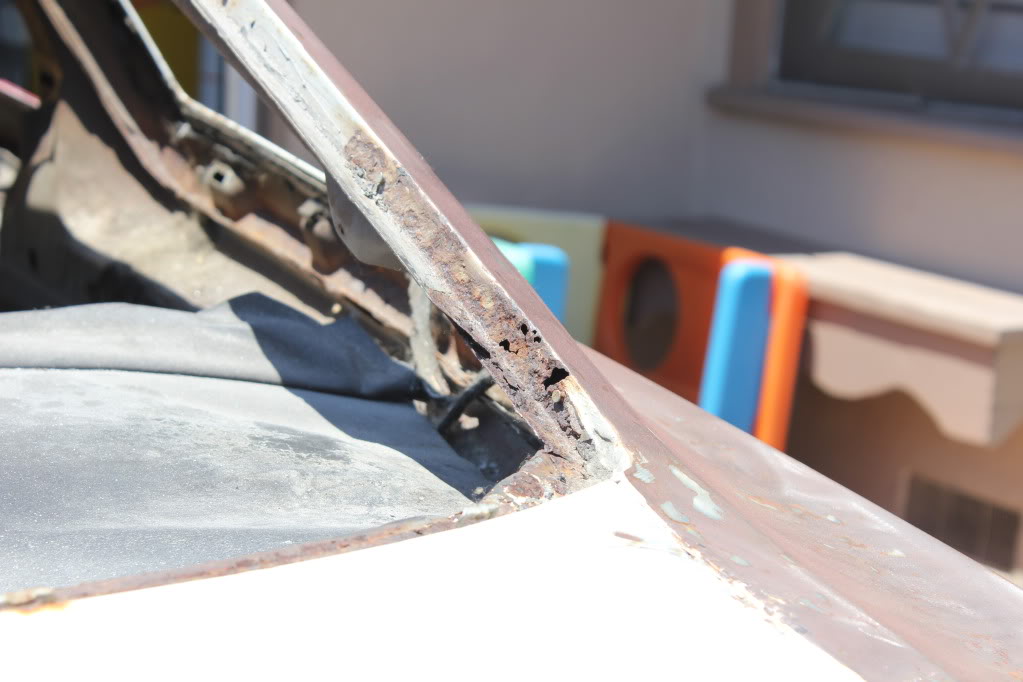


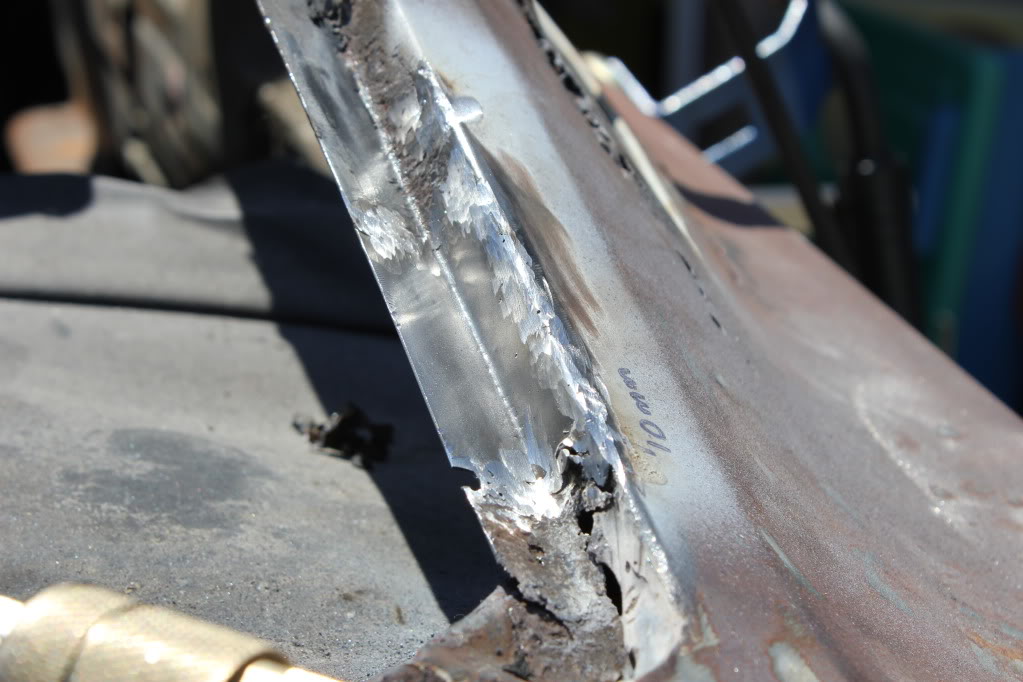

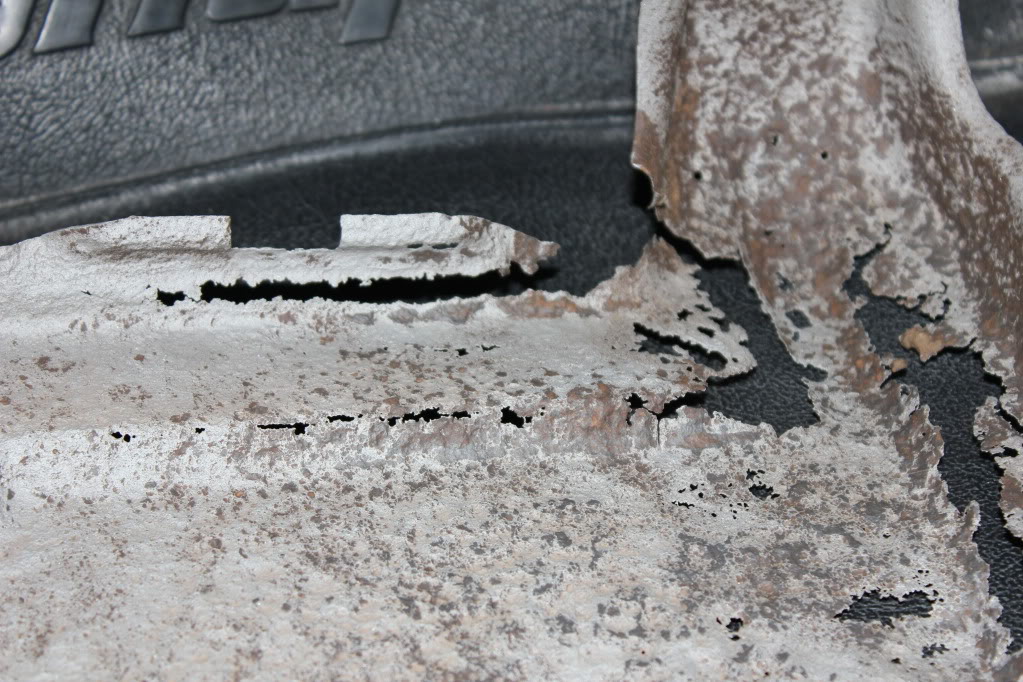
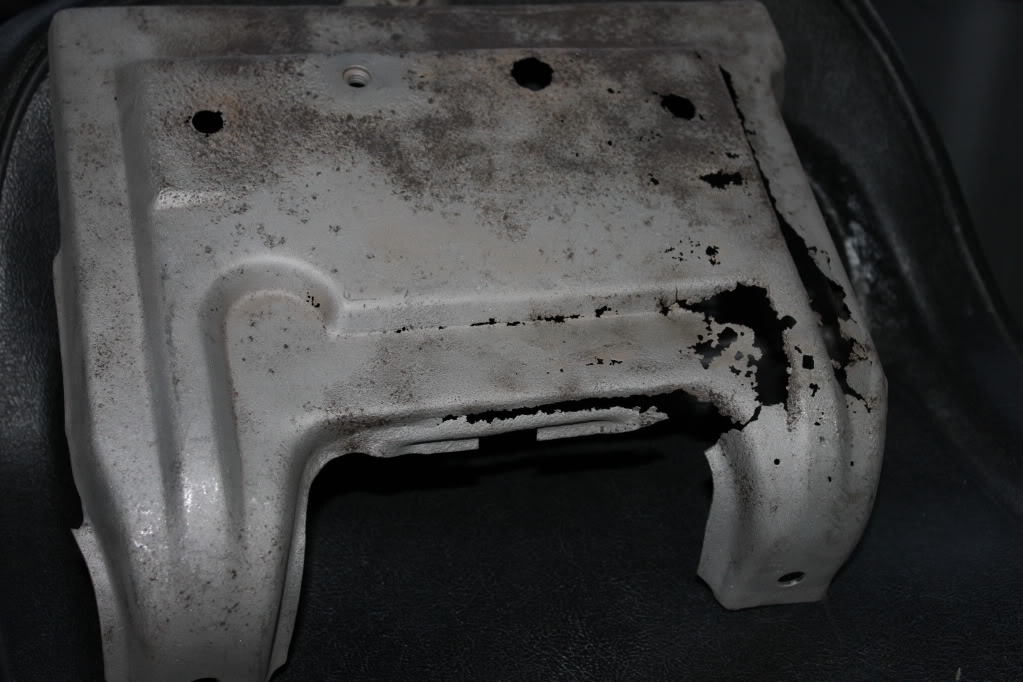
Here's the battery tray project. Still have a lot of grinding ahead of me!




Here's some of the car lately


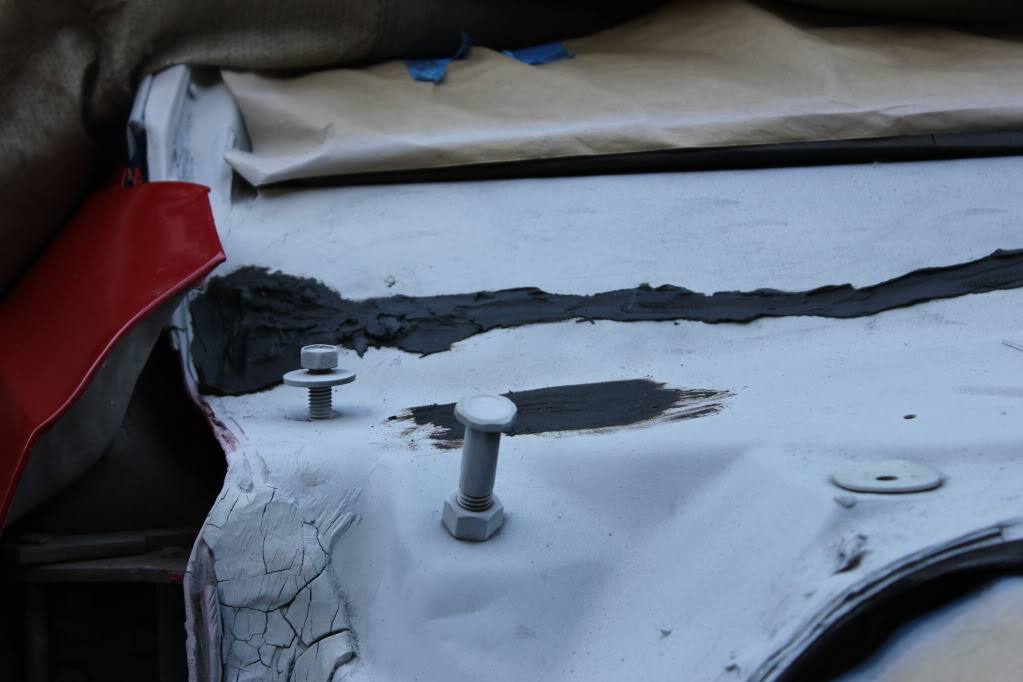

Here's some more pics from work I've been doing the last two days. Just been working on the rear window channels, and trying to bring my battery tray back from the dead.


Here's the battery tray project. Still have a lot of grinding ahead of me!


Here's some of the car lately


73 Guy- G3GM Newbie

- Street Cred : 0
 Re: 73 Chevelle
Why did you just not buy a new battery tray? They are available. JB

JB2wheeler- G3GM Fanatic

- Street Cred : 28
 Re: 73 Chevelle
JB2wheeler wrote:Why did you just not buy a new battery tray? They are available. JB
I agree. Or someone here might sell them one. Thats alot of time and effort for a cheap part.
http://www.nechevelleparts.com/7377-chevelle-battery-tray-no7377.html

Joe73- Donating Member

- Street Cred : 83
 Re: 73 Chevelle
I have a clean tray that I pulled from a six cylinder '76 4 door Malibu, it was ony car for a long time, but since I relocated the battery (to the trunk) I don't need it any more. I wasn't really looking to sell it, but if you want it $20.00 plus the ride it's yours.Joe73 wrote:JB2wheeler wrote:Why did you just not buy a new battery tray? They are available. JB
I agree. Or someone here might sell them one. Thats alot of time and effort for a cheap part.
http://www.nechevelleparts.com/7377-chevelle-battery-tray-no7377.html

dynchel- Donating Member

- Street Cred : 40
 Re: 73 Chevelle
I have been thinking about moving my battery to the bed or get an alloy one off Ebay. Most of the things I think about doing never get done. JB

JB2wheeler- G3GM Fanatic

- Street Cred : 28
 Re: 73 Chevelle
Your welding looks good,dosent look like you are blowing holes in the metal. Are you using gas on your MIG or flux core?
ant7377- G3GM Addict

- Street Cred : 36
 Re: 73 Chevelle
77mali wrote:Maybe he was practicing his welding skills.
That was my thought as well. Practice on something that's going to get covered up anyway if it doesn't turn out optimal.

thatfnthing- Donating Member

- Street Cred : 65
 Similar topics
» Dash assembly for the 1973-1977 Chevelle/Monte Carlo/El camino
» 1973 chevelle bumper vs 1974 chevelle bumper
» 70 SS 396 chevelle
» 1973 chevelle bumper vs 1974 chevelle bumper
» 70 SS 396 chevelle
G3GM :: Media :: G3 Project Pictures
Page 1 of 1
Permissions in this forum:
You cannot reply to topics in this forum|
|
|


» Roll Call and Car showcase
» Central Texas Noob
» Welcome Keith Seymore
» Wanted: Front park lamp assemblies
» 75 Hurst Olds T-tpos
» G3 Chevy rims- help ID these
» 75 el camino project.
» Have had a few questions
» vinyl top removal