Valve lash
3 posters
G3GM :: G3 Tech :: Engine & Driveline
Page 1 of 1
 Valve lash
I have read so many different ways to adjust valve lash, that I've started to go mad....I recently bought a Comp Cam's kit for my top end and their directions are pretty clear but I'd like some opinions from those of you that may have built up a flat tappet, hydraulic lifter cylinder head set up. I started to do this today and got as far as lubing & loosely fitting the push-rods, pivot balls, rockers (which are roller style but for flat tap Cam- *Magnum Rockers) & the nuts. So, here I wait at top dead center...#1 cylinder in place eagerly anticipating some responses and nervous as heck that I'll do something wrong and the thing will blow up.
I don't know what you guys may think of this method but to me it makes the most sense out of anything I've read.
http://www.centuryperformance.com/adjusting-valve-lash-spg-149.html
I don't know what you guys may think of this method but to me it makes the most sense out of anything I've read.
http://www.centuryperformance.com/adjusting-valve-lash-spg-149.html

77mali- Donating Member

- Street Cred : 62
 Re: Valve lash
The repair manuals, like the old Motors manuals, Chiltons, etc ,,,,state that all the valves can be adjusted in just two crankshaft positions IE: with N0 1 on TDC, you can adjust exhaust 1, 3, 4, and 8, and intakes 1, 2, 5, and 7. Rotate the crank be full turn until 0 degrees is on the tab again, and adjust exhaust #2, 5, 6, and 7.......and intake #3, 4, 6, and 8 The other way is with each cylinder at Top Dead Center, but you need to mark the balancer each 90 degrees to do it, and follow the firing order for each cylinder. That's the way I do it.
The balancer can be marked with chalk on each 90 degree position. The mark can be a bit off without a problem, but close as possible. Some manuals say to twist the push rod with you fingers to get the play to zero, but sometimes the lifter cup moves down easy, so it's not always accurate. Moving the push rod up & down to feel zero clearance works better if the twisting motion doesn't give a good zero.
Older manuals say 1 full turn for lifter pre-load after zero is established. Some folks use just 3/4 of a turn, which is what I do.
Hope this helps a bit.......
pila- Donating Member

- Street Cred : 43
 Re: Valve lash
The lifter ( in any case I presume), must be all they way down in the chamber for the "up & down method" of setting zero lash, correct?

77mali- Donating Member

- Street Cred : 62
 Re: Valve lash
Exactly. On the bottom of the cam lobe.I think the easiest way is the way pila tells it. Make sure the #1 is at the top of the compression stroke then rotate the motor and make sure #6 is at top of compression stroke. Make sure its the compression stroke.

ant7377- G3GM Addict

- Street Cred : 36
 Re: Valve lash
Thanks Guys. Gonna go for it this PM.
EDIT:
So after trying this on the 1st few valves, decided to go w/ the way I linked to above. Reason being that I must have done something wrong because the bolts did not show the same amount of thread after tightening and they are supposed to look the same looking in line down the head. This method (for me) was simple, easy to understand and makes perfect sense when you think about it although a bit unorthodox compared to what you see in the manuals. But the end result is that everything looks as it should and only turned the engine over twice; just like the common methods. Still have to seal & torque manifold, reinstall dist & alt, belts..etc...but plan to hopefully fire her up late tonight after work. Will post again w/ end result to verify that all went well and confirm this method worked.

77mali- Donating Member

- Street Cred : 62
 Re: Valve lash
In case you prefer a video I found this on-line to post for others as well.. Needed a refresher as it's been a while w/ all the engine drama I've had. 
https://www.youtube.com/watch?v=89o5rLpbCgI
https://www.youtube.com/watch?v=89o5rLpbCgI

77mali- Donating Member

- Street Cred : 62
 Re: Valve lash
Paul,I did it the above way and to tell you the truth I could not get it right,they seemed to always make noise and it bothered me . I just went through it again,this time running with a old valve cover cut open to allow me to do it while the car was running. It made a little mes but not bad,I go tthe motor warmed up and installed the open valve cover then went at it starting with the #8 cylinder,back off the nut till you hear it start to tick (you will hear it) then slowly tighten it 1/4 turn at a time until it stops ticking then another 1/2 turn.Worked well and the car seemed to run better after I did it. Some say not to do it this way and what not but it worked for me.

ant7377- G3GM Addict

- Street Cred : 36
 Re: Valve lash
I've heard lots of people say that they make the final adjustments with the engine running. I saved my old valve covers just in case I have to do the same thing. Last time I did it I think they could have used a bit more than the 1/4 turn that the video suggests. We'll see. I have to get it pretty close as I have to break-in my new cam @ the same time.

77mali- Donating Member

- Street Cred : 62
 Re: Valve lash
The Comp Cams rockers you have are a good product. I have over 100 K miles one one set, and lots of miles on other sets. I even have the Magnum rockers on my Caddy 507 engine in the Elco project.
Setting valve lash is simple when you understand how it all works.
Pre-load on the lifter is how far the plunger is pushed down in the lifter. Some manuals say to twist the push rods to determine when zero is reached, before the pre-load is adjusted. That works OK mostly, but sometimes the push rods can be twisted fairly easy, even after the plunger moves a bit, so watching the plunger can help determine if it's actually at zero, before adjusting the usual stock 1-turn of pre-load. on the rocker arm.
pila- Donating Member

- Street Cred : 43
 Re: Valve lash
Ended up going with the 1st method I posted on & got it done (even bought a set of feeler gauges). Works best for me- someone else may like another method. Pila's explanation above also is important when adjusting the preload in the lifter when doing this method or another way. (TY!)
When #1 Intake is at full valve lift then the #6 Intake is in the correct position on the cam for lashing. Follow the firing order starting @ #1 & adjust the opposite lifter in the firing order. Same procedure for doing both the intake or exhaust. (Do all the intakes 1st then all the exhausts after-not a t the same time). Read the article 1st, this is just "highlights".
Valve @ full lift----Then adjust
1----6
8----5
4----7
3----2
6----1
5----8
7----4
2----3
Made it a little easier having done this & marking off as you go.
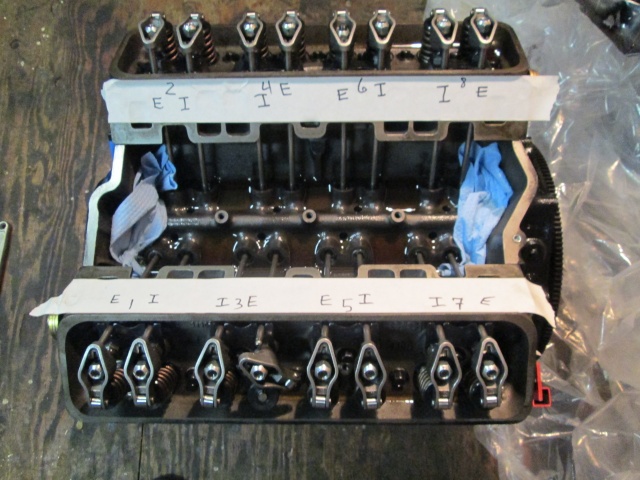
#1 Exhaust @ full lift
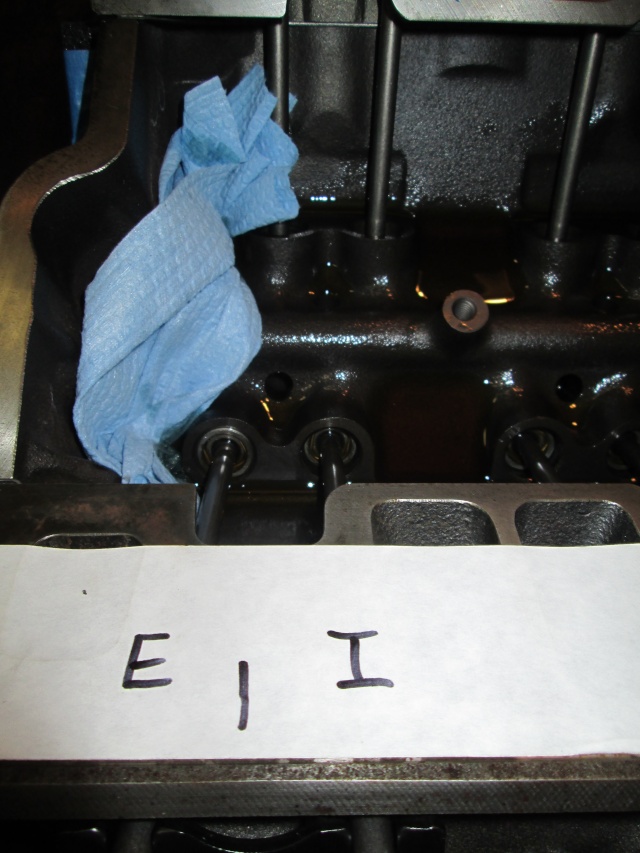
Adjusted #6 Exhaust
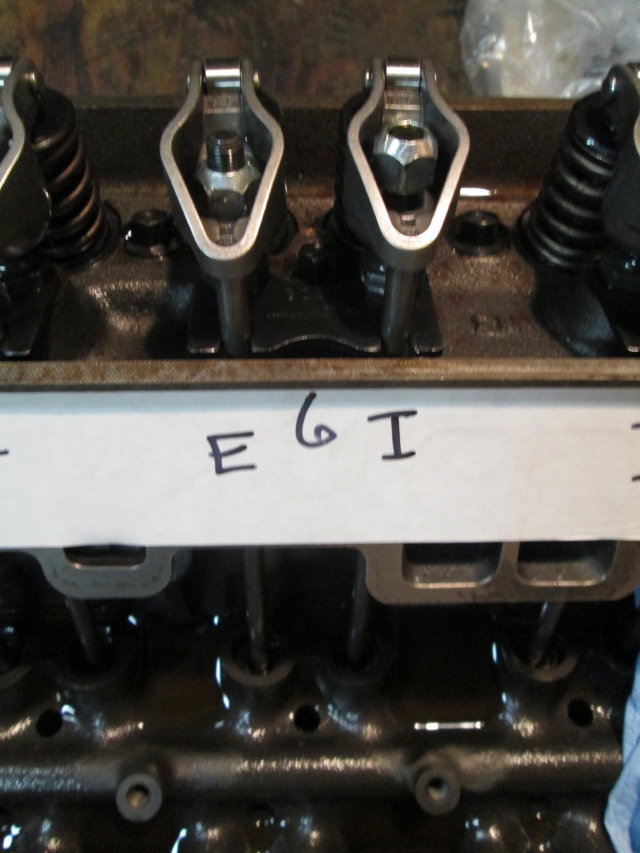
Repeat often....& you're done.
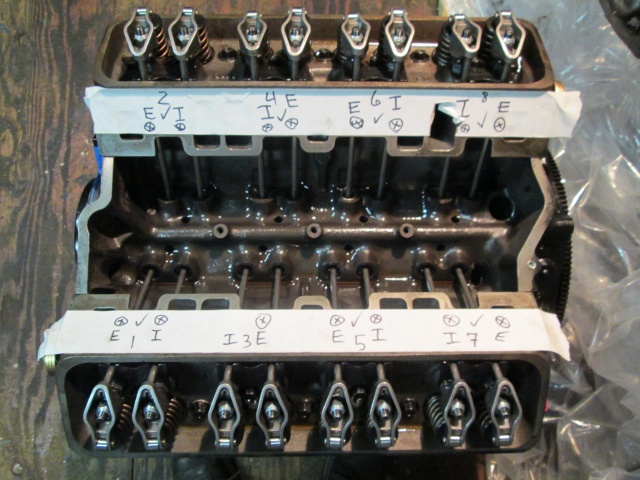
When #1 Intake is at full valve lift then the #6 Intake is in the correct position on the cam for lashing. Follow the firing order starting @ #1 & adjust the opposite lifter in the firing order. Same procedure for doing both the intake or exhaust. (Do all the intakes 1st then all the exhausts after-not a t the same time). Read the article 1st, this is just "highlights".
Valve @ full lift----Then adjust
1----6
8----5
4----7
3----2
6----1
5----8
7----4
2----3
Made it a little easier having done this & marking off as you go.

#1 Exhaust @ full lift

Adjusted #6 Exhaust

Repeat often....& you're done.


77mali- Donating Member

- Street Cred : 62
 Similar topics
» Corrected Cam Specs with Different Ratio Rockers and Valve Lash
» Gen VI 454 max valve lift?
» Valve Seals
» Gen VI 454 max valve lift?
» Valve Seals
G3GM :: G3 Tech :: Engine & Driveline
Page 1 of 1
Permissions in this forum:
You cannot reply to topics in this forum|
|
|


» Roll Call and Car showcase
» Central Texas Noob
» Welcome Keith Seymore
» Wanted: Front park lamp assemblies
» 75 Hurst Olds T-tpos
» G3 Chevy rims- help ID these
» 75 el camino project.
» Have had a few questions
» vinyl top removal